Page is loading ...

Wall Clock Installation Instructions
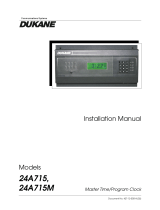
Model AT15RM
Quick Start Steps
1. Install an AirTime ATX Series Transceiver (refer to Transceiver instructions).
2. Press the TRANS button on the front of the Transceiver to begin manual signal transmission.
3. Insert two (2) CR123A lithium batteries (included) in the clock’s battery compartment.
4. Press the RESET button on the back of the clock for 2 seconds to begin “listening” for the signal.
5. The LED on the front of the clock flashes Green every two (2) seconds and reception starts.
6. When the signal is received, the LED will flash Green every second and correction will occur.
NOTE: This equipment has been tested and found to comply with the limits for a Class B digital devi
ce, pursuant to Part 15 of
the FCC Rules. These limits are designed to provide reasonable protection against harmful interference in a residential
installation. This equipment generates, uses, and can radiate radio frequency energy and, if not installed and used in
accordance with the instructions, may cause harmful interference to radio communications. However, there is no guarantee
that interference will not occur in a particular installation. If this equipment does cause harmful interference to radio or
television reception, which can be determined by turning the equipment off and on, the user is encouraged to try to correct
the interference by one or more of the following measures:
• Reorient or relocate the receiving antenna.
• Increase the separation between the equipment and receiver.
• Connect the equipment into an outlet on a circuit different from that to which the receiver is connected.
• Consult the dealer or an experienced radio/TV technician for help.

Hanging the clock
Secure hanger bracket as shown below and adjust the hanger stud using the jam nuts to
desired height. Place the clock on the hanger stud and secure the captive nut.
Normal Operation
In normal operation the clock listens for a synchronization signal 12 times per day (on even
hours at the 58
th
minute between 50
th
and 59
th
second). The LED will not flash during normal
operation.
Verifying Reception of Last Signal
Press the A button to verify that the clock received the last transmission signal from the ATX
Series master. The LED on the front will flash Green to indicate that the last transmission
was received successfully. If the LED flashes Red, then the last transmission was not
received. This may indicate the Wall Clock is located outside the transmission area.
Start Reception
Press the B button to manually set the clock to “listen” mode. The green LED on the front of
the clock will flash every 2 seconds. When a signal is received from an ATX series master,
the LED will flash every second. The second hand will stop at 12:00 and the minute and hour
hands will rapidly advance to the correct time. (If no signal is received, then verify that your
ATX Series master is transmitting or move the clock to a different, closer location)
Manual Time Setting
Press the B button for 5 seconds until the second hand stops. Press the A button to advance
the minute hand one minute. Hold the A button to rapidly advance the minute and hour
hands. Press the B button when the hands reach the correct time. The clock will start
normal timekeeping operation.
Copyright © 2009 Lathem Time Corporation. All rights reserved. Information subject to change without notice. Document No: USG0089
Lathem and AirTime are registered trademarks of Lathem Time Corporation. Revised: 8-19-2011
/