Page is loading ...

Rehabilitation Treadmill
MT200
USER’S MANUAL
PLEASE READ THIS ENTIRE MANUAL CAREFULLY BEFORE OPERATING YOUR NEW TREADMILL AND
SAVE IT FOR FUTURE USE.

MT200
1
Product Registration…………………………………………………………………………. 2
Important Safety Instructions………………………………………………………………… 3
Important Electrical Information……………………………………………………………… 4
Important Operation Instructions…………………………………………………………….. 4
Features……………………………………………………………………………………….. 5
Operation of Your New Treadmill……………………………………………………….…… 9
MT200 Assembly Instructions………………………………………………………………. 21
MT200 Drawing & Parts List………………………………………………………………… 29
Maintenance…………………………………………………………………………………… 27
Maintenance Software Mode………………………………………………………………… 35
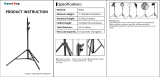
Specifications………………………………………………………………………………….. 37
Manufacturer’s Limited Warranty…………………………………………………………….. 38
Table of Contents

MT200
2
Thank you for your recent purchase of this high quality physical rehabilitation treadmill, the MT200,
from Spirit Medical Systems Group.
Your new product was manufactured by one of the leading fitness and medical products
manufacturers in the world. Further, it is backed by one of the most comprehensive warranties in
the industry. Through our dealers, distributors and manufacturer’s representatives, we will do all
we can to provide many years of successful and prosperous ownership. Your warranty and service
needs will be addressed collaboratively through your regional sales representative and our highly
trained service technicians.
The responsibility of that collaborative team is to provide you with both the technical knowledge
and access to service personnel to make your ownership experience more informed, and
resolution of any difficulties easier to remedy.
Two components of the Spirit Medical Systems Group’s mission statement are “enhancing patient
outcomes and improving effectiveness in the delivery of services”. This is just one of the many
products that will assist you in providing that care to your patients and/or clients.
Please take a moment at this time to record the name of the dealer, distributor, or
manufacturer’s representative, their telephone number, and the date of purchase below to
make any future, needed contact easy. We appreciate your support and we will always
remember that you are the reason that we are in business.
Please complete and mail your registration card today and enjoy your new MT200 treadmill.
Yours in Health and Wellness,
Spirit Medical Systems Group
RECORD YOUR SERIAL NUMBER
Please record the Serial Number of this fitness product in the space provided below. You can
find the serial number on a sticker that is located on the front of the treadmill.
Serial Number_______________________________________
REGISTER YOUR PURCHASE
The self-addressed product registration card must be completed in full and returned to
Spirit or visit: www.spiritmedicalsystems.com to register online.
Product Registration

MT200
3
ATTENTION - Read all instructions in this manual before using this device.
DANGER - To reduce the risk of electric shock disconnect your treadmill from the
electrical outlet prior to cleaning and/or service work.
WARNING - To reduce the risk of burns, fire, electric shock, or injury to persons, install
the treadmill on a flat level surface with access to a 115 volt AC, 60 Hz, 20-amp
grounded outlet. Do not use an extension cord unless it is 14awg or larger, with only
one outlet on the end. The treadmill should be the only appliance in the electrical circuit.
Do not attempt to disable the grounded plug by using improper adapters, or in any way
modify the cord set; a serious shock or fire hazard may result along with computer
malfunctions.
Use this device only for it’s intended use as described in this manual.
Keep children away from the treadmill. There are moving parts, obvious pinch points and
other caution areas that can cause harm.
Except as instructed for use of the device, keep hands away from all moving parts.
Keep the electrical cord away from heated surfaces and out of all travel lanes and do not
operate the treadmill if the cord or plug is damaged.
Never drop or insert any object into any openings.
Do not use outdoors.
To disconnect, turn all controls to the off position then remove the plug from the outlet.
This device is designed for commercial use and will meet the demands of orthopedic, sports
wellness and general conditioning programs.
Do not attempt to use your treadmill for any purpose other than for the purpose it is
intended.
The pulse sensors are not medical devices. Various factors, including the user’s movement,
may affect the accuracy of heart rate readings. The pulse sensors are intended only as
exercise aids in determining heart rate trends in general.
WARNING: Heart rate monitoring system may be inaccurate. Over exercise may result in
injury or death. If you feel faint stop exercising immediately.
Ensure there is a minimum space on the sides of the treadmill of two feet for proper operation,
easy access and to prevent possible injuries to others standing or walking nearby. There should
be a minimum of at least one foot of free space at the front and three and a half feet at the rear.
Do not use any after market parts on this device, other than those recommended by Spirit.
Do not attempt any servicing or adjustments other than those described in this manual. All
else must be left to trained service personnel familiar with electro-mechanical equipment and
authorized under the laws of the country in question to carry out maintenance and repair
work.
Hold the handlebar for support when getting on or off the treadmill.
To avoid injury please observe all minimum and maximum adjustment settings.
Wear proper shoes. High heels, dress shoes, sandals or bare feet are not suitable for use on
the treadmill. Quality athletic shoes are recommended to avoid leg fatigue.
A safety tether cord is provided with this unit. It is a simple magnetic design that should be
used at all times. It is for your safety should you fall or move too far back on the tread-belt.
Pulling this safety tether cord will stop tread-belt movement.
Important Safety Instructions

MT200
4
WARNING!
NEVER remove any cover without first disconnecting AC power. If voltage varies by ten percent
(10%) or more, the performance of your treadmill may be affected. Such conditions are not
covered under your warranty. If you suspect the voltage is low, contact your local power
company or a licensed electrician for proper testing. Operating nominal power is 115 volt AC,
60 Hz, 20-amp.
NEVER expose this treadmill to rain or moisture. This product is NOT designed for use
outdoors, near a pool or spa, or in any other high humidity environment. The temperature
specification is 40 degrees c (104 deg f), and humidity is 95%, non-condensing (no water
drops forming on surfaces).
This product must be grounded. In the unlikely event that the treadmill’s electrical system
should malfunction or breakdown grounding provides a path of least resistance for electric
current, reducing the risk of electric shock. This product is equipped with a cord having an
equipment-grounding plug. The plug must be plugged into an appropriate outlet that is properly
installed and grounded in accordance with all local codes and ordinances.
DANGER - Improper connection of the equipment-grounding conductor can result in a
risk of electric shock. Check with a qualified electrician or serviceman if you are in
doubt as to whether the product is properly grounded. Do not modify the plug provided
with the product if it will not fit the outlet; have a proper outlet installed by a qualified
electrician.
NEVER use the treadmill during an electrical storm. Surges may occur in your facility
power supply that could damage the treadmill’s components.
All users should have medical clearance before starting any rigorous exercise program.
Start the user at a safe exercise level. Do not allow the user to be over exerted.
Symptoms to watch for, but not limited to, are: Shortness of breath or difficulty in breathing,
pain or discomfort, feeling faint.
Make sure the user warms up and cools down properly to avoid over taxing the cardio
vascular system. Allow three to five minutes of warm up and cool down during each
exercise session.
Important Electrical Information
Important Operation Instructions
Grounding Instructions

MT200
5
MT200 – Rehabilitation Treadmill
Parts and Adjustments:
1. Pulse Sensors
2. Electronic Console
3. Safety Lanyard
4. Adjustable Hand Rails
5. Handrail Horizontal Adjustment
6. Handrail Vertical Adjustment
7. Handrail Lift Bar
8. Rear Step-up
9. Rear Incline
10. Front Incline
The Spirit MT200 is an easy product to set up and use, from the adjustments to the intuitive
interface. This section explains how to set up, adjust and operate your MT200 from Spirit Medical
Systems Group.
Features

MT200
6
Leveling the MT200:
•
Once the MT200 is assembled, and placed on a flat level floor, it may be necessary to
adjust the four leveling glides on the bottom of the rear incline unit to ensure proper stability
of the MT200. Use a 1/2” wrench to loosen the top nut of the leveler. Adjust the levelers by
hand as necessary to remove any wobble in the unit. Then tighten the top nut against the
bottom of the stabilizer tube. Make sure the bottom nut remains cinched against the
leveling foot.
Connecting to A.C. Power:
•
The MT200 A.C. mains input is located in the front of the unit. The input module has an
input connector for the line cord, a power switch and a 20 amp circuit breaker. Turn the
power switch to off when the MT200 is not in use.
Hand Rail Adjustments
Vertical Adjustment Horizontal Adjustment Lift Bar
Adjusting the hand rail vertical position:
•
To Lift: Turn both the left and right knobs counter clockwise one or two rotations. Then just
grab the lift bar and pull up. The locking pins in the knobs will automatically ratchet into the
indexing holes in the tubes. Tighten the knobs when desired position is set. There is a
numbered scale on the tubes for repeatable settings.
•
To Lower: Loosen the two knobs and then pull them out and rotate slightly until the knob
remains out on its own. The pin should now be disengaged from the tube and you can use
the lift bar to lower the rails. Lower the rail past the position you desire and rotate the knob
again so the pin can engage the holes in the tube. Now lift the rails to the desired position
and lock the knob.
Adjusting the hand rail horizontal position:
•
Turn both the left and right levers counter clockwise one rotation. Move the rails to the
desired position and re-lock the levers. There are numbered scales on the tubes for
repeatable settings. The levers may be blocked by the rotating tube when position is
changed. The levers can be repositioned by pulling out and rotating them to a new position,
allowing tightening.

MT200
7
Lift Bar:
•
The lift bar will make raising and lowering the hand rails easier. You can remove the lift
bars by loosening the locking knobs. Hold the bar with one hand and loosen the knobs with
the other so the lift bar does not suddenly fall to the floor.
Rear Step:
•
Additional step lowers the step-up height to 4 inches. To install or remove the step easily
there are two removable pins located under the rear of the treadmill. Be sure these two pins
are in place before using.

MT200
8
• MT200 Electronic Console:
Power on
When initially powered on the console will perform an internal self-test. During this time all the
lights will turn on for a short time. The message window will display a software version (i.e. VER
1.0) and the distance window will display an odometer reading indicating how many virtual miles
(or Kilometers) the treadmill has gone. The time window displays how many hours the treadmill
has been used.
The odometer will remain displayed for only a few seconds then the console will go to the start up
display, also known as Idle Mode. The dot matrix display will be scrolling through the different
program profiles and the message window will be scrolling the start up message. You may now
begin to use the MT200.
The console will automatically power down after 20 minutes of inactivity. Press any key to wake
the console up again. To disable this function so console always remains powered on see
Maintenance section on page 35. Always turn off the main power switch when the MT200 is not in
use.

MT200
9
Console Operation:
1. Set Up
The Set Up key function will allow you to enter patient data and customize the settings of the
MT200. When the Set Up key is pressed the first option in the menu appears. Use the up/down
arrows to scroll through the menu and press the enter key to select an option.
Set Up menu:
1. Patient Data:
• Age: used in Vo2 and heart rate programs.
• Gender: used in Vo2 program.
• Weight: used in METs and Calorie calculations and Vo2 program.
• Height: used in the Symmetry program.
2. Deck Lift Mode:
• This mode allows you to raise the entire deck parallel to the floor. In this mode the
deck, rear step and hand rails can be used for step-up, step-down, stretching and
PNF/PTA exercises.
• Instructions for raising deck and step height chart:
1. Press Set Up key at top left of console. Use Up arrow on keypad to Deck Lift
option and press the Enter key. Use the Up arrow to select ON option and
press Stop twice to exit.
2. Now Press Start key. Message window will show that Deck Lift mode is
enabled. Use the Incline keys to raise the entire deck. There are 10 levels
available and height of the deck for each level is below.
3. When finished press Stop to reset the deck lift mode so incline keys will return
to normal operation. To use deck lift function you must enable it each time
through the Set Up key.
4. Deck height chart:
Deck Level # Step to Deck Height Floor to Deck Height (floor to step = 4”)
0 5 “ (12.7 cm) 9” (22.9 cm)
1 5-1/2” (14.0 cm) 9-1/2” (24.0 cm)
2 5-3/4” (14.6 cm) 9-3/4 (24.75 cm)
3 6” (15.25 cm) 10” (25.4 cm)
4 6-1/2” (16.5 cm) 10-1/2” (26.7 cm)
5 6-3/4” (17.1 cm) 10-3/4” (27.3 cm)
6 7” (17.75 cm) 11” (27.9 cm)
7 7-1/4” (18.4 cm) 11-1/4” (28.58 cm)
8 7-1/2” (19.0 cm) 11-1/2” (29.2 cm)
9 8” (20.3 cm) 12” (30.5 cm)
10 8-1/4” (21.0 cm) 12-1/4” (31.1 cm)

MT200
10
2. Quick Start
This is the quickest way to start an exercise session. After the console powers up you just press
the Start key to begin; this will initiate the Quick Start mode. In Quick Start the speed will be set to
zero until the user adjusts the speed. Time will count up from zero, all workout data will start to
accrue and the speed and incline may be adjusted manually by pressing the Up or Down key. The
dot matrix will display a speed level. As you increase the speed more rows will light indicating a
harder workout.
The dot matrix has 24 columns of lights and each column represents 1 minute in the Quick Start
program (time per column can be modified in other programs). At the end of the 24
th
column (or 24
minutes of work) the display will wrap around and restart at the first column again.
3. Basic information
The Dot Matrix Display is used for displaying graphic feedback and has three basic displays for
most programs. When you begin a program the dot matrix will display a speed profile. To the left of
the dot matrix there is a key labeled Display. Pressing this key will switch the display to show an
incline grade and then a track. When the LEDs are blinking the graph will scan through the three
displays.
The four Data Windows display:
• Time: Program time remaining, or elapsed time in quick start mode.
• Incline Grade: Front incline range 0 to 15 %. Rear Incline range 0 to minus 10%
• Distance: Displayed in miles or kilometers, selected in engineering mode (see page 35).
• Speed: Displayed in mph or kph. Range from minus 3 mph to plus 10 mph in 0.1
increments. True zero speed provided by a mechanical brake whenever motor is idle.
The Message Window is the main display for programming instructions and relevant
measurements during a program. The measurement data shown varies depending on the program.
Measurements include:
• Pulse: Heart rate monitor displayed in beats per minute, from 0 to 240 bpm.
• METs: Metabolic equivalent;
values of activities range from 0.9 (sleeping) to 23
(running at 22.5 km/h or a 4:17 mile pace).
• Calories: Or kilocalorie (kcal), nutritional Calories burned during exercise.
• Pace: Displayed as minutes per mile (or kilometer).
• Step Cadence: Steps per minute average.
• Step Length: Heel strike to heel strike step length in inches or centimeters.
• Symmetry: The percentage of difference between the left and right step length.
To the left of the message window is a Display key that allows you to switch the data shown.
Below the Message window is a Heart Icon and a Bar Graph. Simply grasping the hand pulse
sensors, or wearing a heart rate chest belt transmitter, will start the Heart Icon blinking (this may
take a few seconds). The Message Window will display your heart rate in beats per minute. The
Bar Graph represents the percentage of maximum heart rate. NOTE: Enter the correct age in Set
Up for the Bar Graph to be accurate. Refer to Heart Rate section for details about these features.

MT200
11
4. Function Keys
The Stop/Reset key provides several functions:
• Pressing the Stop/Reset key once during a program will Pause the program. To resume the
exercise session just press the Start key.
• If the Stop/Reset button is pressed twice during a workout the program will end and a
summary of information for the exercise session will be displayed.
• If the Stop/Reset key is held down for 3 seconds the console will perform a complete
Reset.
• During data entry for a program the Stop/Reset key performs a Previous Screen function.
This allows you to go back one step in the programming each time you press the
Stop/Reset key.
The Program Keys may be used to preview each program when in the idle mode. Press each
program key to preview the program profile. To begin a program press the corresponding program
key and then press the Enter key to select the program.
The program keys also function as a Number Key Pad when you are in the data-setup mode. The
number for each key is shown below the program name. If you are entering new data such as
Time, Age, weight etc., you can use these keys to enter the numbers quickly.
Reverse Walking: This key sets the belt direction to either reverse or forward. If the belt is already
set in the reverse direction, it will change the direction of the belt to forward. This function only
operates in Quick Start or Manual mode. If the belt is moving when the key is pressed the belt will
slow down to zero speed then allow speed in the opposite direction. The maximum reverse speed
is 3.0 mph (5.0 kph).
Acceleration Rate: This function adjusts the acceleration and deceleration rate of the walking belt
by allowing you to change the amount of time it takes for the belt to change speeds. The
adjustment value is in seconds. You can input how many seconds it takes for the belt to change 1
mph of speed. The default setting is 3 seconds, which means the belt will take 3 seconds to go
from zero to 1 mph. The range can be set from 1 second to 60 seconds. This function is disabled
when the treadmill is shipped and you will have to enter the Engineering mode to activate (see
page 35 for engineering mode)
Zero Speed: This key’s function returns the belt to zero speed when pressed.
Decline: Allows operation of the rear incline motor for Decline function. This key only operates in
Quick Start or Manual modes.
Incline: Press this key to return to front incline function.
Zero Percent: Returns the deck to zero percent when pressed.

MT200
12
5. Selecting and customizing programs
When a program is selected you have the option of modifying the settings. If you want to begin
without entering new settings just press the Start key. This will bypass the programming of data
and take you directly to the start of the program. If you want to change the settings just follow the
instructions in the message window. When you start a program the data from the Set Up menu will
be used.
Manual
The Manual program works as the name implies, manually. This means that you control the
workload yourself, not the computer. To start the Manual program follow the instructions below or
just press the Manual button then the Enter button and follow the directions in the message
window.
1. Press the Manual key then press the Enter key.
2. The message window will prompt you to enter the time for the program. You may enter the
time using the Up and Down keys or the numeric key pad then press the Enter key to
accept.
3. Now you are finished editing the settings and can begin the program by pressing the Start
key. All data calculations will use the patient information from the Set Up function (Set Up
key at top left of console).
4. During the Manual program you will be able to scroll through the data in the message
window by pressing the Display key. You may also switch between the speed, incline or
track displays by pressing the Display key adjacent to the dot matrix display.
5. When the program ends you may press Start to begin the same program again or Stop to
exit the program, or you can save the program you just completed as the Facility program
by pressing the Facility key and following the instructions in the message window.
Preset Programs
The treadmill has four preset exercise programs that have been designed for a variety of goals.
The initial built-in level of difficulty for each program is set to a relatively easy level. You may
adjust the level of difficulty (Max speed) for each program before beginning.
The profiles shown in the dot matrix are merely pictures of the whole profile and will not change in
size when the speed keys are pressed. When setting up a program you will enter the maximum
speed setting for the peak of the profile. During the program the speed levels will change as the
profile progresses. When the up key is pressed to request more speed the profile picture will not
change, but the speed will increase. Pressing the speed keys actually change the peak level of the
program not the current segment speed. You may need to change the peak setting several times
by pressing the speed key before the current segment increases.
Preset programs speed and incline settings
The preset program speed and incline levels are shown in the chart below. The Speed numbers
shown in the chart indicate a percentage of the top speed of the program. For instance, the first
Speed setting for the HILL program shows the number 20. This means that this segment of the
program will have a speed that is 20% of the top speed for the program (The user sets the top
speed when a program is selected). If the user sets the top speed to 10 mph, then the first segment
will be 2 mph. You will notice that segment 12 shows 100. This means the set speed will be 100% of
10 mph or simply 10 mph.

MT200
13
Prog
SEG
Warm up
1
2
3
4
5
6
7
8
9
10
11
12
13
14
15
16
17
18
19
20
21
22
23
24
Cool down
Speed
20
30
40
50
60
60
70
70
70
80
80
70
80
80
100
100
70
80
80
70
70
80
80
70
60
60
50
40
30
20
Hill
Incline
0
0
0
0
1
2
3
3
4
3
3
4
4
5
3
3
4
3
3
4
4
5
4
3
1
1
0
0
0
0
Speed
20
30
40
50
60
60
70
80
100
100
100
100
100
100
100
100
100
100
100
100
100
100
100
80
70
60
50
40
30
20
Plateau
Incline
0
0
0
0
0
0
0
0
0
0
0
0
0
0
0
0
0
0
0
0
0
0
0
0
0
0
0
0
0
0
Speed
20
30
40
50
60
60
70
70
70
80
70
70
80
80
60
70
80
80
70
70
70
100
70
80
60
60
50
40
30
20
Cardio
Incline
0
0
0
0
1
1
1
2
2
3
2
2
3
3
1
2
3
3
2
2
4
4
2
3
1
1
0
0
0
0
Speed
20
30
40
50
60
60
70
80
100
60
60
70
80
100
60
70
100
60
70
100
60
70
80
70
60
60
50
40
30
20
Interval
Incline
0
0
0
0
1
2
3
5
6
2
3
5
6
7
2
3
7
2
3
8
2
3
5
4
3
1
0
0
0
0
Programming Preset Programs:
1. Select a program then press the enter key to begin customizing the program settings, or just
press the start key to begin the program with the default settings. All data calculations will
use the patient information from the Set Up function (Set Up key at top left of console).
2. After selecting a program, press enter to set the program time. The Time window will blink
with the default value of 20 minutes. You may use any of the up/down keys to adjust the time.
After adjusting the time, press enter. (Note: You may press start at any time during the
programming to begin with only settings you have modified at that point).
3. The Speed window will now be blinking, showing the preset top speed of the selected
program. Use the Up/Down keys to adjust, and then press enter. Each program has various
speed changes throughout; this allows you to limit the highest speed the program will attain
during your workout.
4. Now press the Start key to begin your workout.
5. There will be a 3 minute warm-up to begin. You can press the start button to bypass this and
go straight to the workout. During the warm-up the clock will count down from 3 minutes.
Facility Program
The Facility program allows you to build and save a custom program. You can build your own
custom program by following the instructions below or you can save any other preset program you
complete as a custom program. The Facility program allows you to further personalize it by adding
your facility name.
Designing and saving a new program:
1. Press the Facility key. The message window will show a welcome message; if you had
previously saved a program the message will contain the name you gave it. Then press the
Enter key to begin programming.
2. When you press enter, the message window will show “Name – A”, if there is no name

MT200
14
saved. If the name “Custom Workout” had been previously saved the message window will
show “Name – Custom Workout” and the C in Custom will be blinking. If there is a name
saved you can change it or you may press the Stop key to keep the name and continue to
the next step. If you want to enter a name use the Up and/or the Down key to change the
first letter then press Enter to save the first letter and continue to the next letter. When you
have finished entering the name press the Stop key to save the name and continue to the
next step.
3. The message window will ask you to enter an Age. You may enter an Age, using the Up and
Down keys or the numeric key pad, then press the Enter key to accept the new number and
proceed on to the next screen.
4. You are now asked to enter a Weight. You may adjust the Weight number using the Up and
Down keys or the numeric key pad then press enter to continue.
5. Next is Time. You may adjust the Time and press enter to continue.
6. Now you are asked to adjust the Max Level. This is the peak exertion level you will
experience during the program. Adjust the level and then press enter.
7. Now the first column will be blinking and you are asked to adjust the level for the first
segment of the workout. When you finish adjusting the first segment, or if you don’t want to
change, then press enter to continue to the next segment.
8. The next segment will show the same level as the previously adjusted segment. Repeat the
same process as the last segment then press enter. Continue this process until all twenty
four segments have been set.
9. The message window will then tell you to press enter to save the program. After saving the
program the message window says “New program saved” then will give you the option to
Start or modify the program. Pressing Stop will exit to the start up screen.
10. During the Facility program you will be able to scroll through the data in the message
window by pressing the adjacent Display key.
Running a saved program:
1. Press Facility key then Enter
2. Enter Time then press enter. Then press start to begin program.

MT200
15
Vo2 Test
The VO2 test is based on the Gerkin protocol, also known as the fireman’s protocol, and is a
sub-max Vo2 (volume of oxygen) test. The test will increase speed and elevation alternately until
85% of Max heart rate is attained. The time it takes the heart rate to reach 85% determines the
test score (Vo2 max) as shown in the chart below.
Stage Time Speed Grade VO2 Max
1 0 to 1:00
4.5mph 0% 31.15
2.1 1:15 4.5mph 2% 32.55
2.2 1:30 4.5mph 2% 33.6
2.3 1:45 4.5mph 2% 34.65
2.4 2:00 4.5mph 2% 35.35
3.1 2:15 5.0mph 2% 37.45
3.2 2:30 5.0mph 2% 39.55
3.3 2:45 5.0mph 2% 41.3
3.4 3:00 5.0mph 2% 43.4
4.1 3:15 5.0mph 4% 44.1
4.2 3:30 5.0mph 4% 45.15
4.3 3:45 5.0mph 4% 46.2
4.4 4:00 5.0mph 4% 46.5
5.1 4:15 5.5mph 4% 48.6
5.2 4:30 5.5mph 4% 50
5.3 4:45 5.5mph 4% 51.4
5.4 5:00 5.5mph 4% 52.8
6.1 5:15 5.5mph 6% 53.9
6.2 5:30 5.5mph 6% 54.9
6.3 5:45 5.5mph 6% 56
6.4 6:00 5.5mph 6% 57
7.1 6:15 6.0mph 6% 57.7
7.2 6:30 6.0mph 6% 58.8
7.3 6:45 6.0mph 6% 60.2
7.4 7:00 6.0mph 6% 61.2
8.1 7:15 6.0mph 8% 62.3
8.2 7:30 6.0mph 8% 63.3
8.3 7:45 6.0mph 8% 64
8.4 8:00 6.0mph 8% 65
9.1 8:15 6.5mph 8% 66.5
9.2 8:30 6.5mph 8% 68.2
9.3 8:45 6.5mph 8% 69
9.4 9:00 6.5mph 8% 70.7
10.1 9:15 6.5mph 10% 72.1
10.2 9:30 6.5mph 10% 73.1
10.3 9:45 6.5mph 10% 73.8
10.4 10:00 6.5mph 10% 74.9
11.1 10:15 7.0mph 10% 76.3
11.2 10:30 7.0mph 10% 77.7
11.3 10:45 7.0mph 10% 79.1
11.4 11:00 7.0mph 10% 80

MT200
16
Before the test:
• Make sure you are in good health; check with your physician before performing any exercise if
you are over the age of 35 or persons with pre-existing health conditions.
• Make sure you have warmed up and stretched before taking the test.
• Do not take in caffeine before the test.
• If using the hand pulse sensors hold the hand grips gently, do not tense up.
Fitness test programming:
1. Press the VO2 key and press enter.
2. The message window will ask you to enter your Age. You may adjust the age setting,
shown in the Incline window, using the Up and Down keys then press the Enter key to
accept the new number and proceed on to the next screen.
3. You are now asked to enter your Weight. You may adjust the weight setting, shown in the
Distance window, using the Up and Down keys then press enter to continue.
4. Now press Start to begin the test.
During the test:
• The console must be receiving a steady heart rate for the test to begin. You may use the hand
pulse sensors or wear a heart rate chest strap transmitter.
• The test will start with a 3 minute warm-up at 3 MPH before the actual test begins.
• The data shown during the test is:
a. Time indicates total elapsed time
b. Incline in percent grade
c. Distance in Miles or Kilometers depending on preset parameter.
d. Speed in MPH or KPH depending on preset parameter.
e. Target Heart Rate and Actual Heart Rate are shown in the message window.
After the test:
• Cool down for about one to three minutes.
• Take note of your score because the console will automatically return to the start-up mode after
a few minutes.

MT200
17
What the score indicates:
VO2max Chart for males and very fit females
18-25 26-35 36-45 46-55 56-65 65+
years
old
years
old
years
old
years
old
years
old
years
old
excellent
>60
>56
>51
>45
>41
>37
good 52-60
49-56
43-51
39-45
36-41
33-37
above
average
47-51
43-48
39-42
35-38
32-35
29-32
average
42-46
40-42
35-38
32-35
30-31
26-28
below
average
37-41
35-39
31-34
29-31
26-29
22-25
poor 30-36
30-34
26-30
25-28
22-25
20-21
very poor
<30
<30
<26
<25
<22
<20
VO2max Chart for females and de-conditioned males
18-25 26-35 36-45 46-55 56-65 65+
years
old
years
old
years
old
years
old
years
old
years
old
excellent
56 52 45 40 37 32
good 47-56
45-52
38-45
34-40
32-37
28-32
above
average
42-46
39-44
34-37
31-33
28-31
25-27
average
38-41
35-38
31-33
28-30
25-27
22-24
below
average
33-37
31-34
27-30
25-27
22-24
19-22
poor 28-32
26-30
22-26
20-24
18-21
17-18
very poor
<28
<26
<22
<20
<18
<17

MT200
18
Symmetry
The Symmetry program provides basic gait information and a feedback graph. The program will
measure the left and right step length and calculates the symmetry index. The message window
will display the user’s Cadence, Left and Right step length in inches (or centimeters) and
Symmetry index.
The Dot Matrix display will show a graph indicating step symmetry so the user has a visual
feedback to aid in improving their gait. If the user has a longer step length with their left leg the
graph will increase in size on the left of the dot matrix as shown below.
When the program ends, either by the set time reaching zero or pressing stop twice at any time
during the program, a summary is shown in the message window. The summary gives the
average cadence, step lengths and average symmetry for the amount of time the user walked.
1. Press the Symmetry key then press the Enter key.
2. The message window will prompt you to enter the Time for the program. You may enter
the time using the Up and Down keys or the numeric key pad then press the Enter key to
accept and proceed to the next screen.
3. Now you are finished editing the settings and can begin by pressing the Start key. All
data calculations will use the patient information from the Set Up function (Set Up key at
top left of console).
4. During the program you will be able to scroll through the data in the message window by
pressing the Display key.
5. When the program ends you may press Start to begin the same program again or Stop to
exit the program, or you can save the program you just completed as the Facility
program by pressing the Facility key and following the instructions in the message
window.
Biofeedback Graph:
Below is a sample picture showing the symmetry graph. In the message window there is an
average step cadence, left and right step length and symmetry measurements. In the example
below the step length numbers shown indicate that the left leg is stepping longer than the right leg,
26 vs. 15 inches. The graph reflects the longer stride of the left leg. If the step length was even
only two dots would be lit on the bottom center of the graphic screen.
Note: For some types of gaits it may be possible that the left/right data can be displayed in reverse. If this occurs
press the Symmetry program key to flip the display.

MT200
19
*NOTE: The chest strap transmitter is not a standard part, but is a separate purchase.
How to wear your wireless chest strap transmitter:
1. Attach the transmitter to the elastic strap using the locking parts.
2. Adjust the strap as tightly as possible as long as the strap is not too tight to remain comfortable.
3. Position the transmitter with the logo centered in the middle of your body facing away from your
chest (some people must position the transmitter slightly left of center). Attach the final end of
the elastic strap by inserting the round end and, using the locking parts, secure the transmitter
and strap around your chest.
4. Position the transmitter immediately below the pectoral muscles.
5. Sweat is the best conductor to measure very minute heart beat electrical signals. However,
plain water can also be used to pre-wet the electrodes (2 black square areas on the reverse
side of the belt and either side of transmitter). It’s also recommended that you wear the
transmitter strap a few minutes before your work out. Some users, because of body chemistry,
have a more difficult time in achieving a strong, steady signal at the beginning. After “warming
up”, this problem lessens. As noted, wearing clothing over the transmitter/strap doesn’t affect
performance.
6. Your workout must be within range - distance between transmitter/receiver – to achieve a
strong steady signal. The length of range may vary somewhat but generally stay close enough
to the console to maintain good, strong, reliable readings. Wearing the transmitter immediately
against bare skin assures you of proper operation. If you wish, you may wear the transmitter
over a shirt. To do so, moisten the areas of the shirt that the electrodes will rest upon.
Note: The transmitter is automatically activated when it detects activity from the user’s heart. Additionally, it
automatically deactivates when it does not receive any activity. Although the transmitter is water resistant, moisture
can have the effect of creating false signals, so you should take precautions to completely dry the transmitter after
use to prolong battery life (estimated transmitter battery life is 2500 hours). If your chest strap has a replaceable
battery the replacement battery is Panasonic CR2032.
Erratic Operation:
Caution! Do not use this treadmill for Heart Rate Control unless a steady, solid Actual Heart
Rate value is being displayed. High, wild, random numbers being displayed indicate a
problem.
Areas to look at for interference, which may cause erratic heart rate:
(1) Microwave ovens, TVs, small appliances, etc.
(2) Fluorescent lights.
(3) Some household security systems.
(4) Perimeter fence for a pet.
(5) Some people have problems with the transmitter picking up a signal from their skin. If you have
problems try wearing the transmitter upside down. Normally the transmitter will be oriented so
the Spirit logo is right side up.
(6) The antenna that picks up your heart rate is very sensitive. If there is an outside noise source,
turning the whole machine 90 degrees may de-tune the interference.
(7) If there is another person wearing a chest strap within 1 meter, it will interfere.
(8) If you continue to experience problems contact your dealer.
Using a Heart Rate Transmitter
/