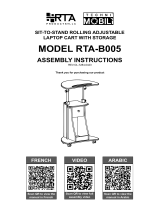
AmpliVox SN3230M Assembly Instruction

Type
Assembly Instruction

This manual is also suitable for

SN3230 RTA
Assembly Instructions
Thank you for choosing the SN3230 RTA Multimedia Lectern from AmpliVox Portable Sound Systems.
We are excited in introducing this truly unique lectern. Our lectern combines flexibility with functionality.
Please refer to this user guide as you enjoy the unique capabilities of another quality product from
AmpliVox Portable Sound Systems.
We encourage you to visit our website www.ampli.com to register your product for its warranty coverage,
Table of Contents Page
Hardware List ………………………....…….. 2
Panel Identification …………………………... 3
Cabinet Assembly ……………………………. 4– 7
Warranty …………………………………..…. 8
AmpliVox ● 650 Anthony Trail, Suite D, Northbrook, IL 60062 ● Phone: (800)267-5486 ● Fax: (800)267-5489 www.ampli.com
Wood color of lectern you have received may
be different then picture as shown above.
2
HARDWARE LIST
ITEM DESCRIPTION QTY
A1 Steel Cam Lock Leg 18
A2 Cam Lock 18
A3 PVC Cap 18
B Pan Head Screw 1/2" L 10
C Allen Key 1
D Door Handle 2
E Door Handle Screw 7/8" L 4
F Wood Dowels 19
G Shelf Support 4
H Screw Insert 4
I
Pan Head Screw 5/8" L (Door
Lock)
12
J Door Hinge 2
K Door / Drawer Lock / Key 2
L L - Bracket 2
M Drawer Slide - Cabinet Side CL/CR 2
N Drawer Slide -Drawer Edge DL/DR 2
0 Caster—No Lock 2
P Caster—Locking 2
Q Door Bumper 2
R Pan Head Screw—5/8" L (Casters) 16
S Shelf Bracket Set 2
GETTING STARTED
TOOLS NEEDED: Philips Screw Driver or
Power Screwdriver, Rubber Mallet
Unpack all panels from shipping box. Lo-
cate hardware box and open.
To prevent scratching of panels, lay panels
on a flat soft surface like carpet.
Complete assembly time is about 30
minutes.
All STEEL CAM LOCK LEGS (Item A1) are
installed into SIDE PANELS (#7 & #8) and
DRAWER FRONT PANEL (#9). Screw
into place as shown in Step #1.
All WOOD DOWELS (Item F) are inserted
into SHELF PANELS (# 1, #2, #3, #10)
using rubber mallet. Using standard ham-
mer will deform tip of dowels making it diffi-
cult to assemble to other panels.
3
PANEL IDENTIFICATION
NOTE: Actual Panel Shapes may vary due to product updates.
4
STEP 1
STEP 2
STEP 3
STEP 4
Screw in the STEEL
CAM LOCK LEGS, 8
on each side panel
In locations shown.
Tap in WOOD DOWEL RODS (F) and
CAM LOCK (A2) on each panel as
shown. Insert CAM LOCK with open
slot facing outside edge.
Locking
Non-Locking
Line up DOWEL
RODS on panel #1
with the holes and
CAM LOCK LEGS of
panel #7. Tap panel
#1 down until flat on
to #7. Take ALLEN
WRENCH and turn
CAM LOCK to lock
into place (2 places)..
Insert PVC CAP (A3)
into top of CAM LOCK
Screw in a DRAWER
SLIDE (M) on each
panel in locations
shown with SCREW
INSERT (H).
Screw L BRACKET to panel #1. The
bent flange faces the panel edge.
Screw (R) the four casters to panel
#2. The Non-Locking casters mount
to back edge with rectangle cutout.
5
STEP 5
STEP 6
STEP 7 STEP 8
Line up DOWEL RODS on panel #3
with the holes and CAM LOCK LEGS
of panel #7. Tap panel #3 down until
flat on to #7. Take ALLEN WRENCH
and turn CAM LOCK to lock into place
(2 places)..
Line up DOWEL RODS on panel #2
with the holes and CAM LOCK LEGS
of panel #7. Tap panel #2 down until
flat on to #7. Take ALLEN WRENCH
and turn CAM LOCK to lock into place
(2 places)..
Line up DOWEL ROD on panel #6 with the
hole and CAM LOCK LEGS of panel #7. Tap
panel #6 down until flat on to #7. Take ALLEN
WRENCH and turn CAM LOCK to lock into
place (2 places)..
Line up DOWEL ROD on panel #1, #3, #2 & #6
with the holes and CAM LOCK LEGS of panel #8.
Tap panel #8 down until flat on all panels. Take
ALLEN WRENCH and turn CAM LOCK to lock
into place (8 places)..
6
STEP 9
STEP 10
STEP 11
The DOOR HINGE (J) has two
parts. Take hinge with the long leg
and drop into cutout on door and
screw (I screws) into place. The
short part of the hinge screws to
the inside side of panel #7 (see
STEP 10).
DOOR HINGE - Part 2
Screw short hinge part (I screws)
to inside of panel #7 (2 places).
When door panel, #5 is complete,
insert long leg into short part.
Screw L BRACKET to
inside of panel #8. The
bent flange faces the
door.
Screw in DOOR
HANDLE (D)
Use (E) screws.
Screw in DOOR
LOCK (K)
Use (I) screws.
Push four of the SHELF SUPPORT
(G) brackets into the sides of
panel #7 and #8 at the desired
height.
Install DOOR BUMPER (Q) on the
DOOR #5. Algin so that it will
7
STEP 12
STEP 13
STEP 14
STEP 15 STEP 16
Install CAM LOCK LEG (A1) on panel #9 (2 places).
Line up DOWEL ROD on panel #10 with the hole and
CAM LOCK LEGS of panel #9. Tap panel #9 down
until flat on to #10. Take ALLEN WRENCH and turn
CAM LOCK to lock into place (2 places).
Use (I) screws to in DRAWER SLIDES (M & N) to
bottom side of DRAWER PANEL (10) as shown.
Slide DRAWER into cabinet.
Open each SHELF BRACKET (S) and screw the two
to the outside of panel #8 and to the underside of
SHELF, panel #11, with the supplied screws. The
leg that has the release is screwed to the shelf.
S
Screw in DOOR HANDLE (D)
Use (E) screws.
Screw in DOOR LOCK (K)
Use (I) screws.
8
WARRANTY
Limited Six (6) -Year Warranty
AmpliVox warrants this product to be free from defects in materials and workmanship (subject to the terms set forth
below) for a period of six (6) years from the date of purchase (“Warranty Period”).
During the Warranty Period, AmpliVox will repair or replace (at AmpliVox’s discretion) this product or any defective parts
(“Warranty Service”).
Repair or replacement under the terms of this warranty does not give right to any extension or a new beginning of the
period of warranty.
CLAIMS UNDER THE WARRANTY
To obtain Warranty Service, contact AmpliVox (800-267-5486) to be assigned a Return Authorization number (RA#). After
receiving a RA#, the defective unit is to be returned to AmpliVox in either its original packaging or packaging affording an
equal degree of protection. You will bear the cost of shipping the product to AmpliVox. If the product is covered by the
warranty, AmpliVox will bear the cost of shipping product back to you after the completion of service under this warranty.
Return shipping will be charged to you for products not covered by the warranty or requiring no warranty repair.
The following information must be presented to obtain Warranty Service: (a) the RA# must be clearly and legibility marked
on the outside of shipping carton, (b) proof of purchase, which clearly indicates the name and address of the seller, the
date of purchase and the product type, which is evidence that this product is within the Warranty Period. Please further
include (c) your return address, (d) daytime telephone number, and (e) reason for return.
LIMITATION OF WARRANTY
This warranty is only valid for the original purchaser and will automatically terminate prior to expiration if this product is
sold or otherwise transferred to another party. The warranty provided by AmpliVox in this statement applies only to
products purchased for use, and not for resale. It does not apply to open box purchases, which are sold “as is” and
without any warranty. This Warranty does not cover cosmetic damage or damage due to misuse, abuse, negligence, Acts
of Nature, accident, disassembling or modification of, or to any part of, the product. This Warranty does not cover damage
due to improper operation, maintenance or installation, or attempted repair by anyone other than AmpliVox. Any
unauthorized repairs will void this warranty.
REPAIRS OR REPLACEMENTS AS PROVIDED UNDER THIS WARRANTY ARE THE EXCLUSIVE REMEDY OF THE
CONSUMER. AMPLIVOX SHALL NOT BE LIABLE FOR ANY INCIDENTAL OR CONSEQUENTIAL DAMAGES FOR
BREACH OF ANY EXPRESS OR IMPLIED WARRANTY ON THIS PRODUCT. EXCEPT TO THE EXTENT PROHIBITED
BY LAW, THIS WARRANTY IS EXCLUSIVE AND IN LIEU OF ALL OTHER EXPRESS AND IMPLIED WARRANTIES
WHAT SOEVER, INCLUDING BUT NOT LIMITED TO THE WARRANTY OF MERCHANTABILITY AND FITNESS FOR A
PRACTICAL PURPOSE.
NOTE! This warranty gives you specific legal rights. You may have other rights which vary from location to location. Some
jurisdictions do not allow the exclusion or limitation of incidental or consequential damages or implied warranties, so the
above exclusions may not apply to you. This warranty does not affect your legal (statutory) rights under your applicable
national or local laws.
AmpliVox - 650 Anthony Trail, Suite D, Northbrook, IL 60062 - Phone: (800)267-5486 Fax: (800)267-5489
www.ampli.com
CASTER PANEL
NOV, 2015
  • Page 1 1
  • Page 2 2
  • Page 3 3
  • Page 4 4
  • Page 5 5
  • Page 6 6
  • Page 7 7
  • Page 8 8

AmpliVox SN3230M Assembly Instruction

Type
Assembly Instruction
This manual is also suitable for

Ask a question and I''ll find the answer in the document

Finding information in a document is now easier with AI