Signature Hardware 286289 Installation guide

Category
Sanitary ware
Type
Installation guide
FREESTANDING TUB FAUCET WITHOUT SHUTOFF VALVE
GETTING STARTED
BEFORE YOU BEGIN
Your application and circumstances may call for varia-
tions to the installation instructions. We recommend
consulting a professional if you are unfamiliar with
installing plumbing fixtures. Signature Hardware accepts
no liability for any damage to the faucet, floor, walls,
plumbing, or for personal injury during installation.
Installation on a concrete slab is not recommended.
Observe all local plumbing and building codes.
Unpack and inspect the faucet for shipping damage. If
any damage is found, contact our Customer Relations
team at 1-866-855-2284.
Ensure that you have gathered all the required
materials that are needed for the installation.
Ensure that the main water supply is turned off.
TOOLS AND MATERIALS:
Plumbers
Tape
Thread
Sealant
Adjustable
Wrench
1Freestanding Tub Faucet without Shutoff Valve Installation Instructions
Neutral Cure
Silicone Sealant
Level
Tape Measure
Damp Cloth
Lug Ell
(x2)
FREESTANDING TUB FAUCET WITHOUT SHUTOFF VALVE
INSTALLATION
1. Slide the slip nuts (B) up the upper riser pipes (C).
2. Thread each of the bell flanges (D), one lock nut (E),
and one rubber washer (F) onto the bottom of each
lower riser pipe (C). Insert the lower riser pipes into the
prepared installation holes in the finished floor.
3. Thread one metal washers (G), and one lock nut (H)
onto each of the lower riser pipes from the under-floor
access space. Connect the lower riser pipes to the
main water supply using the rubber washers (I) and
NPT adapters (J).
4. Insert the two remaining rubber washers (A) into the
slip nuts at the top of the upper risers.
2Freestanding Tub Faucet without Shutoff Valve Installation Instructions
FLOOR
bell flange
lock nut
rubber washer
metal washer
lock nut
rubber washer
NPT adapter
lug ells
(not included)
support mounted between floor joists
FLOOR
A B
C
D
E
F
G
H
I
J
A. Rubber Washer (2)
B. Slip Nut (2)
C. Riser Pipe (2)
D. Bell Flange (2)
E. Lock Nut (2)
F. Rubber Washer (2)
G. Metal Washer (2)
H. Lock Nut (2)
I. Rubber Washer (2)
J. NPT Adapter (2)
FREESTANDING TUB FAUCET WITHOUT SHUTOFF VALVE
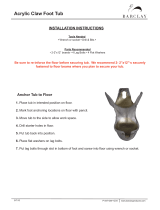
9. Attach the hand shower to the faucet by using the
provided flexible hose. Connect the hose to the
outlet located on the cradle. Place the hand-held
shower in the cradle.
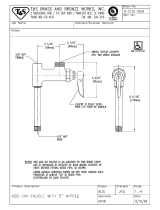
7. Apply thread sealant to the inlets on the back of
the faucet body. Attach the faucet to the upper riser
pipes and tighten the slips nuts to secure.
Tip: Wrap the slip nuts with a soft cloth while tighten-
ing, to avoid scratching the plated finish.
8. Attach the hand shower cradle to the faucet body
by threading it into the top of the faucet. Apply
plumber’s tape or thread sealant to the thread before
attaching. Tighten firmly.
3Freestanding Tub Faucet without Shutoff Valve Installation Instructions
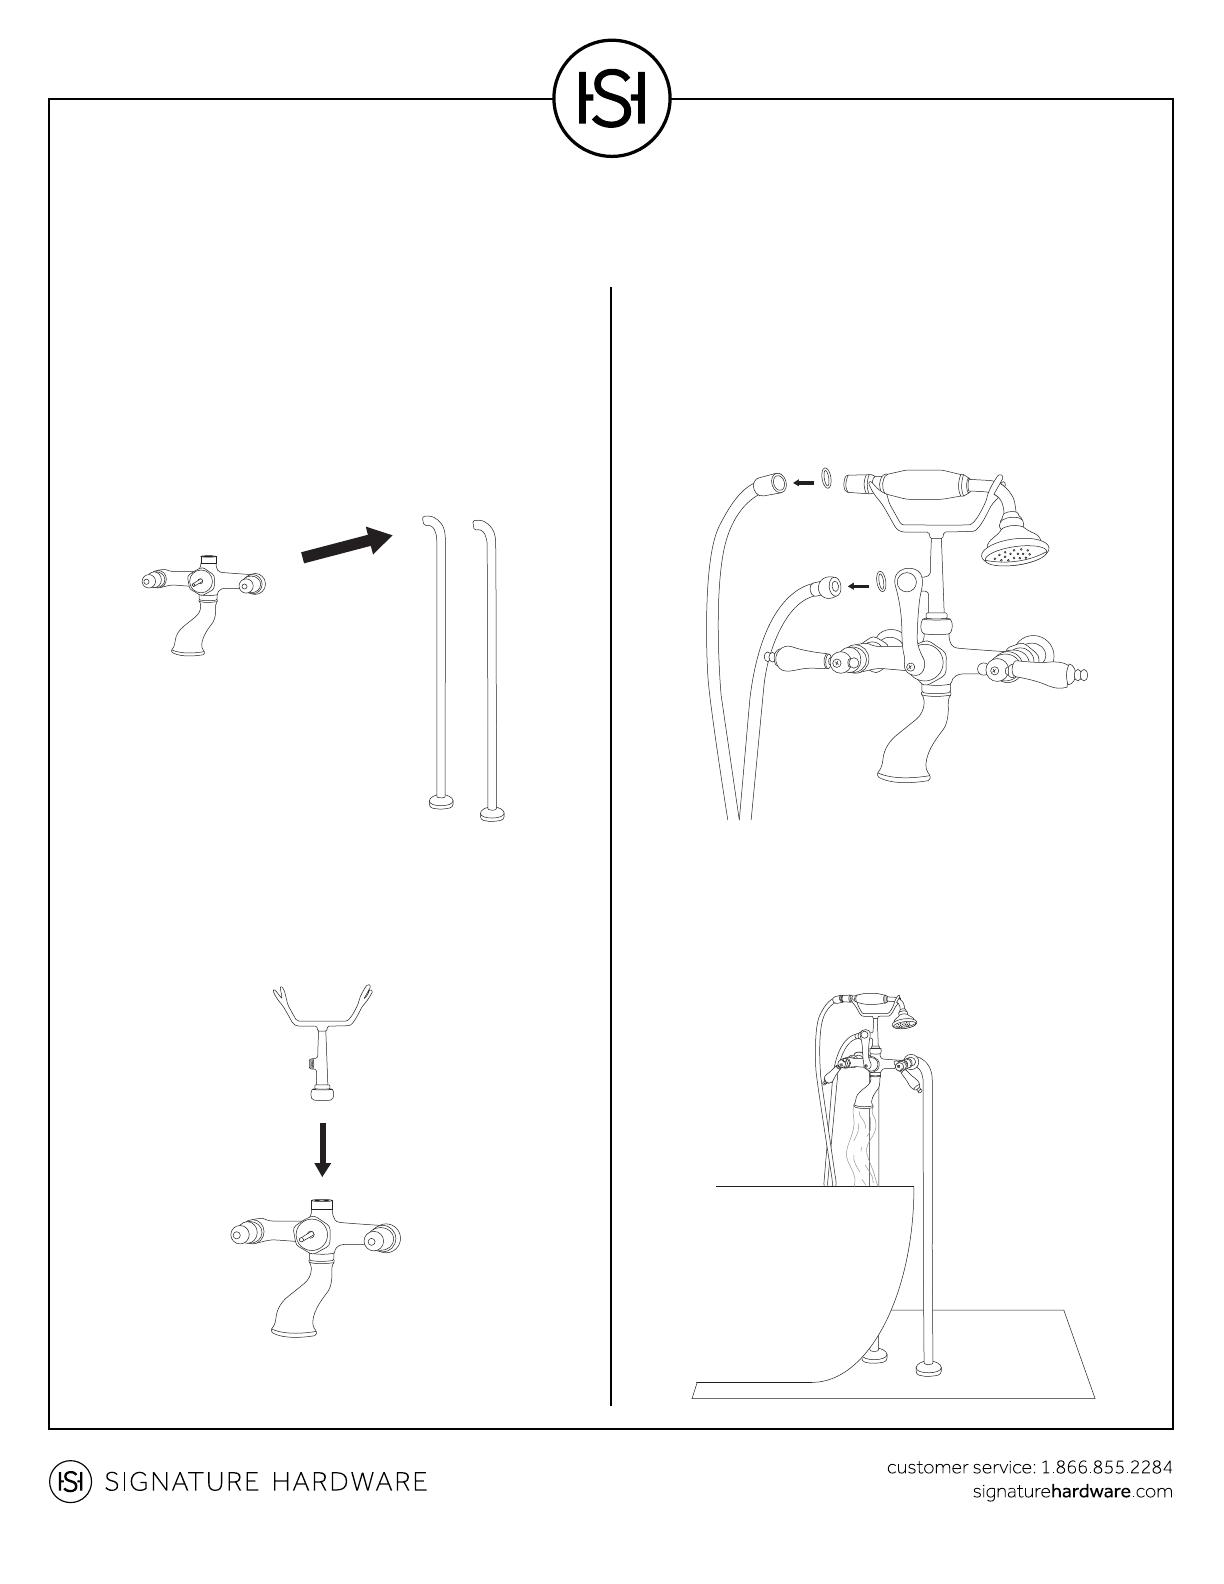
10. Turn on the main water supply, then turn the
faucet on. Allow the water to flow for approximately
60 seconds. Divert the water to the hand shower and
allow the water to flow for another 60 seconds.
Check to make sure that all connections are tight,
and there are no leaks.
  • Page 1 1
  • Page 2 2
  • Page 3 3

Signature Hardware 286289 Installation guide

Category
Sanitary ware
Type
Installation guide

Ask a question and I''ll find the answer in the document

Finding information in a document is now easier with AI