Page is loading ...

BossTone
An all-time classic
fuzz by Jordan
Contents of this document are ©2016 Pedal Parts Ltd.
No reproduction permitted without the express written
permission of Pedal Parts Ltd. All rights reserved.
FuzzPup

IMPORTANT
Before you start...
Grab the general build doc that covers all FuzzPup builds. Most of
the information you need for this build is in there.
Read it? OK, carry on.
FuzzPups
Lovely little boxes of joy with a
totally standardised build pattern
Contents of this document are ©2016 Pedal Parts Ltd.
No reproduction permitted without the express written
permission of Pedal Parts Ltd. All rights reserved.

Schematic + BOM
R1 150K
R2 560K
R3 560K
R4 18K
R5 18K
C1 22n
C2 22n
C3 47p
C4 22n
C5 47u elec
Q1 2N2222
Q2 2N3906
D1,2 1N4148
D3 1N4001
GAIN 100KB
VOL 100KA
We’ve included pads S1 and S2 so you can easily add a switch to
take the clipping diodes out of the circuit. For a stock build you
should place a jumper between these pads - see next page.
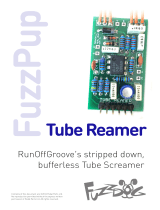
C5 should lay flat on the PCB as shown in the cover image.

PCB layout ©2016 FuzzDog
For a stock build you should place a jumper as shown.

Optional clipping switch
If you take the clipping diodes out of the
circuit you get a completely different crunchy
beast. It’s certainly worth trying the circuit
without them - test it before you add the
S1-S2 jumper. If you want to add a switch to
take them in and out, simply wire up a SPST
or SPDT toggle as shown. SPST will only have
two lugs of course.

FuzzDog.co.uk
/


