DON’T WAIT!
REGISTER NOW!
Register your product within 90 days to ensure your product is
recognized as an purchase and is for warranty
coverage.
in the registry card (Pg. 2) or register
at www.swcorp.com/register
.
LEAD FREE
NSF/ANSI/CAN 61
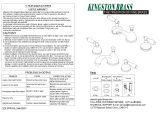
INSTALLATION & OPERATION MANUAL
V1.0
ITEM: L-AZ 905**
2TONE LAVATORY FAUCET
10/30/2022


PG.1
PRODUCT SIZE CHART
5"-16"
[127mm-406mm]
2.7"
[69mm]
2.9"
[74mm]
0.24"
[6mm]
2.05"
[52mm]
5.5"
[140mm]
2.05"
[52mm]
4.5"
[114mm]
0.2"
[5mm]
4.6"
[116mm]
5.3"
[134mm]
2.01"
[51mm]
1.06-1.18"
[27-30mm]
1.5"
[38mm]
1/2" male thread connection
1.3-1.38"
[33-35mm]
TOOLS
Wrench Screwdriver

[18]
[01]
[06]
[03]
[02]
[05]
[04]
[07]
[08]
[13]
[14]
[15]
[16]
[09]
[10]
[11]
[12]
[17]
PG.2
COMPONENTS
Description QtyPart.
[01] 1
1
2
1
2
2
2
3
2
2
2
2
1
1
1
2
[02]
[03]
[04]
[05]
[06]
[07]
[08]
[09]
[10]
[11]
[12]
[13]
[14]
[15]
Spout
Key
Handle
Button
Screw
Metal Gasket
Rubber Washer
Valve Assembly
Rubber Gasket
Lock Nut
Hose
[16]
1
[17] Allen Key
1
[18] T-Wrench
Handle Base
Nut
O-ring
Metal Washer
Aerator
Before installation:
1.Please make sure that all components have been included.
2.Ensure that all supply lines are free of debris with supply stops installed.
3.Ensure water pressure is between 20-125 PSI.
4. If you are having difficulties with installation, please contact a professional plumber.

PG.3
INSTALLATION
1[01]
[11]
[13]
[14]
[15]
[16]
[08]
2
[07]
[06]
[03]
[04]
[17]
[08]
[01]
[12]
[11]
[10]
[09]
outlet
red ring
Stem
blue ring
STEP 1:
Remove Rubber Gasket [13], Metal Gasket [14] and Lock Nut [15] from Spout [01].
Install Hoses [16] to the screw holes at the bottom of the Spout [01] and tighten the Hoses [16] to
secure.
Slide Hoses [16] through O-Ring [08], then install Spout [01] with O-Ring [08] in faucet hole. Adjust the Spout
[01].
Slide Rubber Gasket [13] and Metal Gasket [14] up onto the Rod of Spout [01] under sink and secure
with Nut [15]. Start by hand tightening the Nut [15] first and finish tightening with T-Wrench [18] to secure.
1.
2.
3.
4.
STEP 2:
Slide the Valve Assembly [09] with Rubber Washer [10], Metal Washer [11] and Lock Nut [12] up
through the faucet hole from underneath the sink.
Note: The Valve Assembly [09] with red ring should be installed on the left. The other on the right.
Place the O-Ring [08] over the Valve Assembly [09] on top of the sink, then install the Handle Base [07]
to the Valve Assembly [09] over the O-Ring [08]. Tighten the Handle Base [07] to secure.
Adjust each Valve Assembly [09] so its outlet is pointing at the Spout [01]. Then install the Handle [06]
to the stem of the Valve Assembly [09].
Turn the left Handle [06] clockwise and the right Handle [06] counter-clockwise until they stop. If the
Handle [06] doesn't align with the Handle Base [07] properly, pull up the Handle [06], turn it to the
correct position and install Handle [06] again. If the Handle [06] is still misaligned, unscrew the Handle
Base [07] a little bit to align with the Handle [06].
Make sure the left Handle [06] can't be turned in clockwise and the right Handle [06] can't be turned in
counter-clockwise again. Then, adjust the Valve Assembly [09] so that the Handles [06] are level and
the outlets point to the Spout [01]. Hand tighten the Lock Nuts [12] and tighten the screws with a
screwdriver to secure. Turn the Handles [06] to make sure they move smoothly.
Secure the Handles [06] by tightening Screws [04] with Allen Key [17] and cover Screws [04] with
Buttons [03].
1.
2.
3.
4.
5.
6.
Rod

PG.4
INSTALLATION
STEP 3:
Connect the Hoses [16] to the outlets of Valve
Assembly [09].
STEP 4:
Use hoses or copper tubes(NOT PROVIDED) to
connect the inlets of Valve Assembly [09] and the
Hot and Cold water supplies. Hand tighten the nuts
and tighten with wrench to secure.
[02]
[01]
[05]
[06]
STEP 5:
Turn on hot and cold water supplies and turn the Handles [06], then check all connections at arrows for
leaks. Retighten if necessary, but Do Not Overtighten.
Using the Key [05], remove Aerator [02] from Spout [01].
Turn the Handles[06] to full on position and flush water lines for one minute. Reinstall Aerator [02] with the
Key [05].
1.
2.
3.
5
3 4
outlet outlet
inlet inlet
hose or
copper
tube
HOT COLD
HOT COLD
[16]

PG.5
1.
2.
PUSH POP-UP INSTALLATION
Specification
Body
Gasket
6
Washer
Plastic washer
Lock nut
STEP 7:
Slide Washer, Plastic washer and Lock nut
up onto the Body from under the sink and secure
with Lock nut.
To preserve the finish on the metallic parts of your ANZZl faucet, apply non-abrasive wax, such as car
wax. Any cleaners should be rinsed off immediately.
Clean the aerator regularly to remove calcium build-up and any blockages that could reduce water flow.
STEP 8:
Install the Outlet pipe with Gasket up onto the
Body from under the sink and tighten it securely.
Note: Ensure there is a Gasket between Body
and Outlet pipe.
7
Body
Gasket
Outlet pipe
8
CLEANING & MAINTENANCE
STEP 6:
Remove Body and Gasket from POP-UP drain.
Install the Body and Gasket through the drain
hole of the sink as shown in Figure 6.
1.
2.

/