1
2
3
4
5
6
7
10
11
8
11
12
13
9
2
1
2
D
KCL
D
3
KCR
D
D
1
3
2
F
F
A
A
B
B
B
B
A
A
A8 PCS
4 PCS
8PCS
12
1PC
1 PC
8 PCS
1PC
8 PCS
6 PCS
1 PC
PCS
B
C
G
H
I
J
K
D
E
F
LD RD CRCL
12
L 4 PCS
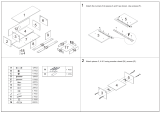
Attach the runners K to pieces 2 and 3 as shown. Use screws (D).
Then attach pieces 2 and 3 to Top panel 1 using wooden dowels (F),
cam dowels (A) and cam locks (B).

34
56
J
C
C
C
C
FF
F
F
J
J
J
J
J
1
3
2
5
3
2
5
4
1
11
12
12
13
11
12
12
13 11
Slot in piece 5 to the built-in ridges. Then add piece 4 to the unit using wooden dowels (F), Screw (C).
Attach piece 12 & 13 to piece 11 using screw (J) with tool (E). Attach piece 12 & 13 to piece 11 using screw (J) with tool (E).

×2
7 8
910
6
7
7
8
10
9
10
C
C
G
H
A
A
L
L
I
I
I
I
I
I
I
I
E
4
2
11
11
Attach 2 section using screw (I) with tool (E). Attach pieces 6, 7 & 8 using screws (C). Make sure that the built-in ridge is
facing inwards and at the bottom.
On piece 10, attach the door handles (H) using screws (G). Slot piece 9 into the ridges. First insert the cam locks (B) into the pre-drilled
holes on parts 7 & 8. Then insert cam dowels(A) into each side, you then
need to line up these screws with the pre-drilled holes on the front piece 10.
Once attached, tighten the cam locks (B) using a cross-head screwdriver
and ensure the piece is secure.

11 12
9
D
D
D
K
DL
K
DR
1
2
10
Turn the drawer upside down. Line up the holes on the outside pieces
with the holes on the runners (KDR & KDL), secure to the drawer
using screws (D)
Insert the drawers.
13 The unit should now be assembled and ready to use.
-
 1
1
-
 2
2
-
 3
3
-
 4
4
Baxton Studio 30501678 Assembly Instructions
- Type
- Assembly Instructions
- This manual is also suitable for
Ask a question and I''ll find the answer in the document
Finding information in a document is now easier with AI
Related papers
-
ROOMS TO GO 30512051 Assembly Instructions
-
ROOMS TO GO MUS-005-Natural/Black Assembly Instructions
-
 Baxton Studio NAB-008-Cherry/White Assembly Instructions
-
ROOMS TO GO MAG-14-Natural/Black-CT Assembly Instructions
-
ROOMS TO GO ETAN-005-Bamboo-ET Assembly Instructions
-
ROOMS TO GO ETAN-004-Bamboo-ET Assembly Instructions
-
ROOMS TO GO ANN-2012-Natural/Brown-Cabinet Assembly Instructions
-
ROOMS TO GO 20212851 Assembly Instructions
-
ROOMS TO GO 21277214 Assembly Instructions
-
ROOMS TO GO WES-004-Natural/Black-Cabinet Assembly Instructions
Other documents
-
Home Styles 5530-5014 Assembly Instructions
-
Home Styles 5530-5014 Installation guide
-
 Whalen ATFC-P2-US / SC-ATFC User manual
-
 Furniture of America HFW-1894C25 Installation guide
-
Home Styles 5100-0043-42 User guide
-
Home Styles 5100-0072 Assembly Instructions
-
 ClosetMaid MasterSuite Installer's Assembly, Installation & Reference Manual
-
Home Styles Kitchen Cart Operating instructions
-
Simpli Home AXWSH002-BL Operating instructions
-
Simpli Home AXCCON47-WH Installation guide


