Page is loading ...

TT-FFS Fast Fuel Sensors
Installation Manual

nVent.com | ii
Important Safeguards
The nVent RAYCHEM TraceTek Fast Fuel Sensor (FFS)
must be installed correctly to ensure proper operation
and detection of spilled hydrocarbons. Read these
important warnings and carefully follow all of the
installation instructions.
• Approvals and performance are based on the use
of nVent Thermal Management parts only. Do not
substitute parts, particularly the shrink tubing used to
seal the connectors.
• All installation and connection should be done without
power applied to protect the equipment and the
installer.
• Take care not to touch or scratch the sensor material
inside the FFS body. Damaging this material will
render the unit non-functional.
• Connector heat shrink tubing seals require the use of
a heat gun that produces temperatures which can burn
exposed skin. Gloves are recommended while using
the heat gun and hands kept well out of the way of the
air stream.

nVent.com | iii
Table of Contents
1
General Information 1
2
Pre-Installation Checks 4
3
General Installation Instructions 7
4
Application Specific Installation Instructions 11
5
Commissioning Section 19
6
Care and Maintenance 26

nVent.com | iv

nVent.com | 1
1
General Information
1.1 Use of the Manual
This manual covers installation of the nVent
RAYCHEM TraceTek Fast Fuel Sensor (FFS) for
hydrocarbon fuel leak detection in commercial
and industrial applications. The manual covers
general area preparation and sensor installation,
wiring details, testing and periodic maintenance
for the FFS only.
Other components are required to create a
fully functioning hydrocarbon leak detection
and alarm system but installation of those
components is not covered in this manual. A
list of the common product installation manuals
which may also be required are as follows:
Title Doc No.
FFS Environmental Cover
(for outdoor use if necessary)
H58519
Float Assembly Installation Instructions H59200
FFS Care and Cleaning Instructions H58307
FFS Hazardous Area Parameter and
Application Guide
H57919
Probe Tester Operating Instructions H58496
TTSIM-1 Installation Manual H56830
TTSIM-1A Installation Manual H57338
TTSIM-2 Installation Manual H57437
TTC-1 Sensing Module Installation
Manual
H53813
TTDM-128 Alarm Panel Installation
and Operations Manual
H57341
TT-TS12 Touch Screen Alarm Panel
Installation and Operations Manual
(UL-508 Compliant)
H80856
TT-TS12-E Touch Screen Alarm Panel
Installation and Operations Manual
(CE Compliant)
H81299
This manual assumes that a proper leak detection
system design using the FFS has been completed
and that all system components are available and
ready for installation.

1
General Information
nVent.com | 2
For additional information contact your local
nVent Dealer or Representative or contact:
nVent Thermal Management
Tel: +1.800.545.6258
Fax: +1.800.527.5703
nVent.com
Important: For warranty and agency
approvals to apply, the instructions that are
included in this manual and the product
packages must be followed.
1.2 Storage
• Store the FFS in a clean dry place in its
shipping box until ready for installation.
• Storage temperatures may not exceed –40°C
(–40°F) to 85°C (185°F).
• Protect the FFS from mechanical damage.
1.3 Safety Guidelines
The safety and reliability of any fuel leak
monitoring system depends on the quality of the
products selected and the manner in which they
are installed and maintained. Incorrect design,
handling, installation or maintenance of any of
the system components could impact the ability
of the overall system to detect and report fuel
leaks. To minimize these risks and to ensure
that the system performs reliably, read and
carefully follow the information, warnings and
instructions in this guide.
Pay special attention to the following:
• Instructions marked
Important
• Safety warnings identified as
WARNING

1
General Information
nVent.com | 3
1.4 Approvals
The FFS is approved by FM and Baseefa for use
in hazardous areas.
F
M
APPROVED
IS/Class I, Div. 1, Groups A, B, C, D/T4; Class I Zone 0, AEx ia
IIC T4
NI/Class I, Div. 2. Groups A, B, C, D/T4; Class I Zone 2, Group
IIC T4
Baseefa11ATEX0221X
IECEx BAS 11.0111X
II 1 G
Ex ia IIC T4 Ga (–40°C ≤ ta ≤ +85°C) (Ui = 15V)
Ex ia IIA T4 Ga (–40°C ≤ ta ≤ +85°C) (Ui = 28V)
1.5 Warranty
nVent’s standard limited 24 month warranty
applies to all products. A copy of the warranty
can be found at nVent.com

2
Pre-Installation Checks
nVent.com | 4
To ensure an efficient and successful installation,
obtain all of the necessary equipment and
ensure the installation area is clear of debris and
provides a safe working environment.
2.1 Tools Required
• Gloves
• Safety Glasses
• Wire Cutters
• Electric Heat Gun
• Specialty Tools — the tools necessary to
connect the FFS Mounting Bracket for your
specific application. Typical installation areas
consist of a concrete floor, metal plate or
container or wooden joist. Assemble the tools
necessary to secure a bolt or screw into the
material for your specific installation area.

2
Pre-Installation Checks
nVent.com | 5
2.2 Installation Components
• FFS
– 100 mm version, 1 ft, 3 ft or 10 ft lead, with
or without a metal connector
– 250 mm version, 1 ft, 3 ft or 10 ft lead, with
or without a metal connector
• nVent RAYCHEM TraceTek Probe Tester – To
confirm FFS functionality before installation.
• Probe Tester Operating Instructions (H58496)
• Mounting Bracket Kit (includes 2 plastic zip ties)
• nVent RAYCHEM TraceTek Leader Cable
to connect the FFS to the Sensor Interface
Module
– TT-MLC-MC (PN 330065-000) for Indoor
Commercial Applications
– TT-MLC-MC-BLK (PN 133332-000) for
Outdoor and Industrial Applications
2.3 Pre-Installation Test
Remove the FFS from its packaging and
connect it to the Probe Tester using the
metal connectors. If your FFS does not have
a connector, use the alligator clip adapter to
connect it to the Probe Tester.
Once connected, follow the instructions in the
Probe Tester Operating Instructions (H58496) to
confirm that the FFS is functioning properly.
If the Probe Tester indicates the FFS is in alarm,
clean the FFS with Isopropyl Alcohol according
to the Care and Cleaning Instructions (H58307).
Once the FFS has been cleaned, retest it with the
Probe Tester to ensure it is operational.
If the FFS does not reset after this procedure,
contact your local nVent representative to obtain
a replacement unit.

2
Pre-Installation Checks
nVent.com | 6
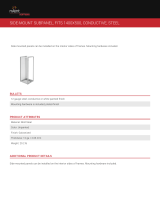
FFS
(100 mm)
FFS
(250 mm)
Probe Tester
Mounting Bracket
and Cable Ties
FFS Installation
Instructions
Leader Cable
– TT-MLC-MC or
– TT-MLC-MC-BLK

3
General Installation Instructions
nVent.com | 7
3.1 Installation Orientation
The FFS is designed to be mounted upright with
the leader cable coming out of the top. This
positions the sensor as close to the floor or fuel
location as possible and minimizes the amount of
fuel required to trigger an alarm. This orientation
is recommended whether the FFS is mounted
on a floor, in a sump or in a floating assembly.
Regardless of the mounting hardware used, this
is the recommended mounting position.
3.2 Mounting Bracket
A Mounting Bracket kit is available which includes
a versatile stainless steel bracket with zip ties to
secure the FFS in position. The mounting bracket
includes a variety of round and oval openings
which accept fasteners up to 0.250" (M6). This
kit provides a simple way to mount the FFS to a
variety of surfaces and structures.

3
General Installation Instructions
nVent.com | 8
3.3 Selecting an FFS
The FFS comes in two lengths; 250 mm and 100
mm. The 100 mm devices are suitable for general
use in fuel detection where the fuel will spill onto
a floor or other surface. The 250 mm devices
are designed to be used in sumps and other
applications where fuel may pool or collect on the
surface of water and the water level may vary due
to rain or other sources. The longer 250 mm sensor
length will remain effective for larger variations in
water level than the 100 mm device.
Note: While the FFS is water-resistant, it is not
intended for applications where it is permanently
immersed in water. Refer to the FFS Data Sheet
(H57977) for guidance on water resistant
capability.
3.9" (100 mm)
Active region
5.7" (145 mm)
1.0"
(25 mm)
1.0"
(25 mm)
9.8" (250 mm)
Active region
11.6" (295 mm)

3
General Installation Instructions
nVent.com | 9
Varying lengths of leader cable are available on
the standard FFS as well as an option to include
a connector.
• Select from 1’, 3’ or 10’ leader cable lengths
depending on the needs of your particular
application. If the FFS is to be mounted in a
float assembly, the 10’ leader is recommended
to accommodate the up/down travel of the
float assembly as the water level varies.
• End termination options include a water tight
connector compatible with other nVent RAYCHEM
TraceTek cables or simple pig-tailed leads. The
connectors have the advantage of straightforward
connection in the field and a water-sealed
interface when assembled in accordance with the
manufacturer’s recommendations. The simple
pig-tailed leads can be used if the FFS is to be
connected to terminal blocks in a junction box or
similar enclosure.

3
General Installation Instructions
nVent.com | 10
3.4 Positioning the FFS
The FFS should be placed in a location which is
protected from damage due to normal vehicle,
personnel or equipment traffic but highly likely
to come in contact with any leaked fuel.
This includes consideration of low points in the
floor where leaked fuel may pool or equipment
locations, such as fuel tanks, fuel line valves and
filters, where leaks are most likely to occur.
The recommended mounting configuration of
the FFS is with the open end touching the floor.
This positions the sensor board as close to the
floor as possible allowing it to detect any fuel
spill as quickly as possible.
The FFS body should be secured to the
mounting bracket via zip ties or some other
removable retention mechanism. It may be
desirable to move the FFS out of the way during
equipment maintenance, either to protect it from
damage or prevent a false alarm due to fuel
spilled during maintenance activities. Therefore,
the retention method used should allow easy
removal and re-installation.

4
Application Specific
Installation Instructions
nVent.com | 11
The following sections provide installation
instructions and recommendations for some of
the standard fuel leak detection applications.
4.1 Diesel Generators - Indoor
The first step to installing the FFS for leak
detection around diesel generators is to define
the location of the sensor.
• If the diesel generator is installed in a recessed
area which is designed to contain any leaked
fuel, then the FFS should be mounted in the
recessed area.
– Find the ideal mounting location by spilling
water at different spots within the recessed
area to determine the point to which most
spilled fluid will flow to.
– Mount the FFS in this spot.

4
Application Specific
Installation Instructions
nVent.com | 12
• If the diesel generator is not recessed, then it
is recommended that a weir be constructed
around the generator to contain any leaked
fuel. The FFS should then be mounted within
the weir to ensure contact with any leaked fuel.
– ¾" (2 cm) angle iron or similar can be used
to construct the weir.
- Secure to the floor using appropriate bolts,
screws or glues.
- Seal the corners and floor interfaces to
prevent fuel leakage out of the weir.
– Find the ideal mounting location by spilling
water at different spots within the weir to
determine the point to which any spilled fluid
will flow.
– Mount the FFS in this spot.

4
Application Specific
Installation Instructions
nVent.com | 13
4.2 Fuel Filters and Valves
Fuel Filters, Valves and other points at which
pipes interface or connect represent the highest
probability of becoming a leak point. A weir
should be built around the potential leak point or
equipment to contain any leaked fuel.
• ¾" (2 cm) angle iron or similar can be used to
construct the weir.
– Secure to the floor using appropriate bolts,
screws or glues.
– Seal the corners and floor interfaces to
prevent fuel leakage out of the weir.
• The FFS should then be mounted within the weir.

4
Application Specific
Installation Instructions
nVent.com | 14
4.3 Sumps and Run-Off Protection
The FFS may be used to detect pooling of leaked
fuel in water sumps or fuel floating on water in
sumps, water storage pools and storm drains, etc.
If your application requires the FFS to be used
in a float system to detect fuel leaks and
contamination on top of the water, then refer to
the TraceTek FFS and Float Assembly Installation
Manual (H59200) for complete details on this
type of installation.
Fixed location installation of the FFS in sumps
and drains may be accomplished by fixing the
mounting bracket directly to the wall of the sump
with the right angle bend at the bottom and
facing out. This provides support for the FFS
so that it does not simply slip out of the zip ties
over time. Mounting location should be chosen
such that the FFS is centered in the desired fuel
detection zone of the sump or drain. The 250 mm
version of the FFS is recommended for these
installations as it provides a longer sensor and
can accommodate larger variations in water level.

4
Application Specific
Installation Instructions
nVent.com | 15
4.4 Fuel Storage Tank Overflow Protection
Large Fuel Storage Tank overflow protection is
normally provided at two points as necessary:
1) Within the overflow containment ring around
the bottom of the tank
2) On the roof for tanks utilizing floating roof
systems
Overflow Containment Ring Installations
The FFS can be mounted anywhere in the
overflow containment ring that is convenient. It
is recommended that the placement be against
the tank side of the containment ring in order
to protect it from damage. Installation of the
FFS should be flush with the bottom of the
containment ring surface.

4
Application Specific
Installation Instructions
nVent.com | 16
Floating Roof Installations
The FFS can be used to detect breaks in the
seal between the tank wall and roof for floating
roof systems. A single or several FFS may be
mounted on the floating roof at its perimeter.
• The mounting bracket may be used with an
appropriate connection method to ensure the
roof integrity is not compromised.
• Sufficient jumper or leader cable must be
used to allow full range of roof motion without
creating any tension on the FFS connector or
connection cable(s).
/