Kenwood CD Series User manual

Category
CD players
Type
User manual

This manual is also suitable for

INSTRUCTION MANUAL
KENWOOD CORPORATION
B60-3684-00 CH ( K,P,Y, M ,X ,T )
I
D
99/12 11 10 9 8 7 6 5 4 3 2 1 98/12 11 10 9 8 7 6 5 4 3 2 1
This instruction manual is used for six models. Model availability and features
(functions) may differ depending on the country and sales area.
CD PLAYER
CD/DPF-R SERIES
CD-206
CD-204
CD-203
DPF-R6010
DPF-R4010
DPF-R3010
DTS disclaimer clause
When Playing DTS-encoded CDs, excessive noise will be exhibited from the analog
stereo outputs. The consumer should take proper precautions when the analog stereo
outputs of the CD player is connected to an amplification system. To enjoy DTS
Digital Surround playback, an external 5.1 channel DTS Digital Surround decoder
system must be connected to the digital output (S/PDIF, ASE/EBU, or TosLink) of the
CD player.
Downloaded from: http://www.usersmanualguide.com/
CD-206/ 204/ 203/ DPF-R6010/ R4010/ R3010 (En
)
2
Before applying pow er Caution : Read this section carefully to ensure safe operation.
Units are designed for operation as follows.
U.S.A. and Canada .........................................................AC 120 V only
Australia..........................................................................AC 240 V only U.K. and Europe .............................................................AC 230 V only
China ...............................................................................AC 220 V only
*Other countries .........................AC 110-120 / 220-240 V switchable
The marking is located on the rear panel and says that the compo-
nent uses laser beams that have been classified as Class 1. It means
that the unit is utilizing laser beams that are of a weaker class. There
is no danger of hazardous radiation outside the unit.
CLASS 1
LASER PRODUCT
The marking of products using lasers
(Except for some areas)
REQUIREM ENT BY NEDERLAND GAZETTE
Batteries are supplied with this product. When
they empty, you should not throw away. Instead,
hand them in as small chemical waste.
Introduction
* AC voltage selection
The AC voltage selector switch on the rear panel is set to the voltage
that prevails in the area to w hich the unit is shipped. Before connecting
the power cord to your AC outlet, make sure that the setting position
of this switch matches your line voltage. If not, it must be set to your
voltage in accordance with the following direction.
Move switch lever to match your line voltage
with a small screwdriver or other pointed tool.
Note:
Our w arranty does not cover damage caused by excessive line voltage
due to improper setting of the AC voltage selector switch.
For the United Kingdom Factory fitted moulded mains plug
1. The mains plug contains a fuse. For replacement, use only a 13-Amp ASTA-approved (BS1362) fuse.
2. The fuse cover must be refitted when replacing the fuse in the moulded plug.
3. Do not cut off the mains plug from this equipment. If the plug fitted is not suitable for the power points in your home or the cable is too short to
reach a power point, then obtain an appropriate safety approved extension lead or adapter, or consult your dealer.
If nonetheless the mains plug is cut off, remove the fuse and dispose of the plug immediately, to avoid a possible shock hazard by inadvertent
connection to the mains supply.
IMPORTANT
The wires in the mains lead are coloured in accordance with the following code:
Blue : Neutral
Brown : Live
Do not connect those leads to the earth terminal of a three-pin plug.
Safety precautions
THE LIGHTNING FLASH WITH ARROWHEAD SYMBOL, WITHIN AN EQUILATERAL TRIANGLE, IS INTENDED TO ALERT
THE USER TO THE PRESENCE OF UNINSULATED DANGEROUS VOLTAGE WITHIN THE PRODUCT’S ENCLOSURE
THAT MAY BE OF SUFFICIENT MAGNITUDE TO CONSTITUTE A RISK OF ELECTRIC SHOCK TO PERSONS.
Caution : Read this section carefully to ensure safe operation.
THE EXCLAMATION POINT WITHIN AN EQUILATERAL TRIANGLE IS INTENDED TO ALERT THE USER TO THE PRESENCE
OF IMPORTANT OPERATING AND MAINTENANCE (SERVICING) INSTRUCTIONS IN THE LITERATURE ACCOMPANYING
THE APPLIANCE.
CAUTION
RISK OF ELECTRIC SHOCK
DO NOT OPEN
CAUTION: TO REDUCE THE RISK OF ELECTRIC SHOCK, DO NOT REMOVE COVER (OR
BACK). NO USER-SERVICEABLE PARTS INSIDE. REFER SERVICING TO QUALIFIED
SERVICE PERSONNEL.
AC voltage selector switch
WARNING : TO PREVENT FIRE OR ELECTRIC SHOCK, DO NOT EXPOSE THIS
APPLIANCE TO RAINOR MOISTURE.
The illustration shows
the CD-206/DPF-R6010.
AC11 0-22 0V
L
R
VARIABLE
LINE OUTPUT
DIGITAL OUTPUT
SYSTEM CONTROL OPTICAL
COAXIAL
SL16 XS 8
ƒ
TEXT
AC110-220V AC220-240V
AC22 0-24 0V
Downloaded from: http://www.usersmanualguide.com/
3
CD-206/ 204/ 203/ DPF-R6010/ R4010/ R3010 (En
)
Unpacking
Unpack the unit carefully and make sure that all accessories are put aside so they will not be lost.
Examine the unit for any possibility of shipping damage. If your unit is damaged or fails to operate, notify your dealer immediately. If your unit was shipped
to you directly, notify the shipping company without delay. Only the consignee (the person or company receiving the unit) can file a claim against the carrier
for shipping damage.
We recommend that you retain the original carton and packing materials for use should you transport or ship the unit in the future.
Keep this manual handy for future reference.
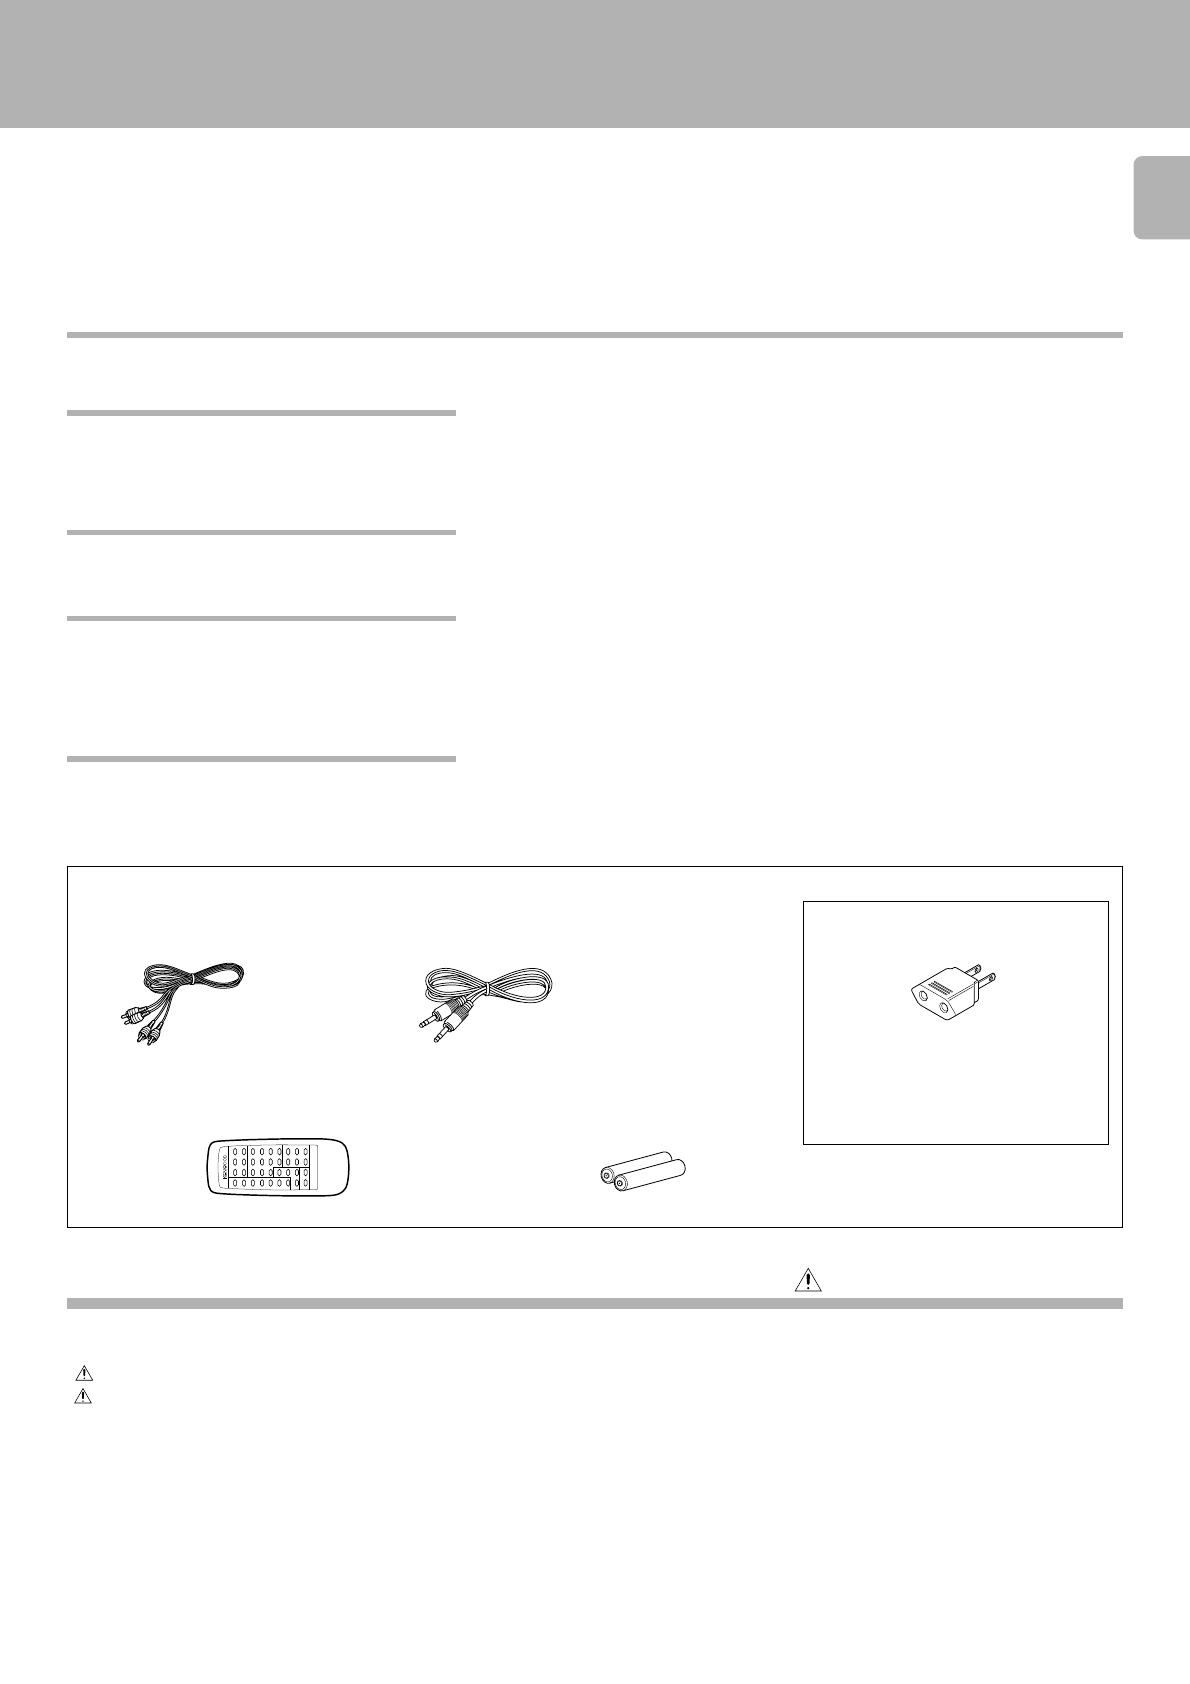
Audio cord ............... (1) System control cord ...........(1)
Remote control unit ..............(1) Batteries (R6/AA)................. (2)
(Except for CD-203/DPF-R3010) (Except for CD-203/DPF-R3010)
REMOTE CONTROL UNIT
RC-P06 01
AC plug adaptor .............. (1)
Use to adapt the plug on the power cord
to the shape of the wall outlet.
(Accessory only for regions where use is
necessary.)
Caution: Read the pages marked carefully to ensure safe operation.
Displays...........................................................................13
Programmed play (PGM mode) ...................................14
Playback in random order (Random playback) ..........17
Repeated playback ........................................................18
Editing.............................................................................20
Normal EDIT................................................................20
MULTI EDIT .................................................................21
Timer operations ...........................................................23
Maintenance...................................................................24
In case of difficulty ........................................................25
Specifications.................................................................26
Introduction..................................................................... 2
Before applying power................................................... 2
Safety precautions ......................................................... 2
Special features........................................................... 3
System connections....................................................... 4
Controls and indicators.................................................. 6
Operation of remote control unit ................................. 8
Preparing to play tracks................................................. 9
Normal play (TRACK mode) ........................................ 10
Searching for tracks by title (TITLE SEARCH) ........... 12
The text information (disc title, track titles, names of the artists, songwriters, composers,
etc.) recorded on the CDs can be easily called and displayed in alphanumerics. (Some
words and text may not be displayed.) @#
D.R.I.V.E. (Dynamic Resolution Intensive Vector Enhancement) IC is built in for drastic
reduction of distortion at small signal level.
Normal EDIT: Edit function for rearranging tracks according to the tape length so that no
music is interrupted in the middle. )
MULTI EDIT: Several CDs can be edited and recorded on 1 tape. (Except for CD-206/
DPF-R6010) ¡
Auto space function. ^
Easy operation functions allow systematic operation with other KENWOOD components
connected through the system control connection. 5
Introduction
Special features
Contents
CD-TEXT support (CD-206/DPF-R6010 only)
Advanced technologies incorporated in pursuit of im-
proved sound quality and stability (CD-206/ DPF-R6010
only)
Convenient features for dubbing CD onto tape
Easy operation functions
Accessories
Downloaded from: http://www.usersmanualguide.com/
CD-206/ 204/ 203/ DPF-R6010/ R4010/ R3010 (En
)
4
L
R
CD
SYSTEM
CONTROL
AC110 -2 20 V AC220-2 40 V
L
R
VARI ABLE
LINE OUTPUT
@
DIGITAL OUTPUT
SYSTEM CONTROL OPTICAL
COAXIAL
SL16 XS 8
ƒ
TEXT
OPTICAL
COAXIAL
L
RSL16 XS 8
ƒ
AC 1 10 -1 20 V 2 3 AC 2 20 -2 40 V
SYSTEM
CONTROL
LINE OUTPUT
DIGITAL
INPUT
System connections
Caution:
Do not plug in the power lead until all connections are
completed. If operation is not possible or erroneous display appears even though
all connections have been made properly, reset themicrocomputer
referring to “ In case of difficulty” .
Make connections as shown below.
When connecting the related system components, refer also
to the instruction manuals of the related components.
1. Connect all cords firmly. If connections are loose there could be loss of sound or noise produced.
2. When plugging and unplugging connection cords, be sure to first remove the pow er cord from the AC outlet. Plugging/unplugging connection
cords without removal of the power cord can cause malfunctions or damage to the unit.
Notes
Notes
Connection to digital amplifier or M D (CD-206/DPF-R6010 only)
Optical fiber cable
÷When using an optical fiber cable to connect this unit to a digital
amplifier, insert the plug straight into the jack until a snap sound is
heard.
÷Be careful not to bend, coil, or bundle the optical fiber cable.
÷Optical fiber cables available on the market may not always be able to
be used with this player. If your cord cannot be used with this unit,
consult the store from which you purchased the cord or your nearest
dealer.
Connect the DIGITAL OUTPUT (OPTICAL or COAXIAL) jack to the digital input jack of the amplifier, DAT recorder, MD recorder,
etc., using an optical fiber cable or coaxial cable which are commercially available in audio stores.
M alfunction of microcomputer
75 coaxial cable
with RCA PIN.
(Commercially-
available)
Remove the protection cap when using the
DIGITAL OUTPUT (OPTICAL) jack
SL 16/XS8 switch 5
(OPTICAL)
DIGITAL INPUT
(COAXIAL) Digital component (MD, DAT, etc.)
System control cord
Commercially-available
optical fiber cable
Digital amplifier
(or ordinary amplifier, receiver, etc.)
Audio cord
To wall AC outlet
To wall AC outlet
SL 16/XS8 switch 5
CD-206/DPF-R6010 :
CD-204/203/
DPF-R4010/R3010 :
Downloaded from: http://www.usersmanualguide.com/
5
CD-206/ 204/ 203/ DPF-R6010/ R4010/ R3010 (En
)
OTUUPT 1-d2B
The OUTPUT level (UP/DOWN) keys of the remote control
unit can adjust the output levels from the LINE/OUT and
PHONES jacks of the unit.
Connect a stereo headphone to the PHONES jack of the CD
player. Adjust the sound volume using the remote control
unit.
Output level
÷It is not favorable for the sound quality to decrease the output level from
this unit too much. Use these keys for coordination with other line
levels.
÷Adjusting the headphone output level also changes the LINE/OUT
level. Do not adjust the output level from this unit particularly during
recording.
÷Please note that the sound output is at the maximum level when the
power is turned on.
109876
54321
12_db
REMOTE CONTROL UNIT
RC-P060 1
OUTPUT
DOWN UP
Adjusting the output levels of the output jacks
and headphone output (Except for CD-203/DPF-
R3010)
To use the headphone (Except for CD-203/DPF-
R3010)
CD-206/DPF-R6010
CD-204/DPF-R4010
Output level
Amplifier or receiver
This unit
Cassette deck
Notes
Notes
1. If your amplifier or receiver does not have a system control terminal, do not
connect any system control cords to the system control terminals on the other
components.
2. Do not connect system control cords to any components other than those
specified by KENWOOD. It may cause a malfunction and damage your
equipment.
3. Be sure the system control plugs are inserted all the way in to the system
control terminals.
SYSTEM CONTROL CONNECTIONS
Connecting system control cords after connecting a KENWOOD
audio component system lets you take advantage of convenient
system control operations.
There are two KENWOOD system control modes. Make connec-
tions according to the groups of terminal symbols shown below.
[XS 8] Mode : lets you combine F , f , and ƒ terminals
[SL16] Mode : for terminals only
This unit is compatible with both [XS8] and [SL16] modes.
Select the mode according to the connected components. 4
÷Do this operation after completing all connections.
(Ensure that the unit is set to STANDBY mode.)
j
SL16 XS 8
SYSTEM CONTROL OPERATIONS
Remote Control
Lets you operate this unit with the system remote control unit supplied with the amplifier or receiver.
Automatic Operation (Except [XR] equipment)
Automatically switches the input selector on the amplifier or receiver when you start playback from this unit.
Synchronized Recording (Except [XR] equipment)
Lets you synchronize recording with the start of playback when recording from a CD. Also, the simple CCRS operation enables great recordings from
CDs.
See the operating instructions supplied with your cassette deck for details.
System connections
SYSTEM
CONTROL
SYSTEM
CONTROL
SYSTEM
CONTROL
Downloaded from: http://www.usersmanualguide.com/
CD-206/ 204/ 203/ DPF-R6010/ R4010/ R3010 (En)
6
DIGITAL AUDIO
COMPACT
MULTIPLE
CD
PLAYER DPF-R6010
D.R.I.V.E.
TEXT
TEXT DISP. ALL INFO.
TIME DISP.
REPEATRANDOM
P.MODE
DISC SKIP
EDIT
DISC 1 DISC 2 DISC 3 DISC 4 DISC 5
0
6
7
PHONES
-ON STANDBY
POWER
&%
#^ *
0!@
CHECK CLEAR
DISC 1 DISC 2 DISC 3 DISC 4 DISC 5
32
15
4689
7
$
-ON STANDBY
Controls and indicators
Play indicator
Pause indicator
Text information display (The displays given in this manual are approximations only. They
may differ from what actually appears on the display.)
DISPLAY
•• •• •• •• •• •• •• •
SINGLE
TOTAL ALL
2019181716
1514131211
109876
543210
REPEAT
TRACK NO.
DISC
NO.
MULTI
EDIT
FILE
RANDOM
PGM
54321
NORM AL
88 88 88_:8
P.C.
BA
Play indicator
Pause indicator
Program mode indicator
RANDOM indicator
EDIT indicator
REPEAT indicator Music calendar (1 ~ 20)
ALL indicator
P.C. indicator
Disc No. indicators TRACK NO. indicator Time counter, Program No.
(SINGLE, TOTAL)
CD-206/DPF-R6010
CD-204/203/DPF-R4010/R3010
CD-204/203
DPF-R4010/R3010 CD-204/203
DPF-R4010/R3010
About the STANDBY mode
When the power cord of this unit is plugged into an AC outlet, a small amount of current is being supplied to the unit even when the ON/STANDBY switch
is not depressed (). This is called the STANDBY mode.
The illustration of the common parts
is of CD-206/DPF-R6010.
Except for USA
and Canada
Downloaded from: http://www.usersmanualguide.com/
7
CD-206/ 204/ 203/ DPF-R6010/ R4010/ R3010 (En)
The keys with the same name as those on the remote control
unit operate the same way as the remote control unit.
1ON/STANDBY (POWER / ) switch 9
Turns the unit ON/STANDBY.
2P.MODE key $
3TEXT DISP. key (CD-206/DPF-R6010 only) #
Used to select the CD-TEXT information display.
CHECK key (CD-204/203/DPF-R4010/R3010 only) %
Used to check or change program contents.
4ALL INFO. key
(CD-206/DPF-R6010 only)
#
Used to display all text information on the CD.
CLEAR key
(CD-204/203/DPF-R4010/R3010 only)
^
Used to clear the program.
5
Remote control light sensor (CD-206/204/DPF-R6010/
R4010 only) 8
6Skip keys (4,¢)!
Press to skip to the beginning of another track.
7Disc selector keys (DISC1 – DISC5) / Indicator (CD-206/
DPF-R6010
only)
0
Press to select the disc to be played.
8DISC SKIP key 9
Press to rotate the disc tray or to select the disc.
Controls and indicators
9Open/Close key (0)9
Opens and closes the disc tray.
0RANDOM key &
Press to play the tracks in a random order.
!REPEAT key *
Press to play the tracks repeatedly.
@TIME DISP. key ^
Press to switch the time indication mode.
#Disc tray 9
Load the disc to be played back.
$Search keys (1,¡)!
Fast forwards or fast reverses the track.
%EDIT mode key )
Press to select the edit mode.
^STOP key (7)0
&PHONES jack (CD-206/204/DPF-R6010/R4010 only)5
Use to connect (optional) headphones.
*PLAY/PAUSE key (6)0
Each time the key is pressed, playback and pause switch
each other.
Downloaded from: http://www.usersmanualguide.com/
CD-206/ 204/ 203/ DPF-R6010/ R4010/ R3010 (En)
8
Operation of remote control unit
(Except for CD-203/DPF-R3010)
1. The supplied batteries are intended for use in operation checks. Therefore, their lives may be shorter than ordinary batteries.
2. When the remote-controllable distance gets shorter than before, replace both batteries with new ones.
3. Malfunction may occur if direct sunlight or the light of a high-frequency lighting fluorescent lamp enters the remote control light sensor. In
such a case, change the system installation position to prevent the malfunction.
Loading batteries
*3OUTPUT (DOWN, UP) key 5
4DISC SELECTOR keys 0
5DISC SKIP key 90
*6Numeric keys (11
11
1 ~ ))
))
), 00
00
0)
!
7Basic function keys
Stop key (7)0
Play/Pause key (6)0
Skip (4,¢) keys !
Search keys (1,¡)!
1Program-related and other keys
RANDOM key &
REPEAT key *
P.MODE key $
TIME DISPLAY key ^
EDIT key )
* CHECK key (CD-206/DPF-R6010
only) %™
* CLEAR key (CD-206/DPF-R6010
only) ^™
2Selector keys relating to text infor-
mation
(
CD-206/DPF-R6010 only)
* ALL TEXT SEARCH key 9
TEXT DISPLAY key #
ALL INFO. key #
* TITLE SEARCH key @
CD-206/DPF-R6010 :
Model:RC-P0601
Infrared ray system
÷When pressing more than one remote control key successively, press
the keys securely by leaving an interval of 1 second or more between
keys.
After plugging in the power cord, press the ON/STANDBY (POWER/
) switch of the main unit to turn the unit ON. When the unit is
turned ON, press the key of the function to be operated.
1 Remove the cover. 2 Insert batteries. 3 Close the cover.
÷Insert two AA-size (R6) batteries as
indicated by the polarity marking.
Operation
Operating range
(Approx.)
Remote control
light sensor
RANDOM DISC SELECTOR
OUTPUT
123
4
5
REPEAT
DOWN UP
DISC SKIP
12
P.MODE 3
45
TIME
DISPLAY 6
EDIT 7 8 9
CHECK TEXT
DISPLAY 0 +10
CLEAR ALL INFO.
6
ALL TEXT
SEARCH TITLE
SEARCH
4
7
¡
¢
REMOTE CONTROL UNIT
RC-P0601
1
1
7
6
5
4
3
2
The keys with the same name as those on the main unit operate the same way as on the main unit.
The keys marked * are provided only on the remote control unit.
CD-204/DPF-R4010 :
Model:RC-P0504
Infrared ray system
1
2
1
2
Notes
Notes
The illustration shows the RC-P0601.
30°
6m 30°
REMOTE CONTROL UNIT
RC-P06 01
Downloaded from: http://www.usersmanualguide.com/
9
CD-206/ 204/ 203/ DPF-R6010/ R4010/ R3010 (En)
REMOTE CONTROL UN IT
RC-P06 01
IDCSRAEIDGN
1D:CDETTX
«
1
Preparing to Play Tracks
Load/unload a disc.
Close the tray.
ALL TEXT SEARCH (CD-206/DPF-R6010 only)
For most CD-TEXT discs, it is convenient to read the complete disc information into the CD player before playing the disc.
This allows text information such as TITLE SEARCH, TEXT DISPLAY, ALL INFO., and other messages to be displayed faster.
: Keys and controls used in the operations described on this page.
All DISC indicators " " light regardless of how many discs are present.
Label side
Disc tray
2Place/remove a disc.
3When loading or unloading other discs
Search in progress or reading information
Blinks.
When the disc is CD-TEXT
÷Repeat the above procedure so that the complete disc information is
read into the CD player.
÷In the case of a non-CD-TEXT disc, the D1 : NO CD TEXT“ display will
appear for approx. 3 seconds.
÷The information read into the CD player is cleared w hen
the tray is opened. Therefore, perform this operation
again if the tray was opened.
After loading all the discs, operate in stop mode.
Preparation Turn the unit ON.
Remote control unit only
÷Do not touch the played side of disc.
÷Loading two discs together will cause malfunctioning.
÷Place the disc properly along the groove on the tray. (If the disc is not
placed horizontally, malfunction will result.)
÷A single CD (8 cm disc) can also be played.
÷Ordinary CD single (8 cm) disc adapters sold in audio stores cannot be
used with this unit.
÷When loading/unloading a disc while the tray rotates, a malfunction
might occur. Load/unload the disc when the tray does not rotate.
-ON STANDBY
POWER
Press the ON/STANDBY (POWER / )key.
0
DISC SKIP
CD-206/DPF-R6010
DISC 1 DISC 2 DISC 3 DISC 4 DISC 5
1Open the tray.
2
CD-204/203/DPF-R4010/R3010
0
REMOTE CONTROL UNIT
RC-P060 1
ALL TEXT
SEARCH
Hereafter the illustration of the common parts
on the front panel is of CD-206/DPF-R6010.
All DISC indicators " " light regardless of how many discs are present.
109876
54321
54321
TRACK NO.
01 0 00:1
SINGLE
TOTAL
DISC
NO.
Loading/unloading discs
Downloaded from: http://www.usersmanualguide.com/
CD-206/ 204/ 203/ DPF-R6010/ R4010/ R3010 (En)
10
SINGLE
TOTAL
109876
54321
REPEAT
TRACK NO.
DISC
NO.
54321 01 2 18:
1
Check that the unit is in the normal play TRACK
mode. !
÷Playback starts from the disc selected in order of the DISC No.
÷When the 3/8 key is pressed without selecting a disc, playback starts
from the indicated DISC No.
10:132
Normal play (TRACK mode)
Use the following procedure to play a CD in the original order
of tracks from track No. 1.
: Keys and controls used in the operations described on this page.
÷Each press pauses and plays the CD alternately.
To stop playbackTo pause playback
Lights up.
1
Playing tracks in order from track No. 1
Lights up.
Track NO. being
played Elapsed time of track being played
2Start playback.
Select the disc. If there is no disc in the selected disc tray, the corresponding
indicator " " goes off.
Blinks during playback.
Hereafter the illustration of the common parts
on the front panel is of CD-206/DPF-R6010.
DISC 1 DISC 2 DISC 3 DISC 4 DISC 5
DISC SKIP
or
Track NO. being
played Elapsed time of track being played
Disc indicator
during Playback ()
10
CD-206/DPF-R6010
CD-204/203/DPF-R4010/R3010
If there is no disc in the selected disc tray, the corresponding
indicator " " goes off.
÷In the case of a CD-TEXT disc, the disc’s title is scrolled on the display.
What is then displayed is in accordance with the TEXT DISPLAY mode.
#
CD-206/DPF-R6010
CD-204/203/DPF-R4010/R3010
6
7
CD-206/DPF-R6010
CD-204/203/DPF-R4010/R3010
54321
8
DISC 1 DISC 2 DISC 3 DISC 4 DISC 5
SINGLE
TOTAL
109876
54321
REPEAT
TRACK NO.
DISC
NO.
54321
01 2 18:
1
REMOTE CONTROL UN IT
RC-P06 01
Downloaded from: http://www.usersmanualguide.com/
11
CD-206/ 204/ 203/ DPF-R6010/ R4010/ R3010 (En)
Skipping tracks
Playback from desired track
2Select the desired track No.
1Select the disc.
÷The track in the direction of the pressed key is skipped, and the selected
track will be played from the beginning.
÷When the 4 key is pressed once during playback, the track being
played will be played from the beginning.
To skip
forward
To skip
backward
Searching
÷Playback starts from the position where the key is released.
Forward
search
Backward
search
Press the numeric keys as shown below....
To enter track No. 23 : 003
To enter track No. 40 : 0000)
÷Playback starts from the selected track and continues on the subse-
quent tracks.
What is thenormal play TRACK mode?
The normal play TRACK mode refers to the state in which the PGM, EDIT and RANDOM mode displays are off.
To set the unit to the TRACK mode:
Press the P.MODE key when the PGM or EDIT“ display is lighted.
Press the RANDOM key when the RNDM display is lighted.
Normal play (TRACK mode)
DISC 1 DISC 2 DISC 3 DISC 4 DISC 5
123
456
789
0 +10
P.MODE
RANDOM
FILE
RANDOM
GP0M1 DETI NRMD
PGM
PGM
54321
MULTI
EDIT
54321
54321
Goes off. Goes off.Goes off.
Goes off. Goes off.
Goes off.
CD-206/DPF-R6010
CD-204/203/DPF-R4010/R3010
Main unit Remote control unit
Downloaded from: http://www.usersmanualguide.com/
CD-206/ 204/ 203/ DPF-R6010/ R4010/ R3010 (En)
12
01CA
01LM N O P Q ...
BCDEFGHIJKLMNOPQ...
TTIELXZY
20:132
1D01ITLTE BAC
In the case of a CD-TEXT disc, the tracks to be heard can be
searched by title.
÷Load a disc (CD-TEXT support) in the CD
player.
÷Check that the unit is in the normal play
TRACK mode. !
÷Press the ALL TEXT SEARCH key. 9
1
Preparation
: Keys and controls used in the operations described on this page.
2
3
Searching for tracks by title (TITLE SEARCH)
(CD-206/DPF-R6010 only)
Press the TITLE SEARCH key.
Select the name of the track (title) to be heard.
Start playback.
To stop the search, press the
TITLE SEARCH key again.
Track title
÷When no CD-TEXT discs are loaded, the NO CD TEXT“ display will
appear for approx. 3 seconds.
The track number
skips forward.
The track number skips
backward.
If no keys are operated for more than a second, the track title is scrolled
on the display.
÷What is displayed will differ depending on the item which has been
selected by TEXT DISPLAY. #
The letters move toward the left.
Track NO. being played Elapsed time of track being played
Display scrolling
Some track titles contain so much text information that the full
titles will not fit on the display. In cases like this, the letters on the
display move from right to left so that the non-visible part of the
title is revealed. This type of display movement is known as
scrolling display.” Display example
Scroll display
Blinks.
Hereafter the illustration of the common parts
on the front panel is of CD-206/DPF-R6010.
REMOTE CONTROL UNIT
RC-P060 1
REMOTE CONTROL UNIT
RC-P060 1
REMOTE CONTROL UNIT
RC-P060 1
4¢
TITLE
SEARCH
6
1D02ITLTE YXZ
|
|
REMOTE CONTROL UN IT
RC-P06 01
Downloaded from: http://www.usersmanualguide.com/
13
CD-206/ 204/ 203/ DPF-R6010/ R4010/ R3010 (En)
Displays
(CD-206/DPF-R6010 only)
÷When there is no text information to be displayed – – –” is scrolled
on the display.
÷In the case of a non-CD-TEXT disc, the NO CD TEXT“ display will
appear for approx. 3 seconds.
To skip to the next track w hile the items are being displayed:
Press the ¢ key.
÷The display can be returned to a previous item by pressing the 4
key.
Scroll display
1Disc/Track Title : Disc and track titles
2Disc/Track Artist : Singer (or performer)
3Disc/Track Songwriter : Songwriter
4Disc/Track Composer : Composer
5Disc/Track Arranger : Arranger
6Disc/Track Message : Message from sponsor or artist
7ID INFO. : Record company, release date, etc.
8Genre INFO. : Genre information
9ALL INFO. END : (Release)
Selecting the text information display (TEXT DISPLAY)
In the case of a CD-TEXT disc, the displays shown below can
be selected.
÷If the key is released while 2 Disc Artist is displayed, 1 Disc Title“
returns to the display.
Displaying all the text information (ALL INFO.)
In the case of a CD-TEXT disc, the text information shown below is displayed automatically during normal play (TRACK mode).
Scroll display
REMOTE CONTROL UNIT
RC-P060 1
TEXT
DISPLAY
iDcsTtiel:AB
:ACBED.F..
rAargnre:ACBD
|
In the stop mode When the key is pressed once, the 1Disc
Title” is scrolled on the display; when it is
pressed repeatedly, the display is changed.
(This operation cannot be performed in the
PGM mode.)
1Disc Title : Disc title
2Disc Artist : Singer (or performer)
3TIME : Disc No., track No., time display
1Track Title :Track title
2Track Artist :Singer (or performer)
3Disc Title :Disc title
4Disc Artist :Singer (or performer)
5TIME :Track No., time display
When the key is pressed once, the 1Track
Title” is scrolled on the display; when it is
pressed repeatedly, the display is changed.
In the play mode
÷If the key is released at any point while 2 Track Artist to 4 Disc
Artist is displayed, 1 Track Title“ returns to the display.
Each item is displayed in turn each time the key is pressed.
When the key is repeatedly pressed while an item is being dis-
played, the display is forcibly moved to the next item.
÷Items from 1 to 6 are displayed in the sequence of disc and track.
÷When there is no text information to be displayed – – – – is scrolled
on the display.
÷In the case of a non-CD-TEXT disc, the NO CD TEXT“ display will
appear for approx. 3 seconds.
|
REMOTE CONTROL UNIT
RC-P060 1
ALL INFO.
REMOTE CONTROL UN IT
RC-P06 01
: Keys and controls used in the operations described on this page.
Hereafter the illustration of the common parts
on the front panel is of CD-206/DPF-R6010.
Downloaded from: http://www.usersmanualguide.com/
CD-206/ 204/ 203/ DPF-R6010/ R4010/ R3010 (En)
14
GP0M1 1DTON2.5
GP0M1 1DTON2.5
«
GP0M1 BADCFEHG
Programmed play (PGM mode)
Use the following procedure to program desired tracks in a
desired order. (up to 32 tracks)
÷ Load a disc in the CD player.
Press so that the “PGM indicator lights.
1
Preparation
Do this operation in the stop mode.
In the case of a CD-TEXT disc, the track's title is scrolled on the display.
÷Tracks can also be selected by pressing the 4 or ¢ key.
÷Up to 32 tracks can be programmed. When FULL is displayed, no
more tracks can be programmed.
÷If you make a mistake, press the CLEAR key and enter the track No.
from the beginning.
÷When the 4 or ¢ key is pressed during playback, the track will be
skipped in the direction of the pressed button.
÷When the 4 key is pressed once during playback, the play position
returns to the beginning of the current track being played.
Start playback.
3
4 Repeat steps 1, 2 and 3 above.
Program desired tracks.
2
1 Select the disc.
Go to step 2 within 8 seconds.
3 Set the entry.
Go to step 3 within 8 seconds.
2 Select the desired track No.
In the case of a CD-TEXT disc, the disc title is scrolled on the display. (CD-206/
DPF-R6010 only)
Press the numeric keys as shown below....
To enter track No. 25 : 005
: Keys and controls used in the operations described on this page.
Blinks.
Hereafter the illustration of the common parts
on the front panel is of CD-206/DPF-R6010.
P.MODE
DISC 1 DISC 2 DISC 3 DISC 4 DISC 5
123
456
789
0 +10
P.MODE
GP0M1 IDCS?
PGM
54321
GP0M1 1DTON?.?
5
REPEAT
TRACK NO.
DISC
NO.
54321
PGM
25 P_ 01
1
CD-206/DPF-R6010
CD-204/203/DPF-R4010/R3010
Light up.
Track number
CD-204/203/DPF-R4010/R3010
6
Main unit Remote control unit
CD-206/DPF-R6010
REMOTE CONTROL UN IT
RC-P06 01
Downloaded from: http://www.usersmanualguide.com/
15
CD-206/ 204/ 203/ DPF-R6010/ R4010/ R3010 (En)
DGP0M1 5TON2.5
To check or change the programmed tracks
1 Press the CHECK key.
Press until the track
No. to be changed is
displayed.
2 Select the disc.
3 Select the new track No.
4 Set the entry.
To add a track to the program
1 Select the disc.
2 Select the desired track No.
3 Press the P.MODE key.
Blinks.
÷Perform only step 1 to simply check the program.
÷In the case of a CD-TEXT disc, the track's title is scrolled on the display.
(CD-206/DPF-R6010 only)
÷Each time the key is pressed, the program No. and the track No. on CD
are displayed.
÷Press it while the PGM 01” indicator blinks.(CD-206/DPF-R6010 only)
÷
Press the key while the P.C.” indicator is lit. (CD-204/203/DPF-R4010/
R3010 only)
÷The track being played cannot be changed.
Example
÷When a track No. is selected, the track will be added to the end of the
existing program.
÷The programmed contents remain in memory.
To stop playback
Programmed play (PGM mode)
REMOTE CONTROL UNIT
RC-P060 1
7
Press until the track
No. to be changed is
displayed.
CHECK
CHECK
CD-206/DPF-R6010
CD-204/203/DPF-R4010/R3010
CD-206/DPF-R6010
CD-204/203/DPF-R4010/R3010
DISC 1 DISC 2 DISC 3 DISC 4 DISC 5
Main unit Remote control unit
123
456
789
0 +10
P.MODE
123
456
789
0 +10
Main unit Remote control unit
DISC 1 DISC 2 DISC 3 DISC 4 DISC 5
Light up
7
REPEAT
TRACK NO.
DISC
NO.
25 P_ 01
5
P.C.
Downloaded from: http://www.usersmanualguide.com/
CD-206/ 204/ 203/ DPF-R6010/ R4010/ R3010 (En)
16
Press to clear tracks from the end.
To clear tracks from the program
To clear all tracks
÷Each time the key is pressed, the last track in the program is cleared.
÷The tracks which are programmed earlier than the track being played
cannot be cleared.
÷Selected tracks can be also completely cleared just by operating the 0
key.
÷The entire program is cleared.
÷Even when the performances of two tracks are continuous (which
occurs with classical or live recording music), the spaces will be
created if they have different track Nos.
Auto space function
During programming of tracks, a non-recorded space of a few
seconds will be automatically created between tracks. By record-
ing tracks with these spaces on tape, the search and repeat play
operations of tape using the DPSS function (which works by
searching the non-recorded spaces) can be performed reliably.
Time display on CD player (TIM E DISP.)
Each press of the TIME DISP. (TIME DISPLAY) key changes
the displayed contents.
11:23 : Elapsed time of track being played
2-2:23 : Remaining time of track being played
323:45T : Elapsed time of entire disc (T lights up.)
4-36:25T : Remaining time on entire disc (T lights up.)
÷Only the display 1 and 2 w ill be displayed in PGM, RANDOM and EDIT
modes.
Do this operation in the play mode.
TIME DISP.
CD-206/DPF-R6010
CD-204/203/DPF-R4010/R3010
REMOTE CONTROL UNIT
RC-P060 1
CLEAR
CLEAR
P.MODE
To program all tracks on a disc (CD-204/203/DPF-R4010/R3010 only)
3 Press the P. MODE key again.
2 Select the desired disc.
1 Press so that the "PGM" indicator lights.
DISC 1 DISC 2 DISC 3 DISC 4 DISC 5
P.MODE
P.MODE
ALL
109876
54321
P_ 01
ALL indicator lights up.
CD-206/DPF-R6010
CD-204/203/DPF-R4010/R3010
11:23 : Elapsed time of track being played (SINGLE lights up.)
2-2:23 : Remaining time of track being played (SINGLE lights
up.)
323:45 : Elapsed time of entire disc (TOTAL lights up.)
4-36:25 : Remaining time on entire disc (TOTAL lights up.)
Programmed play (PGM mode)
Downloaded from: http://www.usersmanualguide.com/
17
CD-206/ 204/ 203/ DPF-R6010/ R4010/ R3010 (En)
<<><E<21>><>>
NRMD005
«
Playback in a random order (Random playback)
As tracks are selected at random, you can enjoy listening to
for a long time.
÷Load a disc in the CD player.
Preparation
: Keys and controls used in the operations described on this page.
1
2Press the RANDOM key.
In case track No. 5 is selected
÷Each time a track ends, the same operation as above is repeated, and
the track selected next is played.
÷Random play stops after all of the tunes have been played once.
÷The random playback can also be repeated by pressing the REPEAT
key.
The number here changes.
Check that the unit is in the normal play TRACK
mode. !
During track selection: >“ and <“ move from the outside to the
inside.
To select another track in the middle of play-
ing one
To cancel random playback
÷Pressing the 4 key once returns to the beginning of the track being
played. ÷Press the RANDOM key to start normal playback.
Hereafter the illustration of the common parts
on the front panel is of CD-206/DPF-R6010.
RANDOM
SINGLE
TOTAL
201918171 6
151413121 1
109876
54321
REPEAT
TRACK NO.
DISC
NO.
FILE
RANDOM
54321
4
SINGLE
TOTAL
5
REPEAT
TRACK NO.
DISC
NO.
FILE
RANDOM
54321
05 0 12:
4
CD-206/DPF-R6010
CD-204/203/DPF-R4010/R3010
Blinks
During random track selection
To select another track during random play
RANDOM
REMOTE CONTROL UN IT
RC-P06 01
Downloaded from: http://www.usersmanualguide.com/
CD-206/ 204/ 203/ DPF-R6010/ R4010/ R3010 (En)
18
1Press so that the “PGM indicator
lights.
Repeated playback
To repeat only the programmed tracks
: Keys and controls used in the operations described on this page.
Preparation ÷Load a disc in the CD player.
2Select the disc.
3Select the desired track number.
4Set the entry.
5Repeat steps 2 4 above.
6Press the REPEAT key.
7Start playback.
Go to step 3 within 8 seconds.
Go to step 4 within 8 seconds.
For the CD-206/DPF-R6010
The current status is displayed when the key
is pressed once.
When it is pressed while the status is dis-
played, the repeat ON status can be set to OFF
(or vice versa).
÷All of the programmed tracks will be repeated.
÷In case only one track is programmed, only that track will be repeated.
÷Up to 32 tracks can be programmed. When FULL is displayed, no
more tracks can be programmed.
Hereafter the illustration of the common parts
on the front panel is of CD-206/DPF-R6010.
P.MODE
DISC 1 DISC 2 DISC 3 DISC 4 DISC 5
123
456
789
0 +10
P.MODE
REPEAT
6
Main unit Remote control unit
CD-206/DPF-R6010
CD-204/203/DPF-R4010/R3010
GP0M1 IDCS?
PGM
54321
EREPTAON
REPEAT
TRACK NO.
DISC
NO.
PGM
54321 01
3
CD-206/DPF-R6010
CD-204/203/DPF-R4010/R3010
PGM indicator light up.
REPEAT indicator light up.
REMOTE CONTROL UN IT
RC-P06 01
Downloaded from: http://www.usersmanualguide.com/
19
CD-206/ 204/ 203/ DPF-R6010/ R4010/ R3010 (En)
To repeat the entire disc
This allows repeated playback of all the tracks on the disc
loaded in the disc tray.
1Press so that the “PGM indicator
goes off.
2Press the REPEAT key.
For the CD-206/DPF-R6010
The current status is displayed when the key
is pressed once.
When it is pressed while the status is dis-
played, the repeat ON status can be set to
OFF (or vice versa).
3Start playback.
To cancel repeated playback
Press the REPEAT key.
Repeated playback
1Press so that the “PGM indicator
lights.
2Select the disc.
3Press the P.MODE key.
4Press the REPEAT key.
5Start playback.
P.MODE
DISC 1 DISC 2 DISC 3 DISC 4 DISC 5
P.MODE
REPEAT
6
CD-206/DPF-R6010
CD-204/203/DPF-R4010/R3010
PGM
54321
REPEAT
TRACK NO.
DISC
NO.
PGM
54321 01
3
GP0M1 10
\
PGM
54321
EREPTAON
REPEAT
TRACK NO.
DISC
NO.
PGM
54321
01
3
EREPTAOFF
REPEAT
TRACK NO.
DISC
NO.
PGM
54321 01
3
PGM indicator light up.
REPEAT indicator light up.
P.MODE
REPEAT
6
CD-206/DPF-R6010
CD-204/203/DPF-R4010/R3010
PGM indicator goes off.
REPEAT indicator goes off.
CD-206/DPF-R6010
CD-204/203/DPF-R4010/R3010
For the CD206/DPF-R6010
Press the REPEAT key once again.
(REPEAT ON \ OFF)
REPEAT
REPEAT indicator light up.
To repeat one of the discs (CD-204/203/DPF-R4010/R3010 only)
Downloaded from: http://www.usersmanualguide.com/
CD-206/ 204/ 203/ DPF-R6010/ R4010/ R3010 (En)
20
Blinks.
CD-206/DPF-R6010
DETIDSI?C
The following procedure allows to record a CD within the
specified tape length so that no music is interrupted in the
middle at the ends of sides A and B.
Editing
Preparation
1Light the “EDIT” indicator.
÷Load a disc in the CD player.
÷Check that the unit is in the normal play
TRACK mode. !
: Keys and controls used in the operations described on this page.
Select the disc.
2
Do this operation in the stop mode.
Go to step 2 within 8 seconds.
If more than 8 seconds have elapsed,
press the key again.
Go to step 3 within 8 seconds.
3Press the numeric keys as shown below.
30-minute tape : 000)
46-minute tape : 00006
÷The interval length can be adjusted with the skip keys 4 and ¢ in
units of one minute (to a maximum of 99 minutes).
÷If you commit a mistake in time entry, press the P.MODE key and
restart the procedure from the beginning.
Enter the recording time of the tape.
When using the numeric keys:
2 Set the entry.
1 Select the time.
\
Hereafter the illustration of the common parts
on the front panel is of CD-206/DPF-R6010.
EDIT
DISC 1 DISC 2 DISC 3 DISC 4 DISC 5
EDIT
TIME DISP.
Main unit Remote control unit
123
456
789
0 +10
When using the TIME DISPLAY key:
Normal EDIT
Normal EDIT: Edit from one disc.
MULTI EDIT: Edit and record from several discs.
PGM
54321
MULTI
EDIT
DETIDSI3CC4-6
CD-204/203/DPF-R4010/R3010
CD-206/DPF-R6010
CD-204/203/DPF-R4010/R3010
Blinks.
÷Automatic editing is executed for side A and side B,
÷By pressing the TIME DISPLAY key the set time-length intervals will
change in this order:
CD-206/DPF-R6010
CD-204/203/DPF-R4010/R3010
Light up.
÷By pressing the TIME DISPLAY key the set time-length intervals will
change in this order:
"46=54=60=74=90=
??
"
=
"46=54=60=90= - - "
=
REMOTE CONTROL UN IT
RC-P06 01
«
EDIT
Downloaded from: http://www.usersmanualguide.com/
  • Page 1 1
  • Page 2 2
  • Page 3 3
  • Page 4 4
  • Page 5 5
  • Page 6 6
  • Page 7 7
  • Page 8 8
  • Page 9 9
  • Page 10 10
  • Page 11 11
  • Page 12 12
  • Page 13 13
  • Page 14 14
  • Page 15 15
  • Page 16 16
  • Page 17 17
  • Page 18 18
  • Page 19 19
  • Page 20 20
  • Page 21 21
  • Page 22 22
  • Page 23 23
  • Page 24 24
  • Page 25 25
  • Page 26 26
  • Page 27 27
  • Page 28 28
  • Page 29 29

Kenwood CD Series User manual

Category
CD players
Type
User manual
This manual is also suitable for

Ask a question and I''ll find the answer in the document

Finding information in a document is now easier with AI