Page is loading ...

DAYSTAR FILTERS
CALCIUM QUARK
Congratulations on your purchase of a Quark Calcium “Eyepiece” solar filter,
designed specifically for compatibility with F/7 or greater Refractor
telescopes. Please read this manual before using the product.
To use the filter, plug in the included power supply. Then insert the
Quark and insert an eyepiece or camera in the rear of the Quark. Turn
the knob to point straight away from the light. When the light turns
green in about 5-15 minutes your viewing experience can begin.
To prevent damage, we strongly recommend using a UV/IR cut filter over
80mm of aperture.
Warnings:
Do not disassemble the filter, the blocking element is separated from the
etalon and the complete assembly must be used together for safe viewing.
Do not power the filter from a computer or cell phone charger as the Quark
requires a high current power supply (> 1.5A) for operation.
For assistance:
Call: 1 (866) 680-6563 Email: service@daystarfilters.com
Visit: http://www.daystarfilters.com

Cautions & Warnings:
There are no user serviceable parts inside the Quark. Do not
disassemble the unit. Certain components are under pressure and
disassembly can cause permanent damage. All elements are required
for proper operation and removal of any internal component will cause a
malfunction that could result in unfiltered light which can cause blindness
or damage to equipment.
Solar Observing with a telescope is sensitive to certain risks.
• Caution and care of the telescope and filter is advised in
assembly, use and dismantling at all times.
• Telescope owners must use caution when affixing the filter to the
telescope never to point any telescope at the sun without the
solar filter safely installed first.
• While observing, owners must take care and caution that all
parts of the filter and telescope assembly are properly affixed
and that no pieces have been opened, tampered with or
removed.
• Owners must also use caution when the telescope is being
assembled and dismantled to assure the telescope is never
pointing at the sun without the solar filter properly installed.
• Responsible owners will be prudent to inform guest or novice
observers of the special nature of the telescope configuration so
not to imply that telescopic observing of the sun is safe without
proper filtration.
A few very important points that owners and operators must
understand:
• DayStar Filters are interference filters. If light reaches a
DayStar Filter at an angle, it will cause wavelength wing
shift. For our application on a telescope, DayStar owners need
F/7 to F/30 light. This model of Quark is designed only for use
on F/7 or slower refractor telescopes.
• DayStar filters are temperature sensitive. Changing the
temperature will change the wavelength (CWL) that the filter will
transmit. Users need to be aware of temperature tuning issues.

USAGE:
The Calcium Quark has a standard eyepiece snout so that it can be
inserted directly into the eyepiece drawtube.
The filter must be plugged in using the supplied power supply. The
etalon cavity is precision heated to regulate the wavelength of the filter
output.
Any other USB power source you wish to use must be rated for at least
1.5 amps at 5 volts. Computer USB ports and cell phone chargers do
not normally support this much power.
After letting the filter come up to temperature and settle, the light will turn
green and viewing can begin.
Because the Quark requires additional backfocus, you will need to dial
the focus knob inward quite significantly. Included with the Calcium
quark are three front snouts that will allow you you extend or compress
the amount of backfocus used by the Quark by changing which snout is
threaded onto the front of the Quark:
Standard configuration (silver 1.25” snout): 67mm backfocus
2” front snout: 61mm backfocus.
1.25” black extension snout: 99mm backfocus. Remove diagonal.
If your telescope has limited focus travel and none of the included snouts
permit reaching focus, you may need to use a 1.25” diagonal instead of a
2” diagonal, or you may need to remove the diagonal entirely in order to
reach focus.
Knob tuning:
A knob is provided to adjust the center wavelength of the filter. Turn the
knob counter clockwise to lower the wavelength towards the blue by up
to 0.5Å. Turn clockwise to raise the wavelength towards the red by up to
0.5Å. Each click of the knob is 0.1Å.
Little change will be visible within 1.0Å of CWL range, as the Calcium II H
line is very wide.

Additional tuning can be performed, just keep in mind that after every
adjustment of the knob the filter must settle in temperature for
approximately 5-10 minutes before your change becomes effective.
Tuning can also be used to observe Doppler shifted features moving
towards or away from you. A feature moving towards you will be brighter
in blue (counterclockwise) wing shift, away from you will be reddened
(clockwise knob tuning).
ENERGY REJECTION:
Energy Rejection Filters reduce the heat load on your filter assembly by
absorbing or reflecting UV and/or IR light and transmitting light in the
visual spectrum.
Note that Red and Yellow glass ERFs are NOT compatible with the
Calcium Quark as they do not pass the Calcium wavelength, by the
nature of colored glass.
Please note, a Herschel Wedge or white light filter cannot be used with
the Quark. Those filters block 99.999% of all light, including the desired
Calcium H light.
REFRACTORS:
For brief observing sessions using refractors with less than 80mm of
aperture when not using a tracking mount, no rejection is necessary. Be
alert for any rise in temperature of your telescope, diagonal, or Quark.
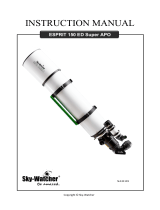
For telescopes under approximately 150mm of
aperture, a screw in UV/IR cut filter can be
employed in front of the telescope diagonal.
The UV/IR cut filter reflects UV and IR light
back out the front of the telescope, reducing
temperatures inside. Do not use a UV/IR cut
filter with a telescope with an integrated rear
field flattener or Petzval lens. The UV/IR cut filter must be the first optical
element to encounter concentrated light. Note that Calcium falls outside
the passband of some UV/IR cut filter designs, so always verify that a
prospective UV/IR filter passes 397nm before purchasing.

Observing with over 150mm of aperture requires consideration of
multiple factors, please consult with DayStar for advice specific to your
situation.
Calcium H versus Calcium K:
Traditionally, university research has employed the Calcium K line for
studies of Calcium on the Sun. These studies have been instrumental in
determining depth of the solar atmosphere. Calcium offers TWO strong
absorption lines at 393.3nm and at 396.9nm, known as the K and H
lines. Researchers originally avoided the H line for academic research,
as it is very close to the Hydrogen Epsilon line.
However, as the visual spectrum ends at approximately 400nm, the
further we venture below this wavelength the more difficult it is for
observers to visually see the image. For visual observations the H line is
closer to the visual spectrum and easier to see in high contrast violet
color while offering the same features as K line. We have found many
older viewers are able to see H visually when they cannot see K. For
imagers, H offers improved quantum efficiency, higher glass
transmission, and superior performance from typical antireflection
coatings. H line offers slightly more visible features due to the Hydrogen
contribution. For strong wing shifts, H offers spectroscopically cleaner
wings than K, simplifying data interpretation at H. Stunning images from
the Hinode spacecraft and Dutch Open Telescope have further
popularized the H line in recent years. For all of these reasons, we are
offering the Calcium Quark in H line.
How it works:
Light from the telescope enters the blocking filter, where wavelengths
near Calcium H are transmitted while the rest are reflected back out.
Violet Calcium H light then passes through the Etalon. The Etalon
passes a very narrow range of light wavelengths, but it is sensitive to
temperature and light angle. In the Quark, the Etalon is heated to
approximately 100-150°F to control the wavelength p assed, and the slow
focal ratio of the telescope controls the angle of light entering the Etalon.

Care and cleaning:
While not in use, we recommend that users store the Quark with its end
caps on, in a climate controlled environment. The optical filter life
expectancy is extended up to 2-3 times by climate controlled storage.
Do not touch the internal, optical elements of the filter assembly. While
the exterior glass surface coatings are durable, they are easily
scratched. A few specks of dust will have no effect on the quality of the
image, and may be gently blown off with a squeeze bulb. Do NOT use
compressed air cans to blow dust off any optical surfaces. Small
amounts of residual 'film' will not affect visual performance. Fingerprints,
smudges and smears must be cleaned off. Preferred cleaning method is
to return the Quark to the DayStar Filters laboratory for proper factory
cleaning.
Do not unscrew, open or separate your Quark filter assembly. The optical
elements are held under pressure by design and will become damaged if
opened. Opening the optical filter assembly will void your warranty. The
safest cleaning method is to moisten a very soft, lint-free tissue, cloth or
"Qtip" with a pure acetone, methanol, or Isopropyl Alcohol (reagent
grade) and gently whisk away the stain. Do not apply solutions directly to
the glass surface. Stroke from the center of the aperture outward only.
After each cleaning stroke, use a fresh applicator. The fewer strokes, the
better! The metal housing and other non optical parts are anodized
surfaces and can be cleaned with Windex.
Maximizing the viewing experience:
Daytime viewing results in stray light entering your eye that can make it
hard to see through the filter. We recommend a viewing hood or cloth be
placed over your head to limit the stray light that enters your eye,
allowing fainter prominences and more surface detail to be observed. A
comfortable chair also improves the experience, allowing the eye to stay
steady for longer periods so as to pick out more subtle details on the
surface of the Sun.

Eyepiece Selection:
Daystar Recommends Tele Vue Plossl series
eyepieces of 12mm to 32mm.
Remember that at long focal ratios, a high powered
eyepiece can exceed Dawes' limit. Observers will
find best results with an eyepiece which is 12mm or
greater to avoid this. Eyepieces of higher power will
result in a fuzzy disk without the ability to focus well.
Not all eyepieces are designed for the Calcium wavelength.
Antireflective coatings may not be efficient at this wavelength. Lens
prescriptions may not be optimized for the lowest possible aberrations at
Calcium. Experimentation is recommended for best results.
We have tested a number of eyepieces over the years. We performed a
comprehensive eyepiece comparison between various brand names and
eyepiece styles. Naglers, zooms, radians and other "fast" eyepieces
typically perform very badly on DayStar applications.
Other brands do offer Plossl eyepieces and they can give a respectable
performance in lieu of a Tele Vue. We have also found some of the very
old wide field "Erfle" eyepieces aren't bad for an experienced observer.
It should be noted that repeatedly in side-by-side tests, we found Tele
Vue brand Plossl eyepieces to offer the highest contrast, most even view
and widest exit pupil. In Solar Observing, contrast is achieved by control
of scattering. Tele Vue Plossls stand out in superior design.
Furthermore, the adjustable eye cup offers additional contrast by
allowing the user to dark adapt during sunny days.
Eyepiece features we found to increase performance include:
- "Fully Multicoated" - Of those eyepieces which did better than others,
those marked "fully multicoated" offered better views from less internal
scattering.
- Blackened optical edges - Tele Vue and other eyepieces which
performed better all had blackened edges of their optical elements. This
also reduces internal scattering within the eyepiece.

About Seeing Limitations and Resolution:
Solar observing seeing conditions vary greatly from nighttime conditions.
During the daytime, radiant heating from the sun affects seeing
significantly. Characterized by turbulence or shimmering as seen over a
hot street, seeing can cause significant impact on quality of solar
observations.
- Bad seeing is caused by air of different temperatures mixing. This
typically happens within the lowest 10 feet of air. It occurs most often
over pavement, dark objects, rooftops and sometimes trees.
- High cirrus clouds or “scuzz” will cause scattering of sunlight in the high
atmosphere which often makes for bad viewing conditions. A classic
sign of high cirrus clouds is the inability to achieve focus, or the need to
“chase focus”, or a lack of contrast. Calcium is particularly susceptible to
poor transparency.
- A jet-stream moving overhead can also hurt seeing conditions even on
a clear day.
DayStar Filters are high power viewing platforms and this high resolution
can be susceptible to seeing issues. Solar Observers using high
powered, high resolution telescopes and DayStar filters should heed
daytime seeing. While many of these conditions are beyond our control,
observing in an area with ideal conditions, without pavement in the
direction of viewing, and on days with no high cirrus will offer best
results. Grass is the best environment for daytime seeing stability.
Each observing location offers different behavior for daytime seeing cells
at different times of the day, as the air through which one views changes
with movement of the sun. Some locations benefit from best seeing in
the morning, while many have best seeing in the afternoon. Because
most heat variation between air and ground surfaces occurs within the
first 10 feet above the ground, often a high observing platform will offer
superior seeing. This might include a second story deck which overlooks
grass.
Solar Imaging Tips:
Daystar recommends MONOCHROME CCD imaging whenever
possible for best results. The recent availability of CCD cameras and
DSLR cameras has offered a simple opportunity for solar observers to
image the Sun in Hydrogen Alpha or Calcium with a Digital SLR camera.

Please be advised,
however, that due to the
nature of
monochromatic light and
its effects on a CCD
camera, certain negative
effects are likely to
occur.
The DSLR imager must
be aware that most
camera manufacturers
(Canon and Nikon) use an IR blocking filter which greatly reduces the
transmission of Hydrogen Alpha light. DSLR cameras without this IR
blocking filter will have better sensitivity imaging in Hydrogen Alpha.
The imager should also appreciate that even after considering IR
blocking filters, that the COLOR CCD chip is constructed in a way that
only 1 in 4 pixels detect red light. The other 3 sensors only detect blue
and green because the pixels are actually permanently covered with a
colored dye for each corresponding color. So a color CCD chip (in a
DSLR or a CCD camera) will only offer 1/4 the sensitivity and 1/2 the
resolution of a monochrome chip.
Another effect present in CCD imaging of
monochrome light of Hydrogen Alpha or Calcium
H is the interference pattern - or Newton's Rings.
The effect is similar to interference testing of an
optical surface between two flat surfaces. The
sensor and cover slip cause a small interferometer
inside the camera and cause a Newton's Ring
moire' pattern. The CCD chip must be tilted to a
minor degree to prevent this pattern. Recent
advances in aftermarket adapters offer a simplified solution for the
issue. This effect is a concern for both color and monochrome sensors.
An optional accessory is available from DayStar (MG-0408) which can be
used between the DSLR and Quark to adjust the light angle and extinct
the interference pattern.

Exposure time:
Imaging solar vs. nighttime astrophotography is very different. Dark sky
imaging requires long exposure times to capture enough light. Solar
imaging offers ample light, so exposures should be very short. Plus,
fluctuations in seeing dictate that short <1/10 second frame rates will be
better, as seeing cells move quickly to distort the image and can come
and go during a long exposure.
• Short exposure webcam imagers are better than long exposure
CCD cameras when imaging the sun.
• Because the sun has a range of brightnesses, automatic
exposure doesn’t work well. A software interface that allows the
user to control the exposure settings manually is very important.
Exposures for prominences taken through a DayStar with a webcam
style camera might be about 1/15 – 1/100
th
of a second. Exposures for
surface detail would be even shorter exposure with about 1/300 to
1/500
th
of a second.
Bit depth:
Solar activity encompasses a wide dynamic brightness range from bright
solar flares to faint eruptive or floating prominences quite a distance from
the solar limb. In order to capture all these features, we recommend the
use of 12 bit or 16 bit cameras. Normal 8 bit cameras can be used, but
will typically only be able to image either the surface or prominences,
necessitating multiple bracketed exposures and subsequent
recombination in a computer. 12 bit or 16 bit cameras enable capturing
these features in the same exposure, simplifying the image processing.
Focal reducers:
Because of the long effective focal length at the output of the Quark, the
image scale will be quite large and small (1/2” or below) image sensors
will only capture a fraction of the whole solar disk in one frame. Large
pixel sizes (9 microns and above) will enable a larger field of view.
Alternatively, a focal reducer can be employed
between the Quark and the camera. Simple 1.25”
screw in focal reducers can be attached to the
camera nosepiece to allow a wider field of view with
small (1/2”, 1/3”, ¼”) sensor cameras. More
distance between the focal reducer and camera
surface will result in more focal reduction and larger field of view.

Features of the Sun in Calcium:
By observing the sun with a
narrow bandpass filter tuned
to 3968.5Å, we can observe
the behavior of the Sun's
Chromosphere. The
chromosphere is like a shell of
gas around the Sun's
photosphere, always moving and changing. The chromosphere's
structure behaves differently in active regions than quiet areas, where
magnetic field lines are stronger. Thought to be tied to the photosphere,
the chromosphere is governed by magnetic forces and, yet it still has its
own IntraNetwork (IN) of material oscillating every 5 minutes.
Plages/Faculae: Most of the
active region area is occupied
by plage. Considerable
atmospheric heating takes
place in the plage. It is bright
in everything from Halpha to
the Calcium H and K lines.
This heating is thought to account for an absence of spicule. While
absent over plage, spicule are prominent around its edges.
Sunspots: Dark spots on the
Sun are areas of high
magnetic fields which have a
cooler temperature. The
darkest central region is called
the umbra, and the lighter
region ringing the umbra is the
penumbra.

On the limb you may see
prominences, a detail of the
chromosphere projected against
the dark black contrast of space.
Prominences are typically much
fainter in Calcium than in
Hydrogen Alpha. Filaments are
Prominences seen on the disk of
the Sun and are a challenging observation at Calcium.
Active Regions are a
concentration of magnetic
acitivity with several types
of features contained in a
close area.
Solar Flares are intense, abrupt releases of energy which occur in areas
where the magnetic field is changing by flux emergence or sunspot
motion. Stresses in lines of force build up slowly and are released in
flares. They occur most frequently at neutral lines where a filament is
supported by horizontal sheared field lines. This event can only take
place along a magnetic inversion line. When many lines of force are
involved, two ribbons of emission appear, brightening simultaneously.

Troubleshooting:
Blank, featureless disk:
Ensure power is applied and LED is green.
Try moving focus in and out significantly, up to three inches (76mm). It
may be necessary to remove your diagonal, and view straight through.
Make sure a 12 to 32mm eyepiece (not included) is installed.
Ensure knob is pointing straight away from the power jack.
Check for droop, all connections between telescope and Quark must be
tight and square.
Dim, dark view:
Ensure UV/IR cut filter passes 397nm with a good transmission.
Wear a hood to block ambient light.
Reconfigure telescope to a faster focal ratio.
Poor contrast:
Check that optical surfaces are clean. Dust specks do not affect the
view, check for smudges such as oil from fingerprints.
Try adjusting wing shift knob up 3-4 clicks clockwise past center and
wait 5-15 minutes. If that does not improve the view, try down 3-4 clicks below
center and wait 5-15minutes.
Atmospheric seeing or transparency may be poor, try again later.
Blurry image:
Blurry views are typically due to poor seeing. Poor seeing can be
caused by the presence of heat waves from concrete, asphalt, or machinery.
Weather effects like the jet stream can also cause blurring. Try moving to a
different location or else observe on a day when weather conditions are
improved.
Yellow LED indication:
Your filter is adjusting to the wavelength chosen by the knob. Wait
approximately 5-15 minutes for the temperature to adjust and then light should
turn green, indicating that the filter has settled to its required temperature and is
on band for viewing.
Yellow, never goes green LED indication:
If after 20 minutes of the same knob position setting the LED has not
turned green, the ambient temperature may be too hot or too cold for the Quark
to regulate the temperature. However, the filter may still be usable while slightly
mistuned and performance may not be affected.
This can also occur if plugged into a computer USB port, which causes
the filter heater to reduce its current draw. Use the supplied power adapter or a
source rated for 1.5 amps, not a data USB port.
Red LED indication:
This usually indicates that the Quark is not receiving enough voltage. If
powered by battery, recharge the battery. Make sure to use the supplied AC/DC
wall adapter, as cell phone chargers and PC USB ports do not have enough
current capability for the Quark.

Red indication can also mean an electrical fault in the Quark electronics.
If power source changes do not resolve the red indication, please return the
Quark to DayStar for inspection and repair.
Specifications:
Wavelength: 3968.5Å (H line)
Tuning knob: Wing shift +/- 0.5Å in 0.1Å increments.
FWHM: 5Å.
Compatibility: F/7 to F/30 Refractor telescopes in full aperture.
Backfocus: Requires refocusing 61, 67, or 99mm inwards.
Blocking filter: Integrated 25mm blocking filter
Clear aperture: 19mm clear etalon aperture
Full disk: Passes full solar disk for focal lengths under ~1800mm.
Aperture limit: None, usable on large telescopes for high magnification.
For apertures over 80mm, suggest UV/IR cut filter.
Sun side: 1.25” snout, 1.25” extension snout, or 2” snout.
Eyepiece side: 1.25” female drawtube.
Brass compression ring to protect eyepiece.
Optional 2" and SCT accessories available.
Power: USB power, 5v 1.5amp, female Micro-B connector.
Power is required for proper operation.
Wall adapter: 90-240VAC wall adapter, includes US, UK, Euro and
Australian plugs.
Opt. battery: Optional 8-hour battery pack available.
LED indicator: Yellow: temperature settling.
Green: ready to observe, filter on band.
Red: fault such as low voltage.
Settling time: Approximately 5-15 minutes after power up or change
of wing shift.
Temperature: Ambient temperature range 40°-100°F
Dimensions: 55mm diameter x 71mm x 91mm long.
Includes: Quark filter, wedge adapter, power supply, user manual.
Warranty: 5 years
*All dedicated solar tracking applications should employ energy rejection

FCC Notice:
This equipment has been tested and found to comply with the limits for a
Class B digital device, pursua
nt to part 15 of the FCC Rules. These limits
are designed to provide reasonable protection against harmful
interference in a residential installation. This equipment generates, uses
and can radiate radio frequency energy and, if not installed and used in
a
ccordance with the instructions, may cause harmful interference to radio
communications. However, there is no guarantee that interference will
not occur in a particular installation. If this equipment does cause harmful
interference to radio or television
reception, which can be determined by
turning the equipment off and on, the user is encouraged to try to correct
the interference by one or more of the following measures:
Reorient or relocate the receiving antenna. Increase the separation
between the equi
pment and receiver. Connect the equipment into an
outlet on a circuit different from that to which the receiver is connected.
Consult the dealer or an experienced radio/TV technician for help.
Correct Disposal of This Product:
(Waste Electrical & Electronic Equipment)
(Applicable in the European Union and other European
countries with separate collection systems)
This marking shown on the product or its literature, indicate
that it should not be disposed with other household wastes at
the end of its work
ing life. To prevent possible harm to the environment
or human health from uncontrolled waste disposal, please separate this
from other types of wastes and recycle it responsibly to promote the
sustainable reuse of material resources. Household users shoul
either the retailer where they purchased this product, or their local
government office, for details of where and how they can take item for
environmentally safe recycling. Business users should contact their
supplier and check the terms and cond
itions of the purchase contract
This product should not be mixed with other commercial wastes
disposal.
Copyright:
This manual copyright © DayStar Filters 2016
, all rights reserved.
This equipment has been tested and found to comply with the limits for a
nt to part 15 of the FCC Rules. These limits
are designed to provide reasonable protection against harmful
interference in a residential installation. This equipment generates, uses
and can radiate radio frequency energy and, if not installed and used in
ccordance with the instructions, may cause harmful interference to radio
communications. However, there is no guarantee that interference will
not occur in a particular installation. If this equipment does cause harmful
reception, which can be determined by
turning the equipment off and on, the user is encouraged to try to correct
Reorient or relocate the receiving antenna. Increase the separation
pment and receiver. Connect the equipment into an
outlet on a circuit different from that to which the receiver is connected.
Consult the dealer or an experienced radio/TV technician for help.
(Applicable in the European Union and other European
This marking shown on the product or its literature, indicate
that it should not be disposed with other household wastes at
ing life. To prevent possible harm to the environment
or human health from uncontrolled waste disposal, please separate this
from other types of wastes and recycle it responsibly to promote the
sustainable reuse of material resources. Household users shoul
d contact
either the retailer where they purchased this product, or their local
government office, for details of where and how they can take item for
environmentally safe recycling. Business users should contact their
itions of the purchase contract
.
This product should not be mixed with other commercial wastes
for
, all rights reserved.

Warranty:
Blockers and trimmers are considered a wear item and only warranteed
on a pro-rated five year term.
Warrantor: DayStar Filters LLC
Elements of Warranty: DayStar warrants, for five years of the original
retail purchase owner, this Product to be free from defects in materials
and workmanship with only the limitations or exclusions set out below.
Warranty Duration: This warranty to the original user shall last for one
year of the original user. The warranty is invalid if the Product is (A)
damaged or not maintained as detailed in Operating and Maintenance
Manual (B) modified, altered, or used as part of any conversion kits,
subassemblies, or any configurations not sold by DayStar, or (C)
serviced or repaired by someone other than the DayStar Filters Service
Center for a defect or manlfunction covered by this warranty. This
warrantee includes shipping to and from any point inside the United
States. Insurance upon that shipping and/or international shipping and/or
any customs and/or import duties attached are the sole responsibiltiy
of the owner.
Statement of Remedy: In the event that the product does not conform to
this warranty at any time while this warranty is in effect, warrantor will
repair the defect and return it to you without charge for parts, service or
any cost incurred by the warrantor in connection with the performance of
this warranty. THE FIVE YEAR WARRANTY SET FORTH ABOVE IS
THE SOLE AND ENTIRE WARRANTY PERTAINING TO THE
PRODUCT AND IS IN LIEU OF AND EXCLUDES ALL OTHER
WARRANTIES OF ANY NATURE WHATSOEVER, WHETHER
EXPRESS, IMPLIED OR ARISING BY OPERATION OF LAW,
INCLUDING BUT NOT LIMITED TO ANY IMPLIED WARRANTIES OF
MERCHANTABILITY OR FITNESS FOR A PARTICULAR PURPOSE.
THIS WARRANTY DOES NOT COVER OR PROVIDE FOR THE
REIMBURSEMENT OR PAYMENT OF INCIDENTAL OR
CONSEQUENTIAL DAMAGES.
Procedure for obtaining performance of warranty: Upon discovery of
flaw, we require that the user communicate by telephone and/or email to
the DayStar Service department to report the failure of equipment.
Should technical support be unable to resolve the conflicts of the
product, it should be packaged in its original packaging and returned with
evidence of original purchase and note describing defect to include
owner contact information. The product should be shipped freight pre-
paid by traceable means or delivered to warrantor at:
DayStar Filters LLC
149 Northwest OO Highway, Warrensburg, MO 64093 USA
www.DayStarFilters.com - 1 (866) 680-6563
/