6
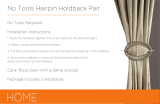
Install “S” Holdback*. Shutter is now
held open by acorn anchor. Position
shutter dog in correct location & mark
for screws & fasten to wall—1½" down
from shutter & 1¾" from outside edge.
*The acorn clip is better suited for holding the
shutters in place, and as such, the “S” Holdback
is recommended more for a decorative use as
opposed to a functional one.
7
Install acorn clip. Swing shutter open
& mark center of holdback clip &
install acorn clip into brick.
Beaded A beaded detail that is molded into the inside edge of the face of each stile.
Board Traditionally used on barns but ideal for more rustic homes. Authentic tongue & groove look with the front
and Batten & back of the shutter featuring the same beveled look as if the shutter were made of individual boards.
Flat Panel A solid shutter where the center portion of the shutter is recessed from the stiles
Shutter (i.e. Memphis style shutter).
Fixed Louvered Positioned the historically accurate way, the louvers are tilted in towards the wall when the shutter
Shutter is in the open position.
Leaf A single shutter or 1/2 pair.
Mousehole A notched hole in the rails that accommodated the ends of the tilt rod when the louvers were in
the closed position. Now it just adds to the authentic appearance.
Mullions The vertical element between the stiles that acts as a divider. Found in Bahama shutters.
Rabbeting Also called “shiplap", used on many functional shutters so that when closed the individual shutter leaves
fit into one another.
Radius or A shutter which has a curved top.
Arched Top
Rails The horizontal crosspieces of a shutter (i.e. top rail, bottom rail, center rail).
Raised Panel A solid shutter where the center portion of the shutter panel protrudes outward from the surrounding
Shutter routed bevel.
Shutter Capping A metal (most usually copper) capping that was placed over the top edge of the shutter to prevent
water intrusion and the resulting wood rot. This capping is not necessary with Atlantic shutters as, due
to materials used, they are impervious to both water intrusion and rot.
Stiles The upright vertical sections of a shutter, which may be beaded or non-beaded.
Tilt Rod Working louvered shutters had a rod, or tilt-rod, to move the louvers into the open or closed position.
These are now purely decorative for those who truly desire the more authentic look.
Shutter Terminology
Position shutter in opening allowing
equal amounts of space between shutter
& wall (A & B), and between shutters
(C) to allow for smooth operation
[see diagram at right]. When attaching
the pintel to the structure you may
have to drill into mortar & brick—use
appropriate molly’s in mortar & brick.
5
A C B