AL-KO 38 E Combi Care Electric Lawn Rake / Scarifier User manual
- Type
- User manual
Page is loading ...
Page is loading ...
Page is loading ...
Page is loading ...
Page is loading ...
Page is loading ...
Page is loading ...
Page is loading ...
Page is loading ...
Page is loading ...
Page is loading ...
Page is loading ...

13
474 397_b
GB
Introduction
Please read this document before starting to use
the machine. This is essential for safe working and
trouble-free handling.
Comply with the safety and warning instructions in
this documentation and on the machine.
This document is a permanent component of the
described product, and should remain with the
machine if it is sold to someone else.
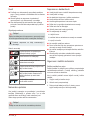
Explanation of symbols
Important!
Following these warning instructions can help to
avoid personal injuries and/or damage to property.
Special instructions for ease of understanding
and regarding handling.
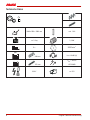
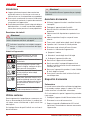
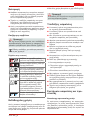
Symbols on the machine
Before starting operation
Read the operating instructions!
Keep third parties out of the danger
area!
Disconnect the mains plug before
working on the blade system!
Important – danger! Keep the con-
nection cable away from the cutting
tools.
Important – danger! Keep your
hands and feet away from the
cutting tools. Disconnect the mains
plug immediately if the mains cable
is damaged.
Wear protective glasses!
Wear ear defenders!
Designated use
This machine is intended for loosening and aerating
a lawn (scarifying) in private applications, and is only
allowed to be used on dried lawns which have been
mown short.
Any use not in accordance with this designated use
shall be regarded as misuse.
Important!
The machine is not allowed to be used in commercial
applications.
Safety notes
Only use the machine if it is in perfect technical
condition
Protect the machine against moisture
Do not deactivate safety and protective devices
Wear protective glasses and ear defenders
Wear long trousers and sturdy shoes
Keep your hands and feet away from the blade
system
Keep third parties out of the danger area
Remove foreign bodies from the working area
When leaving the machine:
Switch off the motor
Wait for the blade system to come to a stop
Disconnect from the mains
Do not leave the machine unsupervised
Children, or other people who are not familiar with
the operating instructions, are not allowed to use
the machine
Do not operate the machine if you are under the
influence of alcohol, drugs or medication
Comply with the local regulations on minimum age
of people operating the machine
Safety and protective devices
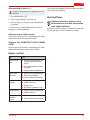
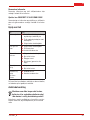
Motor protection switch
The motor protection switch switches off the scarifier/
aerator if the motor is overloaded. Do not deactivate
the function of the motor protection switch.
Proceed as follows if the motor protection switch has
switched off the machine:
1. Disconnect the machine from the mains.
2. Determine the cause of the overload.
3. After allowing the machine to cool down for 2 to
3 minutes, reconnect the power cable and start
operating the machine.

14
Translationoforiginaluserinstructions
Operator presence control
The machine is equipped with an operator presence
control which stops the machine when it is released.
Danger!
Do not deactivate the function of the operator pres-
ence control.
Rear flap
The machine is equipped with a rear flap.
Visual safety indicator (Fig. C, Fig. H)
The visual safety indicator displays when the work
shaft is secured. The work shaft is secured correctly
when the green mark is visible (5 mm).
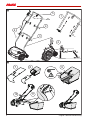
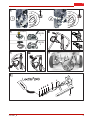
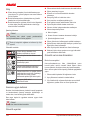
Assembly
Assemble the machine in accordance with the illustra-
tions (Figs. A, B).
Important!
The machine is not allowed to be operated unless it
has been fully assembled.
Startup
Important!
Always perform a visual check prior to startup. Do
not operate the machine if the blade system and/or
the fastening parts are loose, damaged or worn.
Comply with working time regulations in force in
your country
Always comply with the operating instructions
supplied from the motor manufacturer
Power cable safety
Only use rubber-sheathed cables with quality
H05RN-F acc. to DIN/VDE 0282 with a conductor
cross section of 3 x 1.5 mm²
The type designation must be marked on the
power cable. The plug and coupling socket must
be made from rubber or sheathed in rubber, and
be in accordance with DIN/VDE 0620
Only use a power cable with sufficient length
The power cable, plug and coupling socket must
be protected against splash water
Renew the tank or tank lock if damaged
Repairs on the power cable, plug and coupling
socket are only allowed to be carried out by au-
thorised specialist companies. A defective power
cable (e.g. with cracks, cuts, crushed or kinked
points in the insulation) is not allowed to be used
Protect the plug connections against moisture
Danger!
Do not damage or cut the power cable.
If the power cable is damaged, immediately discon-
nect it from the mains.
Electrical requirements
230 V/50 Hz alternating current
Minimum cross section
Power cable = 1.5 mm²
Minimum fusing of mains connection = 10 A
Residual-current circuit breaker (RCCB)
Maximum tripping current = 30 mA.
Establishing the mains connection
1. Connect the coupling part of the power cable to
the plug on the safety pushbutton switch.
2. Coil the power cable into a loop and hook it into
the cable strain relief. Leave the loop long enough
for the cable strain relief to be able to slide from
one side to the other.
Danger!
Never operate the machine from mains sockets
which do not have a residual-current circuit breaker.
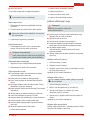
Setting the working depth (Fig. D)
Important!
Only set the working depth if the motor is switched
off and the blade shaft is stopped.
Set the working depth of the blade shaft at the dial
selector.
1. Tilt the scarifier backwards with the handlebar.
2. Push the twist switch down and turn it to level "2".
Positions on the dial selector:
1 - 5 = Setting the working depth (Fig. D)
With new blades, set the dial selector to posi-
tion 2 at most!

15
474 397_b
GB
The correct working depth depends on:
the condition of the lawn
the wear on the blades
If the working depth is incorrect:
the scarifier will stop
the motor will stall
In this case, move the dial selector back to a shallower
working depth.
Always mow the lawn before scarifying.
Starting the motor
1. Push and hold the button of the safety pushbutton
switch.
2. Pull the operator presence control against the
handlebar. The motor starts.
The operator presence control does not lock in
place. It must be held in place all the time.
3. Release the button of the safety pushbutton
switch.
Switching off the motor
1. Release the operator presence control. It automati-
cally returns to its initial position. The motor is
switched off.
Danger of lacerations!
The blade shaft keeps turning under its own
momentum! After switching off, do not reach
under the machine straight away.
Hooking in/unhooking the grass catcher
1. Switch off the motor before hooking in/unhooking
the grass catcher.
2. Wait for the blade shaft to come to a stop
General notes on operation
The blade system must be able to turn entirely
freely in order for the machine to be started
Keep the power cable out of the working area
Do not place your hands and feet close to any
rotating parts
Only control the machine using the handlebar. This
ensures the necessary safety clearance.
Be particularly careful when turning the scarifier or
if you are pulling the machine behind you
Make sure you can stand securely on slopes
Always scarify across the slope
Never scarify on steep slopes
Always scarify at walking pace
Never tilt or transport the machine when the motor
is running
Have the machine checked by a specialist if the
following events occur:
After running into an obstacle
If the motor stops suddenly
If a blade is bent
If the blade shaft is bent
If the V-belt is defective
Maintenance and care
Danger!
Risk of injury on the blade shaft.
Wear protective gloves!
The user cannot open the motor enclosure for
maintenance, such maintenance must be done
by an authorised specialist workshop.
Disconnect the mains plug before any mainten-
ance and cleaning work! Wait for the shaft to
come to a stop.
Only use genuine spare parts.
Only renew worn or damaged implements and
pins as a set, in order to avoid imbalances.
Do not spray the machine with water!
Water ingress can cause irreparable damage to the
motor and the safety pushbutton switch.
Clean the machine after each use (scraper, cloth,
etc.).
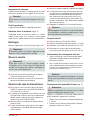
Removing the blade shaft (Fig. H)
1. Unscrew and remove the screw (1) of the bearing.
2. Fold up the bearing half (2).
3. Lift the blade shaft out of the lower bearing half
and pull it out of the drive side (3).
Install in the reverse sequence.

16
Translationoforiginaluserinstructions
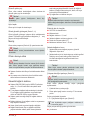
Removing the blades (Fig. I)
Before removing the blades, check their instal-
lation position!
1. Unscrew and remove the hexagon bolt (1).
2. Carefully pull the ball bearing (2) off the shaft (8).
3. Pull the thrust ring (3), washer (4) and short
spacer tube (5) off the shaft.
4. Pull off the blades (6) and long spacer tubes one
after another.
Install in the reverse sequence.
Removing the aerator roller
Remove the aerator roller and renew the steel spring
tines in the same way as the blade shaft.
Only for COMFORT 32 VLE COMBI CARE
Remove the aerator roller and renew the steel spring
tines in the same way as the blade shaft.
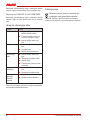
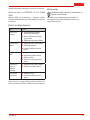
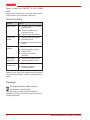
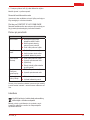
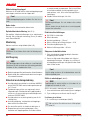
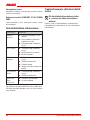
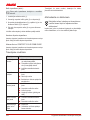
Help in case of malfunctions
Malfunction Help
Motor does not
run
Check the power cable and
the residual-current circuit
breaker
Push the operator presence
control towards the top
handlebar.
Select a lower working depth.
Shaft does not
rotate
Select a lower working depth.
Clear the blades.
Contact a customer service
workshop.
The motor is
losing power
Select a lower working depth.
Renew worn blades.
Clean the housing.
Mow the lawn (grass is too
long).
Poor scarifying
performance
Select a lower working depth.
Renew worn blades.
Machine is
not running
smoothly
Machine is
vibrating
Damaged blades.
Contact a customer service
workshop.
Malfunctions that cannot be rectified using this table
must be attended to by an authorised specialist work-
shop.
Disposal
Do not dispose of worn-out machines or
spent batteries (including rechargeable
batteries) in domestic waste!
The packaging, machine and accessories are made
from recyclable materials and must be disposed of
accordingly.

17
474 397_b
GB
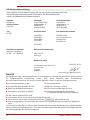
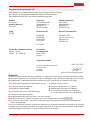
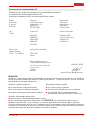
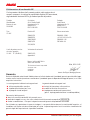
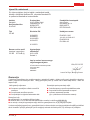
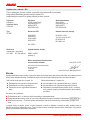
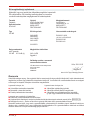
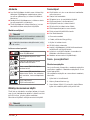
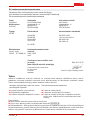
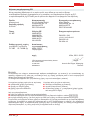
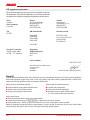
EC declaration of conformity
Weherebydeclarethatthisproduct,intheforminwhichitismarketed,
meetstherequirementsoftheharmonisedEUguidelines,
EUsafetystandards,andtheproduct-specicstandards.
Product
Scarier
Serial number
G1401405
Manufacturer
AL-KOGeräteGmbH
IchenhauserStr.14
89359KOETZ
DEUTSCHLAND
Executive Officer
AntonEberle
IchenhauserStr.14
89359KOETZ
DEUTSCHLAND
Model
CC38E
EU directives
2006/42/EG
2006/95/EG
2004/108/EG
2000/14/EG
2011/65/EU
Harmonised standards
EN60335-1:2002
+A1+A11+A12+A2+A13
EN60335-2-92
EN13684+A3
Sound power level
measured / guaranteed
CC 38E 97 / 99 dB (A)
Conformity evaluation
2000 /14/EG
Appendix V
Notified body
TÜVRheinlandProductSafetyGmbH
AmGrauenStein
51105Köln
GERMANY
Kötz,2011-10-25
AntonioDeFilippo,ManagingDirector
Warranty
If any material or manufacturing defects are found during the statutory customer protection period, we will either
repair or replace the equipment, whichever we consider the more appropriate. This statutory period may vary
according to the legislation in force in the country where the equipment was purchased.
Ourwarrantyisvalidonlyif: Thewarrantyisnolongervalidif:
The equipment has been used properly
The operating instructions have been followed
Genuine replacement parts have been used
The equipment has been tampered with
Technical modifications have been made
The trimmer was not used for its intended purpose (for
example, used for commercial or communal applica-
tions)
The following are not covered by warranty:
Paint damage due to normal wear
Wear parts identified by a border XXX
XXX
(X) on the spare parts list
Combustion motors – these are covered by a separate warranty from the manufacturer concerned
To make a claim under warranty, please take this statement of warranty and proof of purchase to the nearest
authorised customer service centre. This warranty does not affect the usual statutory rights of the customer
relative to the seller.
┌──────┐
└──────┘
Page is loading ...
Page is loading ...
Page is loading ...
Page is loading ...
Page is loading ...
Page is loading ...
Page is loading ...
Page is loading ...
Page is loading ...
Page is loading ...
Page is loading ...
Page is loading ...
Page is loading ...
Page is loading ...
Page is loading ...
Page is loading ...
Page is loading ...
Page is loading ...
Page is loading ...
Page is loading ...
Page is loading ...
Page is loading ...
Page is loading ...
Page is loading ...
Page is loading ...
Page is loading ...
Page is loading ...
Page is loading ...
Page is loading ...
Page is loading ...
Page is loading ...
Page is loading ...
Page is loading ...
Page is loading ...
Page is loading ...
Page is loading ...
Page is loading ...
Page is loading ...
Page is loading ...
Page is loading ...
Page is loading ...
Page is loading ...
Page is loading ...
Page is loading ...
Page is loading ...
Page is loading ...
Page is loading ...
Page is loading ...
Page is loading ...
Page is loading ...
Page is loading ...
Page is loading ...
Page is loading ...
Page is loading ...
Page is loading ...
Page is loading ...
Page is loading ...
Page is loading ...
Page is loading ...
Page is loading ...
Page is loading ...
Page is loading ...
Page is loading ...
Page is loading ...
Page is loading ...
Page is loading ...
Page is loading ...
Page is loading ...
Page is loading ...
Page is loading ...
Page is loading ...
Page is loading ...
Page is loading ...
Page is loading ...
Page is loading ...
Page is loading ...
Page is loading ...
Page is loading ...
Page is loading ...
Page is loading ...
Page is loading ...
Page is loading ...
Page is loading ...
Page is loading ...
Page is loading ...
Page is loading ...
Page is loading ...
Page is loading ...
Page is loading ...
Page is loading ...
Page is loading ...
Page is loading ...
Page is loading ...
Page is loading ...
Page is loading ...
Page is loading ...
Page is loading ...
Page is loading ...
Page is loading ...
Page is loading ...
Page is loading ...
Page is loading ...
Page is loading ...
Page is loading ...
Page is loading ...
Page is loading ...
Page is loading ...
Page is loading ...
Page is loading ...
Page is loading ...
Page is loading ...
Page is loading ...
Page is loading ...
Page is loading ...
Page is loading ...
Page is loading ...
Page is loading ...
Page is loading ...
Page is loading ...
Page is loading ...
Page is loading ...
Page is loading ...
Page is loading ...
Page is loading ...
Page is loading ...
Page is loading ...
Page is loading ...
Page is loading ...
Page is loading ...
Page is loading ...
Page is loading ...

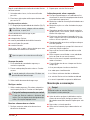
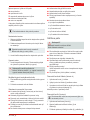
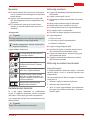
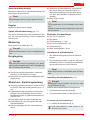
149
474 397_b
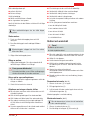
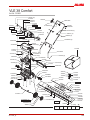
47404001
47418840
343246 (2)
474341
474362
47436840 (2)
474389
46041901
46041802
54475702 (4)
463034
700044 (4)
701980
700119
510176 (3)
460783
349507 (2)
703027
474342
700137 (4)
703094
47404401
47404301
474189
47404502
47405040
47405302
474370
47403805
474214
47403902
474349
474242 (2)
336375 (2)
510176 (8)
510176
47405501
474392
474391
47405140
47405240
510176 (2)
510065 (2)
474380
474375
701980
700488
700507
373702
47434501 (4)
47434440 (2)
474394
474046 (2)
460771 (2)
510176 (4)
47434301 (2)
474047
474042
47405601
47412040
474325
460296
702761 (2)
474323
700413
474321
474371
474372
702761 (2)
474327
474334
462213
474322
460297
474328
701648
531789 (3)
701296
460296
702716
474385
474383
474382
373702
700488
474393
700507
474384 (6)
543555 (2)
701502 (2)
700147 (2)
510176 (2)
474381
474346 (12)
474347 (13)
474376
474377
1/1
VLE 38 Comfort
Art. Nr. 112 800
a b c
d e
f
E 112800
* ** * * *
Page is loading ...
Page is loading ...

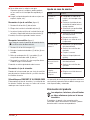
AL-KO Geraete GMBH l Head Quarter l Ichenhauser Str. 14 l 89359 Koetz l Deutschland
Country Company Telephone Fax
A AL-KO Kober Ges.m.b.H. (+43) 35 78 / 2 515227 (+43) 35 78 / 2515 38
AUS AL-KO International PTY. LTD (+61)3 / 97 67- 3700 (+61) 3 / 9767- 3799
B / L Eurogarden NV (+32)16 / 80 54 27 (+32)16 /80 54 25
BG Valerii S&M Group SJ (+359) 2 942 34 02 (+359) 2 942 34 10
CH AL-KO Kober AG (+41)56 / 418 3150 (+41) 56 / 4183160
CZ AL-KO Kober Spol.sr.o. (+420) 3 82 / 2103 81 (+420) 3 82 / 2127 82
D AL-KO Geräte GmbH (+49) 82 21/ 2 03 - 0 (+49) 82 21/ 2 03 -138
DK AL-KO Ginge A/S (+45)98 82 10 00 (+45) 98 8254 54
EST/LT/LV AL-KO Kober SIA (+371) 67409330 (+371) 67807018
F AL-KO S.A.S. (+33) 3 / 85 -763540 (+33) 3 / 85 -763588
GB Rochford Garden Machinery Ltd. (+44)19 63 / 8280 50 (+44)19 63 / 82 80 52
H AL-KO KFT (+36) 29/ 53 70 50 (+36) 29/537051
HR Brun.ko.-prom d.o.o. (+385)1 3096 567 (+385)1 3096 567
I AL-KO Kober GmbH / SRL (+39) 0 39 / 9 32 9311 (+39) 0 39 / 9 32 93 90
IN AGRO-COMMERCIAL (+91) 3322874206 (+91)3322874139
IQ Gulistan Com (+946) 750 450 80 64
IRL Cyril Johnston & Co. Ltd. (+44) 2890813121 (+44)2890914220
LY ASHOFAN FOR AGRICULT. ACC. (+218)512660209 (+218)512660209
MA BADRA Sarl (+212)022447128 (+212)022447130
MK Techno Geneks (+389) 2 2551801 (+389) 2 2520175
N AL-KO GINGE A/S (+47)64 86 25 50 (+47) 64 86 25 54
NL O.DE LEEUW GROENTECHNIEK (+31)38/ 444 6160 (+31)38/ 444 6358
PL AL-KO Kober z.o.o. (+48) 61/ 8 161925 (+48) 61/ 8 161980
RO OMNITECH Technology SRL (+4) 021 326 36 72 (+4) 021 326 36 79
RUS OOO AL-KO Kober (+7)499/168 8718 (+7) 499/96600-00
RUS AL-KO St. Petersburg GmbH (+7) 8 12 /4 461075 (+7) 8 12 / 4 46 1075
S AL-KO Ginge Svenska AB (+46)(0) 3157 35 80 (+46)(0) 3157 56 20
SK AL-KO Kober Slovakia Spol.s.r.o. (+421)2 /45 99 4112 (+421) 2 /45 64 8117
SLO Darko Opara s.p. (+386) 1 722 58 50 (+386) 1 722 58 51
SRB Agromarket d.o.o. (+381) 34 308 000 (+381) 34 308 16
TR ZIMAS A.S. (+90) 232 4580586 (+90) 232 4572697
UA TOV AL-KO Kober (+380)44 /4 92 33 96 (+380) 44 / 4 92 33 97
Telefon: (+49)8221/203-0 l Telefax: (+49)8221/203-138 l www.al-ko.com 03_2011
-
 1
1
-
 2
2
-
 3
3
-
 4
4
-
 5
5
-
 6
6
-
 7
7
-
 8
8
-
 9
9
-
 10
10
-
 11
11
-
 12
12
-
 13
13
-
 14
14
-
 15
15
-
 16
16
-
 17
17
-
 18
18
-
 19
19
-
 20
20
-
 21
21
-
 22
22
-
 23
23
-
 24
24
-
 25
25
-
 26
26
-
 27
27
-
 28
28
-
 29
29
-
 30
30
-
 31
31
-
 32
32
-
 33
33
-
 34
34
-
 35
35
-
 36
36
-
 37
37
-
 38
38
-
 39
39
-
 40
40
-
 41
41
-
 42
42
-
 43
43
-
 44
44
-
 45
45
-
 46
46
-
 47
47
-
 48
48
-
 49
49
-
 50
50
-
 51
51
-
 52
52
-
 53
53
-
 54
54
-
 55
55
-
 56
56
-
 57
57
-
 58
58
-
 59
59
-
 60
60
-
 61
61
-
 62
62
-
 63
63
-
 64
64
-
 65
65
-
 66
66
-
 67
67
-
 68
68
-
 69
69
-
 70
70
-
 71
71
-
 72
72
-
 73
73
-
 74
74
-
 75
75
-
 76
76
-
 77
77
-
 78
78
-
 79
79
-
 80
80
-
 81
81
-
 82
82
-
 83
83
-
 84
84
-
 85
85
-
 86
86
-
 87
87
-
 88
88
-
 89
89
-
 90
90
-
 91
91
-
 92
92
-
 93
93
-
 94
94
-
 95
95
-
 96
96
-
 97
97
-
 98
98
-
 99
99
-
 100
100
-
 101
101
-
 102
102
-
 103
103
-
 104
104
-
 105
105
-
 106
106
-
 107
107
-
 108
108
-
 109
109
-
 110
110
-
 111
111
-
 112
112
-
 113
113
-
 114
114
-
 115
115
-
 116
116
-
 117
117
-
 118
118
-
 119
119
-
 120
120
-
 121
121
-
 122
122
-
 123
123
-
 124
124
-
 125
125
-
 126
126
-
 127
127
-
 128
128
-
 129
129
-
 130
130
-
 131
131
-
 132
132
-
 133
133
-
 134
134
-
 135
135
-
 136
136
-
 137
137
-
 138
138
-
 139
139
-
 140
140
-
 141
141
-
 142
142
-
 143
143
-
 144
144
-
 145
145
-
 146
146
-
 147
147
-
 148
148
-
 149
149
-
 150
150
-
 151
151
-
 152
152


AL-KO 38 E Combi Care Electric Lawn Rake / Scarifier User manual
- Type
- User manual
Ask a question and I''ll find the answer in the document
Finding information in a document is now easier with AI
in other languages
- italiano: AL-KO 38 E Combi Care Electric Lawn Rake / Scarifier Manuale utente
- français: AL-KO 38 E Combi Care Electric Lawn Rake / Scarifier Manuel utilisateur
- español: AL-KO 38 E Combi Care Electric Lawn Rake / Scarifier Manual de usuario
- Deutsch: AL-KO 38 E Combi Care Electric Lawn Rake / Scarifier Benutzerhandbuch
- русский: AL-KO 38 E Combi Care Electric Lawn Rake / Scarifier Руководство пользователя
- Nederlands: AL-KO 38 E Combi Care Electric Lawn Rake / Scarifier Handleiding
- português: AL-KO 38 E Combi Care Electric Lawn Rake / Scarifier Manual do usuário
- slovenčina: AL-KO 38 E Combi Care Electric Lawn Rake / Scarifier Používateľská príručka
- dansk: AL-KO 38 E Combi Care Electric Lawn Rake / Scarifier Brugermanual
- polski: AL-KO 38 E Combi Care Electric Lawn Rake / Scarifier Instrukcja obsługi
- čeština: AL-KO 38 E Combi Care Electric Lawn Rake / Scarifier Uživatelský manuál
- Türkçe: AL-KO 38 E Combi Care Electric Lawn Rake / Scarifier Kullanım kılavuzu
- eesti: AL-KO 38 E Combi Care Electric Lawn Rake / Scarifier Kasutusjuhend
- svenska: AL-KO 38 E Combi Care Electric Lawn Rake / Scarifier Användarmanual
- suomi: AL-KO 38 E Combi Care Electric Lawn Rake / Scarifier Ohjekirja
- română: AL-KO 38 E Combi Care Electric Lawn Rake / Scarifier Manual de utilizare
Related papers
-
AL-KO Electric Lawn Rake / Scarifier Combi Care 32 VLE Comfort User manual
-
-
-
-
-
-
-
-
Other documents
-
Ikra IEVL 1400 GMV 1400 R3000 Gartenmeister Owner's manual
-
Raven GEN 6500E User manual
-
Solo 519-50 User manual
-
Wolf Garten UV 30 EV User manual
-
-
Telwin TEL5000 User manual
-
-
-
-