Page is loading ...

1
iO Pro 3D User Manual
iO Pro 3D
2.21.2020
USER MANUAL

2
iO Pro 3D User Manual
Table of Contents
Contents
General
5 Welcome note
6 Precautions
7 In-box content
7 Your device (image)
8 Getting to know your iO PRO 3D
8 Signing into Google or other accounts
8 Move from Android device
10 Move from iPhone
11 Setup as new
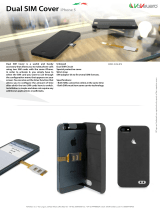
12 Inserting and removing SIM and memory card
12 Managing dual SIMs
13 Set up SIM profile
14 Add or remove accounts
15 Set up email
17 Battery information
17 Charging information
18 Home and lock screen
18 About your lock screen
21 About your home screen
22 Notification bar and notifications, swipe to dismiss, interactive
21 Navigation buttons
23 Quick settings
24 Moving objects on the home screen
25 Home screen shortcuts
27 Split screen mode
28 Screenshots
29 Accessibility settings
29 Visual assistance
32 Hearing assistance
34 Dexterity assistance
35 Use accessibility shortcuts
36 Features
36 Camera
36 Dialer / Contacts
43 Messages
46 Gallery
46 Browser
48 File manager
49 Downloads

3
iO Pro 3D User Manual
50 3D
50 How to view 3D
50 How to take 3D images
50 ROKiT FLiX 3D
50 3D Gallery app
50 YouTube
50 Chrome
50 Applications
50 ROKiT Hub
50 Services (different per region)
50 More about Android and link
51 Security
51 Screen lock (None, swipe, pattern, PIN, password) + preferences
53 Fingerprint sensor
54 Smart Lock
55 SIM lock
56 Find my device
56 App permissions
57 System
58 About phone
60 Resetting your device
61 Updating software
62 Customization
62 Wallpaper
62 Launcher
63 Connectivity
63 Calling
64 Adjust sound during call
64 Wi-Fi Network
65 Bluetooth
67 FM Radio
Table of Contents

4
iO Pro 3D User Manual
68 Information
68 Safety information
68 Declaration Battery precaution
69 Health and safety
69 Driving safety
69 Operating environment
69 Basic Troubleshooting
70 Steps to connect to internet
70 Make sure app is updated to latest version
70 Issue making a call
70 Make sure SIM is connected
70 Contact network provider
Table of Contents

5
iO Pro 3D User Manual
Welcome note
Thank You!
We don’t believe in new and different technologies if they don’t provide a meaningful user benefit. This is how we make decisions involving products.
We’re incredibly proud of what we’ve accomplished with the iO PRO 3D, allowing us to offer some of the finest smartphone innovations right here and now.
The iO PRO 3D combines high-end hardware, a near boundless 18:9 display, and incredibly smooth software. Android 9 OS is having a whole slew of exciting features, and finally, we
enhanced performance through a combination of the best hardware available and carefully optimized software.

6
iO Pro 3D User Manual
Precautions
This mobile phone is well designed with fine art. Please exercise special care when using it.
The following suggestions will help your mobile phone survive the warranty period and extend its life:
Keep the mobile phone and all its accessories away from children’s reach.
Keep the mobile phone dry.
Keep away from rain, moisture, liquid or other substances that may corrode electronic circuits.
Do not use or store the mobile phone in dusty places, or active parts of the mobile phone could be damaged.
Do not store the mobile phone in a high-temperature place.
High temperature will shorten the life of electronic circuits and damage the battery and some plastic parts.
Do not store the mobile phone in a cold place.
Otherwise, moistures will be formed inside the mobile phone and damage electronic circuits when the mobile phone is moved to a constant temperature place.
Do not throw, knock or shock the mobile phone, as that will destroy the internal circuits and high-precision components of the mobile phone.

7
iO Pro 3D User Manual
In-box content
ROKiT iO Pro 3D, gel protective case, hard shell carrying
case, SIM tray removal tool, micro USB cable, warranty
information card

8
iO Pro 3D User Manual
Getting to know your iO PRO 3D
Signing into Google or other accounts
When you set up your phone, you were prompted to add a Google account. If you skipped this, be sure to set one up now so you can download apps from Play Store, get a customized information
feed, and take full advantage of the Calendar, Gmail, and other apps included with your account. You can also add other web accounts.For each account, you can control which of its features and
apps sync with your phone.
When you set up your phone, you added a Google account. If you haven't had a Google account before, this is more than just a password you set up for your phone.
A Google account lets you organize and access your personal information and files from any computer or mobile device:
Synchronize everything. Never lose your contacts. Associate them with your Google account if you create them on your phone and view them from Gmail on any computer or by signing into your
Google account on any phone. Create emails or calendar events on your phone and view them on any computer. Access your browser bookmarks from any device.
Store in the cloud. Upload your photos, videos, and music to the cloud; get to all of it without taking up space on your phone.
Keep your stuff secure. Your account password secures it all and lets you access it from anywhere.
Other than remembering your password, you don’t need to do much maintenance on your Google account – just enjoy the benefits of your secure, synchronized information. However, you can:
Control how frequently your phone syncs your information.
Review and manage the information Google collects from you, such as search and browsing history.
Move from Android device
Learn the basics
Your smartphone is, after all, a phone for making and answering calls. But it also has a keyboard for sending texts and emails and a camera for taking photos and videos.
The status bar on your home screen displays the time and icons that tell you about your phone's battery and network connections.
Get apps
Your smartphone comes with many fun and useful apps, but you can really unlock its power by installing apps that suit your lifestyle. Go to Play Store to explore free and paid apps that help
you be more productive, organized, informed, in touch, and entertained.
Play Store also offers music, movies, TV shows, and books.
Protect your phone
You carry your phone around with you, and accidents happen; phones get lost sometimes. So, set up some security and prevent heartache if you and your phone become separated.
Set up a screen lock. This is your first line of defense in keeping your sensitive information safe. Prefer numbers, shapes, words? Set up a PIN, pattern, or password required to unlock your
phone. A screen lock doesn't prevent you from immediately answering a call or accessing your camera. Display your owner info. On your lock screen, you can discreetly display a “please
return” message with some of your contact info so that, if your phone is lost, someone can return it to you.
Enable lost phone features. For peace of mind, check out Find My Device , in case you ever need to remotely locate and lock or erase your phone.
Personalize your phone
While changing your wallpaper is probably your first customization, don't stop there. Be sure to explore your Settings to set ringtones, font sizes, data usage preferences, keyboard
preferences, and much more. It's a great way to learn many of your phone's capabilities while customizing it to suit your needs. In most apps you can tap settings for app-specific settings.
Be sure to see what options are available to you there, too. Learn the basics : New to Android?

9
iO Pro 3D User Manual
Manage cellular data
Understand your data usage. Keep an eye on your data usage and learn how to make the most of it by going to Settings > Network & Internet > Data usage. See which
apps use large amounts of data and adjust their settings if you want. You can stop auto-syncing over your carrier's network from quick settings by toggling the data
connection off.
Use Wi-Fi to conserve cellular data. When you connect to a Wi-Fi network, your data will auto-sync over its connection instead of your carrier's network, saving cellular
data for when you need it. From quick settings, toggle the Wi-Fi connection on.
Useful to know
Tell your phone what to do. Use your phone hands-free with voice commands. Tell it to navigate you and listen to it speak the directions to you as you drive--it'll even
reroute you if you've gone off course. Tell it to set alarms, find information on the web, make calls. Dictate instead of typing text.
Never miss a photo opportunity. Automatically open the camera right from your lock screen. You can automatically back up your photos and videos with your Google
account or with other photo sharing apps available from Play Store .
Store your stuff
Save your internal storage for apps by using an SD card to store photos, videos, and music. You can open stored items in associated apps, like Photos to see your photos and
videos. It's simple to move items stored on your phone to a computer using the USB cable packaged with your phone.
For even more storage space, plus the ability to access your media and files from any internet connected device (phone, computer, tablet), your new phone gives you access
to cloud storage. Your Google account provides you free cloud storage on Drive, which has its own app and is also available from the menu throughout other apps.
When you know you'll have a weak connection or no connection, many of your apps let you pin cloud items, temporarily storing them on your phone. You can unpin when
you're done to keep phone memory free.
Wi-Fi hotspot. You can share your phone's data connection as a Wi-Fi hotspot or directly tether your phone to a computer for internet access. If you have other devices that
need an internet connection (for example, a laptop, tablet, or other phone), you can use your phone as a Wi-Fi hotspot.
Reboot phone
In the unlikely event that your phone becomes unresponsive, frozen, shows blank or black screen, or does not respond to the Power button, you can reboot it. Press and
hold the Power button for 7 - 10 seconds. The phone will restart normally.
Certain features, services, and applications are network or carrier dependent and may not be available in all areas.

10
iO Pro 3D User Manual
Move from iPhone
Welcome to Android! Here are some differences between your old iPhone and your new phone.
Your assistant: You've retired Siri. Now, find info and get things done with Google Assistant. Just set up “OK, Google”. Then ask for info or help with everyday tasks.
Apps:
Goodbye Apple App Store, hello Google Play Store. Play Store is now your default app store. Apps aren't compatible between iPhone and Android. However, many
developers make iPhone and Android versions of their apps; if the app stores your data online, then you can switch with little effort. Just download the Android version from
Play Store and log in. Install apps remotely. On a computer, visit play.google.com. Browse apps on the bigger screen and then install them on your phone from your
computer.
Your home screen:
On your old iPhone, your home screen was far left. Now, you start with one home screen and can add more pages to the right as needed. Your old phone showed all apps on
your home screen. With your new phone, you can put shortcuts to your most important apps on your home screen for easy access. Or, find your full list by swiping up from
your favorites tray. This frees up room on your home screen for widgets, making your new home much livelier. Android and iPhone both have app icons, but Android also has
widgets. Widgets are like mini apps on your home screen that are interactive or stream information to you. For example, widgets can provide weather updates or upcoming
calendar events. Like your old iPhone, you'll see notifications at the top of the screen, which you can swipe down to review. But on your new phone, you can swipe them left
or right to dismiss them.
Quick access to settings:
On your old iPhone, to adjust settings you opened a Settings app. You can still do that. But now you've also got quick settings. Swipe down from the top of the screen for
easy access to toggles for airplane mode, Wi-Fi, and other frequently used settings.
In the cloud: Your Google account is your key to cloud storage with Google. If you migrated your contacts to your phone, then you can see them from any device or computer
by logging into Gmail. Your Google account includes apps like Calendar and Drive that let you work well with others. And it has apps that let you play too - access your
photos, videos, music from any device when you log in with your Google account. Use Play Music to upload your iTunes library.

11
iO Pro 3D User Manual
Setup up as new
Upon booting up, proceed through the Google wizard to setup your Google account & sync, setup Face Unlock in Smart Lock settings and more. The iO Pro 3D Setup Wizard gives
you the opportunity to personalize your iO PRO 3D, allowing you to craft a smartphone experience that works just the way you want it to. You can customize the software
buttons, gestures and other features as you see fit. Easily swipe down on the home screen to access the Notifications panel and personalize your Quick Settings tray with your
favorite items.

12
iO Pro 3D User Manual
Inserting and removing SIM and memory card
Installing the SIM Card
A SIM card carries useful information, including your mobile phone number, PIN (Personal Identification Number), PIN2, PUK (PIN Unlocking Key), PUK2 (PIN2 Unlocking
Key), IMSI (International Mobile Subscriber Identity), network information, contacts data, and short messages data.
Note: After powering off your mobile phone, wait for a few seconds before removing or inserting a SIM card.
Exercise caution when operating a SIM card, as friction or bending will damage the SIM card.
Properly keep the mobile phone and its fittings such as the SIM cards beyond children's reach.
Installation
● Hold the power key for a while and select power off to power off the mobile phone.
● Place phone with camera facing up and display down as shown.
● Using the SIM tool, remove the SIM tray carefully to prevent SIM from damage.
● Insert SIM(S) and/or SD card with contacts facing down.
● Insert tray gently, it should slide in nicely without resistance.
Note:
The SD card is a miniature object. Please keep it out of the reach of children for fear that children swallow it!
Manage dual SIMs
This information applies only to phones that support dual SIM cards and have both cards inserted.
About dual SIMs
When two SIMs are inserted:
• You see at the top of the home screen.
• Both SIMs can make and receive calls and text messages.

13
iO Pro 3D User Manual
Set up SIM profile
Set SIM options based on how you expect to use the cards:
1. Go to Settings > Network & internet > SIM cards.
2. Select the option that best meets your needs:
• Smart SIM: Automatically select SIM for voice calls based on your call history. In Brazil, selection is also based on your contact's carrier.
• Personal and Work: Use one SIM for personal and the other for work-related voice calls.
• Manual: Choose which SIM to use for voice calls, for data, and for SMS.
3. Follow onscreen instructions to complete setup.
Change SIM name, color, ringtone
When two SIMs are inserted, you'll see them referenced in apps like Contacts,
Messages, and Phone. The SIM name shows your carrier and, if you're using
the Personal and Work profile, shows which it’s assigned to, but you can rename it.
You can also change SIM icon color to make them easy to differentiate.
1. Go to Settings > Network & internet > SIM cards.
2. Tap the SIM to change.
3. Change settings as needed:
• To rename a SIM, tap SIM name, then type a new name.
• To change icon color, Tap Color, then Tap a color.
• To change the SIM's ringtone, Tap Phone ringtone, then select a ringtone.

14
iO Pro 3D User Manual
Add or remove accounts
About accounts
When you set up your phone, you were prompted to add a Google account. If you skipped this, be sure to set one up now so
you can download apps from Play Store, get a customized information feed, and take full advantage of the Calendar, Gmail,
and other apps included with your account. You can also add other web accounts. For each account, you can control which of
its features and apps sync with your phone.
Add Google account
To add a Google account:
1. Go to Settings.
2. Tap Accounts > Add account.
3. Tap Google and follow the onscreen instructions to add an existing account or to create a new one.
4. Once the account is added, Calendar, Contacts, and other account features and apps are updated with information from
that account. You can review and change what syncs with your phone for that account.
Add non-Google account
You can add corporate email accounts, personal email accounts, or other accounts. Many social networking accounts are automatically set up
when you install the app.
1. Go to Settings.
2. Tap Accounts > Add account.
3. Do one of the following:
● Tap the type of account to add and follow the onscreen instructions. Learn more about setting up email accounts.
● If you don't see the type of account you want to add, install the related app from Play Store, then sign into your account through the app.
4.Once the account is added, account-related features and apps are updated with information from that account. To review and change what
syncs with your phone, tap the account type, then account name.

15
iO Pro 3D User Manual
Remove account
If you remove an account, information you synced will be removed from your phone, but it is not
deleted from your account. To remove other accounts:
• Go to Settings > Accounts.
• Tap the account name.
• Tap Remove account.
Set up email
Set up personal email
You can add multiple email accounts of the following types:
● Gmail
● Personal email from other providers (IMAP/POP)
If you added a Google account on your phone:
● When you open the Gmail app for the first time, you'll see your email for that account.
You're already set up.
● To set up additional accounts, open Gmail and tap > Settings > Add account.
If you didn’t add a Google account to your phone and want to set up email for an
IMAP/POP provider (an address that's not Gmail):
1. Open the Gmail app.
2. Follow the onscreen instructions to enter your email address, password, and account options.
If you have problems setting up the account, read Google's help for Gmail.

16
iO Pro 3D User Manual
Set up corporate email
If you use Microsoft Office Outlook on your work computer, your phone can synchronize emails, calendar events, and contacts with the Microsoft Exchange server. Before you start, you'll
need the following information from your company's IT department:
● Email address
● Email password
● Domain name
● Username
● Server name
● Security type/SSL settings
● Client certificate requirement to set up
corporate email:
1. Open the Gmail app.
2. Do one of the following:
● If this is your first time opening the Gmail
app, tap Add an email address.
● If you have been using Gmail with another
account, tap > Settings > Add account.
3. Tap Exchange
4. Follow the onscreen instructions to enter your
email address, password, and other information
from your company's IT department.

17
iO Pro 3D User Manual
Battery information
Charging information
Charging the Battery
Your mobile phone can monitor and display the battery state.
Normally the remaining energy of the battery is indicated by the battery level icon at the upper
right corner of the display screen.
When the battery energy is insufficient, the mobile phone prompts "Battery low".
Using a travel adapter:
● Connect the charging port of the adapter to the mobile phone. Ensure that the adapter is
fully inserted.
● Insert the plug of the travel charger to an appropriate power outlet.
● During the charging, the battery level grids in the battery icon keep flickering till the battery is
fully charged.
● The battery icon will no longer flicker when the charging process ends.
Note:
Ensure that the plug of the charger, the plug of the earphone, and the plug of the USB cable are
inserted in the right direction. Inserting them in the wrong direction may cause charging failure
or other problems.
Before the charging, ensure that the standard voltage and frequency of the local main supply
match the rated voltage and power of the travel charger.
Optimizing battery life
You can extend your battery’s life between charges by turning off features that you don’t need.
You can also monitor how applications and system resources consume battery power.
To guarantee the optimal performance of your battery, please stick to the following rules:
● Turn off radios that you aren’t using. If you aren’t using Wi-Fi, Bluetooth, or mobile data, use
the Setting application to turn them off.
● Turn down screen brightness and set a shorter screen timeout.
● If you don’t need them, turn off automatic syncing for Gmail, Calendar, Contacts, and other
applications.
Note:
On the Home screen, press Settings icon and tap Settings > Battery. The
Battery Use screen lists the applications that have been using the battery,
from greatest to least battery use. The top of the screen displays the time
since you were last connected to a charger or, if you’re currently connected
to one, how long you were running on battery power before you connected
to a charger. Then each application or service that used battery power during
that time is displayed, in order of the amount of power they used. Tap an
application in the Battery Use screen to learn details about its power
consumption. Different applications offer different kinds of information.

18
iO Pro 3D User Manual
Home and lock screen
About your lock screen
The lock screen appears when you're using a screen lock and you turn on or wake your phone.
From the lock screen, you can:
• View and respond to notifications. Double tap one to open it.
• Open your quick settings. Swipe down from top of screen.
• Start a voice search. Swipe right.
• Open the camera. Swipe left.
Go into Lockdown. Temporarily turn off notifications and fingerprint unlocking. You can customize your lock screen to:
• Swipe down from top of screen.
• Start a voice search. Swipe right.
• Open the camera. Swipe left.
Go into Lockdown. Temporarily turn off notifications and fingerprint unlocking.
You can customize your lock screen to:
• Control which notifications, if any, appear.
• Add your name or a short message.
Screen lock options
When you set a screen lock, each time you turn on your phone or wake the screen, you’ll be asked to unlock your phone.
No lock:
• None: This gives no protection, but you can quickly access your home screen.
• Swipe: Swipe up. This prevents accidental dialing but doesn't secure the phone.
• Pattern: Draw a pattern on a grid.

19
iO Pro 3D User Manual
PIN: Enter a four to sixteen-digit numeric code. Longer PINs are more secure.
Password: Enter four to sixteen letters, digits, or symbols for the password. A long, strong password is the most secure option.
When you’re using any of the 3 locks, you can also unlock with your fingerprint sensor and set your phone to automatically unlock in certain conditions.
• Set or change screen lock
• Go to Settings > Security & location.
• Tap Screen lock and select the type of lock you want.
Some options aren't available if you added a VPN or a work (corporate) email account to your phone.

20
iO Pro 3D User Manual
Hide your password or pattern
You can hide your password or pattern to prevent others from viewing it when you unlock your screen.
For passwords:
Go to Settings > Security & location > Show passwords.
Turn Show passwords off .
For patterns: Go to Settings > Security & location.
Tap .
Turn Make pattern visible off .
Quickly tighten lock screen security
Unlocking with the fingerprint sensor and setting up automatic unlocking make it easier to keep your phone
secure and minimize when you need to enter your PIN, pattern, or password. But sometimes you need to trade
convenience for more security. You can temporarily tighten locks and prevent lock screen notifications.
To set it up:
Go to Settings > Security & location > Lock screen preferences.
● Turn Show lockdown option on .
To use it:
● Press & hold the Power button.
● Tap Lockdown.
Your fingerprint sensor and automatic unlock settings are disabled and notifications won’t be displayed on your
lock screen.
To exit Lockdown, unlock your phone with your PIN, Pattern, or Password.
Unlock your screen automatically
If you're using a PIN, Password, or Pattern, you can:
Stay unlocked when connected to a device, like your car audio system.
/