Page is loading ...

Model SL611
Multi-Function Event Recorder
with On Screen Titling
Before connecting, operating, or adjusting this product, please read this instruction
manual carefully and completely.
Security Labs 1-800-774-0284
www.spycorder.com

Contents, Features, Overview 1
Product Safety Information 2
Quick Start Guide, Video Tapes 5
Front Panel, Remote Control 6
Operation and Use, Menus 7
Operation and Use, Functional Desc. 10
Rear Panel Connections 13
Security System Components 15
Trouble Shooting 16
Specifications 17
Installation and Settings Worksheet 18
Warranty Back Cover
Four Head Helical Scan Video Recording and Playback
On Screen Time-Date with Seconds and Frame Counter
Automatic Power On When Triggered
Normally Open & Normally Closed Event Trigger Inputs
Normally Open Panic Record Input
62 Programmable Event Record Times
Five Programmable DAILY Recording Times
Five Programmable ONE TIME Recording Times
Three Programmable TRIGGER BLOCK Times (daily)
Battery Back-Up Retains Time Stamp
Automatic Tracking
Eight Hour Recording with a T-160 Tape
Real Time Recording or Full Video Documentation
Three Selectable End of Tape Options:
- Automatic Eject
- Automatic Rewind and Standby
- Loop Record (Endless Recording Mode)
On Screen Programming with Hand Held IR Remote
Digital Shuttle Control with Slow Motion Playback
Your event recorder is an advanced, high-quality audio/video recorder designed for use within a video surveillance sys-
tem. Its basic function is to record the closed-circuit camera's picture and sound after the recorder is triggered. The
unit will record for the selected event duration after an event record trigger ceases, or to the end of the tape if a
momentary panic record trigger occurs. It also has the ability to record continuously for up to 8 hours with a T-160 tape.
In the Loop Record mode, it will record for virtually an unlimited period. The recorder can turn itself on automatically
while you're away, staying ready to capture important events. It can be connected to the wide variety of detection
devices available, such as a simple door switch, passive infrared detectors, sound detectors, window glass breakage
detectors, magnetic door and window switches and other devices. After the unit has recorded sound and picture, you
can review the picture with the remote control provided. With the purchase of an inexpensive video camera, you can
put your event recorder to work in your business or home. Each event recorded has the time & date on the screen so
you can see when the event occurred. Now you can monitor when your employees or service personnel come and go,
track peak customer traffic, monitor cash drawer(s) or stock room/office(s), or verify events around your home while
you were away.
1
CONTENTS
FEATURES
OVERVIEW

PRODUCT SAFETY INFORMATION
CAUTION: TO PREVENT ELECTRIC SHOCK, DO NOT USE THIS (POLARIZED) PLUG WITH AN EXTENSION
CORD, RECEPTACLE OR OTHER OUTLET UNLESS THE PLUG CAN BE FULLY INSERTED WITHOUT EXPOS-
ING ANY PARTS OF THE BLADES. DO NOT OPEN THE CASE. THERE ARE NO USER SERVICEABLE PARTS
INSIDE. REFER SERVICING ONLY TO QUALIFIED SERVICE PERSONNEL.
WARNING:
Many television programs and films are copyrighted. In certain circumstances, copyright law may apply to private
in-home video taping of copyrighted materials.
FCC WARNING: This equipment may generate or use radio frequency energy. Changes or modifications to this equip-
ment may cause harmful interference unless the modifications are expressly approved in the instruction manual. The
user could lose the authority to operate this equipment if an unauthorized change or modification is made.
MOISTURE CONDENSATION: If you pour a cold liquid into a glass, water vapor in the air will condense on the sur-
face of the glass. This is moisture condensation. Moisture condensation on the head drum, one of the most crucial
parts of the unit, will cause damage to the tape. When the VCR is exposed to a rapid temperature change from cold
to warm, some condensation will occur. Under this condition, connect the power cord to the AC line, press POWER
button on and allow at least two hours for the VCR to dry out.
The serial number is found on the back of this unit. This number is unique to this unit and not available to others. You
should record requested information here and retain this guide as a permanent record of your purchase.
MODEL NUMBER: ___________________________
SERIAL NUMBER: ___________________________
DATE OF PURCHASE: _______________________
THIS VIDEO CASSETTE RECORDER SHOULD BE OPERATED WITH AC 120V, 60Hz CURRENT ONLY.
THIS VIDEO DECK IS A VHS TYPE RECORDER. FOR PROPER OPERATION, USE ONLY A VHS TYPE VIDEO
CASSETTE.
REGULATORY INFORMATION: This equipment has been tested and found to comply with the limits for a Class B dig-
ital device, pursuant to Part 15 of the FCC Rules. These limits are designed to provide reasonable protection against
harmful interference in a residential installation. This equipment generates, uses, and can radiate radio frequency
energy and, if not installed and used in accordance with instructions, may cause harmful interference to radio com-
munications.
However, there is no guarantee that interference will not occur in a particular installation. If this equipment does cause
harmful interference to radio or television reception, which can be determined by turning the equipment off and on, the
user is encouraged to try to correct the interference by one or more of the following measures:
* Reorient or relocate the receiving antenna.
* Increase the separation between the equipment and receiver.
* Connect the equipment into an outlet on a circuit different from that to the receiver is connected.
* Consult the dealer or an experienced radio/TV Technician for help.
This Class B digital apparatus meets all requirements of the Canadian Interference-Causing Equipment Regulations.
Cet appareil numerique de la classe B respecte toutes les exigences du Reglement sur le materiel brouilleur du
Canada.
2

PRODUCT SAFETY INFORMATION (continued)
IMPORTANT SAFEGUARDS
1. Read Instructions--All the safety and operation instructions should be read before the product is operated.
2. Retain Instructions--The safety and operation instructions should be retained for future reference.
3. Heed Warnings--All warnings on the product and in the operating instructions should be adhered to.
4. Follow Instructions--All operating and use instructions should be followed.
5. Cleaning--Unplug this product from the wall outlet before cleaning. Do not use liquid cleaners or aerosol cleaners.
Use a damp cloth for cleaning THE EXTERIOR CASE ONLY. Exception: Products meant for continuous use, such as
a cable converter, may be left plugged in.
6. Attachments--Do not use attachments not recommended by the product manufacturer as they may cause hazards.
7. Water and Moisture--Do not use this product near water, or near moist or damp areas.
8. Accessories--Do not place this product on an unstable cart, stand, tripod, bracket, or table. The product may fall,
causing serious injury to a child or adult, and serious damage to the product. Use only with a cart, stand, tripod, brack-
et, or table recommended by the manufacturer, or sold with the product. Any mounting of the product should follow
the manufacturer's instructions, and should use a mounting accessory recommended by the manufacturer.
9. Movement with Accessories--Moving this product while positioned on a cart should be done carefully. Quick stops,
excessive force, and uneven surfaces may cause the product and cart combination to overturn.
10. Ventilation--Slots and openings in the cabinet are provided for ventilation and to ensure reliable operation of the
product and to protect it from overheating. And these openings must not be blocked or covered. The openings should
never be blocked by placing the product on a bed, sofa, rug or other similar surface. This product should not
be placed in a built-in installation such as a bookcase or rack unless proper ventilation is provided or the manufactur-
er's instructions have been followed.
11. Power Source--This product should be operated only from the type of power source indicated on the marking label.
If you are not sure of the type of power supply to your home, consult your product dealer or local power company. For
products intended to operate from battery power, or other source, refer to the operating instructions.
12. Grounding or Polarization--This product may be equipped with a polarized alternating-current line plug (a plug hav-
ing one blade wider than the other). This plug will fit into the power outlet only one way. This is a safety feature. If
you are unable to insert the plug fully into the outlet, try reversing the plug. If the plug should still fail to fit, contact your
electrician to replace your obsolete outlet. Do not defeat the safety purpose of the polarized plug.
13. Power-Cord Protection--Power-supply cords should be routed so that they are not likely to be walked on or pinched
by items placed upon or against them. Pay particular attention to cords at plugs and the point where they exit the prod-
uct.
14. Accessory inputs-- Only use dry contact type switches as triggering devices / inputs to the security terminal.
Introducing voltage to the event or panic record inputs may cause damage to the recorder as well as the device being
connected. EOT (end of tape) devices must observe polarity and limit DC voltage to 15 volts. Current consumption of
an EOT device must be limited to 100 ma or less. All connections to the rear screw terminal must be free of an AC
component signal and RF noise. Shielded cable should be used for trigger input cable runs over 25 ft. in length.
3

PRODUCT SAFETY INFORMATION (continued)
15. Outdoor Antenna Grounding--If an outside antenna or cable system is connected to the product, be sure the anten-
na or cable system is grounded so as to provide some protection against voltage surges and built-up static charges.
Article 810 of the National Electrical Code, ANSI/NFPA 70, provides information with regarding proper grounding of the
mast and supporting structure, grounding of the lead-in wire to an antenna discharge unit, size of grounding conduc-
tors, location of antenna-discharge unit, connection to grounding electrodes, and requirements for the grounding elec-
trode.
16. Lightning--For added protection for the product during a lightning storm or when it is left unattended and unused
for long periods of time, unplug it from the wall outlet and disconnect the antenna or cable system. This will prevent
damage to the product due to lightning and power-line surges.
17. Power Lines--An outside antenna system should not be located in the vicinity of overhead power lines or other elec-
tric light or power circuits, or where it can fall into such power lines or circuits. When installing an outside antenna sys-
tem, extreme care should be taken to keep from touching such power lines or circuits as contact with them
might be fatal.
18. Overloading--Do not overload wall outlets and extension cords as this can result in a risk of fire electric shock.
19. Object and Liquid Entry--Never push objects of any kind through openings into this product as they may touch dan-
gerous voltage points or short-out parts that could result in a fire or electric shock. Never spill liquid of any kind on the
product.
20. Servicing--Do not attempt to service this product yourself as opening or removing covers may expose you to dan-
gerous voltage or other hazards. Refer all servicing to qualified service personnel.
21. Damage Requiring Service--Unplug this product from the wall outlet and refer servicing to qualified service per-
sonnel under the following conditions:
a. When the power-supply cord or plug is damaged.
b. If liquid has been spilled or objects have fallen into the product.
c. If the product has been exposed to rain or water.
d. If the product does not operate normally by following the operating
instructions. Adjust only those controls that are covered by the operating instructions as an improper adjust
ment of other controls may result in damage and will often require extensive work by a qualified technician
to restore the product to its normal operation.
e. If the product has been dropped or the cabinet has been damaged.
f. When the product exhibits a distinct change in performance-this indicates a need for service.
22. Replacement Parts--When replacement parts are required, be sure the service technician has used replacement
parts specified by the manufacturer or have the same characteristics as the original part. Unauthorized substitutions
may result in fire, electric shock, or other hazards.
23. Safety Check--Upon completion of any service or repairs to this product, ask the service technician to perform safe-
ty checks to determine that the product is in proper operating condition.
24. Wall or Ceiling Mounting--The product should by mounted to a wall or ceiling only as recommended by the manu-
facturer.
25. Heat--The product should be situated away from heat sources such as radiators, heat registers, stoves, or other
products (including amplifiers) that produce heat. USE ONLY IN A WELL VENTILATED AREA.
4

QUICK START GUIDE
The Quick Start Guide is intended for experienced CCTV - security recorder users. Please
refer to operation and use for further operational instructions.
> Connect camera to VIDEO INPUT on rear of recorder.
> Connect video monitor to the VIDEO OUTPUT on the rear of the recorder.
SECURITY TERMINAL CONNECTIONS (if event and/or panic record trigger switches are used):
> If used, connect normally-open and / or normally closed event record switches to screw terminals 1 and 3 (normally open) and 3
and 4 (normally closed). IF NORMALLY CLOSED EVENT SWITCHES ARE USED, REMOVE FACTORY JUMPER CONNEC-
TION BETWEEN SCREWS 3 AND 4. IF NORMALLY CLOSED SWITCHES ARE NOT USED, THE JUMPER MUST BE LEFT
IN PLACE.
> If used, connect normally-open panic record switches to screw terminals 2 and 3.
> Insert recorder AC plug into outlet.
> Turn power on and insert a rewound video cassette.
> Set clock with remote control.
> Set security function preferences with remote control, YOUR EVENT RECORDER IS NOW READY!
POWER UP WHEN PLUGGED IN
The VCR will initialize when AC power is applied. The microprocessor will set the clock as well as check trigger
inputs. The on screen display of “STANDBY” will occur each time the recorder is plugged in. This is normal.
VIDEO TAPES
VIDEO TAPES
Due to the heavy usage associated with security recorders, only high grade, quality tapes should be used. Do not
purchase off brand or discount tapes. They will dramatically shorten the life of the recorder. Observe the following
table for recording times for standard tape lengths:
RECORD SPEED T-120 T-160
SP 120 minutes 160 minutes
EP 360 minutes 480 minutes
TAPE REPLACEMENT / CLEANING
Your video recorder should be cleaned by a professional every 6 months, or sooner, if the recorder is being used
constantly (as in the loop mode). Video tapes should be replaced at least every 30 days. Refer all servicing of your
recorder to the manufacturer or a qualified service technician.
5

OPERATION AND USE - Front Panel/Remote
FRONT PANEL / DISPLAY
The front panel of the recorder incorporates the basic functions: POWER, STOP/EJECT, CHANNEL/TRACKING,
RECORD, REWIND, PLAY/PAUSE, and FAST FORWARD. The front panel display has visual indicators showing
machine status:
The GREEN power indicator shows the VCR power is on. The RED record indicator shows when the VCR is in the
record mode. The RED VCR indicator shows when the machine is in the VCR mode. This is only important when a
TV is connected to the RF OUT jack on the rear of the VCR (disregard when a monitor is connected to the video out
connection). The RED OTR (one touch recording) indicator shows when the unit is in the OTR recording mode.
OTR (One Touch Recording)
OTR can be used to place the VCR into record for a preset time of 30 minutes to 4 hours, in 30 or 60 minute incre-
ments. Pressing the RECORD button on the front panel (while the unit is already in record) enables the OTR function.
Each time the RECORD button is pressed, there will be an on screen indication of the time requested for OTR. To clear
the OTR time, hold in on the FRONT PANEL stop button for approx. 5 seconds until the machine stops recording and
the OTR indicator disappears. OTR can not be activated via the remote control.
6
POWER REC VCR OTR
REMOTE FUNCTIONS
POWER: Press to turn your VCR on and off.
INPUT: Switches between tuner and AV rear panel input. AV is the automatic default
selection.
NUMBERS: Press to set times and enter menu screens.
PLAYBACK: Press to view a video cassette.
REW: Press to REWIND a video tape.
FF: Press to FAST FORWARD through a video cassette.
STOP: Press to STOP a video cassette
TV/VCR: For use when a TV is used as a monitor and is connected to the rear RF
OUT jack. Place in the VCR mode when monitoring with a TV.
SPEED: Press to select recording speed (SP or EP). EP is the default speed until
changed. If your recorder is left unplugged for an extended period, the speed will
default to EP.
CLEAR: Press to clear the real time tape counter when the counter is visible in the
upper right hand screen. Clear is also used to clear certain security functions during
security setup.
MENU: Press to enter into the setup and selection menus.
CH/TRK: Press to adjust playback tracking while viewing a cassette recording. Press
while VCR is stopped to select tuner channels (if a cable TV signal is connected to
the ANT IN jack).
CM SKIP: Not used on this model.
DISPLAY: Press once to display the on screen status and counter. Press twice to
enable counter to remain on screen in upper right hand corner (the counter is NOT
recorded).
P/S: Press to pause the video cassette during record or playback.
CM SKIP: This function is not used on this model.
CH +/-: During playback of a tape, -/+ will adjust tracking to assist in delivering a
clear video picture. Pressing - or + in the video mode (not recording) will move the
machine into the tuner mode and allow the user to select cable TV signals, and
increment the tuner one channel at a time. The -/+ buttons are also used to change
certain menu items during setup.
REC/OTR: Press to place the unit into manual recording. The OTR (one time record)
function is not available from the remote. Use OTR on the front VCR panel.
MENU: Press this button to enter the setup menus.

OPERATION AND USE - Menus
SECURITY FUNCTIONS / MENUS
To set up user preferences for security recording, press the menu button on the remote control. The first menu dis-
played allows you to select other setup menus. SEE A DETAILED DESCRIPTION OF EACH FUNCTION IN “OPER-
ATION AND USE - FUNCTIONAL DESCRIPTIONS” pages 10 - 12.
7
EDIT RECORD OPTIONS MENU (enter from EDIT
SECURITY FEATURES Menu selection # 1)
1) RECORD DURATION: Pressing the REW and FF
buttons on the remote toggle the value for the record
duration. You will find 62 different event times (10 sec,
30 sec., and 1 to 60 min. in one minute increments).
Another selection just prior to the “one minute” selection
is LOOP (shown).
2) REWIND AND STANDBY or REWIND AND EJECT:
Selectable for end of tape option for the tape to rewind
and eject to prevent record over, or rewind and standby
to allow additional events to be recorded. The LOOP
setting under RECORD DURATION WILL OVER
RIDE THE REWIND OPTION. The LOOP setting
enables the machine to REWIND and RECORD.
3) SET SCREEN TEXT: To set on screen text and
placement (see page 8).
MAIN MENU (EDIT SECURITY FEATURES)
Within the main menu, the you may select the following
options:
1) SET RECORD OPTIONS: To select triggered record
durations, end of tape options, and to set screen text
(see below).
2) SET TIMED EVENTS: To set future automatically
recorded timed events, or to block triggers (see page
8).
3) SET CLOCK: To set the clock (see below).
4) ON SCREEN : ON /OFF: By pressing “4” in this
menu, the user toggles the on screen time, date, and
text display ON and OFF.
SET CLOCK MENU (enter from EDIT SECURITY
FEATURES Menu selection # 3)
Enter the current time (as a four digit number, ie. 0433
= 4:33 or 1210 = 12:10) A request for AM or PM will
appear after the time portion is entered. If you enter an
incorrect digit, pressing the clear button will move you
back through your entry. After setting the clock and exit-
ing all the way out of all menus, the recorder will dis-
play “STANDBY” for a few seconds while it initializes
the internal clock.

OPERATION AND USE - Menus (continued)
Setting Screen Text and Preprogrammed Events:
8
SET SCREEN TEXT MENU (enter from Edit Record
Options Menu selection # 3)
1) TITLE ROW: Select which row (up and down place-
ment) the text will appear on by repeatedly pressing the
“1” button. Row #1 is the highest row (just above the
middle of the screen), row #7 is just above the time and
date.
2) TITLE COL: Select which column (side to side place-
ment) that the test will start on by repeatedly pressing
the “2” button.. Observe that text may “bleed” onto the
next row if the text length is too long for the column it is
placed in. Col # 0 is all the way to the left of the screen.
3) SET TEXT: Another menu in which the actual char-
acters of text are set (see below).
EDIT TEXT MENU (enter from SET SCREEN TEXT
Menu selection # 3)
After entering this menu, the user will find 20 “dashes”.
These dashes are place holders for text characters. To
select which place the first character will go, toggle the
+ and - buttons back and forth on the remote. Once the
placement is selected, toggle the REW and FF buttons
back and forth to select the specific character. Observe
numbers, letters, and other characters are available. To
move to the next character, advance using the + button.
To rewrite over a previous character, move backward
with the - key. Up to 20 characters (including spaces)
are available. To view actual screen placement, exit
menus and view screen. Experiment for the best place-
ment of your text.
SELECT EVENT TYPE MENU (enter from EDIT SECU-
RITY FEATURES Menu selection # 2)
1) SET DAILY EVENT: To preset the on and off time for
up to five separate events (see page 9).
2) SET ONE TIME EVENT: To preset a One Time Event
on time, off time, and date that it will occur. Five separate
One Time Events can be programmed (see page 9).
3) SET TRIGGER BLOCK TIME: To select the trigger off
times so that normally open or normally closed event
triggers will not cause the machine to record. Three sep-
arate trigger blocks can be set. (see page 9). NOTE:
Trigger blocks DO NOT disable a PANIC RECORD trig-
ger.

OPERATION AND USE - Menus (continued)
Setting Daily, One Time, and Trigger Block Programmed Event Times:
9
SET DAILY EVENT MENU (enter from SELECT
EVENT TYPE Menu selection # 1)
To set a daily event (occurs each day, seven days a
week), set the start time and end time. An AM or PM
prompt will be given after each time input. To set addi-
tional daily events after entering the first one, press for-
ward with the + button on the remote. You can review
each Daily Event by pressing the -/+ buttons on the
remote. Observe the number of each block set in the
upper left hand corner of the menu screen.Up to five
separate events can be set. SEE OPERATIONS AND
USE “FUNCTIONAL DESCRIPTIONS” for additional
requirements.
SET ONE TIME EVENT MENU (enter from SELECT
EVENT TYPE Menu selection # 2)
Set a one time event (occurs one time only) by setting
the start time, the start date, and the end time. To set
additional one time events after entering the first one,
toggle forward with the + key on the remote. Up to five
separate one time events may be set. You can review
each One Time Event by pressing the -/+ buttons on
the remote. Observe the number of each block set in
the upper left hand corner of the menu screen. A entire
event can be cleared by pressing the CLEAR button on
the remote during review. SEE OPERATIONS AND
USE “FUNCTIONAL DESCRIPTIONS” for additional
requirements.
SET TRIGGER BLOCK TIME MENU (enter from
SELECT EVENT TYPE Menu selection # 3)
Set a trigger block to disable all normally open and nor-
mally closed event triggers from starting the record
function. Trigger blocks DO NOT disable a PANIC
RECORD trigger. To set additional trigger block times
after entering the first one, press the + button on the
remote. Up to three separate trigger block times may
be set. You can review each trigger block setting by
pressing the -/+ buttons on the remote. Observe the
number of each block set in the upper left hand corner
of the menu screen. A entire trigger block can be
cleared by pressing the CLEAR button on the remote
during review. Trigger block start times must be for a
“future” time. SEE OPERATIONS AND USE “FUNC-
TIONAL DESCRIPTIONS” for additional requirements.

OPERATION AND USE - Functional Descriptions
TIME & DATE, FRAME COUNTER
Whenever the unit is recording, a time/date "stamp" is placed on the recording. Located next to the time is the frame
counter which runs during recording. The frame counter counts rapidly from 0-99 and then starts over again. The frame
counter allows specific frame identification on playback. The time/date will be recorded onto any NTSC composite
video signal input through the rear panel VIDEO IN jack. A signal input through the rear ANT IN connector will not
record time/date.
TIME & DATE BATTERY BACK-UP
The time/date stamp is kept in memory in the event of a AC power outage. If the unit is in the 'loop record' mode, the
unit will start recording again after power is restored. In all other modes, the unit will be in the 'off' mode when power
is restored. Any event trigger will then start the recorder automatically. If you are present during a power outage, it is
advisable to unplug the recorder until AC power is restored. The restoration of power may cause a momentary surge
in the AC line and unplugging the recorder will prevent possible damage.
AUTOMATIC AV MODE
All external switch contacts on the rear of the recorder that initiate record will automatically command the VCR to go
into the AV mode prior to recording. If cable recording is desired, place the unit into the tuner cable mode and manu-
ally start record. This feature will always keep the unit linked to the camera (video) input. The recorder also powers up
into the AV mode automatically.
EVENT RECORDING (EDIT RECORD OPTIONS MENU, PAGE 7)
This event recorder can be used to record manually or automatically, depending upon the need. While connected to
the security switches described in the installation section, the unit will record each time a switch is activated. The record
duration should be set according to the amount of time you desire the unit to record after the switch is no longer acti-
vated. If the unit is set to record in the 30 second selection, for example, it will start recording as soon as a trigger
(switch activation) is detected. After the trigger is deactivated, it will automatically record for the 30 second interval, and
then standby for the next trigger. If, for example, a magnetic door switch is used, the unit will begin recording when the
door is opened. AS LONG AS THE DOOR IS OPEN, IT RECORDS. After the door is closed, it will record for the time
interval set. This function is important to keep in mind when setting up the kind of switch system to be used, so that
the tape use will be maximized and "dead spots" (recording of unimportant activity) will be minimized. Record time
intervals are approximate. Make sure each interval is correct for your application by a test run. Switch inputs are
"edge triggered" and detect a change in the state of the switch. You may stop the recorder while the switch is
"active" but another trigger will be required to start the recorder again if manually stopped. IMPORTANT: An
event trigger record duration is terminated at the end of a tape, ie. if the machine is triggered to record for a 27 minute
event and the tape has only 2 minutes left on it, only 2 minutes of that event will be recorded. It will not continue to
record at the beginning of the tape until a new trigger is initiated. SEE TERMINATION OF RECORDINGS.
LOOP RECORD SETTING (EDIT RECORD OPTIONS MENU, PAGE 7)
This function is found as a selection in the record duration setting and when enabled the unit will record continuously.
At the end of a recorded tape, the unit automatically rewinds the tape. When rewinding is complete, the unit will auto-
matically start recording again. This function is useful for recording all events. If the unit is recording on a standard T-
120 tape in the SP mode, the user has less than two hours after a specific event to stop the tape if the event is to be
retained on the tape. If the unit is set to EP, the event will be recorded over in 6 hours and so on. TO START LOOP
RECORD ON ANY TAPE PRESS RECORD ON THE FRONT PANEL OR REMOTE. LOOP RECORD will also be acti-
vated by any external trigger. A on screen indicator “L” (lower left hand corner of the screen) shows the unit is in LOOP
MODE. You can stop the recorder while in loop record, but to reinstate loop record requires pushing record from the
front panel or remote or getting another external trigger. LOOP RECORD setting has priority over the EOT options of
rewind and standby or eject. IMPORTANT: Care needs to be used in the LOOP MODE. Prior events will be erased
as the machine records over the tape continuously.
AUTOMATIC POWER-UP
This event recorder is designed to be used from a POWER OFF mode. When a trigger is detected, the unit will auto-
matically turn itself on and begin recording. The automatic power-up feature was designed to make the recorder
usable, even if the unit was accidentally turned off. If the unit is left in the "off" mode, the user can immediately know
if an event was recorded because the unit will be in the "on" mode after an event is recorded. The user can then review
the tape, turn the unit off, and be ready for the next event recording.
10

OPERATION AND USE - Functional Descriptions (continued)
ON SCREEN TEXT Up to 20 on screen text or message characters can be set with adjustable placement. This can
be used to identify camera location, recorder, store number, etc. See page 8 for instructions to set and place text. (SEE
SET SCREEN TEXT ON PAGE 8)
PANIC RECORD
Connection of a normally-open switch may be used to take advantage of the PANIC RECORD FUNCTION. When this
switch is closed, (momentarily) the unit will start recording and WILL NOT STOP UNTIL THE END OF THE TAPE, OR
UNTIL THE USER MANUALLY PUSHES "STOP" ON THE FRONT PANEL OR ON THE REMOTE. Any triggers detect-
ed by the EVENT RECORD contacts will be disregarded while the event recorder is in the PANIC RECORD mode.
This function can be used by independently allowing the unit to record to the end of the tape each time a PANIC
RECORD trigger is detected. It can also be used in conjunction with the EVENT RECORD feature, by putting a nor-
mally-open "panic switch" on the contacts. EXAMPLE: While a door switch or other switch device turns the EVENT
RECORD features on to record customer traffic, a normally-open "panic switch" button can be placed underneath the
register at the front counter. Should an event occur that should be continuously recorded, the panic switch can be
pushed. IMPORTANT: A panic trigger record duration is terminated at the end of a tape, ie. if the machine is triggered
to panic record (to the end of tape) and only a few minutes remain on the tape, only a few minutes will be recorded.
The machine will then rewind and standby or rewind and eject. Make sure adequate tape is available when using the
PANIC RECORD function. (SEE TERMINATION OF RECORDINGS AT BOTOM OF PAGE)
ONE TIME AND DAILY PROGRAMMED RECORDING
This event recorder can be used to record specific time events, such as the arrival of employees each day, closing,
break times, etc. by using the programmed timer recording. Up to five different daily (occurs 7 days a week) and five
one time programmed recordings can be set. Observe that if the user sets a recording to “overlap” another pro-
grammed recording, that the recorder will miss the one that is overlapped (do not set one program to start within the
duration of another). Panic and event record triggers will be ignored while the machine is recording a programmed
event. IMPORTANT: When the end of tape is reached, the recorder will rewind and eject or rewind and standby. Care
should be used to have enough tape available when setting programmed recordings. (SEE TERMINATION OF
RECORDINGS AT BOTOM OF PAGE & MENUS ON PAGE 9)
END OF TAPE (EOT) OPTIONS (SEE RECORD OPTIONS MENU PAGE 7)
REWIND AND STANDBY: At the end of the tape, the unit will automatically rewind. When at the beginning of the tape,
the unit will standby for the next trigger activation to begin recording.
REWIND AND EJECT: At the end of the tape, the unit will automatically rewind, and then EJECT. This is a useful func-
tion if the tape needs to be saved after recording. To continuously record, see LOOP RECORDING (page 10).
A LOOP Setting under RECORD DURATION will over ride the Standby and Eject settings. LOOP will disregard
the EOT setting and record continuously.
TRIGGER BLOCKING
Trigger blocking is available for users who wish to disable the normally open and normally closed event recording trig-
ger inputs on the rear security terminal. The PANIC RECORD input will NOT be disabled with a trigger block. One pos-
sible use for trigger blocking would be if the user has a business installation with door switches and motion detectors.
The user wants to record with these detectors only after the business is closed, but wants to have a panic record input
under the counter for emergency recording. After the business is closed, the triggers become active and will record
should a door open or if there is motion within the business. Up to three trigger block periods can be set. A trigger block
start time becomes active the NEXT instance the start time occurs (a trigger block cannot be set to be active at 1:00pm
if you set it at 1:01pm; it will be active the FOLLOWING day at 1:00pm). (SEE TRIGGER BLOCK TIME MENU PAGE
9)
TERMINATION OF RECORDINGS
As mentioned previously, the VCR terminates the duration of all recordings at the end of tape, except in the case of
LOOP RECORDING. A new command to record after the tape is rewound is given in the LOOP RECORDING setting.
All other times or durations remaining (one time or daily programmed settings, panic record, event record) will ‘zero
out’ at the end of the tape. The machine will rewind and standby or rewind and eject, depending upon the setting found
in the EDIT RECORD OPTIONS menu found on page 7. The user needs to plan the recording needs and priorities of
the installation and plan tape usage accordingly.
11

OPERATION AND USE - Functional Descriptions (continued)
RECORD DELAY INTERVAL
When the unit receives its first record trigger, the tape loads around the heads before actual recording begins. Whether
the unit is in the POWER OFF or POWER ON mode, it will take approximately two seconds to begin its first recording.
After the first trigger, the unit will be in the INSTANT RECORD MODE for approximately five minutes. If no further trig-
gers are detected, the unit will go back into standby, and will take approximately two seconds to start recording again.
As long as a trigger is detected at least every five minutes, the unit will remain in the INSTANT RECORD MODE. This
feature is present to prevent the tape from breaking due to extended periods of time of tape/video head contact. If a
two second record delay is not desirable, detection switches should be specifically placed to compensate. Many appli-
cations of recording will have a switch activation every five minutes and will keep the unit in the INSTANT RECORD
MODE.
ACTIVATION SWITCHES / ALARM PANELS Any activation switch that has a momentary closure (normally-open), or
a momentary opening (normally - closed) will activate the event recorder. Observe installation guidelines as outlined.
ALARM PANELS: DO NOT CONNECT THE UNIT DIRECTLY TO ACTIVATION SWITCHES THAT ARE CURRENTLY
IN USE BY ANY EXISTING ALARM PANEL. DAMAGE TO THE VCR AND ALARM PANEL COULD RESULT. Since
the recorder uses a 5 volt sensing circuit on its activation switch terminals, only dedicated switches can be used. An
existing switch from an alarm panel can be used, but must be disconnected from all present connections before con-
necting to the recorder. Make sure your alarm system will still have adequate switch coverage before removing a
switch. The recorder can be connected to an unused accessory terminal on the alarm panel. This accessory terminal
must be free of any voltage and be compatible (momentary, normally-open or normally-closed contact). Activation
switches can include passive infrared detectors, sonic detectors, infrared beams, magnetic switches, glass foils, or
other devices. (SEE SECURITY SYSTEM COMPONENTS)
END OF TAPE CONTACT
Screw #5 on the terminal block will close momentarily (approx. one second) to the common terminal (screw #3) when
the tape is at the end. This circuit utilizes an open collector transistor that is pulled to ground. Make sure that any load
on this contact is rated below 100 mA. A low current buzzer circuit can be connected to these contacts to remind the
user to change tapes. Another use is to extend recording time by allowing these contacts to trigger another event
recorder. The user must observe polarity when making connection to the end of tape contacts. (SEE CONNECTING
UNITS TOGETHER & REAR PANEL CONNECTIONS)
CONNECTING UNITS TOGETHER
This unit can be used in series with others of the same model to extend recording time. At the end of each tape, the
END OF TAPE contacts will trigger the next unit to begin recording to the end of tape. This option is for continuous
recording only, not for use with the EVENT RECORD connections. To use the CONTINUOUS RECORD- multiple unit
operation, connect terminals 3 and 5 of the first recorder to terminals 3 and 2 (panic record) of the next recorder. The
wire for connecting units together for series recording should be 22 gauge or larger, insulated cable. Additional
recorders may be added in this manner. Three recorders can record for 24 hours using a T-160 tape in EP.
FIRST RECORDER screw 3 to SECOND RECORDER screw 3
FIRST RECORDER screw 5 to SECOND RECORDER screw 2
When the first recorder is at the end of the tape, the second recorder will be triggered to record to the end of its tape
through the panic record input. The first recorder may be activated by the remote, front panel, or the panic record input
on the terminal strip. Remember that if the you place the unit into record manually it will stop after a triggered event
record input. It will not stop after a triggered panic record, should an additional event record trigger occur.
TUNER OPERATION
A cable ready tuner is available for recording cable signals. To record, disable trigger inputs as they will automatically
reset the machine to AV when triggered. Press the INPUT button on the remote and select a channel with the numer-
ic pad or the “+ and -” buttons. Confirm that a cable ready signal is present on the ANT IN jack on the rear panel of the
recorder. Recording cable signals from the ANT IN connector will not place the time and date on the recording, but it
will be visible during recording on the monitor or TV.
12

REAR PANEL CONNECTIONS
VIDEO LINE IN
Connect the video cable coming from the video camera, monitor or other video source you wish to record here.
VIDEO LINE OUT
This can be used as an access to the video being recorded. You can connect this jack to the VIDEO INPUT on the
back of a monitor. The time and date can be viewed on the monitor if connected in this fashion.
AUDIO LINE IN
Connect the audio cable coming from your security camera, monitor, or other source you wish to record here. (A
microphone by itself may need to be amplified first.)
AUDIO LINE OUT
Not needed for recording, but can be connected as an audio source for other equipment. Connect this jack to the
AUDIO IN on a monitor with audio.
SECURITY SWITCH CONNECTIONS (Security Terminal)
Connect normally-open, normally-closed, and panic switches here. If normally-closed switches are not used, you
must leave the factory installed jumper in place so the unit will operate properly. End of tape circuits are also con-
nected here.
ANT IN
For use in conventional VCR applications. A cable TV signal is required. Cameras modulated to run on cable fre-
quencies may also be connected here. Please note that time/date will not be required with this input. (SEE ‘TUNER
OPERATION BEFORE CONNECTING A CABLE INPUT)
RF OUT
You may use a standard TV for reviewing and observing. Using a standard RF cable (supplied), connect the RF
OUT to the VHF IN or ANT IN on your TV. Then by placing your TV on channel 3 or 4, you can hear and see the
audio and video of the recorder.
RF SELECT SWITCH (CH 3/4)
Set this switch to 3 or 4 corresponding to your TV viewing channel (if an RF input device or TV is used as a moni-
tor).
13

REAR PANEL CONNECTIONS (continued)
SECURITY TERMINALS
TERMINAL #1: NORMALLY-OPEN (N/O) EVENT RECORDING SWITCH
TERMINAL #2:NORMALLY-OPEN PANIC RECORD SWITCH
TERMINAL #3: COMMON TERMINAL
TERMINAL #4: NORMALLY-CLOSED (N/C) EVENT RECORDING SWITCH (LEAVE FACTORY JUMPER ON IF
THIS CONNECTION IS NOT USED)
TERMINAL #5: MOMENTARY CLOSURE TO COMMON (3) AT END OF TAPE (END OF TAPE CONTACT-SEE
DIAGRAMS BELOW)
CONNECT A N/O EVENT RECORDING SWITCH TO TERMINALS 1 AND 3.
CONNECT A N/C EVENT RECORDING SWITCH TO TERMINALS 3 AND 4 (REMOVE JUMPER).
CONNECT A N/O PANIC RECORD (PANIC SWITCH) TO TERMINALS 2 AND 3.
CONNECT AN END OF TAPE CIRCUIT (OR ADDITIONAL RECORDERS IN SERIES) TO TERMINALS 3 AND 5.
(SEE CONNECTING UNITS TOGETHER FOR SERIES RECORDER OPERATION)
END OF TAPE (EOT) CONTACT CONNECTIONS (EOT ALARM OR RELAY)
THERE IS A 5V DC SENSING VOLTAGE PRESENT ON TERMINALS 1, 2, AND 4 DURING OPERATION. TO
AVOID DAMAGE TO YOUR EVENT RECORDER, DO NOT CONNECT AN EXTERNAL VOLTAGE TO SCREWS,
USE ONLY DRY CONTACT TYPE SWITCHES. THE MOMENTARY CLOSURE (EOT) ON SCREW 5 IS RATED AT
100MA. OBSERVE POLARITY WHEN CONNECTING ANY DEVICE TO THE EOT CONTACT. THE EOT CONTACT
IS AN OPEN COLLECTOR TRANSISTOR TO GROUND (NOT AN ISOLATED RELAY). IN THE SITUATION
WHERE ISOLATION OR HIGHER CURRENT CAPACITY IS REQUIRED, A RELAY CAN BE INSTALLED (SEE
ABOVE DIAGRAM).
14

SECURITY SYSTEM COMPONENTS
TRIGGERING DEVICES
This event recorder is designed to be compatible with almost any type of triggering device. A magnetic door switch,
passive infrared detector, panic switch, pressure sensitive floor mat, sound detector, alarm panel output, etc., or any
combination of these can be used to turn the recorder on and start the recording function. All of these devices are sold
as a normally-open or normally-closed switch-type operation.
NORMALLY-OPEN (N/O) SWITCH
A normally open switch is similar to a light switch in your home. When the switch is off, it is considered OPEN. When
you turn on the light, it is CLOSED. When the light switch is OPEN (off), no electricity flows to the light fixture. When
you close the light switch (on), the light turns on. Consequently, a switch is normally open until asked to perform a func-
tion; this is the only time that it is closed. When more than one normally-open switch is used in a circuit, they are con-
nected in "parallel fashion" as shown below.
NORMALLY-CLOSED (N/C) SWITCH
A normally-closed switch is one that conducts electricity until an action causes it to turn off (open). This type of switch
is popular in installations where if a circuit is broken (opened), the alarm is triggered. A break (open) at any normally-
closed switch will cause a trigger. Normally-closed switches are always connected together in a series (loop) as shown
below.
CONNECTING SWITCHES
Once you have selected the triggering device(s) for your installation, you may connect it (them) to the proper screw
terminals on the back of the unit.
Panic recording from a video camera can be achieved by connecting a normally-open switch to screw terminals 2 and
3. Terminals 2 and 3 allow the unit to continuously record until the end of the tape. This function is recommended for
an alarm condition or panic situation. Terminal 5 provides a momentary closure (OPEN COLLECTOR TYPE) to the
common terminal to activate an accessory END OF TAPE alarm, or activate additional event recorders connected in
series.
AUDIO / VIDEO SOURCES
Connect your surveillance camera or closed-circuit monitor output to the video input of the recorder. If your camera
has sound capability, or if you have a microphone amplified to audio line level, it may be connected to the audio input.
Any composite video signal and "line level" audio can be used for recording purposes. "Line level" is an audio signal
compatible with the AUDIO IN jack, i.e. the AUDIO OUT jack on your camera or monitor.
VIEWING THE RECORDING
To view a recording, the recorder can be connected to any standard television set or composite video monitor. A cable
is supplied to connect the OUT TO TV jack on the back of the recorder to the antenna input on your TV . Set your TV
to channel 3 or 4 to correspond to the switch on the back of the recorder. An antenna or cable system signal can be
connected to the IN FROM ANT jack to allow the unit to be used as a conventional VCR. The recorder is fully com-
patible with observation systems, quad monitors, or other standard composite video devices.
15

TROUBLESHOOTING
Your event recorder is designed to give the user years of trouble free operation. If the suggestions listed below do not
solve your problem, contact Customer Service for assistance.
> The recorder wont stop recording at the end of an event. There are many options available for different types of
recording. Confirm the external trigger switches (motions detectors, door switches, etc) are not active or defective.
Confirm that the unit is not in the LOOP RECORD mode. Confirm that the normally closed jumper (if normally closed
switches are not used) is between screws 3 and 4 on the rear terminal.
> I had the recorder set to record for one hour yesterday evening. It only recorded for 10 minutes and quit.
See Termination of Recordings on page 11. At the end of the tape, all recording durations are reset.
> My door switch never records in the afternoon. Check all three of the trigger block time settings and reprogram
or clear those that don’t apply.
> Will the battery backup keep my machine recording if the power goes out? No. This is only to keep the time
and date in memory so that it will not have to be reset when the power is re-established.
> The picture looks good when I’m recording, but is snowy on playback. The tape used may be damaged or the
video heads are dirty or clogged. Replace the tape and try a test recording. If the picture is still snowy, call the manu-
facturer for a instructions on servicing.
> The tape keeps ejecting. Check the settings in the EDIT RECORD OPTIONS menu on page 7 to see if eject is set.
> What does the “L” mean in the lower left hand corner? This is the LOOP RECORD indicator.
> After I plugged the machine in, lots of different characters appeared on the screen, then disappeared. This
is normal. After AC is applied, the machine verifies the on screen display, clock operations, etc. A “STANDBY” indica-
tor appears during part of this testing.
16
TYPICAL RECORDER IMAGE
Time is 1:41 PM and 18 seconds. Frame counter indicator is at frame 17. The date is
August 4, 1998. The on screen text message is showing camera number and descrip-
tion. The “L” in lower left hand corner indicates the unit is recording in LOOP mode.

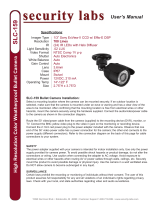
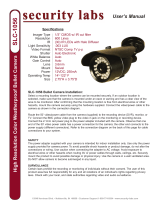
SPECIFICATIONS
GENERAL
Power Source AC 120V, 60 HZ
Power Consumption Approx. 17 Watts
Format VHS, NTSC Direct Drive Capstan and Head Motors
Head System Four Head Helical Scan Double Azimuth
Tape Speed SP (2 hours w/ T-120), EP( 6 hours w/ T-120; 8 hours w/ T160)
FF/REW Time Approx. 3 Minutes (T-120)
Dimensions 14.2" x 3.6" x 12.0" Center Loading w/ Contemporary Styling
Operational Temp. / Humidity 41 degrees F - 100 degrees F, Less than 80% RH
Weight Approx. 10.1 lbs.
VIDEO SECTION
Video Signal System EIA Standard (525 lines, 60 fields) NTSC
Camera Input 1.0 Vp-p, 75 ohms Unbalanced
Video Output 1.0 Vp-p, 75 ohms Unbalanced
Signal to Noise Ratio Greater than 43 dB
Video Horizontal Resolution Greater than 220 lines
AUDIO SECTION
Type Linear Monaural
Line Input/Output -8.0 dBm
Signal to Noise Ratio Greater than 40 dB
Audio Frequency Response 125 Hz to 10KHz
TUNER
Type 181 Channel (cable ready)
VHF Output Signal Channel 3 or 4
SYSTEM OPERATION
Functions on Panel POWER, STOP, EJECT, REW, FF, PLAY, PAUSE, RECORD, CH/TRACK
Language English Program Menu
Tracking Digital Auto Tracking w/ Remote Manual Adjustment
A/V Inputs Rear RCA Type Jack Inputs
Front Panel Display Operational Indicators
SECURITY RECORDING
Power Automatic Power Up when Triggered
Back-up 30 Day Back-up Memory Retains Time Stamp
Time Stamp Time (w/ Seconds) / Date, Frame Counter
On Screen Text On-Screen Text, Up to 20 Characters w/ Adjustable Placement
Triggering Device Inputs Rear Panel Screw Terminal: Normally-Open or Closed Inputs
Event Recording Durations 62 User Selectable Durations: 10s, 30s, 1 to 60 minutes.
Event Recording Operation Records Continuously During Trigger, then for Duration set
Panic Recording Records to EOT, Triggered by a Separate Normally-Open Circuit
Response Time Less than 2 Sec on First Trigger, Instant Record Thereafter
Instant Record Availability Instant Recordings Available for 5 Minutes after Switch Inactivity
End of Tape Contact Momentary Closure (Open Collector to Ground) for Series Recording
Programmable Event Timer 5 Daily Events (7 days a week), 5 One Time Events.
Trigger Blocking 3 Programmable “Trigger Block” Times
External Connections 5 Screw Terminal Barrier Block Connector on Rear Panel
Loop Recording Selectable: at EOT- RW/Eject, RW/Standby, RW/Loop Record
Frame Counter Running 0-99 Frame Counter During Rec. for Unique Frame Identification
Slow Motion Playback (SL610) Variable Speed Shuttle, Noiseless Still Frame
17

INSTALLATION AND SETTINGS WORKSHEET
MODEL NUMBER: _________________________________
SERIAL NUMBER: _________________________________
DATE OF PURCHASE: ______________________________
Periodic Maintenance DATE: __________________ Service performed _______________________________
Periodic Maintenance DATE: __________________ Service performed _______________________________
Periodic Maintenance DATE: __________________ Service performed _______________________________
Periodic Maintenance DATE: __________________ Service performed _______________________________
RECORDER SETTINGS:
Record options
Event Duration Period Set ___________________________
Rewind & ________________________________________
LOOP Mode Enable ________________________________
Screen Text _____________________________________
TEXT Placement COL ___________ ROW______________
Programmed EVENTS
DAILY EVENTS (occurs 7 days a week)
#1 Time On - Off __________________________________
#2 Time On - Off __________________________________
#3 Time On - Off __________________________________
#4 Time On - Off __________________________________
#5 Time On - Off __________________________________
ONE TIME EVENTS
#1 Date & Time On - Off ____________________________
#2 Date & Time On - Off ____________________________
#3 Date & Time On - Off ____________________________
#4 Date & Time On - Off ____________________________
#5 Date & Time On - Off ____________________________
TRIGGER BLOCKS
#1 Time On - Off __________________________________
#2 Time On - Off __________________________________
#3 Time On - Off __________________________________
Event and Panic Input Trigger Installation Notes _______________________________________________
_____________________________________________________________________________________
_____________________________________________________________________________________
_____________________________________________________________________________________
_____________________________________________________________________________________
_____________________________________________________________________________________
18

SECURITY LABS SL611 LIMITED WARRANTY
Security Labs, Inc. warrants that if your SL611 proves to be defective in material or workmanship under
normal usage, Security Labs will provide without charge to the consumer, parts and/or labor necessary
to remedy the defect for the applicable period of time as set forth in the following:
WARRANTY PERIOD
SIX MONTHS: VIDEO HEADS
ONE YEAR: PARTS AND LABOR
The warranty period commences on the date that the product is purchased by the consumer. Any
implied warranty is also limited to the duration above.
THIS WARRANTY DOES NOT COVER THE FOLLOWING: FLUCTUATIONS IN THE POWER SOURCE
OR LIGHTNING-RELATED DAMAGE; ATTACHED OR UNATTACHED ACCESSORIES; COSMETIC
PARTS SUCH AS KNOBS AND ACCESS DOORS; CABINET DAMAGE, INCLUDING DAMAGE IN TRAN-
SIT; ACCIDENTAL DAMAGE; MISUSE; ABUSE; UNAUTHORIZED PARTS USAGE OR REPAIRS;
RECEPTION PROBLEMS DUE TO INADEQUATE SIGNAL; UNAUTHORIZED INTERNAL CONTROL OF
ADJUSTMENTS; INSTALLATION; ADJUSTMENT OF CONSUMER CONTROLS; OR ANY OTHER USE
OF THE PRODUCT OTHER THAN THAT SPECIFICALLY PRESCRIBED IN THE OWNER'S MANUAL.
SECURITY LABS, INC. DOES NOT ASSUME LIABILITY FOR ANY VIOLATION OF PRIVACY FROM
ILLEGAL RECORDINGS MADE ON THIS UNIT. THE USER/OWNER ASSUMES FULL LIABILITY FOR
ANY AND ALL RECORDINGS MADE FROM THIS UNIT IN A SECURITY OR SURVEILLANCE OPERA-
TION OR IN ANY OTHER USE. SECURITY LABS IS NOT RESPONSIBLE FOR RECORDINGS THAT
VIOLATE LAWS OR THAT MAY PROVE OFFENSIVE OR TEND TO INCRIMINATE ANOTHER INDIVID-
UAL. LOCAL, STATE, AND FEDERAL LAWS MUST BE OBSERVED REGARDING ALL RECORDINGS.
To obtain warranty service, the consumer must provide the product along with evidence that will posi-
tively identify the date that the product was purchased from SECURITY LABS, INC. Prior to shipment,
a RETURN AUTHORIZATION must be obtained from SECURITY LABS; this will assist us in more effi-
cient service on your unit, and possibly avoid shipment if the adjustment can be made over the phone.
If shipment is made, the cost for postage, insurance and shipping of the product is the responsibility of
the owner.
SECURITY LABS' OBLIGATION UNDER THIS WARRANTY SHALL BE TO REPLACE SUCH PARTS
AND PROVIDE LABOR AS STATED. SECURITY LABS WILL NOT BE LIABLE FOR ANY LOSSES OR
INCONVENIENCES DIRECT OR INDIRECT, OR CONSEQUENTIAL PROPERTY DAMAGES.
FOR WARRANTY SERVICE CONTACT AND TO OBTAIN A RETURN AUTHORIZATION NUMBER:
SECURITY LABS, INC.
15540 HERRIMAN BLVD.
NOBLESVILLE, IN 46060
CUSTOMER SERVICE
1-800-774-0284
ONLINE
www.spycorder.com
/