Addonics Technologies HDU11SITDR User manual
- Category
- Media duplicators
- Type
- User manual
This manual is also suitable for
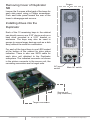
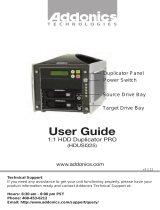
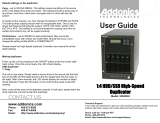
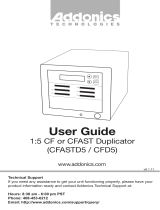
Addonics Technologies HDU11SITDR is a high-performance hard drive duplicator that can quickly and easily copy data from one hard drive to another. With its 11 drive bays, this duplicator can copy up to 11 hard drives simultaneously, making it ideal for businesses and organizations that need to quickly and efficiently copy large amounts of data.
The HDU11SITDR has a user-friendly interface, and its large LCD display makes it easy to monitor and control the duplication process. The device also supports a variety of duplication modes, including full copy, quick copy, and sector-by-sector copy. This versatility makes it suitable for a wide range of data duplication tasks.


-
 1
1
-
 2
2
-
 3
3
-
 4
4
-
 5
5
-
 6
6
-
 7
7
-
 8
8
-
 9
9
-
 10
10
-
 11
11
-
 12
12
-
 13
13
-
 14
14
-
 15
15
-
 16
16
-
 17
17
-
 18
18


Addonics Technologies HDU11SITDR User manual
- Category
- Media duplicators
- Type
- User manual
- This manual is also suitable for
Addonics Technologies HDU11SITDR is a high-performance hard drive duplicator that can quickly and easily copy data from one hard drive to another. With its 11 drive bays, this duplicator can copy up to 11 hard drives simultaneously, making it ideal for businesses and organizations that need to quickly and efficiently copy large amounts of data.
The HDU11SITDR has a user-friendly interface, and its large LCD display makes it easy to monitor and control the duplication process. The device also supports a variety of duplication modes, including full copy, quick copy, and sector-by-sector copy. This versatility makes it suitable for a wide range of data duplication tasks.
Ask a question and I''ll find the answer in the document
Finding information in a document is now easier with AI
Related papers
-
Addonics Technologies HDUS11NB User manual
-
Addonics Technologies HDUS1125LT User manual
-
 Addonics Technologies HDUSI325 User manual
-
 Addonics Technologies HD4SNH User manual
-
 Addonics Technologies ADSACFW User manual
-
Addonics Technologies HDUS11SNDX User manual
-
 Addonics Technologies CFASTD5 User manual
-
 Addonics Technologies AEMDVRBY User manual
-
 Addonics Technologies ZHDUESA User manual
-
Addonics Technologies AD25MSD User manual


Other documents
-
Addonics Deluxe C User guide
-
Addonics 1:5 2.5" HDD/SSD User guide
-
Addonics M2HU9HS-2S Specification
-
Vinpower Flash Memory Duplicator 2.1 User manual
-
ACT HDC13FH User manual
-
-
EZ DUPE CF 7 User manual
-
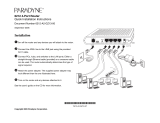 Paradyne Hotwire 6212 Quick Installation Instructions
-
Disc Makers Reflex Flash User manual
-
Renkforce PRO250 Owner's manual
