Page is loading ...

© Copyright Trek Bicycle Corporation 2004
All rights reserved
Part Number 253427
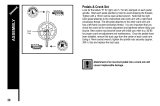
Figure 1- Bontrager road crankset
Table of contents
Read this manual before you ride
...............................................................
..
2
Check compatibility before installing
...........................................................
2
Inspect your crankset regularly
...............................................................
.....
2
Installation instructions
...............................................................
.................
3
Bontrager warranty
...............................................................
........................
4
ROAD CRANKSET OWNER'S MANUAL
Please read all of the supplied instructions thoroughly before using your new
crankset; the manuals contain important safety and maintenance information.
If you do not understand the information in this manual, or you have a
question about your crankset that this manual does not cover, consult your
Bontrager dealer. If you have a question or problem that your Bontrager dealer
can’t handle, contact us at:
Bontrager Components
920.478.4678
Attn: Customer Service
http://www.bontrager.com
801 W. Madison Street
Waterloo, Wisconsin 53594
READ THIS MANUAL BEFORE YOU RIDE

2
Introduction
Figure 2- Drivetrain parts
Figure 2- Drivetrain parts
Chain
Crankset
Crank bolt
Crank bolt
Pedal
Cassette
Figure 3 Tightening pedals
Figure 3 Tightening pedals
The crankset is part of the drivetrain, the
group of parts on the bicycle that transmit
power to the rear wheel (Figure 2):
• Pedals (and toe-clip assemblies on some
models)
• Crankset- left and right crank arms,
chainring(s), and bottom bracket (the
axle and bearings on which the crankset
rotates).
• Chain
• Cassette
This section explains how to inspect,
adjust, and lubricate your crankset.
Inspect your crankset regularly
Inspect your crankset regularly
Once a month
Once a month
check that the chain is clean, free of rust, and properly oiled. A dirty
chain can prematurely wear the chainrings. All links of the chain should pivot smoothly and
chain can prematurely wear the chainrings. All links of the chain should pivot smoothly and
without squeaking, and no links of the chain should be deformed.
without squeaking, and no links of the chain should be deformed.
Every 3 months
Every 3 months
check your chain for wear with a chain wear gauge or a ruler. Each
full link of a new chain measures one inch. If 12 links of your chain measures 12
full link of a new chain measures one inch. If 12 links of your chain measures 12
1/8
check your chain for wear with a chain wear gauge or a ruler. Each
1/8
check your chain for wear with a chain wear gauge or a ruler. Each
inches
or more, it should be replaced. With good maintenance, a chain
usually lasts 1000 to 1500 miles. A worn chain will cause the
chainrings of your crankset to wear prematurely. Replacing the
chain takes special tools and training and should only be done by
your dealer.
Every 3 months
inspect your pedals. Tighten the pedals into
the crank arms; turn the right pedal clockwise, but the left pedal
counter-clockwise (Figure 3):
• Pedals: 350-380 lb•in (40.2-42.9 Nm).
Every 3 months
inspect the crankset. Clean the chainrings
and inspect them for damage. If any teeth are bent or broken,
have the chainring replaced by your dealer. Note that on some
chainrings, a few teeth have a special shape to enhance shifting.
Also check the bottom bracket adjustment, and tighten the crank
bolts:
• Crank bolt (Figure 2): 360-415 lb•in (41-47 Nm)
• Chainring bolts (steel): 70-95 lb•in (7.9-10.7 Nm)
• Chainring bolts (steel): 70-95 lb•in (7.9-10.7 Nm)
• Chainring bolts (aluminum alloy): 72-80 lb•in (8-9 Nm)
• Chainring bolts (aluminum alloy): 72-80 lb•in (8-9 Nm)
Lubrication and cleaning
Lubrication and cleaning
Once a month
Once a month
clean and oil the chain. Place a rag behind the chain to avoid getting
oil on the rest of the bicycle. Use Wrench Force® synthetic chain lube or similar lubrica-
oil on the rest of the bicycle. Use Wrench Force® synthetic chain lube or similar lubrica-
tion. See your dealer for a recommended oil. After oiling your chain, wipe off the excess oil
tion. See your dealer for a recommended oil. After oiling your chain, wipe off the excess oil
with a rag.
with a rag.
When installing a threaded part, apply a small amount of bicycle grease to the threads,
When installing a threaded part, apply a small amount of bicycle grease to the threads,
except for aluminum chainring bolts. With aluminum chainring bolts apply a drop of
except for aluminum chainring bolts. With aluminum chainring bolts apply a drop of
Loctite 222 to the threads.
Loctite 222 to the threads.

3
INSTALLATION INSTRUCTIONS FOR THE
EXPERIENCED MECHANIC
These instructions explain the steps to remove an existing crankset and
install a new one. The correct installation of your crankset is critical to your
safety, so this work should be performed only by an experienced mechanic. If
you are not sure of your ability to correctly install this crankset and adjust the
parts, have the crank installed by your Bontrager dealer.
Check all parts' compatibility before installing
The crankset interfaces with the pedals, bottom bracket, chain, and front
derailleur with its shifter. Each of these parts must be compatible with the
crankset for the systems of a bicycle to function correctly. If you are not sure if
this crankset is compatible with your bicycle, consult your dealer.
Pedal removal and installation
To remove the pedals
Note: There are right and left pedals, usually marked with a letter stamped on the
end of the pedal axle, or on the wrench flats.
1. Turn the right pedal spindle counter-clockwise to remove the right pedal, the
opposite direction of tightening (Figure 3).
2. Turn the left pedal axle clockwise to remove the pedal.
To install the pedals
1. Apply a light coat of Wrench Force® synthetic grease or a similar lubricant
over all the threads.
See your dealer for a recommended grease.
2. Place the pedal washer over the pedal threads.
3. Thread the pedal into the crank arm by hand.
4. Follow the instructions for tightening pedals in
Inspect your crankset
regularly
.
Crank arm removal and installation
The left crank arm is held in place by a crank bolt (Figure 2).
To remove a crankarm
1. Loosen the crankarm bolt on the left crankarm.
2. Continue turning the crank bolt to remove the crank arm.
To install a crankarm
With a self-extracting bolt, the parts must be correctly assembled
(Figure 6).
1. Apply a light coat of Wrench Force® synthetic grease or
a similar lubricant over all the threads, and the bottom
bracket axle splines.
See your dealer for a recommended grease.
2. Align the splines of the axle with the crank arm, and slide the
arm onto the axle.
When installing the crankarm, note the alignment of the opposite crank
arm.
3. Carefully engage the threads of the crank bolt.
4. Tighten as in
Inspect your crankset regularly.
Figure 6- Self-extractor bolt
Figure 6- Self-extractor bolt
parts
Crank
bolt
Extractor collar
Extractor collar

4
Bontrager Warranty
Trek Bicycle Corporation warrants each new Bontrager component against defects
in workmanship and materials for the a period of one year from the date of sale.
This warranty does not cover-
• Normal wear and tear
• Improper assembly
• Improper follow-up maintenance
• Installation of parts or accessories not originally intended for, or compatible
with, the wheels as sold
• Damage or failure due to accident, misuse, abuse, or neglect
• Labor charges for part replacement or changeover
This warranty is void in its entirety by any modification of the component or
its parts.
This warranty is expressly limited to the repair or replacement of a defective
item and is the sole remedy of the warranty. This warranty extends from the
date of purchase, applies only to the original owner, and is not transferable.
Trek is not responsible for incidental or consequential damages. Some states
do not allow the exclusion of incidental or consequential damages, so the above
exclusion may not apply to you.
Claims under this warranty must be made through an authorized dealer. Proof
of purchase is required.
This warranty gives the consumer specific legal rights, and those rights may
vary from place to place. This warranty does not affect the statutory rights of
the consumer.
the consumer.
Bottom bracket removal and installation
A conventional crankset is comprised of a left crankarm, right crankarm, and
bottom bracket. With the Bontrager Road crankset, the right crank arm and
bottom bracket are inseparable.
To remove a standard bottom bracket
1. Loosen the crankarm bolt on the left crankarm and remove the left crankarm.
2. Loosen the crankarm bolt on the right crankarm and remove the right
crankarm.
3. Using the proper tool, loosen and remove the left ("adjustable") bottom
bracket cup.
The left cup is right-hand threaded, and the right cup is left-hand (reverse) threaded.
3. Using the proper tool, loosen and remove the right ("fixed") bottom bracket
cup.
To install a Giga-Pipe bottom bracket
Make sure the frame's bottom bracket shell threads are clean and in good
condition. If necessary, chase and face the threads.
Grease all threaded surfaces, the bearing surfaces of the crank bolt, the
interfaces between the bearings and axle, the axle splines, and also the bearing
side of the seals.
1. Install the right bottom bracket cup, and tighten to 300-360 lb•in (34-41Nm).
2. Install the left bottom bracket cup, and tighten to 300-360 lb•in (34-41Nm).
3. Pass the bottom bracket axle through the right cup to the left cup.
4. Attach the left crankarm and tighten the crank bolt to
360-415 lb•in (41-47 Nm)
.
5. Check the left crankarm for play.
If there is play, remove both crankarms, grease the contact between the bottom
bracket axle and the bearings, and reinstall. It may require installing the cranks
several times to eliminate all play.
/