
www.3dsystems.com
1
Table of Contents
User’s Manual
Thank you for purchasing the Viper ™ Pro SLA ® system. Before using this equipment, please read this guide carefully to
enjoy optimum performance and longer service life.
Introduction
What’s Inside?
Viper Pro SLA System’s Features - RDM
Other Useful Documents
General Safety
Laser Safety
Chemical Safety
Operations
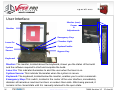
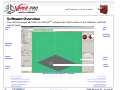
Software Overview
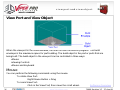
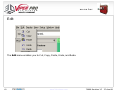
View Port and View Object
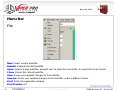
Menu Bar
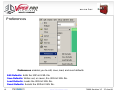
Tool Bar
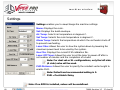
Manual Operations
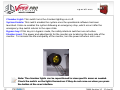
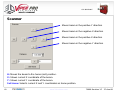
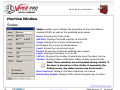
Scanner
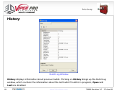
History
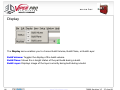
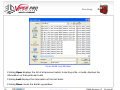
Machine Window
Build Window
Recoater System
Environmental Conditions
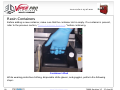
Troubleshooting
Customer Support
Service
Maintenance
System Block Diagram
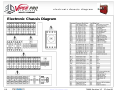
Electronic Chassis Diagram
Legal Notices
Glossary
Specifications
Index
Copyright © 2006-2008 by 3D Systems Corporation. All rights reserved. SLA and the 3D logo are registered trademarks of 3D
Systems, Inc. and 3DPrint, 3DManage, Lightyear, ProCure, Viper, and Zephyr are trademarks of 3D Systems, Inc.
70696 Revision 1C 27-Aug-08

www.3dsystems.com
2
i n t r o d u c t i o n t o t h e v i p e r ™ p r o
s l a ® s y s t e m
user’s manual
70696 Revision 1C 27-Aug-08
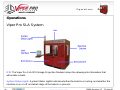
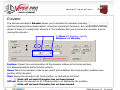
Introduction to the Viper™ Pro SLA® System
The Viper™ Pro SLA® system is a 3-D Production Solid Modeler that generates plastic models or
prototype parts from computer data. The system typically builds parts by processing a three-
dimensional CAD file. Software translates the CAD data to represent cross sections, or slices.
The Viper Pro SLA system creates models by profiling each slice as a layer on the surface of a
resin delivery module (RDM) that contains resin. Layer thickness can range (see the specifications
for details).
A laser beam solidifies the layer of resin. The vertical elevator system lowers the newly formed
slice beneath the surface of the resin at a distance determined prior to part building. A recoating
system ensures consistent layer thickness. Layers build up until all the data for the model is
processed. Then the part is drained and removed from the Viper Pro SLA system for post-
processing. The Viper Pro SLA system consists of an assembly of numerous discrete sub-systems
that are integrated to perform 3-D stereolithographic model generation. The subsystems are
combined into a single physical unit.

www.3dsystems.com
3
w h a t ’s i n s i d e ?
user’s manual
What’s Inside?
This manual includes the following topics:
Latest Features
“Viper Pro SLA System’s Features” describes the latest features incorporated into the Viper Pro SLA
system, such as the resin delivery module (RDM), Intelligent Resin Container, Recoater, and
Scanning System. These features are improvements over previous SL models.
Many Other Useful Documents
In “Other Useful Documents” you’ll find a listing of many other documents that may be
helpful to you as you use the Viper Pro SLA system, such as Viper Pro SLA Client Online Help,
the Facility Requirements Guide, and Material Safety Data Sheets.
Operations
“Operations” describes your new Viper Pro SLA system. Pictures of the Viper Pro
SLA system’s components will help you understand the function of the various parts.
Software
“Software Overview” gives you a detailed overview of the software that operates your
Viper Pro SLA system.
70696 Revision 1C 27-Aug-08

www.3dsystems.com
4
user’s manual
w h a t ’s i n s i d e ?
Recoater System
“Recoater System” describes how to perform different operations with the resin delivery module
(RDM).
Safety
“General Safety”, “Laser Safety”, “Chemical Safety”, and “Environmental Conditions” describe
precautions that you should take when using your new Viper Pro SLA system.
Service and Troubleshooting
In “Troubleshooting” and “Service”, you will find the troubleshooting guide and other basic
information concerning service and maintenance for your Viper Pro SLA system.
Glossary
The “Glossary” defines terms that describe the Viper Pro SLA system and its operations.
After the glossary, you will find the “Technical Specifications
” for your Viper Pro SLA system.
70696 Revision 1C 27-Aug-08

www.3dsystems.com
5
v i p e r p r o s l a s y s t e m ’s
f e a t u r e s
user’s manual
Viper Pro SLA System’s Features
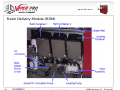
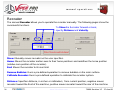
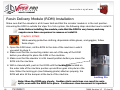
Resin Delivery Module
The Viper Pro SLA system’s time reduction for changing the resin simplifies the part-building
process. Not only can you now change resin in less than ten minutes, you can also swap the resin
delivery module (RDM) easily, with no tools required. All components that come into contact with
resin in the RDM are moved with the module itself. You can remove the RDM easily and quickly and
replace it with another active RDM, without having to clean any wet resin surface. This new feature
significantly reduces resin swap time. In addition, you can warm up an RDM offline, enabling you to
swap one resin delivery module for another that is ready to use.
Gloves, however, may be required to detach the Zephyr ™ recoater blade. This new handling
method ensures that all parts that come into contact with resin under normal operation are a part
of the active RDM.
The RDM enables the user, using a computer monitor, to strain the debris that inevitably
accumulates in the machine so that it can be removed in a similar manner to the removal of build
platforms. It also removes the higher viscosity resin that settles on the bottom of the delivery
module, recirculates the resin to help prevent gel formation, and stirs the resin to achieve uniform
viscosity.
Table 1, shown on the next page, lists the required build envelopes that represent all RDM and
platform elevator configurations that the Viper Pro SLA system supports. Each RDM and platform
elevator design minimizes the amount of resin that the Viper Pro SLA system requires.
70696 Revision 1C 27-Aug-08

www.3dsystems.com
6
v i p e r p r o s l a s y s t e m ’s
f e a t u r e s
user’s manual
Table 1: RDM Configurations
Name Maximum Build Volume Fill Capacity
RDM 650M 650 x 350 x 300 mm (25.6 x 13.7 x 11.8 in) 148 liters (39.1 U.S. gal)
RDM 750SH 650 x 750 x 50 mm (25.6 x 29.5 x 1.97 in) 95 liters (25.1 U.S. gal)
RDM 750H 650 x 750 x 275 mm (25.6 x 29.5 x 10.8 in) 272 liters (71.86 U.S. gal)
RDM 750F 650 x 750 x 550 mm (25.6 x 29.5 x 21.65 in) 414 liters (109.3 U.S. gal)
There are two operating modes for the RDM:
Stand-by Mode
In this mode, the RDM is offline and operates independently from the Viper Pro SLA system,
permitting offline resin and module temperature stabilization when it is connected with line power
to the power umbilical. The resin can warm effectively in this mode, enabling the user to build a
part while warming resin for future use.
Build Mode
In this mode, the RDM is online and connects to the Viper Pro SLA system for power and I/O for
full interoperability. The Viper Pro SLA system monitors and controls the resin temperature while
connected with the active RDM. When the RDM is online, it can pump and recirculate resin.
70696 Revision 1C 27-Aug-08

www.3dsystems.com
7
v i p e r p r o s l a s y s t e m ’s
f e a t u r e s
user’s manual
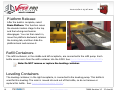
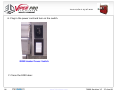
Single Resin Delivery Module
Dual Resin Delivery Module
Extra Large Resin Delivery Module
Intelligent Resin Container
The Viper Pro SLA system is capable of building with one resin delivery module while the second
delivery module is inactive. A system with two resin delivery modules that utilizes only one can be
upgraded to a dual resin delivery module.
The Viper Pro SLA system can also build parts in two separate build zones, Build Zone A and
Build Zone B. Each zone is independently capable of supporting its own active resin delivery
module and motion axis control, enabling controlled builds in both zones simultaneously, with
each build using different resins if desired.
The Viper Pro SLA system can operate so that two build zones combine into a single larger build
zone to create larger parts that make up a single contiguous envelope. The extra large resin
delivery module accommodates a build zone of 1500mm x 750mm x 550mm.
Each container in the Viper Pro SLA system holds an electronic storage device that has
information about the resin that is in the bottle and the RDM. This information enables the Viper
Pro SLA system to make sure that the user does not use the wrong material, use material
incorrectly, or use an empty or expired container.
70696 Revision 1C 27-Aug-08

www.3dsystems.com
8
v i p e r p r o s l a s y s t e m ’s n e w
f e a t u r e s
user’s manual
Recoating Module
IPM
The recoater system has a Zephyr ™ recoater blade with four axes of motion: The y-axis moves
the recoater blade front to rear; the z-axis moves it up and down; the theta y-axis tips or rotates the
blade about the center; the x-axis motion directs sensor motion on the blade. The recoater
system’s liquid level sensor maps the resin surface by moving around the resin surface. The
sensor calibrates the position of the blade so that the blade moves perfectly parallel to the resin
surface, enabling the build to be accurate and precise. The recoating system uses the motion axes
that are connected to the blade, enabling the system to self-calibrate and permitting a customized
setting of the blade gap, or distance from the blade’s bottom to the resin surface, for different
resins.
The Viper Pro SLA system’s IPM (Image Projection Module), directs the laser beam using
directional, focusing optics, and scanning mirrors, along with an AOM (Acoustical Optical Modulator)
to regulate the output power. This process will accurately reproduce the input CAD data one layer
at a time.
70696 Revision 1C 27-Aug-08

www.3dsystems.com
9
O t h e r u s e f u l d o c u m e n t s
user’s manual
Other Useful Documents
The following documents will help you to achieve maximum proficiency with your Viper Pro
SLA system.
3DPrint
TM
Online Help
Run the Viper Pro SLA system software, then select Help > Help Topics in the software window
or the 3DPrint Preview window to launch Viper Pro SLA system client online help. The online
Help provides detailed instructions on how to use the Viper Pro SLA system software to set up,
run, and manage print jobs.
Viper Pro SLA System Facility Requirements Guide
To see what preparation you must do at your site prior to installing the Viper Pro SLA system, read
the Facility Requirements Guide
.
For access,
70696 Revision 1C 27-Aug-08

www.3dsystems.com
10
O t h e r u s e f u l d o c u m e n t s
user’s manual
Viper Pro SLA System Material Safety Data Sheets (MSDSs)
Make sure that everyone in your facility who handles Viper Pro SLA system materials reads these
MSDSs and follows the safety guidelines in them. Every resin shipment includes MSDS paper
copies. You can also find an electronic copy of MSDSs on our Web site, Material Datasheets
.
70696 Revision 1C 27-Aug-08

www.3dsystems.com
11
g e n e r a l s a f e t y
user’s manual
General Safety
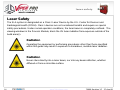
Hazard Messages
There are four safety hazard messages in this Viper Pro SLA System User’s Manual: Also see
“Safety Labels
” for descriptions of safety labels on your Viper Pro SLA system.
Damage
Electric Shock
UV Radiation
Irritant
Always follow the safety procedures. Do not, in any way, risk injury by working dangerously.
Safety is a part of work, and not an obstacle to it.
Machine damage, part damage, and/or data loss can result if you ignore this type of
hazard message.
Injury or death from electric shock can result if you ignore this type of hazard
message.
Eye injury or blindness can result if you ignore this type of hazard message.
Bodily irritation or allergic reaction can result if you ignore this type of hazard
message.
70696 Revision 1C 27-Aug-08

www.3dsystems.com
12
g e n e r a l s a f e t y
user’s manual
The Viper Pro SLA system was designed with safety in mind; however, improper use and
malfunctions can cause injury. To prevent unsafe operation, the Viper Pro SLA system
automatically shuts down immediately if it detects an unsafe condition.
Follow these general safety guidelines when operating your Viper Pro SLA system:
•
Read and follow system instructions.
•
Follow all safety rules in this section and heed all cautions and warnings in this guide.
•
Do not attempt to open the chamber door or windows while a part job is running.
•
Do not use any material without first reviewing its Material Safety Data Sheet (MSDS)
.
•
Dress power and communication cables at the back of the Viper
Pro SLA system to prevent
tripping.
•
Do not attempt to access, service, or adjust the internal components.
•
Do not attempt to perform any maintenance procedures unles
s you have been specifically
trained to do so.
•
Operators are trained to operate the system and to perform all
the necessary tasks to build a
part.
•
Certified service personnel have completed the 3D Systems serv
ice training package and are
certified to perform service tasks. Certification may occur at various levels and servicers should
only perform tas
ks that they are authorized and certified to complete.
•
Do not ignore warning signs that are posted during service operations.
70696 Revision 1C 27-Aug-08

www.3dsystems.com
13
g e n e r a l s a f e t y
user’s manual
• If you see an error message on the system’s display, refer to Troubleshooting before resuming
operation.
• To prevent potential skin irritation and sensitization due to
contact with waste material, follow all
guidelines in the Viper Pro SLA System Material Handling Safety
and Material Disposal Safety.
•
To prevent pinch and crush injuries to the hand, use caution when replacing the platform
inside
the build chamber. The platform carriage will not move when the chamber door is open.
70696 Revision 1C 27-Aug-08

www.3dsystems.com
14
l a s e r s a f e t y
user’s manual
Laser Safety
The SLA system is designated as a Class I Laser Device by the U.S. Center for Devices and
Radiological Health (CDRH). Class I devices are not considered harmful and require no special
safety precautions. Under normal operation conditions, the laser beam is completely confined. The
viewing windows in the Process Module, block the UV laser radiation from exposure outside of the
build area(s).
Radiation
Operating the equipment or performing procedures other than those specified
within this guide may result in exposure to hazardous, invisible laser radiation.
Radiation
Never stare directly into a laser beam, nor into any beam reflection, whether
diffused or from a mirrorlike surface.
70696 Revision 1C 27-Aug-08

www.3dsystems.com
15
l a s e r s a f e t y
user’s manual
Radiation
During normal operation, and with all panels installed, the Viper Pro SLA system
is classified as a Class I laser device. If any of the interlocks are defeated, the
Viper Pro SLA system becomes a Class IV device. Eye damage can occur by
looking directly into the beam or by viewing any type of beam reflection.
Radiation
Interlocks are to be defeated only by trained personnel when needed during
service procedures.
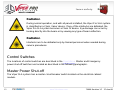
Control Switches
The locations of control switches are described in the Operations. Master and Emergency
power shut-off switches are located as described in the following paragraphs.
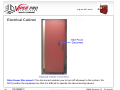
Master Power Shut-off
The Viper SLA system has a master circuit breaker switch located on the electrical cabinet
module.
70696 Revision 1C 27-Aug-08

www.3dsystems.com
16
l a s e r s a f e t y
user’s manual
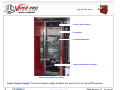
Emergency Shut-off
All SLA systems have an Emergency Shut-off button on the front panel of the Control Module/
Bay. The Viper Pro SLA system has an additional Emergency Shut-off button inside the Process
Chamber. They are bright red with a yellow background. Pressing either switch cuts off all
electrical power to the system, including the laser. See “Safety Labels
”.
Caution
This method of power shut-off is not recommended and should be used only in an
Emergency situation.
To restart the system after an emergency shut-off:
Rotate the Emergency OFF button clockwise to reset it, then press the System Enable.
Control Panel Laser LED
An LED light displays the current status of the laser power availability at the laser power supply.
70696 Revision 1C 27-Aug-08

www.3dsystems.com
17
l a s e r s a f e t y
user’s manual
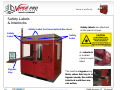
Safety Warning Labels
Safety Interlock Switches
Laser safety warning labels for the Viper Pro SLA systems are affixed inside the process module
and RDM. On the Viper Pro SLA system, labels are affixed on the frame behind the RDM door
and near the aperture at the top of the process chamber. These labels conform to the
requirements for Class IIIb and Class IV lasers. Refer to “Safety Labels
” for their location.
Safety interlock switches protect the user from possible UV laser radiation exposure when certain
doors or panels are opened. See “Safety Labels
” for their locations.
70696 Revision 1C 27-Aug-08

www.3dsystems.com
18
l a s e r s a f e t y
user’s manual
Safety Labels
Safety Label (in frame behind the door)
Safety
Label
Safety
Label
Safety labels are attached
at the places shown.
An interlock
is located
close to each
label.
& Interlocks
The machine bypass key.
Note: when this key is in
bypass mode, the safety
interlock switches are
not active.
Bypass
Key
70696 Revision 1C 27-Aug-08

www.3dsystems.com
19
c h e m i c a l s a f e t y
user’s manual
Chemical Safety
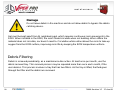
Irritant!
Always wear chemical-resistant gloves, goggles, and protective clothing when
handling resin. Avoid skin contact. Avoid breathing resin fumes.
•
Always wear approved goggles, nitrile gloves and protective clothing when working near
resins
or
with partially cured parts. Epoxy resin is less viscous and splashes more easily than acry
late
resin.
• Wearing contact lenses when working with resins is not recommended.
•
Always wear chemical-resistant gloves whenever handling resins or partially cured part
s.
Recommended gloves are 100% Nitrile. Do NOT wear latex gloves.
•
Always work in a well ventilated area when using resins. Avoid breathing vapors.
•
Always wash skin thoroughly with abrasive soap and COLD water after
working with resins. DO
NOT USE HOT WATER OR SOLVENTS to
wash hands, as it will result in absorption through the
skin.
• Use extreme care when handling solvents used to remove excess resin from uncured parts.
These solvents (
e.g., denatured alcohol, isopropyl alcohol) are very flammable.
• Keep all resins away from heat, sparks and flame. Resin containers may rupture when exposed
to extreme heat.
Use National Fire Protection Association Class B extinguishers such as carbon
dioxide, dry chemical, or foam.
70696 Revision 1C 27-Aug-08

www.3dsystems.com
20
c h e m i c a l s a f e t y
user’s manual
Resin Characteristics
Resin Storage
Resin Disposal
Resin Spill Containment
The photopolymers used in stereolithography may be hazardous if handled improperly. Repeated
skin contact with resins may cause sensitization. Consult the manufacturer’s Material Safety Data
Sheet (MSDS) for information on specific resins. For further information on this and related
topics, consult the 3D Systems – Materials
website.
Resin should be stored in opaque, non-reactive containers, according to the guidelines given in
the MSDS included with the resin. Protect resin from sunlight and ambient room light. Resin may
be stored in RDMs with the lid securely fastened. Pouring resin back into the original containers
is acceptable, but be sure to leave several inches of air above the resin in the sealed container.
This will leave room for expansion and also inhibits spontaneous polymerization for some resins.
Always label resin by type and usage history.
Never mix different resins.
Do not dump used resin down any drains. Follow disposal rules established by company, local,
state, and federal authorities.
Your company has the responsibility to define what constitutes a major spill. Personnel who are
involved in cleaning up major spills of resin should wear NIOSH/MSHA approved respirators
designed for use with organic chemical vapors. In addition, each person should wear protective
goggles, rubber boots, and 100% nitrile gloves to minimize exposure to resin, which can cause
eye, skin, and respiratory irritation, as well as possible skin allergies and respiratory reactions.
70696 Revision 1C 27-Aug-08
Page is loading ...
Page is loading ...
Page is loading ...
Page is loading ...
Page is loading ...
Page is loading ...
Page is loading ...
Page is loading ...
Page is loading ...
Page is loading ...
Page is loading ...
Page is loading ...
Page is loading ...
Page is loading ...
Page is loading ...
Page is loading ...
Page is loading ...
Page is loading ...
Page is loading ...
Page is loading ...
Page is loading ...
Page is loading ...
Page is loading ...
Page is loading ...
Page is loading ...
Page is loading ...
Page is loading ...
Page is loading ...
Page is loading ...
Page is loading ...
Page is loading ...
Page is loading ...
Page is loading ...
Page is loading ...
Page is loading ...
Page is loading ...
Page is loading ...
Page is loading ...
Page is loading ...
Page is loading ...
Page is loading ...
Page is loading ...
Page is loading ...
Page is loading ...
Page is loading ...
Page is loading ...
Page is loading ...
Page is loading ...
Page is loading ...
Page is loading ...
Page is loading ...
Page is loading ...
Page is loading ...
Page is loading ...
Page is loading ...
Page is loading ...
Page is loading ...
Page is loading ...
Page is loading ...
Page is loading ...
Page is loading ...
Page is loading ...
Page is loading ...
Page is loading ...
Page is loading ...
Page is loading ...
Page is loading ...
Page is loading ...
Page is loading ...
Page is loading ...
Page is loading ...
Page is loading ...
Page is loading ...
Page is loading ...
Page is loading ...
Page is loading ...
Page is loading ...
Page is loading ...
Page is loading ...
Page is loading ...
Page is loading ...
Page is loading ...
Page is loading ...
Page is loading ...
Page is loading ...
Page is loading ...
Page is loading ...
Page is loading ...
Page is loading ...
Page is loading ...
Page is loading ...
Page is loading ...
Page is loading ...
Page is loading ...
Page is loading ...
Page is loading ...
Page is loading ...
Page is loading ...
Page is loading ...
Page is loading ...
Page is loading ...
-
 1
1
-
 2
2
-
 3
3
-
 4
4
-
 5
5
-
 6
6
-
 7
7
-
 8
8
-
 9
9
-
 10
10
-
 11
11
-
 12
12
-
 13
13
-
 14
14
-
 15
15
-
 16
16
-
 17
17
-
 18
18
-
 19
19
-
 20
20
-
 21
21
-
 22
22
-
 23
23
-
 24
24
-
 25
25
-
 26
26
-
 27
27
-
 28
28
-
 29
29
-
 30
30
-
 31
31
-
 32
32
-
 33
33
-
 34
34
-
 35
35
-
 36
36
-
 37
37
-
 38
38
-
 39
39
-
 40
40
-
 41
41
-
 42
42
-
 43
43
-
 44
44
-
 45
45
-
 46
46
-
 47
47
-
 48
48
-
 49
49
-
 50
50
-
 51
51
-
 52
52
-
 53
53
-
 54
54
-
 55
55
-
 56
56
-
 57
57
-
 58
58
-
 59
59
-
 60
60
-
 61
61
-
 62
62
-
 63
63
-
 64
64
-
 65
65
-
 66
66
-
 67
67
-
 68
68
-
 69
69
-
 70
70
-
 71
71
-
 72
72
-
 73
73
-
 74
74
-
 75
75
-
 76
76
-
 77
77
-
 78
78
-
 79
79
-
 80
80
-
 81
81
-
 82
82
-
 83
83
-
 84
84
-
 85
85
-
 86
86
-
 87
87
-
 88
88
-
 89
89
-
 90
90
-
 91
91
-
 92
92
-
 93
93
-
 94
94
-
 95
95
-
 96
96
-
 97
97
-
 98
98
-
 99
99
-
 100
100
-
 101
101
-
 102
102
-
 103
103
-
 104
104
-
 105
105
-
 106
106
-
 107
107
-
 108
108
-
 109
109
-
 110
110
-
 111
111
-
 112
112
-
 113
113
-
 114
114
-
 115
115
-
 116
116
-
 117
117
-
 118
118
-
 119
119
-
 120
120
-
 121
121


Ask a question and I''ll find the answer in the document
Finding information in a document is now easier with AI
Related papers
-
3D Systems iPro 9000 SLA Center User manual
-
-
-
-
-
-
-
-
-
3D Systems sPro User manual
Other documents
-
Barco X2 Owner's manual
-
Acer RDM User Manual Content
-
-
Barco F80-Q9 Owner's manual
-
Viper DR1500H-EU User manual
-
CrewSafe Viper Pro Operating instructions
-
NGS VIPERMOUSEBLACK Datasheet
-
High End Systems Laser Chorus Viper User manual
-
Viper TC-9 Installation and Owner's Manual
-
 formlabs 3 SLA 3D Printer Installation guide
