Page is loading ...

INSTALLATION INSTRUCTIONS FOR PART 95-3305
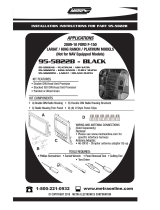
95-3305
KIT FEATURES
• Double DIN Radio Provision
• Stacked ISO Units Provision
A) Double DIN Trim Plate B) Double DIN Brackets
KIT COMPONENTS
A
Small Flat Blade Screwdriver • Panel Removal Tool
• Phillips Screwdriver • Socket Set • Torx Driver • Allen Wrench
1-800-221-0932
© COPYRIGHT 2004-2011 METRA ELECTRONICS CORPORATION
www.metraonline.com
TOOLS REQUIRED:
APPLICATIONS
B
CH EV RO L ET
Avalanche 2007-10/Equinox 2007-09
Express Van 2008-10/Impala 2006-10
Monte Carlo 2006-07/Tahoe 2007-11
Silverado 2007-11
(Excluding Classic Models)
Suburban 2007-10/Traverse 2009-11
BUICK
Enclave 2008-11, Lucerne 2006-10
GMC
Acadia 2007-11
Savanna 2008-10
Sierra Denaili 2007-11
(Excluding Classic Models)
Yukon Denali/XL 2007-10
HUMMER
H2 2008-09
PONTIAC
Torrent 2007-09
SATURN
Outlook 2007-09/Vue 2008-09
WIRING AND ANTENNA CONNECTIONS
(Sold Separately)
Wiring Harness:
• See www.metraonline.com for specific interface
Antenna Adapter:
• 40-CR10 - Chrysler antenna adapter 2002-up

Dash Disassembly
- Chevrolet Impala 2006-2010. . . . . . . . . . . . . . . . . . . . . . . . . . . . . . . . . . . . . . . . . . . . . . . . . . 1
- Chevrolet Monte Carlo 2006-2007 . . . . . . . . . . . . . . . . . . . . . . . . . . . . . . . . . . . . . . . . . . . . .1
- Buick Lucerne 2006-2010 . . . . . . . . . . . . . . . . . . . . . . . . . . . . . . . . . . . . . . . . . . . . . . . . . . . 1
- Chevrolet Avalanche 2007-2010 . . . . . . . . . . . . . . . . . . . . . . . . . . . . . . . . . . . . . . . . . . . . . . .2
- Chevrolet
Silverado
(Excluding Classic Models)
2007-2011 . . . . . . . . . . . . . . . . . . . . . .2
- Chevrolet Suburban 2007-2010 . . . . . . . . . . . . . . . . . . . . . . . . . . . . . . . . . . . . . . . . . . . . . . .2
- Chevrolet Tahoe 2007-2011 . . . . . . . . . . . . . . . . . . . . .. . . . . . . . . . . . . . . . . . . . . . . . . . . . . 2
- GMC
Sierra/Denali
(Excluding Classic Models)
2007-2011 . . . . . . . . . . . . . . . . . . . . . . 2
- GMC Yukon/XL Denali 2007-2010 . . . . . . . . . . . . . . . . . . . . . . . . .. . . . . . . . . . . . . . . . . . . . .2
- Chevrolet Express Van 2008-10/GMC Savanna 2008-10 . . . . . . . . . . . . . . . . . . . . . . . . . . . 3
- Suzuki XL-7 2007-2009 . . . . . . . . . . . . . . . . . . . . . . . . . . . . . . . . . . . . . . . . . . . . . . . . . . . . . .4
-
Chevrolet Equinox 2007-09 /Pontiac Torrent 2007-09 . . . . . . . . . . . . . . . . . . . . . . . . . . . . . 5
- Buick Enclave 2008-11/ GMC Acadia 2007-11 /Saturn Outlook 2007-09 . . . . . . . . . . . . . . 6
- Chevy Traverse 2009-11 . . . . . . . . . . . . . . . . . . . . . . . . . . . . . . . . . . . . . . . . . . . . . . . . . . . . . 6
- Hummer H2 2008-2009 . . . . . . . . . . . . . . . . . . . . . . . . . . . . . . . . . . . . . . . . . . . . . . . . . . . . . .7
- Saturn Vue 2008-2009 . . . . . . . . . . . . . . . . . . . . . . . . .. . . . . . . . . . . . . . . . . . . . . . . . . . . . . .8
Kit Assembly
- Double DIN Radio Provision . . . . . . . . . . . . . . . . . . . . . . . . . . . . . . . . . . . . . . . . . . . . . . . . . .9
- Stacked ISO Units Provision . . . . . . . . . . . . . . . . . . . . . . . . . . . . . . . . . . . . . . . . . . . . . . . . . 9
Final Assembly
. . . . . . . . . . . . . . . . . . . . . . . . . . . . . . . . . . . . . . . . . . . . . . . . . . .10
TABLE OF CONTENTS
95-3305
*Note:
Refer also to the instructions included with the aftermarket radio.
KNOWLEDGE IS POWER
Enhance your installation and fabrication skills by
enrolling in the most recognized and respected
mobile electronics school in our industry.
Log onto www.installerinstitute.com or call
800-354-6782 for more information and take
steps toward a better tomorrow.

95-3305 DASH DISASSEMBLY
BUICK LUCERNE
CHEVY IMPALA / MONTE CARLO 2006-2010
A
B
1
Disconnect the negative battery ter-
minal to prevent an accidental short
circuit.
1
Unclip and remove the trim panel
around radio and a/c control.
(Figure A)
2
Remove (6) 9/32” screws to extract
radio and a/c control from sub dash.
(Figure B)
3
Continue to kit assembly.

2
95-3305 DASH DISASSEMBLY
A
B
C
Unclip and remove radio trim panel.
(Figure A)
2
Remove (2) 8mm screws securing
switch panel below climate controls.
Unplug and remove switch panel.
(Figure B)
3
Remove (2) 8mm screws securing cli-
mate controls. Unplug and remove cli-
mate controls.
(Figure B)
4
Remove (4) 9/32” screws securing
radio. Unplug and remove the radio.
(Figure C)
5
Continue to kit assembly.
*Note: Refer also to the instructions included with the aftermarket radio.
Disconnect the negative battery termi-
nal to prevent an accidental short cir-
cuit.
1
SILVERADO
(Excluding Classic Models)
/SUBURBAN
CHEVY AVALANCHE/TAHOE
GMC YUKON/SIERRA
(Excluding Classic Models)
2007-11

3
95-3305 DASH DISASSEMBLY
CHEVY EXPRESS VAN / GMC SAVANNA 2008-10
Remove (2)10mm bolts from below knee bolster under steering column and remove
panel.
2
Remove (2)10mm bolts from panel below passenger dash airbag and remove panel.
3
Unsnap and remove radio and instrument cluster panel. (May not be necessary to
completely remove radio and instrument cluster panel to access radio.)
4
Remove (4) 9/32” bolts to remove radio.
5
Continue to kit assembly.
*Note: Refer also to the instructions included with the aftermarket radio.
Disconnect the negative battery terminal to prevent an accidental short circuit.
1

4
95-3305 DASH DISASSEMBLY
A
B
C
AUX
BAND
FWD
REV
SEEK
SEEK
PASSENGER AIR BAG
AUX
D
12:02
103:5
E
SUZUKI XL-7 2007-09
Press in on sides of the shifter boot to
release it from the shifter trim panel.
(Figure A)
2
Lift the boot up to access the Allen
screw securing the shifter knob to the
shifter lever. Loosen the Allen screw
and remove the shifter knob.
3
Remove (1) torx screw from the shifter
trim panel
(Figure C)
, then using a
panel removal tool unsnap the shifter
trim panel. Unplug and remove the
panel.
(Figure D)
4
Remove (4) 9/32” screws securing
the radio. Unplug and remove the
radio.
6
Using a panel removal tool unsnap
the radio trim panel. Unplug and
remove the panel.
(Figure E)
5
Continue to kit assembly.
*Note: Refer also to the instructions included with the aftermarket radio.
Disconnect the negative battery termi-
nal to prevent an accidental short cir-
cuit.
1

5
95-3305 DASH DISASSEMBLY
A
B
C
CHEVROLET EQUINOX 2007-09
PONTIAC TORRENT 2007-09
Unsnap panel below power window
switch and remove. Note: This allows
you to unplug the window switch easi-
er.
(Figure A)
2
Unsnap and remove entire panel sur-
rounding radio and shifter.
(Figure B)
3
Remove (4) 9/32 screws securing
radio. Unplug and remove the radio.
(Figure C)
4
Continue to kit assembly.
*Note: Refer also to the instructions included with the aftermarket radio.
Disconnect the negative battery termi-
nal to prevent an accidental short
circuit.
1

6
95-3305 DASH DISASSEMBLY
BUICK ENCLAVE / CHEVY TRAVERSE
GMC ACADIA
SATURN OUTLOOK
BUICK ENCLAVE 2008-11 / GMC ACADIA 2007-11
SATURN OUTLOOK 2007-09
Unclip the radio trim panel including
the climate controls. Unplug the cli-
mate controls and remove the panel.
(See drawings)
2
Remove (4) 9/32 screws securing the
radio. Unplug and remove the radio.
3
Continue to kit assembly.
*Note: Refer also to the instructions included with the aftermarket radio.
Disconnect the negative battery termi-
nal to prevent an accidental short cir-
cuit.
1

7
95-3305 DASH DISASSEMBLY
A
HUMMER H2 2008-09
Unclip the radio trim panel including
the a/c vents. Unplug any harnesses
connected to the panel and remove the
panel.
(Figure A)
2
Remove (4) 9/32” screws securing the
climate controls. Unplug and remove
the climate controls.
3
Remove (4) 9/32 screws securing the
radio. Unplug and remove the radio.
4
Continue to kit assembly.
*Note: Refer also to the instructions included with the aftermarket radio.
Disconnect the negative battery termi-
nal to prevent an accidental short cir-
cuit.
1

8
95-3305 DASH DISASSEMBLY
A
B
C
SATURN VUE 2008-09
Unclip and remove the trim panel on
top of the radio trim panel.
(Figure A)
2
Remove (2) Phillips screws exposed
under panel removed in step 2.
(Figure B)
3
Unclip and remove the radio trim panel
including the a/c vents.
(Figure B)
4
Remove (4) 9/32 screws securing the
radio. Unplug and remove the radio.
6
Unclip and remove the trim panel
surrounding the shifter including the
climate controls.
(Figure C)
5
Continue to kit assembly.
*Note: Refer also to the instructions included with the aftermarket radio.
Disconnect the negative battery termi-
nal to prevent an accidental short cir-
cuit.
1

95-3305 KIT ASSEMBLY
B
C
C
DOUBLE DIN RADIO PROVISION
STACKED ISO UNITS PROVISION
Slide the DDIN radio unit into the trim
plate bracket assembly and secure the
unit to the kit using the screws sup-
plied with the head unit.
(Figure C)
2
Continue to final assembly.
*Note: Refer also to the instructions included with the aftermarket radio.
Slide the appropriate bracket into the
trim plate aligning the holes in the
trim plate to the clips on the bracket.
(Figure B)
1
Slide the stacked ISO DIN units into the
trim plate bracket assembly and
secure the units to the kit using the
screws supplied with the head units.
(Figure C)
2
Slide the appropriate bracket into the
trim plate aligning the holes in the
trim plate to the clips on the bracket.
1
NOTE: XL-7 ONLY
Trim top corners of radio housing.
(Figure A)
B
A
NOTE: XL-7 ONLY
Trim top corners of radio housing.
(Figure A)
A
9

95-3305 FINAL ASSEMBLY
FINAL ASSEMBLY
(A) Strip wire ends back 1/2"
B) Twist ends together
C) Solder
D) Tape
A
B
C
D
Locate the factory wiring harness in the dash. Metra recommends using the
proper mating adapter and making connections as shown. (Isolate and individ-
ually tape off the ends of any unused wires to prevent electrical short circuit.)
Re-connect the negative battery terminal and test the unit for proper operation.
Reassemble radio and dash assemblies in reverse order of disassembly.
1
2
3
10
FINAL WIRING CONNECTIONS
Make wiring connections using the EIA color code chart shown below and the instructions included with the
head unit. Metra recommends making connections as shown below; Strip, Splice, Solder, Tape. Isolate and
individually tape off ends of any unused wires to prevent electrical short circuit.
METRA / EIA WIRING CODE
12V Ignition / Acc. . . . . . . . . . Red
12V Batt / Memory. . . . . . . . . Yellow
Ground. . . . . . . . . . . . . . . . . . Black*
Power Antenna. . . . . . . . . . . . Blue
Amp Turn-On . . . . . . . . . . . . . Blue / White
Amp Ground. . . . . . . . . . . . . . Black / White
Illumination . . . . . . . . . . . . . . Orange
Dimmer . . . . . . . . . . . . . . . . . Orange / White
Right Front (+) . . . . . . . . . . . . Gray
Right Front (-). . . . . . . . . . . . . Gray/ Black
Left Front (+) . . . . . . . . . . . . . White
Left Front (-). . . . . . . . . . . . . . White / Black
Right Rear (+) . . . . . . . . . . . . Violet
Right Rear (-) . . . . . . . . . . . . . Violet / Black
Left Rear (+) . . . . . . . . . . . . . Green
*NOTE: When a Black wire is not present, ground radio to vehicle chassis.
All colors may not be present on all leads due to manufacturer’s specifications.
REV. 11/22/10 © COPYRIGHT 2004-2010 METRA ELECTRONICS CORPORATION INST95-3305

INSTRUCCIONES DE INSTALACIÓN PARA LA PIEZA 95-3305
95-3305
CARACTERÍSTICAS DEL KIT
• Accesorio para radio DIN doble
• Accesorio para unidades ISO apiladas
A) Placa de terminación DIN doble B) Soportes DIN dobles
COMPONENTES DEL KIT
A
• Destornillador de hoja plana pequeño • Herramienta para retirar paneles
• Destornillador Phillips • Juego de soportes • Destornillador Torx • Llave Allen
1-800-221-0932
© COPYRIGHT 2004-2010 METRA ELECTRONICS CORPORATION
www.metraonline.com
HERRAMIENTAS REQUERIDAS:
APLICACIONES
B
CONEXIONES DE CABLEADO Y ANTENA
(se venden por separado)
Arnés del cableado:
• Vea www.metraonline.com para la interfaz específica
Adaptador de antena:
• Adaptador de antena Chrysler 40-CR10 2002 y modelos
CHEVROLET
Avalanche 2007-10/Equinox 2007-09
Express Van 2008-10/Impala 2006-10
Monte Carlo 2006-07/Tahoe 2007-11
Silverado 2007-11 (excl. Classic models)
Suburban 2007-10/Traverse 2009-11
GMC Acadia 2007-11
Savanna 2008-10
Sierra/Denali 2007-11
(excluding classic models)
Yukon/Denali/XL 2007-10
HUMMER H2 2008-09
PONTIAC Torrent 2007-09
SATURN Outlook 2007-09/Vue 2008-09
SUZUKI
XL7 2007-09
BUICK Enclave 2008-11, Lucerne 2006-10

Desmontaje del tablero
- Chevrolet Impala 2006-2010. . . . . . . . . . . . . . . . . . . . . . . . . . . . . . . . . . . . . . . . . . . . . . . . . . 1
- Chevrolet Monte Carlo 2006-2007 . . . . . . . . . . . . . . . . . . . . . . . . . . . . . . . . . . . . . . . . . . . . .1
- Buick Lucerne 2006-2010 . . . . . . . . . . . . . . . . . . . . . . . . . . . . . . . . . . . . . . . . . . . . . . . . . . . 1
- Chevrolet Avalanche 2007-2010 . . . . . . . . . . . . . . . . . . . . . . . . . . . . . . . . . . . . . . . . . . . . . . .2
- Chevrolet
Silverado
(no incluye los modelos clásicos)
2007-2011 . . . . . . . . . . . . . . . . . . . . . . .2
- Chevrolet Suburban 2007-2011 . . . . . . . . . . . . . . . . . . . . . . . . . . . . . . . . . . . . . . . . . . . . . . .2
- Chevrolet Tahoe 2007-2011 . . . . . . . . . . . . . . . . . . . . .. . . . . . . . . . . . . . . . . . . . . . . . . . . . . .2
- GMC
Sierra
(no incluye los modelos clásicos)
2007-2011 . . . . . . . . . . . . . . . . . . . . . . . . . . . .2
- GMC Yukon/XL Denali 2007-2010 . . . . . . . . . . . . . . . . . . . . . . . . .. . . . . . . . . . . . . . . . . . . . .2
- Chevrolet Express Van 2008-10/GMC Savanna 2008-10 . . . . . . . . . . . . . . . . . . . . . . . . . . . 3
-
Suzuki XL-7 2007-2009 . . . . . . . . . . . . . . . . . . . . . . . . . . . . . . . . . . . . . . . . . . . . . . . . . . . . . .4
- Chevrolet Equinox 2007-09 /Pontiac Torrent 2007-09 . . . . . . . . . . . . . . . . . . . . . . . . . . . . . 5
- Buick Enclave 2008-10/ GMC Acadia 2007-11 /Saturn Outlook 2007-09 . . . . . . . . . . . . . . 6
- Chevy Traverse 2009-11 . . . . . . . . . . . . . . . . . . . . . . . . . . . . . . . . . . . . . . . . . . . . . . . . . . . . . 6
-
Hummer H2 2008-2009 . . . . . . . . . . . . . . . . . . . . . . . . . . . . . . . . . . . . . . . . . . . . . . . . . . . . . .7
- Saturn Vue 2008-2009 . . . . . . . . . . . . . . . . . . . . . . . . .. . . . . . . . . . . . . . . . . . . . . . . . . . . . . .8
Montaje del kit
- Accesorio para radio DIN doble . . . . . . . . . . . . . . . . . . . . . . . . . . . . . . . . . . . . . . . . . . . . . . .9
- Accesorio para unidades ISO apiladas . . . . . . . . . . . . . . . . . . . . . . . . . . . . . . . . . . . . . . . . 9
Montaje final . . . . . . . . . . . . . . . . . . . . . . . . . . . . . . . . . . . . . . . . . . . . . . . . . . . . .10
INDICE
95-3305
*Nota:
Asimismo, remítase a las instrucciones incluidas con el radio de posventa.
KNOWLEDGE IS POWER
Enhance your installation and fabrication skills by
enrolling in the most recognized and respected
mobile electronics school in our industry.
Log onto www.installerinstitute.com or call
800-354-6782 for more information and take
steps toward a better tomorrow.
/