Page is loading ...

Kit Contents :
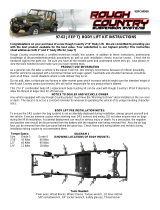
1—Straight Gear Selector
97-02 JEEP TJ STRAIGHT LOWER GEAR SELECTOR
92102100
Congratulations on your purchase of a new Rough Country gear selector. We are committed to providing you
with the best product available for the best value. Your satisfaction is our highest priority!
Rough Country recommends a certified technician installs this system. In addition to these instructions, professional
knowledge of disassemble/reassembly procedures as well as post installation checks must be known. Check the kit
hardware against the parts list. Be sure you have all the needed parts and understand where they go. Also please
review the tools needed list and make sure you have needed tools.
PRODUCT USE INFORMATION
As a general rule, the taller a vehicle is the easier it will roll. We strongly recommend, because of rollover possibility,
that the vehicle be equipped with a functional roll-bar and cage system. Seat belts and shoulder harnesses should be
worn at all times. Avoid situations where a side rollover may occur.
Do not add, alter, or fabricate any factory or after-market parts which increase vehicle height over the intended height
of the Rough Country product purchased. We will not be responsible for any product that is altered.
NOTICE TO DEALER AND VECHICLE OWNER
Any vehicle equipped with any Rough Country product must have the “Warning to Driver” decal installed on the sun
visor or dash. The decal is to act as a constant reminder for whoever is operating the vehicle of its unique handling
characteristics.

INSTALLATION INSTRUCTIONS
1. Using a 10mm socket remove the bolt from the cup holder See Photo 1, open the center console and remove the
two bolts in the bottom. See Photo 2.
2. Pull up on the shifter boot to gain access to the console mounting bolts. Remove the bolt with a 10mm socket.
See Photo 3.
3. Next pull up the emergency brake and the transfer case shifter, this will allow for the console to be removed.
4. Push the passenger side seat forward to allow the two side bolts to be removed from the console using a 10mm
socket. See Photo 4.
5. You can now pick up on the console and work the console over the shifters. See Photo 5. After the console
clears the shifters you will have to push in the tabs releasing the 12V power supply out of the console. See Photo
6. Next turn the 12V power supply sideways and work it through the hole in the console.
Photo 4 Photo 3
Photo 2
Photo 6 Photo 5
Photo 1

6. Next remove the 4 bolts hold on the lower shifter boot with a 8mm socket. See Photo 7.
7. Using a 8mm socket remove the 9 bolts holding the shifter plate to the transmission tunnel. See Photo 8.
8. Next remove the 4 bolts holding transfer case shifter gate with a 8mm socket. See Photo 9.
9. Pull up on the shifter and remove the shifter from the lower gear selector. See Photo 10. If the gear shifter is fro-
zen because of rust skip this step and then remove shifter after the assembly is pulled out of the transmission.
10. Remove the dust boot from the top of the transmission. See Photo 11.
11. Push down on the spring loaded cap and turn counter clockwise to unlock, remove the cap, spring, and lower
gear selector from the transmission. See Photo 12. If you could not remove the shifter from the lower gear selec-
tor now is the time to put the assembly in a vise to pull apart the shifter.
Photo 8
Photo 9 Photo 10
Photo 11 Photo 12
Photo 7

12. Remove the nylon bushing from the end of the stock lower gear selector and install the bushing on the Rough
Country straight gear selector. See Photo 13.
13. Place the Rough Country gear selector into the transmission, insert the spring and cap. Push down on the cap
and turn clockwise to lock into place. See Photo 14.
14. Install the rubber dust boot back onto the transmission.
15. Lightly grease the outside edges of the lower gear selector.
16. Install the shifter plate to the transmission tunnel and the transfer case gate using factory hardware and a 8mm
socket.
17. Slide the shifter over the top of the lower gear selector and install the lower shifter boot with the 4 factory bolts.
Use a 8mm socket to tighten.
18. Insert the 12V power supply back into the console and slide the console over the shifters into place. Make sure
you pull the shifter boot through the console before the console is all the way down into place.
19. Use a 10mm socket to reinstall all the factory console bolts.
20. Snap the shifter boot back into place and make a test run shifting through each gear.
Photo 13 Photo 14
Thank you for choosing Rough Country for your suspension needs.
1/4