Page is loading ...

Camcorder
User’s Guide
Changing Entertainment. Again.
CC6254

To reduce risk of injury, charge only rechargeable batteries recommended by the
manufacturer for this product. Other types of batteries may burst causing damage and
personal injury.
FCC Regulations state that unauthorized changes or modifications to this equipment
may void the user’s authority to operate it.
i
This symbol indicates
"dangerous voltage"
inside the product that
presents a risk of
electric shock or
personal injury.
WARNING
To reduce the
risk of fire or
electric shock, do
not expose this
product or AC
charger to rain or
moisture.
To reduce the risk of electric
shock, do not remove cover (or
back). No user serviceable parts
inside. Refer servicing to qualified
service personnel.
This symbol
indicates
important
instructions
accompanying the
product.
WARNING
RISK OF ELECTRIC SHOCK
DO NOT OPEN
Product Registration
Please fill out the product registration card and return it immediately. Returning
this card allows us to contact you if needed.
Keep your sales receipt for proof of purchase to obtain warranty parts and service
and attach it here. Record the serial number and model numbers located on the
bottom of the camcorder.
Model No. ______________________________________________________
Serial No. _______________________________________________________
Purchase Date. __________________________________________________
Purchased From. _________________________________________________
Important Information

1
Table of Contents
Table of Contents
(continued on the next page)
Chapter 1: Connections & Setup
Parts Checklist ......................................................................................... 6
Buttons and Controls ............................................................................. 7
Getting Started ....................................................................................... 9
Unpack the camcorder and accessories .......................................... 9
Adjust the hand strap .................................................................... 10
Attach the lens cap ........................................................................ 10
Attach the power supply ............................................................... 11
Turn on the camcorder................................................................... 12
Insert a cassette tape ..................................................................... 13
Use the viewfinder to see what’s recording ................................. 14
Start recording ............................................................................... 14
Play your recording ........................................................................ 15
Turn off the camcorder .................................................................. 15
Powering the Camcorder ..................................................................... 16
Charging the Battery ..................................................................... 16
Refreshing the Battery ................................................................... 17
Battery Level Icon ........................................................................... 18
Battery Care and Storage .............................................................. 19
Using the Power Supply ................................................................. 20
Using the Shoulder Strap ..................................................................... 21
Setting the Date and Time ................................................................... 22
Setting the Tape
Recording Speed ................................................................................... 23
Setting the Tape Length ....................................................................... 24

2
Table of Contents
Chapter 2: Using the Viewfinder
Seeing What You Are Recording ......................................................... 26
Using the Viewfinder ..................................................................... 26
On-screen Icons..................................................................................... 27
Warning Icons ................................................................................. 27
Recording and Playback Icons ....................................................... 28
Other Icons ..................................................................................... 33
Chapter 3: Recording
Recording Details.................................................................................. 36
5-Second Recording ....................................................................... 37
Quick Review .................................................................................. 37
Retake ............................................................................................. 38
Digital and Optical Zooming ......................................................... 39
Using Steady Pix™ .......................................................................... 41
Recording Tips ...................................................................................... 42
Chapter 4: Playback
Playback Options .................................................................................. 44
Basic Playback ................................................................................. 44
Still Playback Mode ........................................................................ 47
Shuttle Search ................................................................................. 48
Choose your Connection ...................................................................... 49
Using the Cassette Tape Adapter .................................................. 49
Connecting to a TV (or VCR) with Audio/Video Input Jacks ........ 52
Playback on a TV (or VCR) with Audio/Video Input Jacks............ 53
Tape Dubbing ................................................................................. 54

3
Table of Contents
(continued on the next page)
Chapter 5: Advanced Features
Using the Menus For Advanced Adjustment...................................... 56
Menu Definitions .................................................................................. 57
Camera Menu ................................................................................. 57
System Menu .................................................................................. 57
System Menu (continued) .............................................................. 58
Using the Advanced Features .............................................................. 60
Fade/Wipe Effects ........................................................................... 60
Program AE With Special Effects ................................................... 62
Digital Effects ................................................................................. 63
Exposure Control ............................................................................ 64
Focusing .......................................................................................... 65
White Balance Adjustment ............................................................ 67
Date/Time Insert ............................................................................. 69
Instant Titles ................................................................................... 70
Animation ....................................................................................... 71
Time-Lapse ...................................................................................... 72
Chapter 6: Other Information
Troubleshooting.................................................................................... 74
Final Notes ............................................................................................ 78
Power .............................................................................................. 78
Date/Time Settings ......................................................................... 78
Video Recording ............................................................................. 79
TBC (Time Base Corrector) ............................................................. 79
Tapes ............................................................................................... 80
Care and Cleaning ................................................................................ 81
After Using the Camcorder ............................................................ 81
Cleaning The Camcorder ............................................................... 81
Care and Maintenance ......................................................................... 81

4
Table of Contents
Tape Care and Storage ................................................................... 82
Things to Avoid .............................................................................. 83
Traveling Tips ........................................................................................ 83
Specifications ........................................................................................ 84
Customer Assistance and Service ........................................................ 85
Limited Warranty .................................................................................. 87
FCC and Industry Canada Information ................................................ 91
Optional Accessories ............................................................................ 92
Accessories Order Form .................................................................. 95
Index ...................................................................................................... 98

Chapter 1
Connections & Setup
Chapter Overview:
• Parts Checklist
• Buttons and Controls
• Getting Started
• Powering the Camcorder
• Using the Shoulder Strap
• Setting the Date and Time
• Setting the Tape Recording Speed
• Setting the Tape Length
5
Changing Entertainment. Again.

6 Chapter 1
Connections & Setup
Shoulder strap
Part # ACS091
D
I
G
I
T
A
L
(
D
S
C
I
N
/
O
U
T
)
D
S
C
S
T
O
P
R
R
E
T
A
K
E
F
L
I
G
H
T
O
F
F
A
U
T
O
O
N
C
O
U
NT
ER
R/
M
F
AD
E
/W
IP
E
P
. A
E
D
IG
IF
E
CT
C
H
A
R
G
E
V
I
D
E
O
R
E
F
R
E
S
H
E
J
E
C
T
S
T
E
A
D
Y
P
I
X
/
T
B
C
+
+
M
E
N
U
/
TR
A
C
K
IN
G
5
S
E
C
. R
E
C
V
O
L
Camcorder
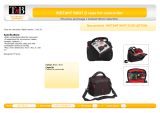
Parts Checklist
Make sure the box includes the items shown here:
Caution
Never use the power supply for any purpose other than charging the FB1260 battery
pack or for supplying power to the camcorder.
AC power supply
Part # 250814
Battery pack
Part # 244427 (FB1260)
Lens cap
Part # 251624
Cassette tape adapter
Part # 244270
AA battery for
cassette tape
adapter

Connections & Setup
Chapter 1 7
M
E
N
U
/
T
R
A
C
K
IN
G
5
S
E
C
.
R
E
C
V
O
L
STEADY PIX/TBC
+
+
P
L
A
Y
O
F
F
A
M
S
T
O
P
R
R
E
T
A
K
E
F
COUNTER R/M
FADE/WIPE
P. A E
DIGIFECT
BATTERY
RELEASE
switch
Audio/Video
jacks
Viewfinder
MENU/
TRACKING
dial
5 SEC. REC
button
Power Zoom
STEADY PIX™
button
Recording
Start/Stop
button
Power
switch
D
I
G
I
T
A
L
(
D
S
C
I
N
/
O
U
T
)
D
S
C
S
T
O
P
R
R
E
T
A
K
E
F
L
I
G
H
T
O
F
F
A
U
T
O
O
N
C
O
U
N
T
E
R
R
/
M
F
A
D
E
/
W
I
P
E
P
.
A
E
D
I
G
I
F
E
C
T
C
H
A
R
G
E
V
I
D
E
O
R
E
F
R
E
S
H
E
J
E
C
T
S
T
EA
D
Y
P
IX
/TB
C
+
+
MENU
/TRACKING
5 SEC. REC
V
O
L
Hand strap
Eyepiece focus
control
Microphone
Buttons and Controls

8 Chapter 1
Connections & Setup
STOP
R
RETAKE
F
COUNTER R/M
FADE/WIPE
P. A E
DIGIFECT
CHARGE
VIDEO
REFRESH
EJECT
Camcorder bottom view
Area marked CLOSE
Shoulder
strap
eyelets
Tripod mounting sockets
CHARGE
STOP R RETAKE F
CO
U
N
TER
R
/M
FAD
E/W
IPE
P
. A
E
D
IG
IFEC
T
POWER
REFRESH
EJECT
EJECT
switch
REFRESH button
Playback
buttons
POWER indicator
CHARGE
indicator
COUNTER R/M and
FADE/WIDE button
P.AE
button
DIGIFECT
button

Connections & Setup
Chapter 1 9
Getting Started
This section describes the basics on how to set up your camcorder to record for the first
time. Refer to the other sections for detailed operation and feature options.
Unpack the camcorder and accessories
• The items shown are packed with the camcorder. If any pieces are missing or
appear damaged, contact your dealer immediately.
• Remove the plastic film that covers the front and side logos on the camcorder. Use
your fingernail, not anything sharp, to remove.
• Save all packing materials and box in case the camcorder ever needs to be
shipped or stored.

10 Chapter 1
Connections & Setup
M
E
N
U
/
T
R
A
C
K
I
N
G
5
S
E
C
.
R
E
C
V
O
L
S
T
E
A
D
Y
P
IX
/T
B
C
+
+
P
L
A
Y
O
F
F
A
M
S
T
O
P
R
R
E
T
A
K
E
F
C
O
U
N
T
E
R
R
/
M
F
A
D
E
/
W
I
P
E
P
.
A
E
D
I
G
I
F
E
C
T
Adjust the hand strap
1. Lift the flap on the hand strap and separate the Velcro strip.
2. Insert your hand so your fingers can comfortably reach the buttons.
3. Adjust the strap to fit snugly.
4. Refasten the strap, and fold the flap back down.
Attach the lens cap
To protect the lens, attach the provided lens cap to the camcorder as shown in the
illustration.
M
E
N
U
/
T
R
A
C
K
I
N
G
5
S
E
C
.
R
E
C
V
O
L
S
T
E
A
D
Y
P
I
X
/
T
B
C
+
+
P
L
A
Y
O
F
F
A
M
S
T
O
P
R
R
E
T
A
K
E
F
C
O
U
N
T
E
R
R
/M
F
A
D
E
/W
IP
E
P
. A
E
D
IG
IF
E
C
T

Connections & Setup
Chapter 1 11
2
1
DC IN jack
AC power supply
MENU/
TRACKING
5 SEC. REC
VOL
STEADY PIX/TBC
+
+
P
L
A
Y
O
F
F
A
M
S
T
O
P
R
R
E
T
A
K
E
F
COUNTER R/M
FADE/WIPE
P
. AE
DIGIFECT
Attach the power supply
Since the battery must be charged before it can be used the first time, you need to use an
AC outlet to power the camcorder.
1. Plug the small end of the power supply into the DC IN jack on the camcorder.
2. Plug the other end of the power supply into a working AC outlet.

12 Chapter 1
Connections & Setup
Turn on the camcorder
Set the Power switch to the desired setting, either
automatic (
A
) or manual (
M
) record mode, powered
off (OFF), or in playback mode (
).
The POWER indicator comes on when the
camcorder is turned on.
Automatic recording
A
places the camcorder
into AutoShot™ mode. Focus, exposure, iris
control, white balance, and the video light are
controlled by the camcorder during automatic
recording.
Manual recording mode
M
allows you to
control many of the camcorder’s special
features, including accessing the menus and
setting the clock.
Notes:
• Many special effects don’t operate in
AutoShot mode (see pages 57-59 for
more information).
• The camcorder automatically turns off to
save battery power if you leave it in
record-standby mode for more than five
minutes. To turn it back on, set the
Power switch to OFF, then back to
automatic or manual record mode.
CHARGE
STOP R RETAKE F
COUNTER R/M
FADE/W
IPE
P. AE
DIGIFECT
POWER
REFRESH
EJECT
POWER indicator
Power switch
M
E
N
U
/
T
R
A
C
K
IN
G
5
S
E
C
. R
E
C
V
O
L
S
T
E
A
D
Y
P
IX
/
T
B
C
+
+
P
L
A
Y
O
F
F
A
M
S
T
O
P
R
R
E
T
A
K
E
F
C
O
U
N
T
E
R
R
/
M
F
A
D
E
/
W
I
P
E
P
.
A
E
D
I
G
I
F
E
C
T
A
M
P
L
A
Y
O
F
F

Connections & Setup
Chapter 1 13
Insert a cassette tape
1. Make sure the camcorder is connected to a
power supply.
2. Adjust the viewfinder.
3. With the camcorder set to
A
(automatic
record), slide the EJECT switch until the
cassette tape holder opens. Don’t force the
camcorder open.
4. Insert a tape with the tape wheel facing up and
the tape window facing out.
Notes:
• Make sure the tape is not slack when
loading the cassette tape. If there is any
slack, turn the wheel on the cassette
tape in the direction of the arrow to
take up the slack.
• Make sure the Erase Protection tab is in
the position that allows recording. If
not, slide the tab. Some tapes have
removable tabs. If the tab has been
removed, cover the hole with adhesive
tape.
5. Push on the area marked CLOSE until the
cassette tape holder locks into place. (PAUSE
appears in the viewfinder.)
Notes:
• You can’t open the cassette tape holder
unless a power supply is attached.
• The cassette tape holder can’t be
opened while the camcorder is in the
record mode.
CHARGE
STOP R RETAKE F
COUNTER R/M
FADE/W
IPE
P. AE
DIGIFECT
POWER
REFRESH
EJECT
EJECT switch
STOP
R
RETAKE
F
LIGHT
OFF AUTO ON
COUNTER R/M
FADE/WIPE
P. AE
DIGIFECT
CHARGE
VIDEO
REFRESH
EJECT
BATTERY
RELEASE switch
Area marked
CLOSE
Tape window
Tape wheel
Cassette tape holder

14 Chapter 1
Connections & Setup
Use the viewfinder to see what’s
recording
1. Remove the lens cap.
3. Adjust the viewfinder to a comfortable position.
4. Turn the eyepiece focus control to adjust the
focus of the viewfinder for your vision.
Start recording
1. Remove the lens cap.
2. Set the Power switch to
A
(automatic record).
(The POWER indicator comes on.)
3. Press and release the Recording Start/Stop
button to start recording. (
REC
appears in the
viewfinder (but won’t show up in the
recording)).
4. When finished recording, press and release the
Recording Start/Stop button again to stop
recording. The camcorder is now in the record-
pause mode. (PAUSE appears in the viewfinder.)
M
E
N
U
/
T
R
A
C
K
I
N
G
5
S
E
C
.
R
E
C
V
O
L
S
T
E
A
D
Y
P
I
X
/
T
B
C
+
+
P
L
A
Y
O
F
F
A
M
S
T
O
P
R
R
E
T
A
K
E
F
C
O
U
N
T
E
R
R
/
M
F
A
D
E
/
W
I
P
E
P
.
A
E
D
I
G
I
F
E
C
T
Viewfinder
Eyepiece focus
control
Recording
Start/Stop
button
Power switch
A
M
P
L
A
Y
O
F
F

Connections & Setup
Chapter 1 15
Play your recording
1. Set the Power switch to . (The POWER
indicator comes on.)
2. Press the Rewind button
to reverse the tape
to the beginning. When rewound completely,
the camcorder automatically stops.
3. Press the Play/Pause button
/
to start
playback. View the recording using the
viewfinder.
4. Press the Stop button
when finished playing
the tape.
Turn off the camcorder
Set the Power switch to OFF.
Playback buttons on top of
the camcorder include:
Stop ( ),
Rewind ( )
Play/Pause (
/
)
Fast Forward ( ).
CHARGE
STOP R RETAKE F
COUNTER R/M
FADE/W
IPE
P. AE
DIGIFECT
POWER
REFRESH
EJECT

16 Chapter 1
Connections & Setup
Powering the Camcorder
You can power your camcorder with a battery or AC
power.
Charging the Battery
1. Set the Power switch to OFF.
2. Make sure the battery is attached to the
camcorder. Hook the top end of the battery to
the camcorder and push the battery in until it
locks in place.
Important: If the battery pack is attached in
the wrong position, a malfunction may occur.
3. Plug the small end of the power supply into the
DC IN jack on the camcorder and the other end
into an AC outlet. (The CHARGE indicator
blinks.)
4. When the CHARGE indicator stops blinking but
stays on, charging is finished. Make sure the
Power switch is set to OFF, then unplug the
power supply from the AC outlet and from the
camcorder.
Important: Before detaching the power
source, make sure the camcorder’s power is
turned off. Failure to do so can result in a
camcorder malfunction.
Notes:
• If a protective cap is on the battery,
remove it before use or charging.
• When charging a battery for the first
time or after a long storage period, the
CHARGE indicator may not come on.
Remove the battery and try again.
• Charge the battery in temperatures
between 50˚ and 90˚ Fahrenheit (10-35˚
Celsius).
• Charging times are based on a fully
discharged battery and vary depending
on ambient temperature and battery
condition.
Power switch
M
E
N
U
/
T
R
A
C
K
IN
G
5 S
E
C
. R
E
C
V
O
L
S
T
E
A
D
Y
P
I
X
/T
B
C
+
+
P
L
A
Y
O
F
F
A
M
S
T
O
P
R
R
E
T
A
K
E
F
C
O
U
N
T
E
R
R
/
M
F
A
D
E
/
W
I
P
E
P
.
A
E
D
I
G
I
F
E
C
T
A
M
P
L
A
Y
O
F
F
CHARGE
STOP R RETAKE F
COUNTER R/M
FADE/WIPE
P. AE
DIGIFECT
POWER
REFRESH
EJECT
CHARGE indicator
Tip
Before extended use, it is
recommended that you prepare
enough battery packs to cover 3
times the planned shooting time.
DC IN
jack

Connections & Setup
Chapter 1 17
Approximate charging time
Approximate recording time (in minutes)
Note: Recording time is reduced significantly when you use the Zoom or Record-
Standby modes repeatedly.
Battery Charging Time
FB1260 approx. 90 min.
Battery Viewfinder on
FB1260 100
Charge marker
Using the Charge Marker
A charge marker is provided on the battery pack to
help you remember whether it has been charged or
not. Two colors are provided (red and black)—you
choose which one means charged and which means
discharged.
Removing the Battery
Slide the BATTERY RELEASE switch and pull out the battery pack.
Refreshing the Battery
If you charge a battery before it has been fully discharged, the battery’s capacity may be
reduced over time. We recommend you discharge or “refresh” your battery before
recharging it.

18 Chapter 1
Connections & Setup
1. Follow steps 1-3 in “Charging the Battery” (see
page 16).
2. Press and hold the REFRESH button for 2
seconds. (The REFRESH indicator blinks. When
the battery has been refreshed, charging
automatically starts and the CHARGE indicator
blinks.)
Notes:
• If you store a partially charged battery
for a long period of time, its
performance is reduced.
• During charging or discharging, the
camcorder can’t be operated.
• Charging and discharging isn’t possible if
the wrong type of battery is used.
• If the battery operation time remains
extremely short even after having been
fully charged, the battery is worn out
and needs to be replaced. Please
purchase a new one.
Battery Level Icon
The battery level icon appears in the viewfinder and
reveals the amount of power left in the rechargeable
battery.
Note: The battery level icon is not recorded
on the tape.
CHARGE
STOP R RETAKE F
CO
U
N
TER
R
/M
FAD
E/W
IP
E
P
. A
E
D
IG
IFEC
T
POWER
REFRESH
EJECT
CHARGE
indicator
REFRESH button
REFRESH
indicator
M
E
N
U
/
T
R
A
C
K
I
N
G
5
S
E
C
.
R
E
C
V
O
L
S
E
T
A
D
Y
P
I
X
/
T
B
C
+
+
P
L
A
Y
O
F
F
A
M
S
T
O
P
R
R
E
T
A
K
E
C
O
U
N
T
E
R
R
/
M
F
A
D
E
/
W
I
P
E
P
.
A
E
D
I
G
I
F
E
C
T
BATTERY
RELEASE switch
/