EPH Controls TRFPi2 User manual

Category
Thermostats
Type
User manual

EPH Controls TRFPi2 is a wireless room thermostat that allows you to easily control the temperature in your home. With its user-friendly interface and a range of features, it's the perfect solution for keeping your home comfortable and energy-efficient. Program the TRFPi2 to your desired settings for different times of the day and days of the week, ensuring your home is always at the perfect temperature when you need it. It also has a frost protection feature to prevent your pipes from freezing in cold weather, and a key lock to prevent unwanted changes to your settings.

EPH Controls TRFPi2 is a wireless room thermostat that allows you to easily control the temperature in your home. With its user-friendly interface and a range of features, it's the perfect solution for keeping your home comfortable and energy-efficient. Program the TRFPi2 to your desired settings for different times of the day and days of the week, ensuring your home is always at the perfect temperature when you need it. It also has a frost protection feature to prevent your pipes from freezing in cold weather, and a key lock to prevent unwanted changes to your settings.

TRFPi2 Room Thermostat Wireless Operating Instructions
Page 1 of 3
Boiler Plus
4. Installation
1. Factory default settings
7. Resetting the thermostat
6. Button / Symbol description
5. Frost protection
8. Keypad lock and unlock
2. Specications & wiring
Temperature indicator: °C
Switching dierential: 0.4°C
In built frost protection: 5°C - Not adjustable
Clock: 24 hours
Keypad lock: O
Operating mode: 5/2 day
5°C
OFF
Reset button
Wireless connect
button
Set point increase
Set point decrease
+1hr button
Standby button
Set button
OK button
Standby symbol
Current program
Keypad lock
symbol
Heating ON symbol
Wireless symbol
Day of the week
3. Mounting
Contents
1. Factory default settings
2. Specications & wiring
3. Mounting
4. Installation
5. Frost protection
6. Button / symbol description
7. Resetting the thermostat
8. Keypad lock and unlock
9. Setting the date, time and operating mode
10. Factory program settings
11. Adjusting the program settings for 5/2d
12. Temporary override (Manual)
13. Permanent override (Hold)
14. +1hr Boost funtion
15. Adjusting the switching dierential
16. To connect the TRFPi2 thermostat to the RF1A
17. To disconnect the TRFPi2 thermostat from the RF1A
18. Battery low warning
19. Replacing the batteries
20. Installer menu
Prior to setting the thermostat, it is neccessary to
complete all required settings described in this section.
Power supply: 2 x AA Alkaline Battery
Power consumption: 2 mW
Battery replacement: Once a year
Temp. control range: 5 ... 35°C
Ambient temperature: 0 ... 50°C
Dimensions: 84 x 84 x 30mm
Temperature sensor: NTC 10K Ohm @ 25°C
Temperature indication: ˚C
Switching dierential: Adjustable from 0.2/0.4/0.6/0.8/1.0˚C
Frost protection: Only operational in stand by mode
Slacken the fastening screw on the bottom of the thermostat with a philips
head screwdriver.
The thermostat is hinged and can be opened 180 degrees.
Mount the unit as described in section 3.
Insert 2 x AA batteries.
Close the thermostat and tighten the fastening screw.
The mounting height should be 1.5 meters above the oor level.
The thermostat should be wall mounted in the room where the heating is to
be controlled.
The place of installation should be chosen so that the sensor can measure the
room temperature as accurately as possible.
Choose the mounting location to prevent direct exposure to sunlight or other
heating / cooling sources when mounted.
The unit can be tted to: 1. Recessed conduit boxes.
2. Surface mounting boxes.
3. Directly on walls.
4. Table mounting with stand provided.
Frost protection is built into this thermostat.
It is pre xed at 5°C and is not adjustable.
It will only be activated when the thermostat is in the stand by mode
and the room temperature falls below 5°C.
It is necessary to reset the thermostat prior to initial programming.
Press the button on the side of the thermostat.
rst nowill appear on the screen.
Press the button.
rst yeswill appear on the screen.
Press the ‘OK button to return to normal operation.
RESET
To lock the keypad, press and hold the and buttons for 5 seconds.
will appear on the screen. The keypad is now locked.
To unlock the keypad, press and hold the and buttons for 5 seconds.
will disappear from the screen. The keypad is now unlocked.
CAUTION!
The thermostat must not be left unsupervised
when open. (Prevent non specialists and especially
children from gaining access to it.)
Only qualied electricians or authorised service
sta are permitted to open the thermostat.
If the thermostat is used in a way not specied by
the manufacturer, its safety may be impaired.
Important: Keep this document
20230123_TRFPi2_OpIns_PK
EPH Controls Ireland
technical@ephcontrols.com www.ephcontrols.com
EPH Controls UK
technical@ephcontrols.co.uk www.ephcontrols.co.uk
TRFPi2 Room Thermostat Wireless Operating Instructions
Page 2 of 3
Boiler Plus
20230123_TRFPi2_OpIns_PK
EPH Controls Ireland
technical@ephcontrols.com www.ephcontrols.com
EPH Controls UK
technical@ephcontrols.co.uk www.ephcontrols.co.uk
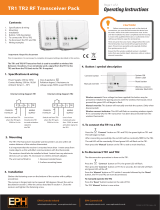
10. Factory program setting 5 / 2d
9. Setting the date, time and operating mode
Press the button once. Set Year will appear on the screen.
Press the or buttons to adjust the year. Press the OK button.
Press the or buttons to adjust the month. Press the OK button.
Press the or buttons to adjust the day. Press the OK button.
Press the or buttons to adjust the hour. Press the OK button.
Press the or buttons to adjust the minute. Press the OK button.
Press the or buttons to adjust from 5/2d to 7d or 24h mode.
Press the button or wait 30 seconds and the thermostat will return to
normal operation.
Set
11. Adjusting the program settings for 5/2d
Press the button twice.
Programming for Monday to Friday is now selected.
Press the or buttons to adjust the P1 time. Press the OK button.
Press the or buttons to adjust the P1 temp. Press the OK button.
Repeat this process to adjust P2 to P6 times and temperatures.
Press the button.
Programming for Saturday to Sunday is now selected.
Press the or buttons to adjust the P1 time. Press the OK button.
Press the or buttons to adjust the P1 temp. Press the OK button.
Repeat this process to adjust P2 to P6 times and temperatures.
Press the button to return to automatic mode.
If 7 D mode is selected, you can program each day of the week with 6
individual times and temperatures.
If 24H mode is selected, you can only program each day of the week with the
same 6 times and temperatures.
Press the or buttons to adjust the temperature setpoint.
Manual will appear on the screen.
Press ‘OK or after 5 seconds the thermostat will operate in this temporary
override.
Press the button to return to automatic mode.
Set
Set
12. Temporary override (Manual)
13. Permanent override (Hold)
16. To connect the TRFPi2 thermostat to the RF1A
receiver
Mon-Fri
5/2D
P1 P2 P3 P4 P5 P6
06:30 08:00 12:00 14:00 17:30 22:00
21˚C 18˚C 21˚C 18˚C 21˚C 16˚C
Sat-Sun
08:00 10:00 12:00 14:00 17:30 23:00
Mon-Fri
7D
P1 P2 P3 P4 P5 P6
06:30 08:00 12:00 14:00 17:30 22:00
21˚C 18˚C 21˚C 18˚C 21˚C 16˚C
Sat-Sun
08:00 10:00 12:00 14:00 17:30 23:00
P1 P2 P3 P4 P5 P6
06:30 08:00 12:00 14:00 17:30 22:00
21˚C 18˚C 21˚C 18˚C 21˚C 16˚C
Everyday
24H
RF Connect
On the TRFPi2 thermostat:
Press the button. The red and green light will begin to ash.
Press the button.
The thermostat will begin to search through the RF channels.
Once an RF connection has been established the thermostat will show r01
on the LCD screen.
Press the ‘OK button to nish the process.
The thermostat is now connected to the RF1A receiver.
RF Connect’ appears on the screen.
15. Adjusting the switching dierential 0.4˚C
Press the ‘OK and ‘+1hr buttons for 5 seconds.
H On 0.4˚C will appear on the screen.
Press the or buttons to adjust from 0.2, 0.4, 0.6, 0.8 or 1˚C.
Press the ‘OK button to return to normal operation.
Connect
Please note, If you are installing a CombiPack2 the TRFPi2 thermostat and
the RF1A receiver will have a pre-established RF connection so it is not
necessary to carry out the RF connection process below.
On the RF1A receiver:
Press the ‘+1hr button for 3 seconds.
Hold will appear on the screen.
Press the or buttons to adjust the temperature setpoint.
Press ‘OK or after 5 seconds the thermostat will operate in this permanent
override.
Press the button to return to automatic mode.
14. +1hr Boost function
Press the ‘+1hr button once.
Press the or button to select your desired boost temperature.
Press the ‘OK button.
The thermostat will operate in this mode for one hour before returning to
automatic mode.
To cancel the boost mode at anytime, press the button or the +1hr button.
TRFPi2 Room Thermostat Wireless Operating Instructions
Page 3 of 3
Normal Mode (Nor)
20. Installer menu
To access the installer menu, you must hold OK and for 5 seconds.
When in the installer menu, press or and OK to navigate and select.
When the thermostat is in Normal mode, the thermostat will try to reach the
target temperature after the program changes.
Example: Program 1 on the thermostat is 21°C for 06:30am and the room
temperature is 18°C. The thermostat will start the heating at 06:30am and the
room temperature will start to increase then.
To return to main menu, press OK to select Nor
When the thermostat is in Optimum Start mode, the thermostat will try to
reach the target temperature by the start time of the next switching time.
This is done by setting the Ti (time interval) on the thermostat in this menu
to 10, 15 or 20. This will allow the thermostat 10 mins, 15 mins or 20 mins to
increase the room temperature by 1°C.
Ti can be set when OS is selected in the installer menu.
To return to main menu, press OK to select required Ti
To achieve the target temperature when the program starts, the thermostat
will read:
1. The Room Temperature (RT)
2. The Setpoint Temperature (ST)
3. The Target Temperature Dierence (TTD) is the dierence between
the setpoint temperature and the room temperature .
The time (in minutes) that it will take to overcome (TTD) is called Optimum
Start Time (OST) and its maximum value is 3 hours = 180 mins. This is
subtracted from the start time.
As the temperature increases the thermostat will recalculate the OST if the
temperature is increasing too quickly.
Optimum Start Mode (OS)
Example when Ti = 20
Program 1 on the thermostat is 21°C for
06:30am and the room temperature is 18°C.
The thermostat will start the heating at
05:30am to reach 21°C for 06:30am @ Ti=20.
Example when Ti = 10
Program 1 on the thermostat is 21°C for
06:30am and the room temperature is 18°C.
The thermostat will start the heating at
06:00am to reach 21°C for 06:30am @ Ti=10.
20˚C
0
20
40
60
80
100
120
140
160
180
Optimum Start Time (Mins)
Target Temperature Dierence ˚C
TTD
89 7654321
Optimum Start Control Graph with Ti = 20
0
15
30
45
60
75
90
105
120
135
Optimum Start Time (Mins)
Target Temperature Dierence ˚C
TTD
89 7654321
Optimum Start Control Graph with Ti = 15
0
10
20
30
40
50
60
70
80
90
Optimum Start Time (Mins)
Target Temperature Dierence ˚C
TTD
89 7654321
Optimum Start Control Graph with Ti = 10
Boiler Plus
Boiler Plus
20230123_TRFPi2_OpIns_PK
EPH Controls Ireland
technical@ephcontrols.com www.ephcontrols.com
EPH Controls UK
technical@ephcontrols.co.uk www.ephcontrols.co.uk
Press the button.
The thermostat will begin to search through the RF channels.
Press and hold the standby button for 10 seconds.
AdL’ & AdH will ash intermittently on the screen of the thermostat.
Press the ‘OK button twice to complete the unpairing process.
The thermostat TRFPi2 is now disconnected from the receiver RF1A.
Note: RF Connect may remain on the screen for a couple of minutes.
Connect
RF Connect
17. To disconnect the TRFPi2 thermostat from the
RF1A receiver
18. Battery low warning
On the TRFPi2 thermostat;
RESET
On the RF1A
When the batteries are almost empty, the symbol will begin
to ash on the screen.
The batteries must now be replaced or the unit will shut down.
19. Replacing the batteries
Slacken the fastening screw on the
bottom of the thermostat with a philips
head screwdriver.
The thermostat is hinged and can be
opened 180 degrees.
Replace the batteries with 2 x AA
Alkaline batteries.
Close the thermostat and tighten the
fastening screw.
Press the button and immediately press the button.
The red and green lights will ash quickly followed by a solid red light.
The RF1A receiver is now disconnected from the TRFPi2 thermostat.
  • Page 1 1
  • Page 2 2
  • Page 3 3

EPH Controls TRFPi2 User manual

Category
Thermostats
Type
User manual

EPH Controls TRFPi2 is a wireless room thermostat that allows you to easily control the temperature in your home. With its user-friendly interface and a range of features, it's the perfect solution for keeping your home comfortable and energy-efficient. Program the TRFPi2 to your desired settings for different times of the day and days of the week, ensuring your home is always at the perfect temperature when you need it. It also has a frost protection feature to prevent your pipes from freezing in cold weather, and a key lock to prevent unwanted changes to your settings.

Ask a question and I''ll find the answer in the document

Finding information in a document is now easier with AI