Installation Manual
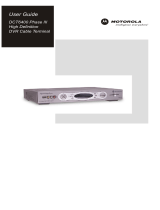
DCT6400 Phase III
High-Definition
DVR Cable Terminal
I
DC
T64
16 II

CAUTION
RISK OF ELECTRIC SHOCK
REFER SERVICING TO QUALIFIED SERVICE PERSONNEL.
TO REDUCE THE RISK OF ELECTRIC SHOCK,
DO NOT REMOVE COVER (OR BACK).
NO USER-SERVICEABLE PARTS INSIDE.
CAUTION:
Caution
These servicing instructions are for use by qualified personnel only. To reduce the risk of electrical shock, do not perform any servicing other
than that contained in the Installation and Troubleshooting Instructions unless you are qualified to do so. Refer all servicing to qualified service
personnel.
Special Symbols That Might Appear on the Equipment
This symbol indicates that dangerous voltage levels are present within the equipment. These voltages are not
insulated and may be of sufficient strength to cause serious bodily injury when touched. The symbol may also
appear on schematics.
The exclamation point, within an equilateral triangle, is intended to alert the user to the presence of important
installation, servicing, and operating instructions in the documents accompanying the equipment.
For continued protection against fire, replace all fuses only with fuses having the same electrical ratings
marked at the location of the fuse.
This equipment operates over the marked Voltage and Frequency range without requiring manual setting of any
selector switches. Different types of line cord sets may be used for connections to the mains supply circuit and should
comply with the electrical code requirements of the country of use. The line cord provided with the equipment is
acceptable for use with NEMA Style 5-15R ac receptacles supplying nominal 120 Volts.
WARNING: TO REDUCE THE RISK OF FIRE OR SHOCK, DO NOT EXPOSE THIS APPLIANCE TO RAIN OR MOISTURE. THE
APPARATUS SHALL NOT BE EXPOSED TO DRIPPING OR SPLASHING AND NO OBJECTS FILLED WITH LIQUIDS, SUCH AS VASES,
SHALL BE PLACED ON THE APPARATUS.
CAUTION: TO PREVENT ELECTRICAL SHOCK, DO NOT USE THIS (POLARIZED) PLUG WITH AN EXTENSION CORD, RECEPTACLE,
OR OTHER OUTLET UNLESS THE BLADES CAN BE FULLY INSERTED TO PREVENT BLADE EXPOSURE.
CAUTION: TO ENSURE REGULATORY AND SAFETY COMPLIANCE, USE ONLY THE PROVIDED POWER CABLES.
It is recommended that the customer install an AC surge arrestor in the AC outlet to which this device is connected. This is to avoid damaging the
equipment by local lightning strikes and other electrical surges.

IMPORTANT SAFETY INSTRUCTIONS
1 Read these instructions.
2 Keep these instructions.
3 Heed all warnings.
4 Follow all instructions.
5 Do not use this apparatus near water.
6 Clean only with dry cloth.
7 Do not block any ventilation openings. Install in accordance with the manufacturers
instructions.
8 Do not install near any heat sources such as radiators, heat registers, stoves, or other
apparatus (including amplifiers) that produce heat.
9 Do not defeat the safety purpose of the polarized or grounding-type plug. A polarized plug has
two blades with one wider than the other. A grounding type plug has two blades and a third
grounding prong. The wide blade or the third prong are provided for your safety. If the provided
plug does not fit into your outlet, consult an electrician for replacement of the obsolete outlet.
10 Protect the power cord from being walked on or pinched particularly at plugs, convenience
receptacles, and the point where they exit from the apparatus.
11 Only use attachments/accessories specified by the manufacturer.
12 Unplug this apparatus during lightning storms or when unused for long periods of time.
13 Refer all servicing to qualified service personnel. Servicing is required when the apparatus has
been damaged in any way, such as the power-supply cord or plug is damaged, liquid has been
spilled or objects have fallen into the apparatus, the apparatus has been exposed to rain or
moisture, does not operate normally, or has been dropped.
Caring for the Environment by Recycling
When you see this symbol on a Motorola product, do not dispose of the product with residential or commercial waste.
Recycling your Motorola Equipment
Please do not dispose of this product with your residential or commercial waste. Some countries or regions, such as the
European Union, have set up systems to collect and recycle electrical and electronic waste items. Contact your local
authorities for information about practices established for your region. If collection systems are not available, call
Motorola Customer Service for assistance.
FCC Compliance
This equipment has been tested and found to comply with the limits for a Class B digital device, pursuant to Part 15 of the FCC Rules. These
limits are designed to provide reasonable protection against harmful interference when the equipment is operated in a residential environment.
This equipment generates, uses, and can radiate radio frequency energy and, if not installed and used in accordance with the instructions, may
cause harmful interference to radio communications. Operation of this equipment in a residential area is likely to cause harmful interference in
which case the user will be required to correct the interference at his/her own expense. Any changes or modifications not expressly approved
by Motorola could void the user’s authority to operate this equipment under the rules and regulations of the FCC. However, there is no
guarantee that interference will not occur in a particular installation. If this equipment does cause harmful interference to radio or television
reception, which can be determined by turning the equipment off and on, the user is encouraged to try to correct the interference by one of the
following measures:
Re-orient or relocate the receiving antenna
Increase the separation between the equipment and receiver
Connect the equipment into an outlet on a circuit different from that to which the receiver is connected.
Consult the dealer or an experienced radio/TV technician for help.
You may find the following booklet, prepared by the Federal Communication Commission, helpful: How to Identify and Resolve Radio-TV
Interference Problems, Stock No. 004-000-0342-4, U.S. Government Printing Office, Washington, DC 20402.
Changes or modification not expressly approved by the party responsible for compliance could void the user’s authority to operate the
equipment.

FCC Declaration of Conformity
According to 47 CFR, Parts 2 and 15 for Class B Personal Computers and Peripherals; and/or CPU Boards and Power Supplies used with
Class B Personal Computers, Motorola, Inc., 6450 Sequence Drive, San Diego, CA 92121, 1-800-225-9446 or 101 Tournament Drive,
Horsham, PA 19044, 1-888-944-4357, declares under sole responsibility that the product identifies with 47 CFR Part 2 and 15 of the FCC Rules
as a Class B digital device. Each product marketed is identical to the representative unit tested and founded to be compliant with the standards.
Records maintained continue to reflect the equipment being produced can be expected to be within the variation accepted, due to quantity
production and testing on a statistical basis as required by 47 CFR 2.909. Operation is subject to the following condition: This device must
accept any interference received, including interference that may cause undesired operation. The above named party is responsible for
ensuring that the equipment complies with the standards of 47 CFR, Paragraphs 15.107 to 15.109
Canadian Compliance
This Class B digital device complies with Canadian ICES-003. Cet appareil numérique de la classe B est conforme à la norme NMB-003 du
Canada.
NOTE TO CATV SYSTEM INSTALLER: This reminder is provided to call CATV system installer’s attention to Article 820-40 of the NEC that
provides guidelines for proper grounding and, in particular, specifies that the cable ground shall be connected to the grounding system of the
building, as close as possible to the point of cable entry as practical.
Copyright © 2005 by Motorola, Inc.
All rights reserved. No part of this publication may be reproduced in any form or by any means or used to make any derivative work (such as
translation, transformation or adaptation) without written permission from Motorola, Inc.
Motorola reserves the right to revise this publication and to make changes in content from time to time without obligation on the part of Motorola
to provide notification of such revision or change. Motorola provides this guide without warranty of any kind, either implied or expressed,
including, but not limited to, the implied warranties of merchantability and fitness for a particular purpose. Motorola may make improvements or
changes in the product(s) described in this manual at any time.
MOTOROLA and the Stylized M Logo are registered in the US Patent & Trademark Office. Dolby Digital manufactured under license from
Dolby Laboratories Licensing Corporation. Dolby, Dolby Digital, ProLogic and the double-D symbol are registered trademarks of Dolby
Laboratories Licensing Corporation. DOCSIS is a registered trademark of Cable Television Laboratories, Inc. This device incorporates a
copyright protection technology that is protected by U.S. patents and other intellectual property rights. Use of the copyright protection
technology is granted by Macrovision for home and other limited pay-per-view uses only, unless otherwise authorized by Macrovision. Reverse
engineering or disassembly is prohibited. Macrovision is a registered trademark of Macrovision Corporation. HDMI, the HDMI logo and High-
Definition Multimedia Interface are trademarks or registered trademarks of HDMI Licensing LLC.
All other product or service names are the
property of their respective owners. © Motorola, Inc. 2005

Contents
Section 1
Introduction
Features ............................................................................................................................................................................................ 1-2
Tuners ...................................................................................................................................................................................... 1-2
Standard Audio/Video Features............................................................................................................................................. 1-2
Standard DVR Functionality................................................................................................................................................... 1-3
Standard Data Features.......................................................................................................................................................... 1-3
Standard Miscellaneous Features ......................................................................................................................................... 1-3
Available Optional Features................................................................................................................................................... 1-4
Using This Manual ........................................................................................................................................................................... 1-4
Related Documentation................................................................................................................................................................... 1-4
Document Conventions................................................................................................................................................................... 1-4
If You Need Help............................................................................................................................................................................... 1-5
Calling for Repairs ........................................................................................................................................................................... 1-6
Section 2
Overview
Front Panel ....................................................................................................................................................................................... 2-1
Rear Panel......................................................................................................................................................................................... 2-2
Section 3
Installation
Important Safety Considerations ................................................................................................................................................... 3-1
During Transportation to the Subscriber Home................................................................................................................... 3-1
During Installation................................................................................................................................................................... 3-1
Before You Begin ............................................................................................................................................................................. 3-2
Clearing the Hard Drive .......................................................................................................................................................... 3-2
Video Connection Options ..................................................................................................................................................... 3-3
Audio Connection Options..................................................................................................................................................... 3-3
Installation Overview ....................................................................................................................................................................... 3-4
Cabling to an HDTV for Video......................................................................................................................................................... 3-5
Cabling to an HDTV and an A/V Receiver............................................................................................................................. 3-6
Cabling to a Standard Definition TV and an A/V Receiver .................................................................................................. 3-7
Cabling to a Standard Definition TV and Audio Receiver ................................................................................................... 3-8
Installing the Optional IR Blaster ................................................................................................................................................... 3-9
Locating the IR Receiver on the VCR.................................................................................................................................... 3-9
Connecting the IR Blaster .................................................................................................................................................... 3-10
Checking the IR Blaster........................................................................................................................................................ 3-10
DCT6400 Phase III Installation Manual

ii Contents
Data Device Connections ..............................................................................................................................................................3-11
Boot Cycle.......................................................................................................................................................................................3-12
Boot Cycle Error Codes ........................................................................................................................................................3-13
Operational Check for the Remote Control..................................................................................................................................3-14
Optimizing the High-Definition Settings.......................................................................................................................................3-15
Graphics Overlaying the Video .....................................................................................................................................................3-17
Section 4
Diagnostics
Using the Diagnostics......................................................................................................................................................................4-2
d01 General Status ...........................................................................................................................................................................4-3
d02 Purchase Status ........................................................................................................................................................................4-4
d03 Out-Of-Band (OOB) Status .......................................................................................................................................................4-5
d04 In-Band Status ...........................................................................................................................................................................4-6
d05 Unit Address ..............................................................................................................................................................................4-8
d06 Current Channel Status ..........................................................................................................................................................4-10
d07 RF Modem (Upstream) ............................................................................................................................................................4-13
d08 Code Modules..........................................................................................................................................................................4-14
d09 Memory Configuration ............................................................................................................................................................4-16
d10 Keypad - LED ...........................................................................................................................................................................4-16
d11 Interface Status........................................................................................................................................................................4-17
d12 User Setting Status .................................................................................................................................................................4-19
d13 DVR/Hard Drive Status............................................................................................................................................................4-21
d14 DOCSIS Status.........................................................................................................................................................................4-23
d15 Application Specific Information ...........................................................................................................................................4-27
d16 Interactive Status ....................................................................................................................................................................4-27
Section 5
Troubleshooting
Appendix A
Specifications
Appendix B
Connection Record
Abbreviations and Acronyms
DCT6400 Phase III Installation Manual

Contents iii
Figures
Figure 1-1 DCT6400 front and rear views ..................................................................................................................................... 1-1
Figure 2-1 Front panel ..................................................................................................................................................................... 2-1
Figure 2-2 Rear panel...................................................................................................................................................................... 2-2
Figure 3-1 Cabling to an HDTV ...................................................................................................................................................... 3-5
Figure 3-2 Cabling to an HDTV and audio/video receiver........................................................................................................... 3-6
Figure 3-3 Cabling to a standard-definition stereo TV ................................................................................................................ 3-7
Figure 3-4 Cabling an audio receiver ............................................................................................................................................ 3-8
Figure 3-5 IR transmitter installed in mounting bracket ............................................................................................................. 3-9
Figure 3-6 IR Blaster installed ..................................................................................................................................................... 3-10
Figure 3-7 Sample data devices you can connect to the DCT6400.......................................................................................... 3-11
Figure 4-1 Example of the LED for the main menu...................................................................................................................... 4-2
Figure 4-2 Example GENERAL STATUS LED (no error) ............................................................................................................. 4-3
Figure 4-3 LED display for PURCHASE STATUS diagnostic...................................................................................................... 4-4
Figure 4-4 LED display for the OOB diagnostic........................................................................................................................... 4-5
Figure 4-5 LED display for in-band diagnostic ............................................................................................................................ 4-6
Figure 4-6 LED display of a unit address ..................................................................................................................................... 4-8
Figure 4-7 Current channel status LED displays....................................................................................................................... 4-10
Figure 4-8 RF upstream modem LED display ............................................................................................................................ 4-12
Figure 4-9 LED display for code modules .................................................................................................................................. 4-13
Figure 4-10 Interactive Info LED display..................................................................................................................................... 4-22
Figure B-1 Connection record .......................................................................................................................................................B-1
Tables
Table 1-1 DVR Recording Time Guidelines ................................................................................................................................... 1-3
Table 2-1 Front panel ...................................................................................................................................................................... 2-1
Table 2-2 Rear panel connections................................................................................................................................................. 2-3
Table 3-1 LED displays and OOB frequencies........................................................................................................................... 3-12
Table 3-2 Boot cycle error codes ................................................................................................................................................ 3-13
Table 3-3 Operational check ........................................................................................................................................................ 3-14
Table 3-4 Modes supporting graphics overlay........................................................................................................................... 3-17
DCT6400 Phase III Installation Manual

Section 1
Introduction
This manual provides instructions for cable operator personnel to install the Motorola DCT6400
Phase III high-definition digital video recorder (DVR) cable terminals. The DCT6400 Phase III
terminals include a high-end processor, expanded memory, and enhanced graphics to support
digital, on-demand, and analog broadcast and interactive services. They provide a full
complement of interconnection options.
The DCT6400 Series includes the DCT6412 and DCT6416 Phase III, collectively referred to in
this manual as the “DCT6400.”
They DCT6400 Series advanced capabilities, including:
Authorization and purchase of on-demand programming
High-definition television (HDTV) video decoding
HDTV output through component video (Y Pb Pr), High-Definition Multimedia Interface
™
(HDMI
™
), or IEEE 1394 Firewire
Surround-sound audio through a variety of analog and digital interconnection options
Dual-tuner DVR functionality to pause and time shift live video and seamlessly record in
conjunction with the interactive programming guide (IPG)
Built-in DOCSIS
®
cable modem
Ethernet and Universal Serial Bus (USB) 2.0 ports for future home networking applications
Adaptability to various software platforms
As with all Motorola digital cable terminals, the hardware features are enabled by core
operating and third party application software.
Figure 1-1
Front and rear views
INFO OPTION
MENUGUIDE
POWER SELECT
C
H
A
N
N
E
L
C
U
R
S
O
R
SMART CARD
P
MUTE
MSGS.
ON REMOTE
RECORD
USB 2.0 VI DEO IN L AUDIO IN R
Dual Tuner DVR / HDTV Capable
DCT6416 II I
RF IN 2
L
L
AUDIO
IN
AUDIO
OUT
R
R
OPTICAL
SPDIF
S-VIDEO
IR
RF OUT
RF IN 1
RPT OUT
CM IN
CABLE
IN
SWITCHED
105-125V
60Hz
4A MAX
500W MAX
IEEE
1394
TV PASS CARD
SATA
ETHERNET
HDMI
Pr
OUT
VIDEO
Pb
Y
IN
SPDIF
DCT6400 Phase III Installation Manual

1-2 Introduction
Features
Tuners
Two 54 to 860 MHz video tuners with analog AMS-VSB and digital MPEG-2 main profile high
level video processor
One dedicated tuner for the DOCSIS high-speed data/voice services channel, up to 860 MHz
One dedicated tuner for the out-of-band (OOB) control channel
Standard Audio/Video Features
ITU standard 64/256 QAM/FEC/enhanced adaptive equalizer
Clear analog channel processor with BTSC decoder
DES based encryption/DCII access control
Out-of-band data receiver (70-130 MHz) 2.048 Mbps
Audio/video input ports (front and rear)
Analog/digital video scaling (picture in graphics)
32-bit 2D/3D graphics support in hardware
Macrovision
®
copy protection
High-definition video output through:
HDMI (also compatible with DVI using an HDMI-to-DVI converter cable)
Component Video (Y Pb Pr)
IEEE 1394
Standard-definition video output through:
S-Video
Baseband
RF
Audio output through:
S/PDIF ATSC standard Dolby Digital® AC-3 electrical or optical
Baseband L/R
DCT6400 Phase III Installation Manual

Introduction 1-3
Standard DVR Functionality
DVR functionality integrated with the IPG enables subscribers to:
Pause, rewind, fast-forward, or record live TV
Maintain a personal recorded program library and access it using the IPG
Select programs to record across multiple channels and time slots
Rewind and replay recorded programs
Simultaneously watch two programs, switching easily between them using the
SWAP key
Record a program in the background while viewing another live program
Simultaneously record programs from two channels while watching a different pre-recorded
program, with the ability to switch viewing between any of the three programs
Motorola cannot guarantee the exact amount of programming that each subscriber will be able to
record. The approximate time depends on the programming type and the drive size:
Table 1-1
DVR Recording Time Guidelines
Estimated Recording Hours For
Model Drive Size
Analog
Channels
Standard Digital
Channels
HDTV
Channels
DCT6412
120 GB 24 to 32 38 to 73 10 to 15
DCT6416
160 GB 35 to 43 55 to 100 14 to 21
All times are approximate. The actual hours a subscriber can record are a function of program
bit rate, the IPG type, and the reserved buffer space. A SATA port is available to connect an
external drive to add DVR recording capacity.
Standard Data Features
Integrated DOCSIS 1.0/1.1 capable cable modem
16 MB flash memory
128 MB SDRAM
One rear and one front Universal Serial Bus (USB) 2.0 port (dual connector interface)
10/100 Base-T Ethernet Port (RJ-45)
On-board real-time RF return (DOCSIS compliant)
Renewable security connector
Standard Miscellaneous Features
Smart Card interface for electronic commerce
Infra-Red (IR) blaster port
Switched accessory outlet
Messaging capabilities
DCT6400 Phase III Installation Manual

1-4 Introduction
Digital diagnostics
Full feature access from front panel using a four-digit, seven-segment LED display
Available Optional Features
Factory-installed expansion flash memory (32 MB)
IR Blaster transmitter
Using This Manual
This manual provides instructions to install and configure a DCT6400:
Section 1 Introduction provides a product description, a list of related documentation, the technical
help line telephone number, and the repair/return procedure.
Section 2 Overview describes the DCT6400 and provides an overview of its use. This section also
identifies the front-panel displays and keys and describes the rear-panel features.
Section 3 Installation provides subscriber location installation and testing instructions.
Section 4 Diagnostics provides instructions on accessing and interpreting the built-in diagnostics.
Section 5 Troubleshooting provides information on common error conditions and their resolution.
Appendix A Specifications provides the technical specifications.
Appendix B Connection Record provides a diagram for recording the connections between the
DCT6400 and other devices.
Abbreviations
and Acronyms
The Abbreviations and Acronyms list contains the full spelling of the short forms used in
this manual.
Related Documentation
The following documentation may be helpful when operating the DCT6400:
DCT6400 Phase III User Guide
User documentation for the remote control, audio receiver, TV, and other components
Separate instruction manuals are available for associated components.
Document Conventions
Before you begin working with this manual, familiarize yourself with the following stylistic
conventions:
SMALL CAPS
Denotes silk screening on the equipment, typically representing front- and rear-panel
controls, input/output (I/O) connections, and LEDs
* (asterisk)
Indicates that several versions of the same model number exist and the information applies
to all models; when the information applies to a specific model, the complete model number
is given
Italic type
Used for emphasis
Courier font
Displayed text
DCT6400 Phase III Installation Manual

Introduction 1-5
If You Need Help
If you need assistance while working with the DCT6400, contact the Motorola Technical
Response Center (TRC):
Inside the U.S.: 1-888-944-HELP (1-888-944-4357)
Outside the U.S.: 1-215-323-0044
Motorola Online:
http://businessonline.motorola.com
The TRC is on call 24 hours a day, 7 days a week. In addition, Motorola Online offers a
searchable solutions database, technical documentation, and low-priority issue creation and
tracking.
Http://businessonline.motorola.com888-944-4357 / 215-323-0044 / 888-944-HELP
Data Networks/
Transmission Products
PRESS 3
Products
PRESS 1
Cable Router
VOIP
PRESS 2
Cable Modems
Products
PRESS 3
Transmission
Transport
Products
(MBT/MWT/MEA)
PRESS 5
Multiservice
Management
PRESS 4
Network
Licensing
PRESS 1
Network
Management
Products
PRESS 2
Network
Technical Response Center
Telephone Menu Options
Connected Home Solutions
Video Products
PRESS 1
Issued: 03/2005
Consumer
Support
PRESS 4
Broadcaster,
Satellite IRD or
Encoder Products
PRESS 2
Severity Level
1 - Critical Failure
2 - Serious Failure
3 - Non-Serious Failure
4 - Escalated Support
5 - Technical Assistance
PRESS 3
Settops
PRESS 2
Headend
PRESS 1
Controllers
PRESS 2
Analog
PRESS 1
Digital
IRD
PRESS 1
Commercial
Encoder
PRESS 2
Uplink
Modem
PRESS 2
Cable
PRESS 3
DCP
Satellite
C Band
PRESS 1
Consumer
DCT6400 Phase III Installation Manual

1-6 Introduction
Calling for Repairs
If a Motorola DCT6xxx set-top requires repair service, please call one of the following Motorola
Authorized Service Centers:
Company
From USA
or Canada
Outside USA
or Canada
World Wide Digital
1-800-227-0450 1-956-541-0600
Teleplan
1-800-352-5274 1-302-322-6088
To ensure efficient service, request a Return for Service Authorization (RSA) number. Be sure to
display the RSA number prominently on all equipment boxes.
The Service Center will provide the shipping address of the location performing your repairs.
To ship your equipment for repair:
1 Pack the unit securely, if possible in its original factory shipping carton.
2 Print or display the RSA number so it is easily visible on all equipment boxes.
3 Enclose a note describing the exact problem. Complete and enclose the checklist provided
with the unit.
4 Ship the unit PREPAID to the address provided by the Service Center.
DCT6400 Phase III Installation Manual

Section 2
Overview
This section describes the front and rear panel.
Front Panel
The front panel controls provide functional navigation if the remote control is lost or is
temporarily out of service. Certain functions, such as those requiring a numeric entry, require a
remote control. Some connectors are not enabled and require the support of application software.
Figure 2-1
Front panel
INFO OPTION
MENUGUIDE
POWER SELECT
C
H
A
N
N
E
L
C
U
R
S
O
R
SMART CARD
P
MUTE
MSGS.
ON
REMOTE
RECORD
USB 2.0 VI DEO IN L AUDIO IN R
Dual Tuner DVR / HDTV Capable
DCT6416 II I
6
7
89 10111
2
13
12
3
4
5
Table 2-1
Front panel
Key Feature Function
1*
USB 2.0 USB 2.0 connector for devices such as keyboards, joysticks, scanners, disk storage, PCs,
printers, or digital cameras
2
*
VIDEO IN Accepts baseband video from a VCR, camcorder, or other video device
3
*
AUDIO IN L and R connectors Accept audio from a VCR, camcorder, or other audio device.
4 LED
Displays the channel number or time of day. The indicators are:
MSGS. — the DCT6400 has received messages for you to read
ON — the DCT6400 is powered on
RECORD — the DVR is recording
REMOTE — the remote control is in use
5
*
SMARTCARD Supports electronic commerce activity using a Smart Card
6
CURSOR Moves the cursor around the program guide and menu screens
7
MENU Displays the main menu
8
POWER Turns the unit on or off
9
INFO Displays the current channel and program information (not supported by all applications)
10
OPTION Reserved for future use.
11
SELECT Selects menu options or programs from the program guide
12
GUIDE Displays the program guide
13
CHANNEL Changes the channels by moving up or down
* These connectors are not enabled and require the support of the application software.
DCT6400 Phase III Installation Manual

2-2 Overview
Rear Panel
The rear panel contains a switched power outlet; connectors for video, audio, and RF cabling;
data output; and modem and data interface connectors. Some connectors are not enabled and
require the support of application software.
Figure 2-2
Rear panel
RF IN 2
L
L
AUDIO
IN
AUDIO
OUT
R
R
OPTICAL
SPDIF
S-VIDEO
IR
RF OUT
RF IN 1
RPT OUT
CM IN
CABLE
IN
SWITCHED
105-125V
60Hz
4A MAX
500W MAX
IEEE
1394
TV PASS CARD
SATA
ETHERNET
HDMI
Pr
OUT
VIDEO
PbY
IN
SPDIF
12 4 98
10
5
11 12 13 14 16 1817
3
76
15
Table 2-2
Rear panel connections
Key Item Function
1
CABLE IN F-type coaxial cable input
2
RF OUT RF video output
3
OPTICAL SPDIF Optical digital Dolby Digital 5.1 audio or PCM audio output
4*
AUDIO IN L and R (left and right) RCA connectors for loop-through audio from audio equipment
5
SPDIF Coaxial Dolby Digital 5.1 or PCM audio output
6*
VIDEO IN RCA type video input from a TV, VCR, camcorder, or other device
7
VIDEO OUT RCA type video output to a VCR or TV
8*
ETHERNET Ethernet 10/100Base-T port
9
AC power AC power connector:
The bottom plug is an input for the AC power cord
The top plug is a switched power outlet for a device such as a TV or VCR
10
IR Mini phono jack enabling the DCT6400 to control a VCR using an optional low power IR
Blaster transmitter (not all IPGs support this feature)
11
S-VIDEO
S-Video high quality video output to a VCR or TV that accepts S-Video
12
AUDIO OUT L and R (left and right) RCA type stereo audio output jacks
13
Y Pb Pr Component video output to an HDTV
14
HDMI HDMI video output to an HDTV (can connect to a DVI input using an HDMI-to-DVI
converter cable)
15
TV PASSCARD TV passcard interface
16*
USB USB 2.0 connector for devices such as keyboards, joysticks, scanners, disk storage, PCs,
printers, or digital cameras
17
SATA Connector for optional external hard drive
18
IEEE 1394 IEEE 1394 connector for connecting to audio and video devices such as a DTV.
* These connectors are not enabled and require the support of the application software
DCT6400 Phase III Installation Manual

Section 3
Installation
This section provides instructions to cable the DCT6400 and check its operation. The cabling
diagrams illustrate connections to high- or standard-definition TVs, home theater receivers, and
stereo VCRs.
Important Safety Considerations
The DCT6400 requires careful handling to avoid potential damage to its internal hard disk drive
or the loss of recorded data. Be sure to follow these requirements during transportation and
installation.
During Transportation to the Subscriber Home
Transport the cable terminal in its shipping box or an equally padded container.
Do not expose the terminal to rain or moisture.
During Installation
VENTILATE
INFO
OPTION
MENU GUIDE
POWER SELECT
C
H
A
N
N
E
L
C
U
R
S
O
R
SMART CARD
P
MUT E
MS G S .
ON REMOTE
RECORD
USB 2 .0 VIDEO IN L AUDIO IN R
Du a l T uner DV R / H DT V C ap a ble
DCT 6416 III
Do not place the cable terminal in an enclosed area where the cooling vents are blocked or
impede the flow of air through the ventilation openings.
Install the terminal so that its position does not interfere with its proper ventilation. For
example, do not place the terminal on a bed, sofa, rug, or similar surface that could block the
ventilation openings.
Install the terminal away from heat sources such as radiators, heat registers and stoves.
Installation of the terminal near consumer electronics devices, such as stereo
receiver/amplifiers and televisions, is permitted as long as the air surrounding the terminal
does not exceed 40º C (104º F).
Place the terminal on a flat surface not prone to vibration or impact.
Do not install the terminal in an area where condensation occurs.
To prevent the temporary loss of guide data and cause a temporarily non-responding terminal,
do not plug the AC power cord into a switched power outlet.
To avoid shock and vibration damage to the internal hard drive, do not move the terminal while
it is plugged in.
To allow the hard drive to spin down and park its heads, wait at least 10 seconds after
disconnecting power before moving the terminal.
DCT6400 Phase III Installation Manual

3-2 Installation
Before You Begin
Before you move or change components on the subscriber entertainment system:
Review the installation instructions.
Determine if you are connecting to a standard TV, a composite (baseband) monitor, or a
component monitor.
Verify that you have the necessary cables and other required items.
If the terminal was previously used, clear its hard drive before installing it at a new
subscriber location
Clearing the Hard Drive
On a previously-used cable terminal, delete all recorded programs from the hard drive before
installing it at a new subscriber location. This prevents your new subscriber from viewing
programming they may not have purchased or may not want to see.
To prevent subscribers from accidentally deleting all of their recorded programs, a specific set of
keystrokes is required to clear the hard drive. Having a TV connected is optional.
To clear the hard drive:
1 Start the Diagnostics as described in Section 4, “Diagnostics.”
d 01 is displayed on the
front-panel LED.
2 Using a remote control, within five seconds, press
REPLAY, MY DVR three times, and LIVE TV.
(On some remote controls, the
MY DVR key may be labeled “LIST.”)
If you correctly enter this key sequence in five seconds or less, the hard drive is cleared and
the front-panel LED displays
Clr.
3 If
Clr is not displayed, re-enter the key sequence in step 2
If
Clr is displayed, press any other key to reset the terminal, turn it off, and complete the
clearing process.
DCT6400 Phase III Installation Manual

Installation 3-3
Video Connection Options
Use the following guidelines to determine the best video connection for the subscriber home
entertainment system. To determine the available video inputs on the TV, check the manual
supplied with the TV or the TV itself.
The DCT6400 offers the following video outputs:
Component
(Y Pb Pr)
HDTV and
SDTV
The Y Pb Pr outputs provide component video, the most widely supported HD video
connection.
HDMI
or
IEEE 1394
HDTV and
SDTV
HDMI and IEEE 1394 offer higher quality HD video than component video. If the TV
has an HDMI or a DVI input, use the
HDMI output instead of the IEEE 1394 output.
HDMI and IEEE 1394 are video and audio connections. If you use HDMI or
IEEE 1394, no separate audio connection to the TV is required.
HDMI is compatible with DVI. If the TV has a DVI input, you can use an HDMI-to-
DVI converter cable to connect to the DCT6400
HDMI connector.
If you use IEEE 1394, on-screen graphics do not display.
S-Video
SDTV only If your TV has an S-Video input, use S-Video. S-Video is the highest quality
standard-definition video output on the DCT6400.
Video
(composite)
SDTV only If your TV does not have an S-Video input, use the composite video (
VIDEO) output.
RF
SDTV only If your TV only has a coaxial RF input, connect it to the DCT6400
RF OUT connector.
Audio Connection Options
Connect the stereo audio cable to the AUDIO R and L connectors on the DCT6400 and the audio
left and right connectors on the TV. If the equipment supports it, use the
OPTICAL SPDIF or
coaxial digital
SPDIF output instead of the AUDIO R and L outputs. In most cases, these outputs
offer better audio quality, including support for 5.1 Surround Sound.
When connecting to a home theater receiver, depending on its inputs, you can use the following
DCT6400 audio outputs:
OPTICAL SPDIF or
coaxial
SPDIF
If the receiver supports it, use the
OPTICAL SPDIF or coaxial SPDIF audio output to deliver
Dolby AC-3 audio to a Dolby Digital home theater receiver.
Baseband
AUDIO
R and L
If the audio receiver does not support Dolby Digital, use the baseband
AUDIO R and L
outputs to connect to the audio receiver.
The cabling diagrams show sample audio/video (A/V) connections to an audio receiver, where
the receiver functions as an A/V router. When connecting to an audio receiver, reference its
installation instructions for directions on connecting to baseband and S/PDIF ports.
The VCR and TV receive their A/V signals from the currently selected input device on the audio
receiver. This is important when the subscriber has another A/V device such as a DVD player, a
secondary VCR, a CD player, or other electronic component. We recommend connecting the TV to
the monitor output so on-screen menus for the receiver can be displayed. (In many cases the
receivers themselves have interactive on-screen menus).
DCT6400 Phase III Installation Manual

3-4 Installation
Installation Overview
1 Determine if you are connecting to a:
High-definition TV
or monitor
Use the component video (Y Pb Pr), HDMI, or IEEE 1394 outputs. No other video
connection supports HDTV.
Standard
definition TV
Connect the
S-VIDEO connector using an S-video cable or connect the composite
VIDEO connector using an RCA phono cable. If the TV only has a coaxial RF input,
connect it to the DCT6400
RF OUT connector.
2 Determine if you are connecting the audio to a home theater receiver or directly to the TV:
For an HDMI or IEEE 1394 video connection, no additional audio connections to the TV
are required.
If the receiver or TV has a S/PDIF input, use the
OPTICAL SPDIF or coaxial SPDIF outputs.
Otherwise, use the baseband left and right
AUDIO OUT outputs.
3 Locate the cabling diagram(s) that best match the subscriber configuration.
4 Connect the audio and video cables in a manner matching that diagram.
5 Determine if you are connecting to a data device (see “Data Device Connections” in this
section). For installation details, refer to instructions included with the data device.
6 Connect the cable terminal to the coaxial cable wall outlet.
7 Perform the boot cycle, including the download to the terminal, as described in “Boot Cycle”
in this section.
8 Perform the operational check for the remote control.
9 Optimize the high-definition settings. See “Optimizing the High-Definition Settings” in this
section.
10 Verify that the appropriate configuration information has been downloaded using the
addressable controller, such as the DAC 6000.
DCT6400 Phase III Installation Manual

Installation 3-5
Cabling to an HDTV for Video
For HDTV video, for the best possible video quality:
If the TV has an HDMI input, connect it to the DCT6400 HDMI output. If the TV has a DVI
input, you can connect it to the DCT6400 HDMI output using and HDMI-to-DVI converter
cable.
If the TV has neither an HDMI nor a DVI input but has an IEEE 1394 input, connect it to
the DCT6400 IEEE 1394 output. If you use IEEE 1394, on-screen graphics do not display.
Otherwise, use the component video (Y, Pb, and Pr) connectors.
Figure 3-1
Cabling to an HDTV
RF IN 2
L
L
AUDIO
IN
AUDIO
OUT
R
R
OPTICAL
SPDIF
S-VIDEO
IR
RF OUT
RF IN 1
RPT OUT
CM IN
CABLE
IN
SWITCHED
105-125V
60Hz
4A MAX
500W MAX
IEEE
1394
TV PASS CARD
SATA
ETHERNET
HDMI
Pr
OUT
VIDEO
PbY
IN
SPDIF
HDTV
DCT6400 Phase III
either / or
CABLE/
ANTENNA IN
IEEE 1394
Component
Vi de o Input
Y
Pb
Pr
Cable in
HDMI
Because HDMI and IEEE 1394 provide a video and audio output, no additional audio
connections to the TV are required if you use HDMI or IEEE 1394.
DCT6400 Phase III Installation Manual
Page is loading ...
Page is loading ...
Page is loading ...
Page is loading ...
Page is loading ...
Page is loading ...
Page is loading ...
Page is loading ...
Page is loading ...
Page is loading ...
Page is loading ...
Page is loading ...
Page is loading ...
Page is loading ...
Page is loading ...
Page is loading ...
Page is loading ...
Page is loading ...
Page is loading ...
Page is loading ...
Page is loading ...
Page is loading ...
Page is loading ...
Page is loading ...
Page is loading ...
Page is loading ...
Page is loading ...
Page is loading ...
Page is loading ...
Page is loading ...
Page is loading ...
Page is loading ...
Page is loading ...
Page is loading ...
Page is loading ...
Page is loading ...
Page is loading ...
Page is loading ...
Page is loading ...
Page is loading ...
Page is loading ...
Page is loading ...
Page is loading ...
Page is loading ...
Page is loading ...
Page is loading ...
Page is loading ...
Page is loading ...
Page is loading ...
/