Page is loading ...

NIGHT VISION
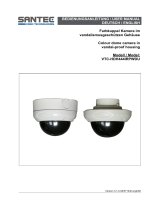
Indoor/Outdoor Bullet
Model no: DP15IR
DP15IRV
Camera Installation & Configuration
Please carefully read these instructions before using this product.
Save this document for future use.
31543AA
1-855-2avertX
(1-855-228-3798)
www.avertx.com
Precaution
• Please study the user manual before installation and
keep the manual for future reference.
• Avoid shining the LED lights directly in eyes.
• Do not install the camera on an unstable surface.
• Toavoidreorelectricshock,useaproperpower
source.
• Do not disassemble the camera.
• Stop using the camera if you see smoke or feel unusual
heat.
• Donotcutorpeelthecoveringawayfromthecable.
Thiswilleliminateweatherprotectionandvoidthewar-
ranty.
Features
• 650 TV-Line Resolution
• Digital Wide Dynamic Range
• IR LEDs
• IP66-rated
GENERAL SPECIFICATIONS
Model No. DP15IR DP15IRV
Image Sensor 1/3” Sony CCD
IP Rating IP66
Type / Format NTSC
Wide Dynamic Range Digital Wide Dynamic Range
Minimum Illumination 0.1Lux@F1.2,0LuxwithLEDsengaged
Day / Night Digital Day / Night
Resolution 650 TVL
Focal Length 4mm Fixed 4mm ~
9mm Verifocal Lens
Iris Control Auto
Auto White Balance Range 2500K ~ 9500K
Backlight Compensation Yes
Auto Gain Control Auto
Operating Temperature 14˚~122˚F(-10˚~50˚C)
Heater No
PowerConsumption 6.6W Max
Input Voltage 12vDC
Weight 1.9lbs(0.9kg)
Dimensions W:4.1”(105mm)xH:4.1”(105mm)XL:8.9”
(226mm)*
Housing Gray
BOX CONTENTS
•Screws(x4)
•Anchors(x4)
•Hex-headwrench
•Sunvisorscrew
•Extra video output cable
DIMENSIONS
REGULATORY COMPLIANCE
Emissions FCCpart15,subpartB,ClassA
CE: EN61000-6-4:2007
Immunity CE:EN60130-4:1995+A1:1998+A2:2003
FCC COMPLIANCE
ThisproducthasbeentestedandfoundtocomplywiththelimitsforaClassA
digital device pursuant to Part 15 of the FCC rules. These limits are designed to
providereasonableprotectionagainstharmfulinterferencewhentheequipment
isoperatedinacommercialenvironment.Theproductgenerates,uses,andcan
radiateradiofrequencyenergy,and,ifnotinstalledandusedinaccordancewith
themanufacturer’sinstructionmanual,maycauseharmfulinterferencewithradio
communications. Operation of this product in a residential area is likely to cause
harmfulinterference,inwhichcaseyouwillberequiredtocorrecttheinterference
atyourownexpense.
ThisdevicecomplieswithPart15oftheFCCRules.Operationissubjecttothe
followingtwoconditions:
1. This device may not cause harmful interference.
2. Thisdevicemustacceptanyinterferencereceived,includinginterference
that may cause undesired operation.
These limits are designed to provide reasonable protection against harmful
interferenceinanon-residentialinstallation.However,thereisnoguaranteethat
interferencewillnotoccurinaparticularinstallation.Ifthisequipmentdoescause
harmfulinterferencewiththeradioortelevisionreception,whichcanbedeter-
minedbyturningtheequipmentoffandon,youareencouragedtotrytocorrect
theinterferencebyoneormoreofthefollowingmeasures:
1. Reorient or relocate the antenna of the radio/television receiver.
2. Increasetheseparationbetweenthisequipmentandtheradio/television
receiver.
3. Plugtheequipmentintoadifferentoutletsothattheequipmentandthe
radio/televisionreceiverareondifferentpowermainsbranchcircuits.
4. Consult the dealer or an experienced radio/television technician for
additional suggestions.
*Width,Height,andLengthmeasurementsincludemountandsunsheild.

FUNCTION SETTING
1. Pushthelevertoaccessthemenuandconrmselec-
tion. Push the lever for one second to open or close the
menu. Use the lever to return to the previous menu from
motion detection or privacy mask setting sections.
2. Useascrewdrivertoadjustthefocus.
3. Useascrewdrivertoadjustthezoom.
4. Plug a test monitor into the optional VIDEO terminal to
viewmenuscreensduringinstallation.
5. The debug port is used for product upgrades. This
should only be accessed by a trained technician.
CAMERA OSD MENU
INSTALLATION
Wall or Ceiling
1. Drilla1”holeinthewallorceilingforthecable.
2. Drill four 1/4” holes and insert the included anchors.
3. Attachthecablesandtightentheincludedscrewsto
mountthecameratothewallorceiling.
4. Attach the sunvisor using the included sunvisor bolt.
5. Usetheinculded3mmhex-headwrenchtoloosenthe
adjustmentbolt.
6. Aim the camera and tighten the bolt to complete the
installation.
EXPOSURE
LENS
SELECT
MANUAL BRIGHTNESS 0 ~ 99
E. SHUTTER AUTO,1/60~
1/100000
DC BRIGHTNESS 0 ~ 99
E. SHUTTER AUTO,1/60~
1/100000
AGC OFF,LOW,MIDDLE,HIGH Auto Day/Night is
disabled if AGC is
OFF
SENSE-
UP
AUTO,OFF,X2,X4,X8,X16,
X32,X64,X128,X256,X512,
X1024
Usesense-upinlow
light environments
BACK-
LIGHT
BLC BLC LEVEL OFF,LOW,MID,
HIGH
TOP 0 ~ 15:
BOTTOM 0 ~ 16
LEFT 0 ~ 15
RIGHT 0 ~ 16
HLC HBLC OFF
MANUAL HBLC LEVEL:
OFF,LOW,MID,HIGH
TOP,BOTTOM,LEFT,RIGHT
same as BLC
MODE ALLDAY,NIGHT
HLC LEVEL 1 ~ 100
MASK 1-4 ON
TOP: 0 ~ 33
BOTTOM: 1 ~ 34
LEFT: 0 ~ 44
RIGHT 1 ~ 45
OFF: HLC MASK
OFF
D-WDR SET LEVEL 0 ~ 20
3D-DNR OFF,LOW,MID,HIGH,AUTO Reducenoiseinlow
light environments
WHITE BALANCE
AWB
MODE
ATW Color temp. 2500 ~ 9500 K
MANUAL M-WR 0~128:Adjustthe
red value
M-WB 0~128:Adjustthe
blue value
PUSH Optimizewhitebalanceforcurrentcondi-
tions
R-Y GAIN 0 ~ 255 Adjustredtoneofimage
B-Y GAIN 0 ~ 255 Adjustbluetoneofimage
DAY & NIGHT
D&N
MODE
AUTO DAY-NIGHT 7 ~ 30
NIGHT-DAY 6 ~ 29
DELAY TIME 0 ~ 15: Set the
duration
AUTO-
CDS
A. DAY-NIGHT 6 ~ 36
A. NIGHT-DAY 6 ~ 36
C. DAY-NIGHT 0 ~ 255
C. NIGHT-DAY 0 ~ 255
COLOR Fixed at Color
B&W Fixed at B&W
EXT DELAY TIME 0 ~ 15
BURST ON,OFF Enable/disable burst
signal in BW mode
C-SUP 0 ~ 100 Color suppress
control
A-SUP 0 ~ 100 Iris suppress control
SMART
IR
ON,OFF Decreases screen
saturationofobjects
withinashortrange
MIRROR MIRROR,OFF Vertical image
inversion
SHARP-
NESS
0 ~ 30
GAMMA 0.45,0.55,0.65
USER GAMMA .20 ~ 1.00 by incre-
ments of .05
PRIVACY
MASK
1~8
OFF
ON DOT SEL L_TOP,L_BOT,
R_BOT,R_TOP:
Determines location
for Motion Detection
DOTXY ENTER SETTING:
Determines coor-
dinates
MOVEXY ENTER SETTING:
Determines coor-
dinates
COLOR Select mask color
SPECIAL
LANGUAGE Selectlanguage(9
available)
TITLE OFF-ON EDIT Display the camera
name on screen
RESET Camera name reset
POSITION Camera name
position
DPC OFF Deactivates Detect
Pixel Correction in
lowillumination
AUTO WHITE THR 0 ~ 255: Set the
limitedvalueofwhite
pixel correction
LUMA THR 0 ~ 255: Set the
limitedvalueofwhite
pixel correction
RETURN Move back to previ-
ous menu.
FACTORY SET YES,NO Reset your camera
to factory default
conditon
EXIT
SAVEANDEXIT Save the value and
exit the menu
EXIT Escape the menu
withoutsaving
/