Page is loading ...

© 1997 by Motorola, Inc., Radio Products Group
8000 W. Sunrise Blvd., Ft. Lauderdale, FL 33322
Printed in U.S.A. 09/97. All Rights Reserved.
MCS 2000™ Radios
Radio Service Software
User’s Guide
Software Part Number: RVN-4113F
68-81081C15-E

Computer Software Copyrights
The Motorola
®
equipment described in this manual may include copyrighted Motorola computer
programs stored in semiconductor memories or other media. Laws in the United States and other
countries preserve for Motorola certain exclusive rights for copyrighted computer programs,
including the exclusive right to copy or reproduce in any form the copyrighted computer program.
Accordingly, any copyrighted Motorola computer programs contained in the Motorola equipment
described in this manual may not be copied or reproduced in any manner without the express
permission of Motorola. Furthermore, the purchase of Motorola equipment shall not be deemed to
grant either directly or by implication, estoppel or otherwise, any license under the copyrights,
patents or patent applications of Motorola, except for the normal non-exclusive, royalty-free license
to use that arises by operation of law in the sales of a product.
Licensing Restrictions
The installation program used to install MCS 2000™ Radio Service Software, INSTALL, is licensed
software provided by Knowledge Dynamics Corp., P.O. Box 1558, Canyon Lake, Texas 78130-1558
(USA). INSTALL is Copyright (c) 1987-1992 by Knowledge Dynamics Corp. which reserves all
copyright protection worldwide. INSTALL is provided to you for the exclusive purpose of installing
MCS 2000 Radio Service Software. Motorola is exclusively responsible for the support of MCS 2000
Radio Service Software, including support during the installation phase. In no event will Knowledge
Dynamics Corp. provide any technical support for MCS 2000 Radio Service Software.
Trademarks
, Motorola and PAC•RT are registered trademarks of Motorola, Inc.
MCS 2000, Call Alert, Channel Scan, Digital Private-Line, DVI-XL, DVP, DVP-XL, FLASHport,
HearClear, Modat, Private-Line, Quik-Call, Quik-Call II, Sel Cal, Single Tone, SmartZone, Stat-Alert,
OmniLink, and VRM-500 are trademarks of Motorola, Inc.
PC XT and Personal Computer AT are trademarks of IBM Corp.
MS-DOS and Windows are trademarks of Microsoft Corp.
Computer Software Copyrights
Copyright© Motorola 1990-1997. Printed in USA. All rights reserved.

i
Table of Contents
➠
1 - Introduction . . . . . . . . . . . . . . . . . . . . . . . . . . . . . . . . . . . . . . . . . . . . . . . . . . . . . . . . . . . . . .1
Prerequisites . . . . . . . . . . . . . . . . . . . . . . . . . . . . . . . . . . . . . . . . . . . . . . . . . . . . . . . . . . . . . . . . . . . . . . 2
Using This Manual. . . . . . . . . . . . . . . . . . . . . . . . . . . . . . . . . . . . . . . . . . . . . . . . . . . . . . . . . . . . . . . . . 3
Assembling The Hardware . . . . . . . . . . . . . . . . . . . . . . . . . . . . . . . . . . . . . . . . . . . . . . . . . . . . . . . . . . . 4
Steps to Connect the Hardware. . . . . . . . . . . . . . . . . . . . . . . . . . . . . . . . . . . . . . . . . . . . . . . . . . . . . 4
What’s On The RSS Diskettes. . . . . . . . . . . . . . . . . . . . . . . . . . . . . . . . . . . . . . . . . . . . . . . . . . . . . . . . . 6
Organizing Your Hard Disk . . . . . . . . . . . . . . . . . . . . . . . . . . . . . . . . . . . . . . . . . . . . . . . . . . . . . . . . . . 7
Starting The RSS . . . . . . . . . . . . . . . . . . . . . . . . . . . . . . . . . . . . . . . . . . . . . . . . . . . . . . . . . . . . . . . . . . . 8
The Banner Screen . . . . . . . . . . . . . . . . . . . . . . . . . . . . . . . . . . . . . . . . . . . . . . . . . . . . . . . . . . . . . . . . 10
Anatomy of a Menu . . . . . . . . . . . . . . . . . . . . . . . . . . . . . . . . . . . . . . . . . . . . . . . . . . . . . . . . . . . . . . . 11
Navigating Through The RSS. . . . . . . . . . . . . . . . . . . . . . . . . . . . . . . . . . . . . . . . . . . . . . . . . . . . . . . . 12
Anatomy of a Screen . . . . . . . . . . . . . . . . . . . . . . . . . . . . . . . . . . . . . . . . . . . . . . . . . . . . . . . . . . . . . . 13
Changing A Field Value . . . . . . . . . . . . . . . . . . . . . . . . . . . . . . . . . . . . . . . . . . . . . . . . . . . . . . . . . . . . 14
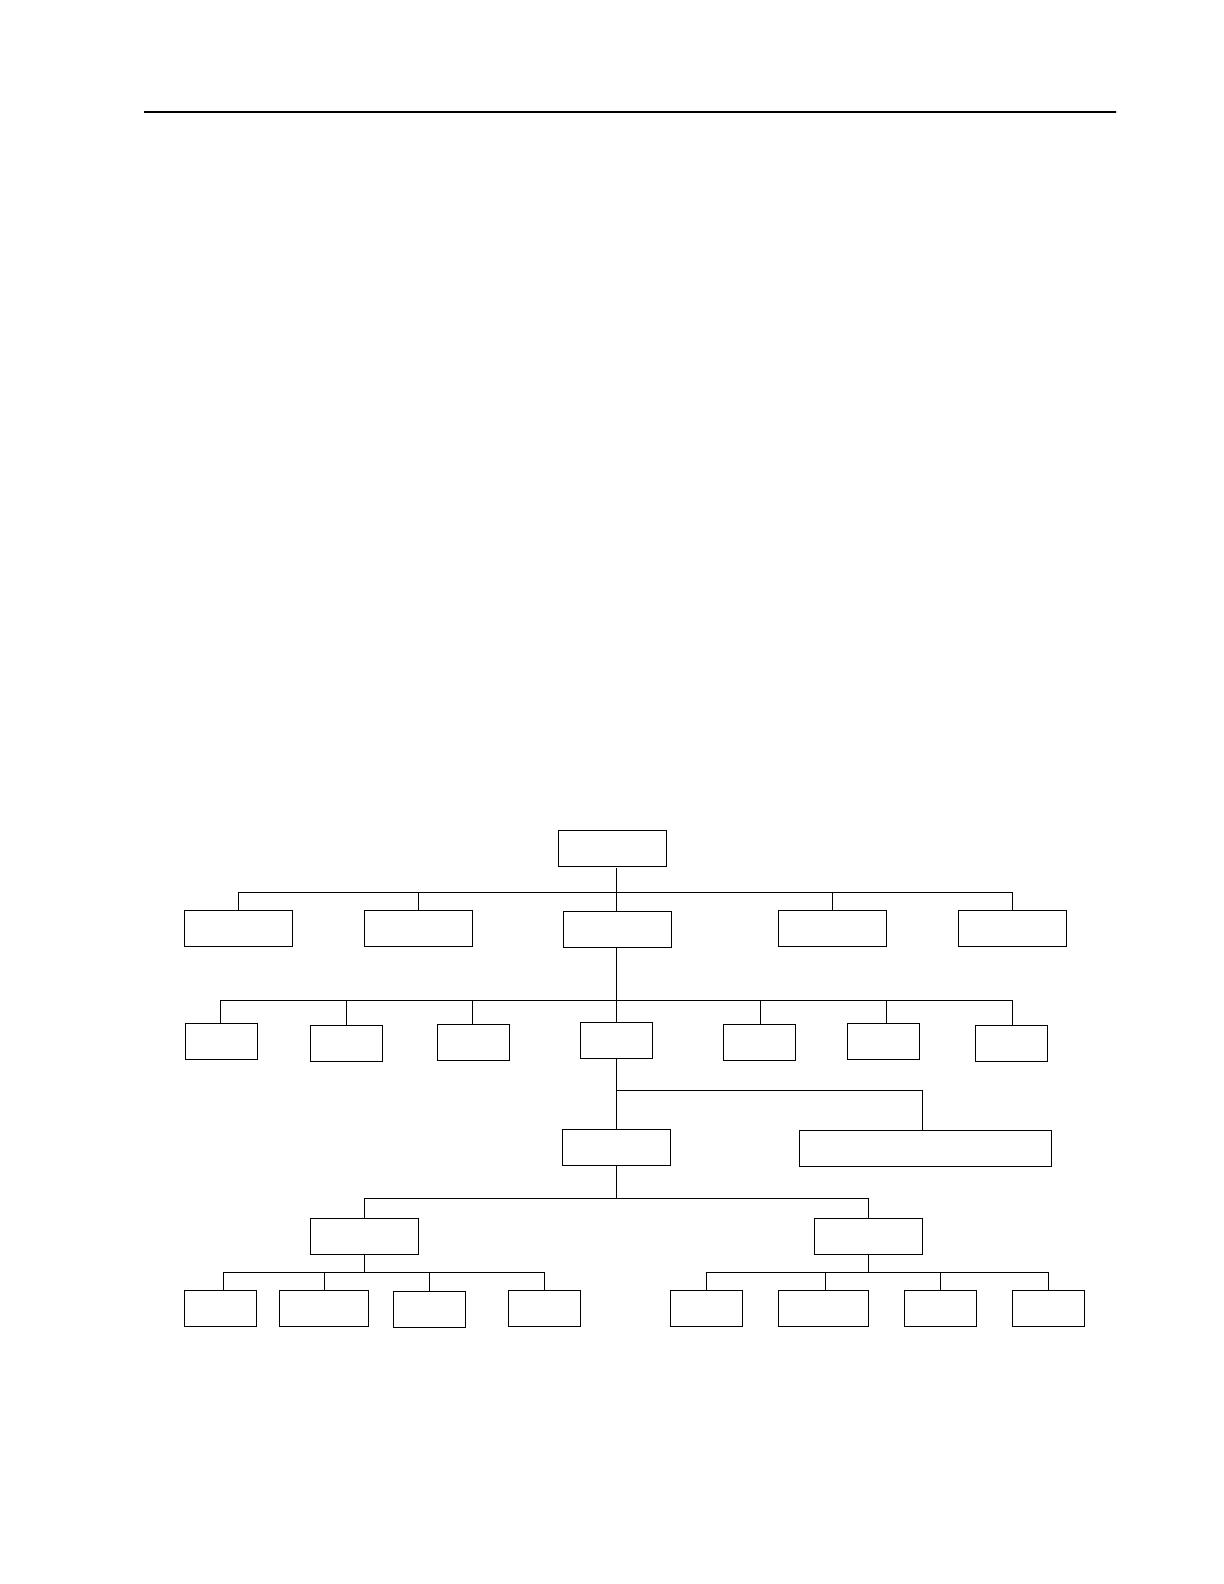
Complete Menu Mapping at a Glance. . . . . . . . . . . . . . . . . . . . . . . . . . . . . . . . . . . . . . . . . . . . . . . . . 15
Configuring RSS Computer Defaults . . . . . . . . . . . . . . . . . . . . . . . . . . . . . . . . . . . . . . . . . . . . . . . . . . 17
Main Menu. . . . . . . . . . . . . . . . . . . . . . . . . . . . . . . . . . . . . . . . . . . . . . . . . . . . . . . . . . . . . . . . . . . . . . 19
How to Read the Codeplug . . . . . . . . . . . . . . . . . . . . . . . . . . . . . . . . . . . . . . . . . . . . . . . . . . . . . . . . . 21
Service Software Configuration . . . . . . . . . . . . . . . . . . . . . . . . . . . . . . . . . . . . . . . . . . . . . . . . . . . . . . 22
Configuring Paths and Port . . . . . . . . . . . . . . . . . . . . . . . . . . . . . . . . . . . . . . . . . . . . . . . . . . . . . . . . . 23
Setting Screen Colors . . . . . . . . . . . . . . . . . . . . . . . . . . . . . . . . . . . . . . . . . . . . . . . . . . . . . . . . . . . . . . 26
2 - Basic Radio Programming Tutorial . . . . . . . . . . . . . . . . . . . . . . . . . . . . . . . . . . . . . . . . . .29
Programming a Basic MCS 2000 Radio . . . . . . . . . . . . . . . . . . . . . . . . . . . . . . . . . . . . . . . . . . . . . . . . 29
Desired Features. . . . . . . . . . . . . . . . . . . . . . . . . . . . . . . . . . . . . . . . . . . . . . . . . . . . . . . . . . . . . . . . 29
Major Decisions Involved . . . . . . . . . . . . . . . . . . . . . . . . . . . . . . . . . . . . . . . . . . . . . . . . . . . . . . . . 29
High-Level Programming Flow . . . . . . . . . . . . . . . . . . . . . . . . . . . . . . . . . . . . . . . . . . . . . . . . . . . . 30
Step-by-Step Programming Instructions . . . . . . . . . . . . . . . . . . . . . . . . . . . . . . . . . . . . . . . . . . . . . 30
Cloning Radios. . . . . . . . . . . . . . . . . . . . . . . . . . . . . . . . . . . . . . . . . . . . . . . . . . . . . . . . . . . . . . . . . . . 35
3 - Service Menu Functions . . . . . . . . . . . . . . . . . . . . . . . . . . . . . . . . . . . . . . . . . . . . . . . . . . . .37
Servicing the Radio Using the RSS. . . . . . . . . . . . . . . . . . . . . . . . . . . . . . . . . . . . . . . . . . . . . . . . . . . . 37
Menu Map . . . . . . . . . . . . . . . . . . . . . . . . . . . . . . . . . . . . . . . . . . . . . . . . . . . . . . . . . . . . . . . . . . . . . . 37
Service Menu . . . . . . . . . . . . . . . . . . . . . . . . . . . . . . . . . . . . . . . . . . . . . . . . . . . . . . . . . . . . . . . . . . . . 38
Transmitter Alignment Menu . . . . . . . . . . . . . . . . . . . . . . . . . . . . . . . . . . . . . . . . . . . . . . . . . . . . . . . 40
Reference Oscillator Alignment . . . . . . . . . . . . . . . . . . . . . . . . . . . . . . . . . . . . . . . . . . . . . . . . . . . . . . 42
Transmit Power Alignment . . . . . . . . . . . . . . . . . . . . . . . . . . . . . . . . . . . . . . . . . . . . . . . . . . . . . . . . . 43
Transmit Deviation Balance Alignment . . . . . . . . . . . . . . . . . . . . . . . . . . . . . . . . . . . . . . . . . . . . . . . 45
Transmit Deviation Limit Alignment . . . . . . . . . . . . . . . . . . . . . . . . . . . . . . . . . . . . . . . . . . . . . . . . . 47
Transmit Deviation Limit Alignment: Reference Softpot . . . . . . . . . . . . . . . . . . . . . . . . . . . . . . . . . . 49
SECURE Transmit Deviation . . . . . . . . . . . . . . . . . . . . . . . . . . . . . . . . . . . . . . . . . . . . . . . . . . . . . . . . 51
Transmit Current Limit . . . . . . . . . . . . . . . . . . . . . . . . . . . . . . . . . . . . . . . . . . . . . . . . . . . . . . . . . . . . 52
Receive Alignment Menu. . . . . . . . . . . . . . . . . . . . . . . . . . . . . . . . . . . . . . . . . . . . . . . . . . . . . . . . . . . 54
Front-End Filter Alignment . . . . . . . . . . . . . . . . . . . . . . . . . . . . . . . . . . . . . . . . . . . . . . . . . . . . . . . . . 55
Rated Audio Alignment . . . . . . . . . . . . . . . . . . . . . . . . . . . . . . . . . . . . . . . . . . . . . . . . . . . . . . . . . . . . 56
Squelch Attenuator (12.5 kHz) Alignment . . . . . . . . . . . . . . . . . . . . . . . . . . . . . . . . . . . . . . . . . . . . . 57
Squelch Attenuator (20 kHz) Alignment . . . . . . . . . . . . . . . . . . . . . . . . . . . . . . . . . . . . . . . . . . . . . . . 58
Squelch Attenuator (25/30 kHz) Alignment . . . . . . . . . . . . . . . . . . . . . . . . . . . . . . . . . . . . . . . . . . . . 59
RSSI Alignment. . . . . . . . . . . . . . . . . . . . . . . . . . . . . . . . . . . . . . . . . . . . . . . . . . . . . . . . . . . . . . . . . . . 60
SECURE Receive Discriminator Level. . . . . . . . . . . . . . . . . . . . . . . . . . . . . . . . . . . . . . . . . . . . . . . . . . 61

ii
VRM500 Receive Discriminator Level . . . . . . . . . . . . . . . . . . . . . . . . . . . . . . . . . . . . . . . . . . . . . . . . . 62
Signalling Alignment Menu. . . . . . . . . . . . . . . . . . . . . . . . . . . . . . . . . . . . . . . . . . . . . . . . . . . . . . . . . 63
DTMF Transmit Deviation . . . . . . . . . . . . . . . . . . . . . . . . . . . . . . . . . . . . . . . . . . . . . . . . . . . . . . . . . . 64
Transmit Signalling: High Speed . . . . . . . . . . . . . . . . . . . . . . . . . . . . . . . . . . . . . . . . . . . . . . . . . . . . . 65
Transmit Signalling: MDC-1200. . . . . . . . . . . . . . . . . . . . . . . . . . . . . . . . . . . . . . . . . . . . . . . . . . . . . . 66
Controller Board Initialization. . . . . . . . . . . . . . . . . . . . . . . . . . . . . . . . . . . . . . . . . . . . . . . . . . . . . . . 68
4 - Get/Save/Program Menu Functions . . . . . . . . . . . . . . . . . . . . . . . . . . . . . . . . . . . . . . . . . .71
Menu Map . . . . . . . . . . . . . . . . . . . . . . . . . . . . . . . . . . . . . . . . . . . . . . . . . . . . . . . . . . . . . . . . . . . . . . 71
Get/Save/Program Menu . . . . . . . . . . . . . . . . . . . . . . . . . . . . . . . . . . . . . . . . . . . . . . . . . . . . . . . . . . . 72
Reading Codeplug Data From Radio (Requires RIB) . . . . . . . . . . . . . . . . . . . . . . . . . . . . . . . . . . . . . . 74
Get Codeplug Data From Archive File . . . . . . . . . . . . . . . . . . . . . . . . . . . . . . . . . . . . . . . . . . . . . . . . . 75
Get TCMS Codeplug Update Disk File . . . . . . . . . . . . . . . . . . . . . . . . . . . . . . . . . . . . . . . . . . . . . . . . . 76
Clone Radio . . . . . . . . . . . . . . . . . . . . . . . . . . . . . . . . . . . . . . . . . . . . . . . . . . . . . . . . . . . . . . . . . . . . . 77
Save Codeplug Data to an Archive File . . . . . . . . . . . . . . . . . . . . . . . . . . . . . . . . . . . . . . . . . . . . . . . . 80
Program the Radio’s Codeplug (Requires RIB). . . . . . . . . . . . . . . . . . . . . . . . . . . . . . . . . . . . . . . . . . .82
Programming History. . . . . . . . . . . . . . . . . . . . . . . . . . . . . . . . . . . . . . . . . . . . . . . . . . . . . . . . . . . . . . 83
5 - Change/View Menu Functions. . . . . . . . . . . . . . . . . . . . . . . . . . . . . . . . . . . . . . . . . . . . . . .85
Menu Map . . . . . . . . . . . . . . . . . . . . . . . . . . . . . . . . . . . . . . . . . . . . . . . . . . . . . . . . . . . . . . . . . . . . . . 85
Change/View Menu . . . . . . . . . . . . . . . . . . . . . . . . . . . . . . . . . . . . . . . . . . . . . . . . . . . . . . . . . . . . . . . 87
Radio Wide Configuration Menu. . . . . . . . . . . . . . . . . . . . . . . . . . . . . . . . . . . . . . . . . . . . . . . . . . . . . 89
Radio Wide Options . . . . . . . . . . . . . . . . . . . . . . . . . . . . . . . . . . . . . . . . . . . . . . . . . . . . . . . . . . . . . . . 90
VRM100 Options . . . . . . . . . . . . . . . . . . . . . . . . . . . . . . . . . . . . . . . . . . . . . . . . . . . . . . . . . . . . . . . . . 96
Radio Wide SECURE Options. . . . . . . . . . . . . . . . . . . . . . . . . . . . . . . . . . . . . . . . . . . . . . . . . . . . . . . . 98
Radio Wide Emergency Options . . . . . . . . . . . . . . . . . . . . . . . . . . . . . . . . . . . . . . . . . . . . . . . . . . . . 100
More Radio Wide Options . . . . . . . . . . . . . . . . . . . . . . . . . . . . . . . . . . . . . . . . . . . . . . . . . . . . . . . . . 102
Radio Wide Features Configuration Menu. . . . . . . . . . . . . . . . . . . . . . . . . . . . . . . . . . . . . . . . . . . . . 105
Radio Wide Button Configuration. . . . . . . . . . . . . . . . . . . . . . . . . . . . . . . . . . . . . . . . . . . . . . . . . . . 106
Radio Wide Switch Configuration . . . . . . . . . . . . . . . . . . . . . . . . . . . . . . . . . . . . . . . . . . . . . . . . . . . 111
Radio Wide Menu Item Configuration . . . . . . . . . . . . . . . . . . . . . . . . . . . . . . . . . . . . . . . . . . . . . . . 112
DEK Configuration. . . . . . . . . . . . . . . . . . . . . . . . . . . . . . . . . . . . . . . . . . . . . . . . . . . . . . . . . . . . . . . 117
Phone Configuration . . . . . . . . . . . . . . . . . . . . . . . . . . . . . . . . . . . . . . . . . . . . . . . . . . . . . . . . . . . . . 118
DTMF Access/Deaccess Codes . . . . . . . . . . . . . . . . . . . . . . . . . . . . . . . . . . . . . . . . . . . . . . . . . . . . . . 120
Dialing Options . . . . . . . . . . . . . . . . . . . . . . . . . . . . . . . . . . . . . . . . . . . . . . . . . . . . . . . . . . . . . . . . . 122
Radio Wide Scan Lists and Options . . . . . . . . . . . . . . . . . . . . . . . . . . . . . . . . . . . . . . . . . . . . . . . . . . 124
Radio Wide Scan Options. . . . . . . . . . . . . . . . . . . . . . . . . . . . . . . . . . . . . . . . . . . . . . . . . . . . . . . . . . 128
Radio Wide Display Options . . . . . . . . . . . . . . . . . . . . . . . . . . . . . . . . . . . . . . . . . . . . . . . . . . . . . . . 131
Radio Wide Display More Options. . . . . . . . . . . . . . . . . . . . . . . . . . . . . . . . . . . . . . . . . . . . . . . . . . . 134
Alarm Options . . . . . . . . . . . . . . . . . . . . . . . . . . . . . . . . . . . . . . . . . . . . . . . . . . . . . . . . . . . . . . . . . . 135
Trunking Menu. . . . . . . . . . . . . . . . . . . . . . . . . . . . . . . . . . . . . . . . . . . . . . . . . . . . . . . . . . . . . . . . . . 137
Trunking Radio Wide Options. . . . . . . . . . . . . . . . . . . . . . . . . . . . . . . . . . . . . . . . . . . . . . . . . . . . . . 138
SmartZone Environment . . . . . . . . . . . . . . . . . . . . . . . . . . . . . . . . . . . . . . . . . . . . . . . . . . . . . . . . . . 140
Voice-On-Control (VOC) Options . . . . . . . . . . . . . . . . . . . . . . . . . . . . . . . . . . . . . . . . . . . . . . . . . . . 145
Trunking Systems . . . . . . . . . . . . . . . . . . . . . . . . . . . . . . . . . . . . . . . . . . . . . . . . . . . . . . . . . . . . . . . . 147
Channel Assignment Data (UHF/VHF models only). . . . . . . . . . . . . . . . . . . . . . . . . . . . . . . . . . . . . 153
Control Channels. . . . . . . . . . . . . . . . . . . . . . . . . . . . . . . . . . . . . . . . . . . . . . . . . . . . . . . . . . . . . . . . 155
Trunking System Options. . . . . . . . . . . . . . . . . . . . . . . . . . . . . . . . . . . . . . . . . . . . . . . . . . . . . . . . . . 157
Trunking One-Touch Button Options . . . . . . . . . . . . . . . . . . . . . . . . . . . . . . . . . . . . . . . . . . . . . . . . 162
Trunking Status Alias . . . . . . . . . . . . . . . . . . . . . . . . . . . . . . . . . . . . . . . . . . . . . . . . . . . . . . . . . . . . . 164
Trunking Message Alias . . . . . . . . . . . . . . . . . . . . . . . . . . . . . . . . . . . . . . . . . . . . . . . . . . . . . . . . . . . 165
Trunking Site Alias . . . . . . . . . . . . . . . . . . . . . . . . . . . . . . . . . . . . . . . . . . . . . . . . . . . . . . . . . . . . . . . 166
Trunking Personality . . . . . . . . . . . . . . . . . . . . . . . . . . . . . . . . . . . . . . . . . . . . . . . . . . . . . . . . . . . . . 167
WAC AMSS Failsoft. . . . . . . . . . . . . . . . . . . . . . . . . . . . . . . . . . . . . . . . . . . . . . . . . . . . . . . . . . . . . . . 175
Trunking Subfleets . . . . . . . . . . . . . . . . . . . . . . . . . . . . . . . . . . . . . . . . . . . . . . . . . . . . . . . . . . . . . . . 177
Trunking Emergency Data Configuration . . . . . . . . . . . . . . . . . . . . . . . . . . . . . . . . . . . . . . . . . . . . . 179
Trunking Personality Options . . . . . . . . . . . . . . . . . . . . . . . . . . . . . . . . . . . . . . . . . . . . . . . . . . . . . . 186

iii
SmartZone Preferred Sites. . . . . . . . . . . . . . . . . . . . . . . . . . . . . . . . . . . . . . . . . . . . . . . . . . . . . . . . . . 189
OmniLink Preferred Sites . . . . . . . . . . . . . . . . . . . . . . . . . . . . . . . . . . . . . . . . . . . . . . . . . . . . . . . . . . 190
VRM100 Trunk Options. . . . . . . . . . . . . . . . . . . . . . . . . . . . . . . . . . . . . . . . . . . . . . . . . . . . . . . . . . . 192
VRM500 Trunk Options. . . . . . . . . . . . . . . . . . . . . . . . . . . . . . . . . . . . . . . . . . . . . . . . . . . . . . . . . . . 195
Trunking Call List Table. . . . . . . . . . . . . . . . . . . . . . . . . . . . . . . . . . . . . . . . . . . . . . . . . . . . . . . . . . . 197
Conventional Menu. . . . . . . . . . . . . . . . . . . . . . . . . . . . . . . . . . . . . . . . . . . . . . . . . . . . . . . . . . . . . . 198
Conventional Radio Wide Options . . . . . . . . . . . . . . . . . . . . . . . . . . . . . . . . . . . . . . . . . . . . . . . . . . 199
MPL List Configuration . . . . . . . . . . . . . . . . . . . . . . . . . . . . . . . . . . . . . . . . . . . . . . . . . . . . . . . . . . . 201
Conventional Personality . . . . . . . . . . . . . . . . . . . . . . . . . . . . . . . . . . . . . . . . . . . . . . . . . . . . . . . . . 203
SECURE Options. . . . . . . . . . . . . . . . . . . . . . . . . . . . . . . . . . . . . . . . . . . . . . . . . . . . . . . . . . . . . . . . . 209
Personality MDC Options . . . . . . . . . . . . . . . . . . . . . . . . . . . . . . . . . . . . . . . . . . . . . . . . . . . . . . . . . 212
Conventional Personality Phone Options. . . . . . . . . . . . . . . . . . . . . . . . . . . . . . . . . . . . . . . . . . . . . 215
More Conventional Personality Options. . . . . . . . . . . . . . . . . . . . . . . . . . . . . . . . . . . . . . . . . . . . . . 217
Conventional Personality RAC Options . . . . . . . . . . . . . . . . . . . . . . . . . . . . . . . . . . . . . . . . . . . . . . 221
MDC Configuration Menu. . . . . . . . . . . . . . . . . . . . . . . . . . . . . . . . . . . . . . . . . . . . . . . . . . . . . . . . . 224
MDC Systems . . . . . . . . . . . . . . . . . . . . . . . . . . . . . . . . . . . . . . . . . . . . . . . . . . . . . . . . . . . . . . . . . . . 225
More Emergency Options . . . . . . . . . . . . . . . . . . . . . . . . . . . . . . . . . . . . . . . . . . . . . . . . . . . . . . . . . 229
MDC System Options. . . . . . . . . . . . . . . . . . . . . . . . . . . . . . . . . . . . . . . . . . . . . . . . . . . . . . . . . . . . . 230
MDC System Remote Options . . . . . . . . . . . . . . . . . . . . . . . . . . . . . . . . . . . . . . . . . . . . . . . . . . . . . . 234
MDC Call List Table. . . . . . . . . . . . . . . . . . . . . . . . . . . . . . . . . . . . . . . . . . . . . . . . . . . . . . . . . . . . . . 236
MDC Repeater ID . . . . . . . . . . . . . . . . . . . . . . . . . . . . . . . . . . . . . . . . . . . . . . . . . . . . . . . . . . . . . . . . 238
Auxiliary Menu. . . . . . . . . . . . . . . . . . . . . . . . . . . . . . . . . . . . . . . . . . . . . . . . . . . . . . . . . . . . . . . . . . 239
Single Tone Systems. . . . . . . . . . . . . . . . . . . . . . . . . . . . . . . . . . . . . . . . . . . . . . . . . . . . . . . . . . . . . . 240
Single Tone List . . . . . . . . . . . . . . . . . . . . . . . . . . . . . . . . . . . . . . . . . . . . . . . . . . . . . . . . . . . . . . . . . 242
Quik-Call II System . . . . . . . . . . . . . . . . . . . . . . . . . . . . . . . . . . . . . . . . . . . . . . . . . . . . . . . . . . . . . . 243
Quik-Call II System Options . . . . . . . . . . . . . . . . . . . . . . . . . . . . . . . . . . . . . . . . . . . . . . . . . . . . . . . 246
GE STAR System. . . . . . . . . . . . . . . . . . . . . . . . . . . . . . . . . . . . . . . . . . . . . . . . . . . . . . . . . . . . . . . . . 248
Conventional Message Alias List . . . . . . . . . . . . . . . . . . . . . . . . . . . . . . . . . . . . . . . . . . . . . . . . . . . . 251
Conventional Status Alias List. . . . . . . . . . . . . . . . . . . . . . . . . . . . . . . . . . . . . . . . . . . . . . . . . . . . . . 252
Zone/Talkgroup Assignment . . . . . . . . . . . . . . . . . . . . . . . . . . . . . . . . . . . . . . . . . . . . . . . . . . . . . . . 253
6 - Print Menu Functions. . . . . . . . . . . . . . . . . . . . . . . . . . . . . . . . . . . . . . . . . . . . . . . . . . . . .255
Menu Map . . . . . . . . . . . . . . . . . . . . . . . . . . . . . . . . . . . . . . . . . . . . . . . . . . . . . . . . . . . . . . . . . . . . . 255
Print Menu . . . . . . . . . . . . . . . . . . . . . . . . . . . . . . . . . . . . . . . . . . . . . . . . . . . . . . . . . . . . . . . . . . . . . 256
Print
Radio Wide Features Configuration Menu . . . . . . . . . . . . . . . . . . . . . . . . . . . . . . . . . . . . . . . . . . . . 257
Trunking Print Menu . . . . . . . . . . . . . . . . . . . . . . . . . . . . . . . . . . . . . . . . . . . . . . . . . . . . . . . . . . . . . 258
Conventional Print Menu . . . . . . . . . . . . . . . . . . . . . . . . . . . . . . . . . . . . . . . . . . . . . . . . . . . . . . . . . 259
7 - File Maintenance Menu Functions. . . . . . . . . . . . . . . . . . . . . . . . . . . . . . . . . . . . . . . . . . .261
Menu Map . . . . . . . . . . . . . . . . . . . . . . . . . . . . . . . . . . . . . . . . . . . . . . . . . . . . . . . . . . . . . . . . . . . . . 261
File Maintenance Menu . . . . . . . . . . . . . . . . . . . . . . . . . . . . . . . . . . . . . . . . . . . . . . . . . . . . . . . . . . . 262
Create Directory Path. . . . . . . . . . . . . . . . . . . . . . . . . . . . . . . . . . . . . . . . . . . . . . . . . . . . . . . . . . . . . 263
Delete Archive File . . . . . . . . . . . . . . . . . . . . . . . . . . . . . . . . . . . . . . . . . . . . . . . . . . . . . . . . . . . . . . . 264
8 - FLASHport Upgrade . . . . . . . . . . . . . . . . . . . . . . . . . . . . . . . . . . . . . . . . . . . . . . . . . . . . . .265
Menu Map . . . . . . . . . . . . . . . . . . . . . . . . . . . . . . . . . . . . . . . . . . . . . . . . . . . . . . . . . . . . . . . . . . . . . 265
FLASHport Upgrade . . . . . . . . . . . . . . . . . . . . . . . . . . . . . . . . . . . . . . . . . . . . . . . . . . . . . . . . . . . . . . 266
View Radio Configuration . . . . . . . . . . . . . . . . . . . . . . . . . . . . . . . . . . . . . . . . . . . . . . . . . . . . . . . . . 267
Enhancement Options. . . . . . . . . . . . . . . . . . . . . . . . . . . . . . . . . . . . . . . . . . . . . . . . . . . . . . . . . . . . 268
View FLASHkey Configuration . . . . . . . . . . . . . . . . . . . . . . . . . . . . . . . . . . . . . . . . . . . . . . . . . . . . . 269
View Features . . . . . . . . . . . . . . . . . . . . . . . . . . . . . . . . . . . . . . . . . . . . . . . . . . . . . . . . . . . . . . . . . . . 270
More Features. . . . . . . . . . . . . . . . . . . . . . . . . . . . . . . . . . . . . . . . . . . . . . . . . . . . . . . . . . . . . . . . . . . 271
Upgrade Radio . . . . . . . . . . . . . . . . . . . . . . . . . . . . . . . . . . . . . . . . . . . . . . . . . . . . . . . . . . . . . . . . . . 272
Appendix A - Computer-to-Radio Communication Error Codes . . . . . . . . . . . . . . . . . . . . .273

iv
Appendix B - TPL Frequencies and Codes . . . . . . . . . . . . . . . . . . . . . . . . . . . . . . . . . . . . . . .275
Appendix C - DPL Codes . . . . . . . . . . . . . . . . . . . . . . . . . . . . . . . . . . . . . . . . . . . . . . . . . . . . .277
Appendix D - MCS 2000 Features . . . . . . . . . . . . . . . . . . . . . . . . . . . . . . . . . . . . . . . . . . . . . .279
Appendix E - Field/Menu Navigation Key Sequences. . . . . . . . . . . . . . . . . . . . . . . . . . . . . .287
Appendix F - Trunked Radio Personality Chart. . . . . . . . . . . . . . . . . . . . . . . . . . . . . . . . . .295
Appendix G - Conventional Radio Personality Chart . . . . . . . . . . . . . . . . . . . . . . . . . . . . .297
Glossary. . . . . . . . . . . . . . . . . . . . . . . . . . . . . . . . . . . . . . . . . . . . . . . . . . . . . . . . . . . . . . . . . . .299
Index . . . . . . . . . . . . . . . . . . . . . . . . . . . . . . . . . . . . . . . . . . . . . . . . . . . . . . . . . . . . . . . . . . . . .307

1
Introduction
1
Welcome to the world of two-way radio programming. This Radio
Service Software (RSS) manual is your guide to customizing and
programming a variety of features into the MCS 2000 radio.
The MCS 2000 series of Mobile radios has a unique set of features,
including unique PL/DPL codes for each channel, a variety of
signalling abilities with channel scan, and the convenience of
maintenance-free tuning due to the wide-band capability. This feature
set makes these radios ideal for commercial businesses and police and
fire protection services that typically utilize radios in their vehicles.
Modern microprocessor chip technology used to manufacture this
radio and the MCS 2000 RSS (a computer program, which when
interfaced with a radio, electronically programs a radio) make it
possible for you to personalize a radio with a unique set of features for
each individual customer. No tools are needed.
The RSS computer program resides on the diskettes you received in the
package with this manual. The radio’s customization and servicing is
accomplished using an IBM
®
Personal System/2
®
Model 30 or higher
computer.
Note:
The alignment and troubleshooting sections of this manual are
intended for use by qualified communications technicians and
maintenance personnel ONLY.
Listed below are some of the major features and functions of the MCS
2000 RSS:
Programmable Features Service Functions
Transmit (TX) frequencies Reference oscillator alignment
Receive (RX) frequencies Transmit deviation alignment
PL/DPL codes Transmit power alignment
Signalling system parameters Replaced power amplifier calibration
Phone operation Replaced logic board calibration
FLASHport upgrade (
requires
FLASHport upgrade package
)
Replaced RF board calibration

2
Prerequisites
To program radios using the RSS, we recommend a basic working
knowledge of the following:
❒
Microcomputers
❒
The radio’s available features (Refer to the appropriate Radio
Operator’s Manual.)
❒
Your customers’ needs
❒
MS-DOS operating system, version 5.0 or later
This RSS requires a minimum of 510 kilobytes of free RAM to run. The
DOS MEM command can be used to determine the amount of free
memory available on your computer (that is, type
c:\dos\mem
and
hit
Return
). The location of MEM.EXE may vary from computer to
computer.
DOS 5.0 is required.
It is also strongly recommended that this
RSS be run on a computer with the following minimum configuration:
❒
80386 CPU or higher
❒
DOS 5.0 or later
❒
4 MB of RAM (1MB lower + 3MB or more extended) or greater
For complex radio configurations, it is recommended that the RSS be
executed from a RAM disk. This will reduce execution time
significantly.
Note:
This application is compatible with DOS 6.0, but cannot
be run as a Double Space file.
To configure your computer with a RAM disk, you need to modify your
CONFIG.SYS file with the following statements:
DEVICE=C:\DOS\HIMEM.SYS
DEVICE=C:\DOS\MEM386.EXE OFF
FILES=30
In order to run the RSS from the RAM disk, a .BAT (batch) file should
be used to copy the necessary files from the hard drive to the RAM disk.
Archive files are not affected and must be saved on the hard drive or
floppy drive as usual.
Note:
If you are a computer beginner, refer to the DOS manual
that came with your computer for a detailed description of DOS
procedures and commands.

3
Using This Manual
The MCS 2000 RSS Manual is designed to teach basic radio feature
programming and speed up access to technical reference information.
It is intended for both beginners and advanced RSS users. This manual
contains information on all of the following:
❒
How to complete the hardware installation
❒
How to install the RSS
❒
How the RSS operates and how the screens are organized
❒
How to navigate through the menus and screens and use special
keyboard commands
❒
What the purpose of each menu and screen is, along with detailed
descriptions of the functions and data fields relevant to each
menu/screen
❒
How to program a radio as well as how to service the radio
❒
How to organize your file directories and specify directory paths
for codeplug files
❒
How to print out radio programming information
❒
How to clone (or program identical information into) a radio
To locate the information you need, use the Table of Contents and/or
the Index. Explanations of technical terms used in this manual can be
found in the Glossary.
The availability of some menus, screens or fields in the RSS are
dependent upon the model of the radio/codeplug loaded into memory
or on the values that have been assigned to certain fields in the RSS.
Conditional statements which provide this kind of information and
other important instructions are italicized throughout this manual.
Under each menu or screen title in this manual, you will find a
sequence of F-keys (or function keys) such as . This
sequence represents the path from the MAIN MENU to that specific
menu or screen. To access the desired menu or screen, simply press
these keys one by one from the MAIN MENU. Paths from the MAIN
MENU to specific menus, screens and fields in the RSS can be found in
Appendix E.
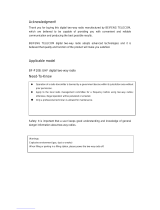
Watch for WARNINGS, CAUTIONS and NOTES which can be found
throughout this manual, the definitions of which are provided below:
DCE
WARNING
An operational procedure, practice, or condition,
etc., which may result in injury or death if not
carefully observed.
Caution
An operational procedure, practice, or condition, etc.,
which may result in damage to the equipment if not
carefully observed.
Note: An operational procedure, practice, or condition, etc., which
is important to emphasize.
!
!

4
Assembling The
Hardware
The figure below shows how to assemble the required (and optional)
equipment used to program the MCS 2000 radio.
Steps to Connect the
Hardware
1. Connect the RIB-to-computer cable to the communications port of
the computer (9/25-pin end).
2. Connect the other end (15-pin end) to the Radio Interface Box
(RIB).
Note:
If your computer has a 25-pin connections port
connector, you will need the cable
30-80369B71
to insert
between the computer and the RIB-to-computer cable.
3. Connect the 25-pin end of the RIB-to-radio cable to the RIB, and
the 9-pin end to the connector on the front side of the radio as
B
A
Srch
Emer Scan Phon Call Dim Menu
Z
Z
H/L
Home
Sel
Mon
Computer
RIB-to-Radio Cable
58-80385B31 Cable
RKN4062A
Smart RIB-to-Radio Cable
RKN4047A Cable (required for
FLASHport on Mobile radios only)
Radio Interface Box (RIB)-to-Computer Cable
30-80369B72 Cable for IBM Personal
Computer AT or compatible computer
(9-pin end and a 15-pin end).
or 30-80369B71 Cable for computers requiring
a 25-pin serial port connection
(25-pin end and a 15-pin end).
or Smart Radio Interface Box (SRIB) to
Computer Cable 30-80390B48 or later
cable (Required for FLASHport operation only.)
MCS 2000 Mobile
RIB Power Supply
60-82728J01 (9Vac) Power Supply
01-80357A57 (110 Vac) Power Supply
or 01-80358A56 (220 Vac) Power Supply.
It is more reliable to use the power supply
than to use a weak battery.
Smart RIB Power Supply
01-80302E27 or later (120 Vac) Power
Supply (Required for FLASHport operation
only.)
Portable Products Test Set -
P/N RTX4005B or
RTX-4005A Test Set (with
rework kit RPX-4665A)
Provides the capability for
testing many transmitter and
receiver functions.
Transmitter modulation and
keying can be simulated and
receiver parameters can be
tested without opening up
the radio. The Test Set is used
in conjunction with the
programming/test cable.
RIB
Radio Interface Box (RIB)
RLN4008B RIB
or Smart Radio Interface Box (RIB) RLN1015B or
later RIB (Required for FLASHport operation only.)
For laptop computer and on-the-road use only; use
a 9V battery (not included).
Use a fresh, 9V battery. The LED will remain lit
with a weak battery and this may cause certain
errors on the screen.
!
Caution
5
shown.
4. Plug one end of the RIB power supply into the RIB and the other
end into a wall outlet.
After you connect the hardware, switch on the radio by turning the
volume control clockwise. You will hear one of the following types of
tones.
You can install, start or explore the RSS using just the diskettes and
your computer if you do not have all the necessary hardware. You can
even update existing radio archive files stored on disk. What you
cannot do without the required hardware is read from or save
codeplug data to an actual radio and perform service functions.
Note:
If you are using a laptop computer and you plan to use the RSS
while the computer is in battery mode, you may need to set the serial/
parallel adapter to run on battery power. This can be accomplished
using the application diskette supplied by the computer manufacturer.
If this action is not performed, you are likely to receive serial bus errors.
Note:
If your RIB has a switch and LED, be sure to turn the switch on
before each programming session.
High-pitched, short
tone
Hardware is connected correctly and the radio’s
internal firmware is operating properly.
Note:
This tone may be disabled in the
codeplug and may not be heard.
Continuous low tone Critical failure or radio’s internal software
malfunction.
Caution
When programming or calibrating a radio, DO NOT
disconnect the radio from the RIB when the computer is
communicating with the radio. If you do so, the radio
may become inoperable. The only recommended time
to disconnect the radio is while you are at the MAIN
MENU or at any of the GET/SAVE/PROGRAM screens.
!

6
What’s On The RSS
Diskettes
Below are the files located on the diskette you received with this
manual.
The INSTALL program creates a file named MCS.BAT. This file is
located under the root directory of the hard drive, enabling the RSS to
start up from the root directory.
Experienced RSS users and computer pros can skip the “Organizing
Your Hard Disk” section and proceed to the “Starting The RSS” section.
New RSS users should read all sections.
File Name File Type Description
INSTALL.EXE Installation file Used to install the RSS.
INSTALL.DAT Installation file Contains installation data.
MCSINS.001 Compressed
executable file
File that the installation program
uncompresses when it installs the RSS
on your hard disk.
MCSINS.002 Compressed
executable file
Second part of the executable
files.
DISK.ID Installation file Floppy Disk ID.
README.TXT Text file Contains information about the
current RSS release.
7
Organizing Your
Hard Disk
It is important to spend some time early on deciding which types or
groups of files should be located together in the same file directory. File
directories can be created using the DOS
MD
or
MKDIR
command.
You may want to organize your directories first by customer area, then
by customer name and finally by radio model type, or perhaps in the
reverse order. Consider the different ways in which you operate your
business. Do you separate radio files by customer location, by sales
revenue, by fiscal year, or perhaps by date of purchase? When deciding
how to organize your files and directories, we suggest the following:
❒
Put as few directories as possible near the top (or root) of your
directory tree. The next level of directories would be the customer
names within each of those areas.
❒
Keep the RSS diskette contents in one directory and your archive
files in a different directory.
❒ Storing archive files for different radio models in the same
directory can cause a lot of confusion. Use a separate directory
name for each radio model and then store the archive files for that
specific model within the appropriate model directory.
Below is a sample directory tree for storing radio archive files on the
hard disk. Though your hard disk directory tree may vary depending
on your way of doing business, this setup may be a good starting
point. The installation program will automatically create the MRSS
and MCS directories for you if they do not already exist.
1994 1995
FIRE SECURITY TOWING COURIERFIRE SECURITY
TOWING
COURIER
ROOT
SPREADSHEET WP
MRSS
DATABASE GRAPHICS
ETC.
SPECTRA
STX
MCS
SABER SI
MTSX
ETC.
ARCHIVE
EXECUTABLE PROGRAM FILES

8
Starting The RSS
Create a Back-up Copy of RSS
Diskette(s)
We recommend that you make a back-up copy of the RSS. To make a
back-up copy, follow these steps:
1. Insert the RSS diskette you received with this manual into drive A.
2. Type DISKCOPY A: A:
3. Keep the original RSS diskettes in a safe place away from magnets,
moisture and heat.
What To Do with Previous
Versions of RSS Diskettes
It is recommended that you discard previous versions of the RSS so
that the RSS version you have is the very latest. This will also ensure
that you do not mistakenly program a radio with outdated data.
Note: The latest RSS version usually has updated codeplug
structures which cannot be read by old versions of RSS.
Installing the RSS on your Hard
Disk
Install the latest RSS version as soon as you receive it. The software
installation will take approximately three minutes, but this duration
may vary based on the processing power of your computer.
The INSTALL program will:
❒ Create the MRSS, MCS and ARCHIVE directories if they do not
already exist.
❒ Create OFP, SYSKEY, SRIB and UPGRADE directories.
❒ Write over the old version’s program files with the same name, if
they exist.
The INSTALL program will NOT write over your archive files.
You may install the RSS on several personal computers and laptop
computers at a single site depending on the terms of your license. If you
have additional sites (such as a second shop), you should purchase
additional subscriptions.
Note:
The RSS is NOT a Windows program. If you have Windows
loaded, the RSS program will not operate properly.
Caution
Accidentally reversing the insertion order of the diskettes
will erase the contents of the RSS diskette. You will be
prompted to insert the source diskette (the original RSS
diskette) and the target diskette (a newly formatted one)
respectively. When the disk copy command has been
executed, use the target diskette as the new working
copy.
!

9
To install the RSS, follow the steps below:
1. Insert the RSS diskette into drive A.
2. Type A: (press Return).
3. At the A: prompt, type INSTALL.
Note: After installing the RSS on a hard disk, you may notice
new files with CFG or ODB extensions on your hard drive. These
are configuration files used by the system and the RSS. Do NOT
delete or move these files from the C:\MRSS\MCS directory.
RSS Start-Up Procedure After installing the RSS on your hard disk, follow the start-up
procedure below:
1. Log on to the hard drive by typing C: and pressing Return.
2. At the C:\ prompt, type MCS.
This command starts up the RSS. If the software does not start up
correctly, you may hear a tone or see an error message or error code
printed on the display. If this happens, verify that the file MCS.BAT
appears under the root directory of Drive C.

10
The Banner Screen When the RSS has been successfully loaded in your computer, you will
see a BANNER screen similar to the one below.
The Version and Date on the BANNER screen above are not shown here.
However, your RSS will show the actual version and date on the screen.
Press any key at the BANNER screen to access the MAIN MENU.
MOTOROLA
RADIO SERVICE SOFTWARE
for the
MCS 2000
Radios
<VERSION> <DATE>
25
Press Spacebar To Continue
(C) Copyright Motorola Inc. 1992 - 1996. All rights reserved.
A

11
Anatomy of a Menu Within the RSS, there are menus that will take you to other menus
and/or to screens where you can change the choice or value of a field.
The only difference between a menu and a screen is the nature of the
information that appears in the working area, marked by the letter C in
the figure below. A menu or screen has four areas labelled below as A,
B, C and D respectively.
RSS Location ID Area In this area, you will find the words “MOTOROLA Radio Service
Software” and a menu or screen path name for the current menu or
screen shown on the display.
Instruction Area As the name indicates, this area asks you to perform specific actions
such as “Select Function, F1-F10”, “Use UP/DOWN arrows to scroll
value” and so on.
Working Area This area of the menu (not a screen) displays a list of functions (menu
choices) that you can execute from the current menu. Each menu item
is preceded by a function key. Pressing a function key from among the
available choices advances you to another menu or screen as the case
may be.
F-Key (Function Key) ID
Area
This area displays the function keys and their corresponding names for
the current menu or screen.
Note: All functions (supported and unsupported) will be
displayed in the menu’s working area. The unsupported
functions (based on the radio’s model or options) will, however,
NOT be displayed in the F-key area.
MOTOROLA Radio Service Software Select Function F1 - F10.
MCS Model:
No System Keys Found.
MAIN
MAIN MENU
---------
F1 - HELP
F2 - SERVICE: Alignment (Requires RIB)
F3 - GET/SAVE/PROGRAM/CLONE Codeplug Data from/to Disk/Radio
F4 - CHANGE/VIEW Radio Codeplug Data
F5 - PRINT Radio Codeplug Data
F6 - FILE Maintenance
F7 -
F8 - FLASHport Upgrade
F9 - SETUP Computer Configuration
F10 - Exit Radio Service Software, Return to DOS
F1 F2 F3 F4 F5 F6 F7 F8 F9 F10
HELP SERVICE GET CHANGE PRINT FILE FLASHport SETUP EXIT
MENU SAVE VIEW DATA MAINT UPGRADE MENU TO DOS
A
B
C
D
A
B
C
D

12
Navigating Through
The RSS
Every action of the RSS is controlled by you through the use of
formatted displays and function keys.
Under each menu or screen title in this manual, you will find a
sequence of F-keys (or function keys) such as . This
sequence represents the path from the MAIN MENU to that specific
menu or screen. To access the desired menu or screen, simply press
these keys one by one from the MAIN MENU.
The F-keys and other special keys that you can use to communicate
with the RSS are listed below along with their various functions.
F1 Used to display on-help information on every RSS screen and menu.
On-line help provides information on how to use the currently
displayed menu, screen, line or field. You may also find system setup
information in a HELP screen. In many cases, help information
provided is for the specific line of the screen that is currently
highlighted.
F2 through F9 The F2 through F9 keys perform special functions and actions which
can vary from menu to menu and from screen to screen. For instance,
on some screens, F5 will print out the current screen to your printer, F8
will save the data and options currently displayed, and so on.
F10 This key is used to exit to the previous menu or screen. The F10 key
performs this function on every menu and screen. The only exceptions
are as follows:
❒ At the MAIN MENU, the F10 key is used to exit the RSS.
❒ In sub-menus of the PRINT MENU, the F10 key is used to cancel
printing if printing is in progress.
Esc Used to exit to the MAIN MENU. The Esc key performs this function
on every menu and screen.
DCE
A

13
Anatomy of a
Screen
The only difference between a menu and a screen lies in the contents
of the working area.
The working area of a screen contains a list of programmable features
called “fields” the values in which can be selected or changed using the
arrow, Tab or Return keys. On some screens, there are features that can
be selected for each individual channel or mode; these features are
selected on a mode-by-mode basis. On other screens, there are features
that can be selected for all modes of the radio (referred to as “radio-
wide” features). And still other screens list those features that perform
specific RSS functions such as servicing the radio or printing
personality data.
MOTOROLA Radio Service Software Use UP/DOWN Arrows to Select Type.
MCS Model:
MAIN:CHANGE/VIEW:CONV:PERS
Personality........1 CONVENTIONAL PERSONALITY
------------------------
Receive Only..............Disabled Signalling................. MDC
Direct / Talkaround........Enabled MDC System #...................1
Time Out Timer..........3- 60 PTT ID..................Disabled
Scan List.....................None
Hot Keypad................Disabled
Phone Operation..........Unlimited
Receive Transmit Direct
Frequency (MHz) 136.06250 136.01250 136.06250
Squelch Type CSQ Disabled Disabled
Code
DPL Invert
F1 F2 F3 F4 F5 F6 F7 F8 F9 F10
HELP ADD PREV NEXT DELETE MDC PHONE MORE EXIT
PERS PERS PERS PERS OPTIONS OPTIONS OPTIONS

14
Changing A Field
Value
The keys commonly used in the RSS to change a field value and their
respective functions are listed below.
Tab or Enter Used to accept data currently in the field and move the prompt
forward one field. If the entry is not accepted (that is, it is probably not
a valid value), an error beep will sound.
Del Used to erase the current character in a field.
PgUp Used to display the previous page of information on the screen.
PgDn Used to display the next page of information on the screen.
Screen fields come in three basic types:
Information fields Non-editable fields which cannot be altered or changed.
Scrollable fields Contain a range of values or several options from which you can select
the desired value/option. To edit or change a choice, use the UP/
DOWN arrow keys.
Direct-entry fields The desired value must be typed in. To edit or change a choice, type in
an acceptable value.
Changing a field’s value is typically done either by scrolling through a
list of options (in scrollable fields) or by typing in a correct or
acceptable value (in direct-entry fields). Scrolling is accomplished
using the arrow keys.
/