Da-Lite Da-Snap User manual
- Category
- Projection screens
- Type
- User manual
This manual is also suitable for
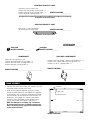
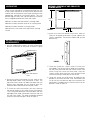
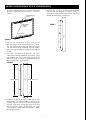
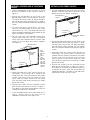
Da-Lite Da-Snap is a versatile projection screen system for various presentation needs. It features a snap-on screen surface that allows for quick and easy setup and removal. The frame is made of durable aluminum and can be mounted on a wall or ceiling. The screen surface is available in a variety of materials and sizes to suit different projection requirements. Da-Snap is suitable for use in classrooms, offices, home theaters, and other presentation venues.
Da-Lite Da-Snap is a versatile projection screen system for various presentation needs. It features a snap-on screen surface that allows for quick and easy setup and removal. The frame is made of durable aluminum and can be mounted on a wall or ceiling. The screen surface is available in a variety of materials and sizes to suit different projection requirements. Da-Snap is suitable for use in classrooms, offices, home theaters, and other presentation venues.


-
 1
1
-
 2
2
-
 3
3
-
 4
4
-
 5
5
-
 6
6
-
 7
7
-
 8
8


Da-Lite Da-Snap User manual
- Category
- Projection screens
- Type
- User manual
- This manual is also suitable for
Da-Lite Da-Snap is a versatile projection screen system for various presentation needs. It features a snap-on screen surface that allows for quick and easy setup and removal. The frame is made of durable aluminum and can be mounted on a wall or ceiling. The screen surface is available in a variety of materials and sizes to suit different projection requirements. Da-Snap is suitable for use in classrooms, offices, home theaters, and other presentation venues.
Ask a question and I''ll find the answer in the document
Finding information in a document is now easier with AI
Related papers
-
Da-Lite IMAGER User manual
-
Da-Lite Da-Snap 123" User manual
-
Da-Lite 37876V User manual
-
Da-Lite 95592 User manual
-
-
-
-
-
Da-Lite 27969T User manual
-

