Page is loading ...

BAOFENG UV-B5
TWO-WAY RADIO
USER’S MANUAL

PREFACE
Thank you for purchasing UV-B5 Amateur Portable Radio, which is a dual
band/dual display radio. This easy-to-use radio will deliver you secure, instant and
reliable communications at peak efficiency. Please read this manual carefully before
use. The information presented herein will help you to derive maximum performance
from your radio.

CONTENT
01 SAFETY INFORMATION
02 FEATURES AND FUNCTIONS
03 UNPACKING AND CHECKING
EQUIPMENTS
04 BATTERY CHARGING
05 BATTERY INFORMATION
INITIAL USE
BATTERY TIPS
PROLONG BATTERY LIFE
BATTERY STORAGE
07 INSTALLATION OF ACCESSORIES
INSTALLING THE ANTENNA
INSTALLING THE BELT CLIP
MICRO-HEADSET INSTALLATION OF EXTERNAL
BATTERY INSTALLATION
09 PARTS, CONTROLS AND KEYS
RADIO OVERVIEW
10 BASIC OPERATION
RADIO ON-OFF
VOLUME CONTROL
SELECTING A FREQUENCY OR CHANNEL
TRANSMITTING
11 COMMAND I KEY DEFINITION
13 COMBINATION KEY FUNCTION
1750 Hz TONE FOR ACCESS TO REPEATERS
RESET (Restore to default setting)
14 ADVANCED OPERATION
SET MENU DESCRIPTION
FREQUENCY HOPPING "STEP"
SQUELCH THRESHOLD SETTING "SQL"
BATTERY SAVER "SAVE"
SELECTING TRANSMIT POWER "POWER"
SELECTING OFF TRANSMISSION TONE "ROGE"
TIMER TRANSMISSION "TOT"
FUNCTION "VOX" (VOICE OPERATED
TRANSMISSION)
FUNCTION "BEEP" KEYPAD
VOICE PROMPT "VOIC"
DUAL WATCH/DUAL STANDBY "TDR"
SUBTONES / CODES FOR RECEIVING "RCODE"
SUBTONES / CODES FOR TRANSMITTING
"TCODE"
DISPLAY ILLUMINATION "ABR"
SENDING SIGNAL CODE "PTT ID"
AUTOMATIC NUMBER IDENTIFICATION "ANI"
MODE OF TRANSMITTING SIGNAL CODE
"PTIDM"
DTMF TONE "DTST"
DISPLAY OF FREQUENCY 1 "MDF1" DISPLAY OF
FREQUENCY 2 "MDF2"
BUSY CHANNEL LOCKOUT "BCL"
DIRECTION OF FREQUENCY SHIFT "SHIFT"
FREQUENCY SHIFT "OFFSE"
SCAN TYPE "SCANM"
PRIORITY TRANSMITTING "TXAB"
REVERSED DUPLEX MODE "REV"

CONTENT
TONE END OF TRANSMISSION "STE"
NAME OF CHANNEL "NAME"
WIDEBAND OR NARROW BAND "W/N"
AUDIO COMPANDING "COMP"
28 ADDITIONAL FEATURES AND
SETTINGS
STORED IN MEMORY CHANNEL
ALARM FUNCTION
COMMERICIAL FM RADIO
MEMORIZING FM RADIO STATIONS
30 CTCSS TABLE
31 DCS TABLE
32 TECHNICAL SPECIFICATION
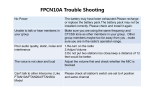
34 TROUBLESHOOTING
36 WARRANTY

SAFETY INFORMATION
The following safety precautions shall always be observed during operation, service
and repair of this equipment.
This equipment shall be serviced by qualified technicians only.
Do not modify the radio for any reason.
Use only BAOFENG supplied or approved batteries and chargers.
Do not use any portable radio that has a damaged antenna. If a damaged
antenna comes into contact with your skin, a minor burn can result.
Turn off your radio prior to entering any area with explosive and flammable
materials.
Do not charge your battery in a location with explosive and flammable materials.
To avoid electromagnetic interference and/or compatibility conflicts, turn off your
radio in any area where posted notices instruct you to do so.
Turn off your radio before boarding an aircraft. Any use of a radio must he in
accordance with airline regulations or crew instructions.
Turn off your radio before entering a blasting area.
For vehicles with an air bag, do not place a radio in the area over an air bag or in
the air bag deployment area.
Do not expose the radio to direct sunlight over a long time, nor place it close to
heating source.
When transmitting with a portable radio, hold the radio in a vertical position with
the microphone 3 to 4 centimeters away from your lips. Keep antenna at least 2.5
centimeters away from your body when transmitting.
WARNING: If you wear a radio on your body, ensure the radio and
its antenna are at least 2.5 centimeters away from your body when
transmitting.

FEATURES AND FUNCTIONS
1. Frequency Range:
Commercial FM radio 65-108MHz (only for reception)
VHF 136-174 (RX/TX) UHF 400-470MHz (RX/TX) dual band
2. Mode: VFO, Channel Mode
3. Commercial FM radio
4. Dual Display/Dual Band
5. DTMF encoding
6. Incorporates 104 codes "DCS" and 50 privacy codes "CTCSS" programmable
7. CTCSS and DCS setting in different MENUs
8. Transmitter transmission (TOT)
9. Frequency step (5/6.25/10/12.5/20/25kHz)
10. Battery saving function
11. VOX (Voice operated transmission)
12. BCL (Busy channel lockout)
13. Low battery warning
14. Auto LCD illumination
15. Channel mode display (Name, Frequency, Channel #)
16. DTMF tone of transmitting code
17. Scan resume method (TO/CO/SE)
18. PTT-ID (Press or release the PTT to transmit code; Press and release the PTT to transmit
code)
19. Under frequency mode, band shift setting for accessing repeater
20. Offset frequency range 0 - 69.9875MHz
21. Direct entering numerical key to select MENU
22. Channel capacity 99
23. Reverse function
24. Alarm function
25. Audio companding
26. PC programming

UNPACKING AND CHECKING EQUIPMENTS
Carefully unpack the transceiver. We recommend that you identify the items listed in
the following before discarding the packing material. If any items are missing or have
been damaged during shipment, please contact your dealers immediately.
ITEM QUANTITY
Transceiver Unit 1
Antenna 1
Handstrap 1
Charger 1
Battery 1
Beltclip 1
User's Manual 1
Note:
- Items included in the package, may differ from those listed in the table above
depending on the country of purchase. For more information, consult your dealer or
vendor.
- Consult the dealer or retailer for information about options available.

BATTERY CHARGING
Use only the charger specified by the manufacturer. The charger's LED indicates the
charging progress.
Please follow these steps:
1. Plug the AC connector of the adapter into the AC outlet socket.
2. Place the radio with the battery attached, or the battery alone, in the charger.
3. Make sure the battery is in good contact with the charging terminals. The charging
process initiates when the red LED lights.
4. The green LED lights about 4 hours later indicating the battery is fully charged.
Then remove the radio with the battery attached or the battery alone from the
charger.

BATTERY INFORMATION
INITIAL USE
New batteries are shipped uncharged fully from the factory. Charge a new battery for
5 hours before initial use. The maximum battery capacity and performance is
achieved after three full charge/discharge cycles. If you notice the battery power runs
low, please recharge the battery.
WARNING:
- To reduce the risk of injury, charge only the battery specified by the manufacturer.
Other batteries may burst, causing bodily injury and property damage.
- To avoid risk of personal injury, do not dispose of batteries in a fire!
- Dispose of batteries according to local regulations (e.g. recycling). Do not dispose
as household waste.
- Never attempt to disassemble the battery.
BATTERY TIPS
1. When charging your battery, keep it at a temperature among 5°C
40°C.Temperature out of the limit may cause battery leakage or damage.
2. When charging a battery attached to a radio, turn the radio off to ensure a full
charge.
3. Do not cut off the power supply or remove the battery when charging a battery.
4. Never charge a battery that is wet. Please dry it with a soft cloth prior to charge.
5. The battery will eventually wear out. When the operating time (talk-time and
standby time) is noticeably shorter than normal performance, it is time to buy a new
battery.
PROLONG BATTERY LIFE
1. Battery performance will be greatly decreased at a temperature below 0°C. A
spare battery is necessary in cold weather. The cold battery unable to work in this
situation may work under room temperature, so keep it for later use.
2. The dust on the battery contact may cause the battery cannot work or charge.
Please use a clean dry cloth to wipe it before attaching the battery to the radio.

BATTERY INFORMATION
BATTERY STORAGE
1. Fully charge a battery before you store it for a long time, to avoid battery damage
due to over-discharge.
2. Recharge a battery after several months' storage (Li-Ion batteries: 6 months), to
avoid battery capacity reduction due to over-discharge.
3. Store your battery in a cool and dry place under room temperature, to reduce self-
discharge.

INSTALLATION OF ACCESSORIES
INSTALLING THE ANTENNA
Install the antenna as shown in the figure below and
turn it clockwise until it stops.
Note:
- When installing the antenna, don't rotate it by its top,
holding it by its base and turn.
- If you use an external antenna, make sure the “SWR”
is about 1.5:1 or less, to avoid damage to the
transceiver's final transistors.
- Do not hold the antenna with your hand or wrap the
outside of it to avoid bad operation of the transceiver.
- Never transmit without an antenna.
INSTALLING THE BELT CLIP
If necessary, install the belt clip at the rear of the
battery compartment cover as shown in the figure
below.
Note:
- Do not use any kind of glue to fix the screw on the
belt clip.
The solvents Glue may damage the battery casing.
MICRO-HEADSET INSTALLATION OF EXTERNAL
Plug the external micro-headset connector into the jack
of “SP&MIC” of the transceiver as shown in the figure
below.

INSTALLATION OF ACCESSORIES
BATTERY INSTALLATION
- When attaching the battery, make sure the battery is in parallel and in good contact
with the aluminum chassis. The battery bottom is about 1 to 2 centimeters below the
bottom of the radio's body.
- Align the battery with the guide rails on the aluminum chassis and slide it upwards
until a “click” is heard.
- The battery latch at the bottom locks the battery.
- Turn off the radio before removing the battery.
- Slide the battery latch, at the bottom of the radio's body, in the direction indicated by
the arrow.
- Slide down the battery for about 1 to 2 centimeters, and then remove the battery
from the radio's body.

PARTS, CONTROLS AND KEYS
RADIO OVERVIEW
A: LED indicator
B: Knob (Channel)
C: Knob (ON/OFF, volume)
D: PTT Key (push-to-talk)
E: Monitor
F: SP&MIC Jack
K: Mic
G: Alarm Button
H: LCD
I: Speaker
J: Keypad

BASIC OPERATION
RADIO ON
-
OFF
- Make sure the antenna and battery are installed
correctly and the battery charged.
- Rotate the knob clockwise to turn the radio on, and
rotate the knob fully counter-clockwise until a “click” is
heard to turn the radio off.
VOLUME CONTROL
Press and hold the MONI button, then rotate the knob
clockwise or counter-clockwise, to adjust the volume.
SELECTING A FREQUENCY OR CHANNEL
Press the key [UP] or [DOWN] to select tie desired
frequency/channel you want. Also you may directly
enter the numeric to select frequency/channel. The
display shows the frequency / channel selected.
Note:
- You cannot select a channel if not previously stored.
TRANSMITTING
- To transmit, press and hold [PTT] and speak into the
microphone in your normal tone of voice. The LED
indicator lights continuously red when transmitting.
- To maximize sound clarity at the receiving station,
hold the transceiver 2 to 3 inches from mouth and talk
in normal tone of voice.
- Release [PTT] to receive.

COMMAND/KEY DEFINITION
[MENU] KEY
1. Press [MENU] key, then press [UP] or [DOWN] key to choose each menu. All
menu parameters and channel saving are confirmed by pressing [AB/] key.
2. Press and hold on [MENU] key for 2 seconds, to lock the keypad or unlock the
keypad.
[UP]/[DOWN] KEY
1. Press and hold [UP] or [DOWN] key for frequency/channel up or down fast.
2. Under scanning mode, press [UP] or [DOWN] key, the scanning will be opposite.
[AB/]
- While come into menu, press [AB/] key, to set all menu parameter.
- Under VFO/Channel mode, press [AB/] key, to switch Frequency A/Channel A and
Frequency B/Channel B.
FM
- Press [FM] key to turn on the FM radio.
- Press and hold on [FM] key to delete the stored FM radio channel.

COMMAND/KEY DEFINITION
VM/SCAN
- Press [VM/SCAN] key to switch VFO mode and channel mode
- Press [MENU] key, then press [VM/SCAN] key to scan the frequency/channel.
- Press and hold on [VM/SCAN] about 2 seconds to store frequency. Now press [UP]
or [DOWN] key, if the left top numeric flashes, that means it is blank; and if it doesn't
flash, that means there are stored channel, you press [AB/] key to confirm saving or
cover the stored channel. Press any numeric key to cancel saving.
NUMERIC KEY
- Use for entering frequency, channel #, menu #, menu parameter etc.
PTT
- Push PTT to transmit, release PTT to receive.
MONI
- Press and hold (Squelch OFF) to hear the background noise; Release to return to
normal operation.

COMBINATION KEY FUNCTION
1750 Hz TONE FOR ACCESS TO REPEATERS
- The user needs to establish long distance communications through an amateur
radio repeater which is activated after receiving a 1750Hz tone. Press and hold on
the [PTT], then press the [MONI] button to transmit a 1750Hz tone.
RESET (Restore to default setting)
- Press and hold on [MENU] key, then switch on, to reset the radio, the LCD displays
“VFO” (Frequency reset) or “ALL” (All reset), choose which one you want, press
[AB/] to confirm.

ADVANCED OPERATION
- You can program your transceiver operating in the setup menu to suit your needs or
preferences.
SET MENU DESCRIPTION
Menu Function/Description Available settings
1 STEP (Frequency step) 5/6.25/10/12.5/20/25kHz
2 SQL (Squelch level) 0-9
3 SAVE (Battery save) OFF/ON
4 TXPR (Transmit power) HIGH/LOW
5 ROGE (Off transmission tone) OFF/ON
6 TOT (Transmission timer) 1min-7min
7 VOX (Voice operated transmission) OFF/1-9
8 BEEP (Keypad beep) OFF/ON
9 VOIC (Voice prompt) OFF/ON
10 TDR (Dual watch) OFF/ON
11
RCODE (Reception Continuous Tone Coded
Squelch)
OFF
12
TCODE (Transmission Continuous Tone Coded
Squelch)
OFF
13 ABR (Display illumination) OFF/ON
14
PTT-ID (Press the PTT button to transmit the
signal code)
OFF/ON

ADVANCED OPERATION
Menu Function/Description Available settings
15 ANI (Automatic number identification of the radio) 0-9; A-F
16 PTIDM (The mode of transmitting the signal code ) OFF/BOT/EOT/BOTH
17 DTST (The DTMF tone of transmitting code) OFF/ON
18 MDF-1 (Under channel mode, F1 channel displays) FREQ/CHAN/NAME
19 MDF-2 (Under channel mode, F2 channel displays) FREQ/CHAN/NAME
20 BCL (Busy channel lockout) ON/OFF
21 SFTD (Direction of frequency shift) 0, -, +
22 OFFSET (Frequency shift) 0...69.995M
23 SCRNM (Scan resume method) TO/CO/SE
24
TXAB (Transmitting selection while in dual watch/
reception)
OFF/F1/F2
25 REV (Reverse frequency) ON/OFF
26 STE (Tail Tone Elimination) ON/OFF
27 NAME (Channel name) 0-9
28 W/N (Wide/Narrow bandwidth) WIDE/NARRO
29 COMP (Noise reduction) ON/OFF

ADVANCED OPERATION
1. FREQUENCY HOPPING "STEP"
Schedule frequent breaks to select the receive and transmit frequency adequate.
Perform the following steps to select the desired frequency hopping:
1. Press the [MENU], then press [UP]/[DOWN] to select the Menu 01 "STEP"
2. Press [AB/], then press [UP]/[DOWN] to select 5/6.25/10/12.5/20/25kHz
3. Press [AB/] to save the setting.
4. Press [MENU] or any numeric key to exit.
2. SQUELCH THRESHOLD SETTING "SQL"
The squelch mute the speaker when no signal transceiver reception extending the
duration of the battery. To adjust the squelch threshold, perform the following steps:
1. Press the [MENU], then press [UP]/[DOWN] to select the Menu 02 "SQL"
2. Press [AB/], then press [UP]/[DOWN] to select the desired level between 0 and 9
(level default setting is 5). It is recommended that you begin to adjust from Level 1,
selecting the level where the background noise in the absence of signal.
3. Press [AB/] to save the setting.
4. Press [MENU] or any numeric key to exit.
3. BATTERY SAVER "SAVE"
This transceiver incorporates a battery saver, if you have acts of active follows:
If we receive a very strong signal and we have a transceiver with high transmit
power, the transceiver is automatically set to the low transmission power. With this
option, extend the life of the battery of the transceiver. Follow the steps below to
enable or disable this feature:
1. Press the [MENU], then press [UP]/[DOWN] to select the Menu 03 "SAVE".
2. Press [AB/], then press [UP]/[DOWN] to select ON/OFF.
3. Press [AB/] to save the setting.
4. Press [MENU] or any numeric key to exit.
/