Page is loading ...

2
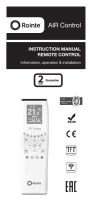
INSTRUCTION MANUAL
BASIC REMOTE CONTROL
Information, operation & installation

2
Contents
1. Introduction...............................................................2
2. Product information and operation.........................3
2.1. Control panel.....................................................3
2.2. Switching on and off (stand-by)......................4
2.3. Select product to program..............................5
2.4. Adjust the Day/Time.........................................5
2.5. Set the temperature..........................................5
2.6. Lock the keypad...............................................5
2.7. MANUAL/AUTOMATIC function......................6
2.7.1 MANUAL function...................................6
2.7.2 AUTOMATIC function.............................7
2.7.3 Pre-installed programmes.....................9
2.8. Send data........................................................10
3. Maintenance and cleaning.....................................10
3.1. Cleaning...........................................................10
3.2. Batteries..........................................................10
4. Guarantee................................................................11
5. Certificate of Guarantee.........................................15
1. Introduction
This product is manufactured with high quality com-
ponents and has passed the most demanding quality
controls to meet rigorous safety standards and effi-
ciency requirements. This product communicates via
infrared up to a distance of 3m.
IMPORTANT - Please read this Instruction Manual
carefully to ensure correct operation. It is important
that this manual is left with the product after instal-
lation.

3
2. Product information and operation
2.1. Control panel
2.1.1. Keypad
NO. DESCRIPTION
0
TFT display
1
Send information button
Adjust day and time button
2
Decrease temperature button
3
MANUAL / AUTOMATIC function
4
Pre-installed programme 1 button
5
Pre-installed programme 2 button
6
Pre-installed programme 3 button
7
Pre-installed programme 4 button
8
On / Off button
Accept / Confirm button
9
Increase temperature button

4
2.1.2. TFT display panel
NO. DESCRIPTION
1
Programming
2
Days of the week
3
Time of day
4
Temperature selected
5
Control panel locked / unlocked
6
MANUAL / AUTOMATIC function indicator
7
COMFORT / ECO / ANTI-FROST mode indicator
2.2. Switching on and off (stand-by)
To switch the product ON, please press the but-
ton once. After 5 seconds the temperature, time and
days of the week will be displayed.
To switch the product OFF, please press the but-
ton once again. The product will go into stand-by
mode with the word ‘STAND-BY’ displayed.
If no mode is selected after 2 minutes, it will auto-
matically switch off. When the remote is switched off
the time and date will be stored, as well as the last
programme, provided the batteries are not removed.

5
2.3. Select product to program
After the remote has been switched on, the TFT
screen will display 2 options for you to choose
between: radiator, towel rail or water heater. Press
to select the radiator or towel rail to program.
Press to select the water heater to program.
2.4. Set the Day and Time
To set or adjust the day and time, please press and
hold the button for 3 seconds. Use the and
buttons to set the hour, then press to
confirm. Then use the and buttons to set the
minutes and press to confirm. Finally, use the
and buttons to set the day (1 = Monday, 2 =
Tuesday etc.) and confirm by pressing the button.
Send the adjustment to the product by pressing the
button (see section 2.8.).
2.5. Set the temperature
To change the current temperature in the MANUAL
function, please press the or the button. To
decrease the temperature press the button and
to increase the temperature press the button.
To change the temperature in the AUTOMATIC
function whilst editing a programme see the steps
above to increase or decrease temperature. Please
note that this will change the temperature for the
current mode (COMFORT or ECO) for all the hours
programmed in that mode.
2.6. Locking the keypad
To lock the keypad on your product using your remote
control, please hold and press the button AND
the button TOGETHER for 3 seconds. Then press
the button to send this instruction to your product
and the keypad lock will be activated. The symbol

6
will appear on the display panel of your product and
the keys will not respond.
To unlock the keypad on your product using your
remote control, please hold and press the button
AND the button TOGETHER for 3 seconds. Then
press the button to send this instruction to your
radiator, towel rail or water heater. The keypad will
then be unlocked.
IMPORTANT: In the event that your remote control
stops working, you can disable the keypad lock on
your product by pressing the button AND the
button TOGETHER for 3 seconds. The product
will reset but you will lose any programming.
2.7. MANUAL / AUTOMATIC functions
To change or choose the MANUAL or AUTOMATIC
function, press the button on the keypad. You
can change from AUTOMATIC to MANUAL and vice
versa by pressing the button again. On the dis-
play panel, the symbol will appear for the AUTO-
MATIC function and the symbol for the MANUAL
function. The AUTOMATIC function activates the pro-
gramming you have already established in the prod-
uct.
MANUAL
This function allows you to change the
product between the COMFORT, ECO
and ANTI-FROST modes and to change
the temperature (see section 2.5.).
AUTOMATIC
This function will activate the
programming that has previously been
set in the product.
2.7.1. MANUAL function
The MANUAL function allows you to manually set the
temperature of your product. Press the button to
increase the temperature. Press the button to de-

7
crease the temperature. Depending on the tempera-
ture selected you will see one of the following icons:
Radiator and Towel Rail
Symbol Mode
Temperature Range
Min. Max.
COMFORT 19ºC 30ºC
ECO 15ºC 18.5ºC
ANTI-FROST 7ºC
Water Heater
Symbol Mode
Temperature range
Min. Max.
COMFORT 55ºC 73ºC
ECO 40ºC 54.5ºC
ANTI-FROST 7ºC
Send the adjustment to the radiator, water heater or
towel rail by pressing the button (section 2.8.).
IMPORTANT: Whilst you are in MANUAL function,
automatic programming in the product will not
work.
2.7.2. AUTOMATIC function
To program the AUTOMATIC mode, see section 2.7. to
put the product into AUTOMATIC mode. Then press
and hold the button 3 seconds to begin
programming.
STEP 1 - Select COMFORT mode temperature
Select the COMFORT mode temperature between 19ºC
and 30ºC using the and buttons. The icon
and the temperature will flash. Press the button
to confirm and move to the ECO temperature.

8
STEP 2 - Select ECO mode temperature
Select the ECO mode temperature between 15ºC and
19.5ºC. The icon and the temperature will flash.
Press the button to confirm and move to the ANTI-
FROST mode.
STEP 3 - Select the ANTI-FROST mode
A flashing symbol will be displayed and OFF or
ANTIFROST will appear. Choose whether to have
ANTI-FROST on or off when COMFORT or ECO mode
isn´t activated by pressing the and buttons and
then the button to confirm and move to setting
the days of the week.
STEP 4 - Select the Days
The days of the week will start flashing on the display
panel and show as DAY 1, DAY 2, DAY 3 etc.
Use the and buttons to move forwards or
backwards through the days. Press to select the
day or days that you wish to include in your AUTOMATIC
programme. The day will stop flashing once selected.
Repeat for all the days you wish to program with the
same settings and once all days are selected press
the button to move onto setting the hour.
STEP 5 - Select the Hours
Once step 4 has been completed, 0h appears on the
display panel. 0h is equal to the time, midnight. Use
the or buttons to select the hour you wish to
change. Use the button to change the mode
(COMFORT, ECO or ANTI-FROST) for the hour you
wish to modify for all the days selected in step 4. The
corresponding icon for that mode will appear at the
top of the screen.
To finish the programming press the button
leave for 30 seconds without pressing any buttons.

9
To change the programming go back to step 1 and
proceed as described before. Send the adjustment
to the radiator, water heater or towel rail by pressing
the button (see section 2.8.).
IMPORTANT: If you wish to have individual days
with different programming within your program
you will need to modify each day separately,
starting from the Main Menu again for each day/
days. Follow Steps 1 to 5 above to program multiple
differing days/hours/temperatures.
2.7.3. Pre-installed programmes
The BASIC remote control has four pre-installed
programme keys as shown below:
Please see your product manual for full details of these
pre-installed programme schedules.
• Select a pre-installed programme:
To select and activate any of the 4 pre-installed
programmes in your product, simply press the
, , or button on the keypad. Send the
adjustment to the product by pressing the button
(see section 2.8.).
•
Display the pre-installed programme
activated:
To display the activated pre-installed programme
scheduling simply press the , , or
button on the keypad again.
• To edit one day of the pre-installed
programmes activated:
To modify a day of the activated pre-installed
programme please press and hold either the ,
, or button. This will edit the day displayed.

10
• To edit a full pre-installed programme:
When on the main screen press the pre-installed
programme button you wish to edit for for 3 seconds.
Then follow steps 1 to 5 on pages 8 and 9 to edit a full
pre-installed programme.
2.8. Send data between remote control & product
It is important to send data from your remote
control to your product regularly to ensure up-to-
date information has been stored. By pressing the
button (at a maximum distance of between 1.5
and 2 metres, and a maximum angle of 30º from the
product) , you will submit all the data stored on the
remote control to that product. On the remote control
screen you will see:
IMPORTANT: Do not forget to send the data to the
radiator, towel rail or water heater each time you
change the configuration in the remote control.
3. Maintenance
3.1. Cleaning
Clean the remote control with a damp cloth and
ph neutral soap or an antistatic cloth. Never use a
dry cloth; there is a danger of creating static
electricity.
3.2. Batteries
The BASIC Control remote control uses two 1.5V
AAA batteries. You are advised to remove the
batteries from the remote control when it is not going
to be used for a long period of time (e.g. a vacation/
holiday, the summer months etc.).

11
4. Guarantee
In this section, we hereby describe the guarantee
conditions, which the buyer acquires, on buying this
product from ROINTE. These conditions comply with
all the rights construed in the national legislation in
force, as well as any additional rights and guarantees,
which are offered by ROINTE.
Any incident that you might detect in your ROINTE
product can be sorted by the product seller or quickly
by the manufacturer. Please contact ROINTE by
telephoning 0203 321 5929 for Technical Support.
Alternatively, you can email ROINTE at support@
rointe.co.uk, through which we will instruct you on
how to solve the incident.
4.1. ROINTE guarantees that there are no material
defects of design or manufacture at the time of original
acquisition and guarantees the remote control for a
period of 24 months, provided it has not been modified
in any way.
4.2. If during the guarantee period, the product does
not work correctly under normal use, and any design,
material or manufacturing defect is found, ROINTE
will repair or substitute the product as it may see fit, in
accordance with the terms and conditions as follows:
4.2.1. The guarantee is only applicable if the original
guarantee is issued by the seller and when the said
guarantee is filled in correctly including product
reference, series number (marked on the product’s
label indicating technical features), purchase date
and the seller’s stamp, and either registered on our
website at www.rointe.co.uk or returned completed to
ROINTE within 90 days of installation. ROINTE reserves
the right to reject the guarantee service when this
information has been removed or modified after the
original product purchase.

12
4.2.2. The guarantee is only applicable to those
cases that concern material, design and manufacturing
defects, and under no circumstances covers damage
to the product for the following reasons:
4.2.3.1 Damage caused by negligence and/
or misuse of the product, i.e. used for other purposes
that are not construed as its normal use or for not
respecting the instructions of use and maintenance
given by ROINTE as well as incorrect installation or use
of the product that may not comply with the current
technical standards of safety.
4.2.3.2. Any unauthorised modification of the
product or repairs of the product carried out by third
parties or unauthorised technicians or opening of the
product by third parties or unauthorised people.
4.2.3.3. Any accidents that are deemed
outside the control of ROINTE, such as (but not limited
to): lightning, fires, floods, natural disasters, public
disorder, atmospheric or geologic phenomena etc.
4.2.3. Any repairs or substitutions that are included
in this guarantee do not allow any additions or new
periods of guarantee.
4.2.4. Any repairs or substitutions covered under
this guarantee must be parts that are functionally
equivalent. The defective parts or parts removed or
replaced shall become the property of ROINTE.
4.3. The Technical Service department of ROINTE
will advise you if you need to purchase any parts not
covered under the guarantee or out of guarantee.
4.4. This guarantee will be null and void if the product:
has been manipulated, modified and/or repaired in any
way and/or by unauthorised persons.
4.5. This guarantee is not transferable.

13
4.6. Proof of purchase will be required to ROINTE for
any claim.
4.7. This guarantee does not affect your statutory
rights.
4.8. This guarantee does not affect the buyer’s legal
rights stipulated in the current national legislation, nor
affects those rights against the distributor or installer
that could come forth in compliance with the purchase
contract.
4.9. In the absence of a national legal legislation
applicable, this guarantee shall prevail and may be
construed as the buyer’s only protection. ROINTE,
its offices, distributors and installers may not be held
responsible for any accidental damage that emerges
due to infringement of any rules implicitly related to
this product.
For help about the product or guarantee, please
contact ROINTE by telephoning 0203 321 5929 for
Technical Support or by email to support@rointe.
co.uk.

14
NOTES:

NOTES:
CERTIFICATE OF GUARANTEE
In the event of detecting any defect in the product
within the period of guarantee, you must fill in the
following Guarantee Certificate and send it to us
stamped together with a copy of the sales invoice
via email support@rointe.co.uk or to the following
postal address: INDUSTRIAS ROYAL TERMIC,
S.L., C/E, Parcela 43, 30140 Santomera (Murcia,
Spain).
For new constructions, it is essential that you
attach the Certificate of First Occupation.
NB: This certificate of Guarantee must be filled in
fully in order to obtain guarantee rights. The date
of purchase and seller’s stamp are compulsory.
Please, attach a copy of your sales invoices.
In addition, for new constructions include the
Certificate of First Occupation.
Cut along the dotted line
CERTIFICATE OF GUARANTEE
REFERENCE:
Nº SERIES:
USER:
PURCHASE DATE:
HOME ADDRESS:
TOWN: POSTCODE:
COUNTY:
COUNTRY:
TELEPHONE: EMAIL:
SELLER’S STAMP:
15


17
NOTES:

18
NOTES:

19
Thank you for choosing Rointe. We hope you
enjoy your product.
If you require further assistance or information,
please contact our Technical Service
Department by telephoning 0203 321 5929 or
email [email protected].

MBCUK17V2
ROINTE UK
Catalyst House,
720 Centennial Court, Centennial Park
Elstree, Herts, WD6 3SY
T. 0203 321 5928
F. 0208 953 5861
Technical Support
T. 0203 321 5929
E: suppor[email protected].uk
www.rointe.co.uk
/