Dell W-Airwave Quick start guide

Type
Quick start guide
Dell Networking
W-AirWave 8.0
Best Practices Guide
May 2014 | 0510824-08 Dell Networking W-AirWave 8.0 | Best Practices Guide
Copyright
© 2014 Aruba Networks, Inc. Aruba Networks trademarks include , Aruba Networks
®
, Aruba
Wireless Networks
®
, the registered Aruba the Mobile Edge Company logo, and Aruba Mobility Management System
®
.
Dell™, the DELL logo, and PowerConnect™ are trademarks of Dell Inc.
All rights reserved. Specifications in this manual are subject to change without notice.
Originated in the USA. All other trademarks are the property of their respective owners.
Open Source Code
Certain Aruba products include Open Source software code developed by third parties, including software code subject
to the GNU General Public License (GPL), GNU Lesser General Public License (LGPL), or other Open Source Licenses.
Includes software from Litech Systems Design. The IF-MAP client library copyright 2011
Infoblox, Inc. All rights reserved. This product includes software developed by Lars Fenneberg, et al. The Open Source
code used can be found at this site:
http://www.arubanetworks.com/open_source
Legal Notice
The use of Aruba Networks, Inc. switching platforms and software, by all individuals or corporations, to terminate other
vendors’ VPN client devices constitutes complete acceptance of liability by that individual or corporation for this action
and indemnifies, in full, Aruba Networks, Inc. from any and all legal actions that might be taken against it with respect
to infringement of copyright on behalf of those vendors.
Dell Networking W-AirWave 8.0 | Best Practices Guide Overview | 3
Chapter 1
Overview
This document provides best practices for leveraging Dell Networking W-AirWave to monitor and manage your Dell
Networking W-Series infrastructure, which provides a wealth of functionality such as firewall, VPN, remote AP, IDS,
IPS, and ARM, as well as an abundance of statistical information.
Follow the simple guidelines in this document to garner the full benefit of your Dell Networking W-Series infrastructure.
This overview chapter contains the following topics:
l "Understanding Dell Networking W-Series Topology" on page 3
l "Prerequisites for Integrating Dell Networking W-Series Infrastructure " on page 3
Understanding Dell Networking W-Series Topology
Figure 1 depicts a typical master-local deployment for the Dell Networking W-AirWave Wireless Management System
(AWMS):
Figure 1:Typical Dell Networking W-Series Deployment
There should never be a local controller managed by an AirWave server whose master controller is also not under
management.
Prerequisites for Integrating Dell Networking W-Series Infrastructure
You will need the following information to monitor and manage your Dell Networking W-Series infrastructure:
l SNMP community string (monitoring and discovery)
l Telnet/SSH credentials (configuration only)
l Enable password (configuration only)
Without proper Telnet/SSH credentials, AirWave will not be able to acquire license and serial information from controllers.
l SNMPv3 credentials are required for Wireless LAN Management System (WMS) Offload:
4 | Overview Dell Networking W-AirWave 8.0 | Best Practices Guide
n Username
n Auth password
n Privacy password
n Auth protocol
Dell Networking W-AirWave 8.0 | Best Practices Guide Configuring W-AirWave for Global W-Series Infrastructure | 5
Chapter 2
Configuring W-AirWave for Global W-Series
Infrastructure
This section explains how to configure W-AirWave to globally manage your Dell Networking W-Series infrastructure.
l "Disabling Rate Limiting in AMP Setup > General" on page 5
l "Entering Credentials in Device Setup > Communication" on page 5
l "Setting Up Recommended Timeout and Retries" on page 7
l "Setting Up Time Synchronization" on page 7
l "Enabling Support for Channel Utilization And Statistics" on page 8
Disabling Rate Limiting in AMP Setup > General
The SNMP Rate Limiting for Monitored Devices option adds a small delay between each SNMP GET request, which
results in the actual polling intervals that are longer than what is configured. For example, setting a ten-minute polling
interval will result in an actual 12-minute polling interval. Disabling rate limiting is recommended in most cases.
To disable rate limiting in W-AirWave, follow these steps:
1. Navigate to AMP Setup > General.
2. Locate the Performance section.
3. In the SNMP Rate Limiting for Monitored Devices field, select No, as shown in Figure 2.
4. Click Save.
Figure 2:SNMP Rate Limiting in AMP Setup > General
Entering Credentials in Device Setup > Communication
AirWave requires several credentials to properly interface with Dell Networking W-Series devices. To enter these
credentials, follow these steps:
6 | Configuring W-AirWave for Global W-Series Infrastructure Dell Networking W-AirWave 8.0 | Best Practices Guide
1. Navigate to Device Setup > Communication.
2. In the Default Credentials section, select the Edit link next to Dell. The page illustrated in Figure 3 appears.
3. Enter the SNMP Community String.
Be sure to note the community string because it must match the SNMP trap community string, which is configured later in
this document.
Figure 3:Credentials in Device Setup > Communication
4. Enter the required fields for configuration and basic monitoring:
l Telnet/SSH Username
l Telnet/SSH Password
l enable Password
5. Enter the required fields for WMS Offload:
l SNMPv3 Username
l Auth Password
l SNMPv3 Auth Protocol
l Privacy Password
l SNMPv3 Privacy Protocol
The authentication and privacy protocols should be SHA-1 and DES in order for WMS Offload to work.
6. Click Save.
Setting Up Recommended Timeout and Retries
1. In the Device Setup > Communication page, locate the SNMP Setting section.
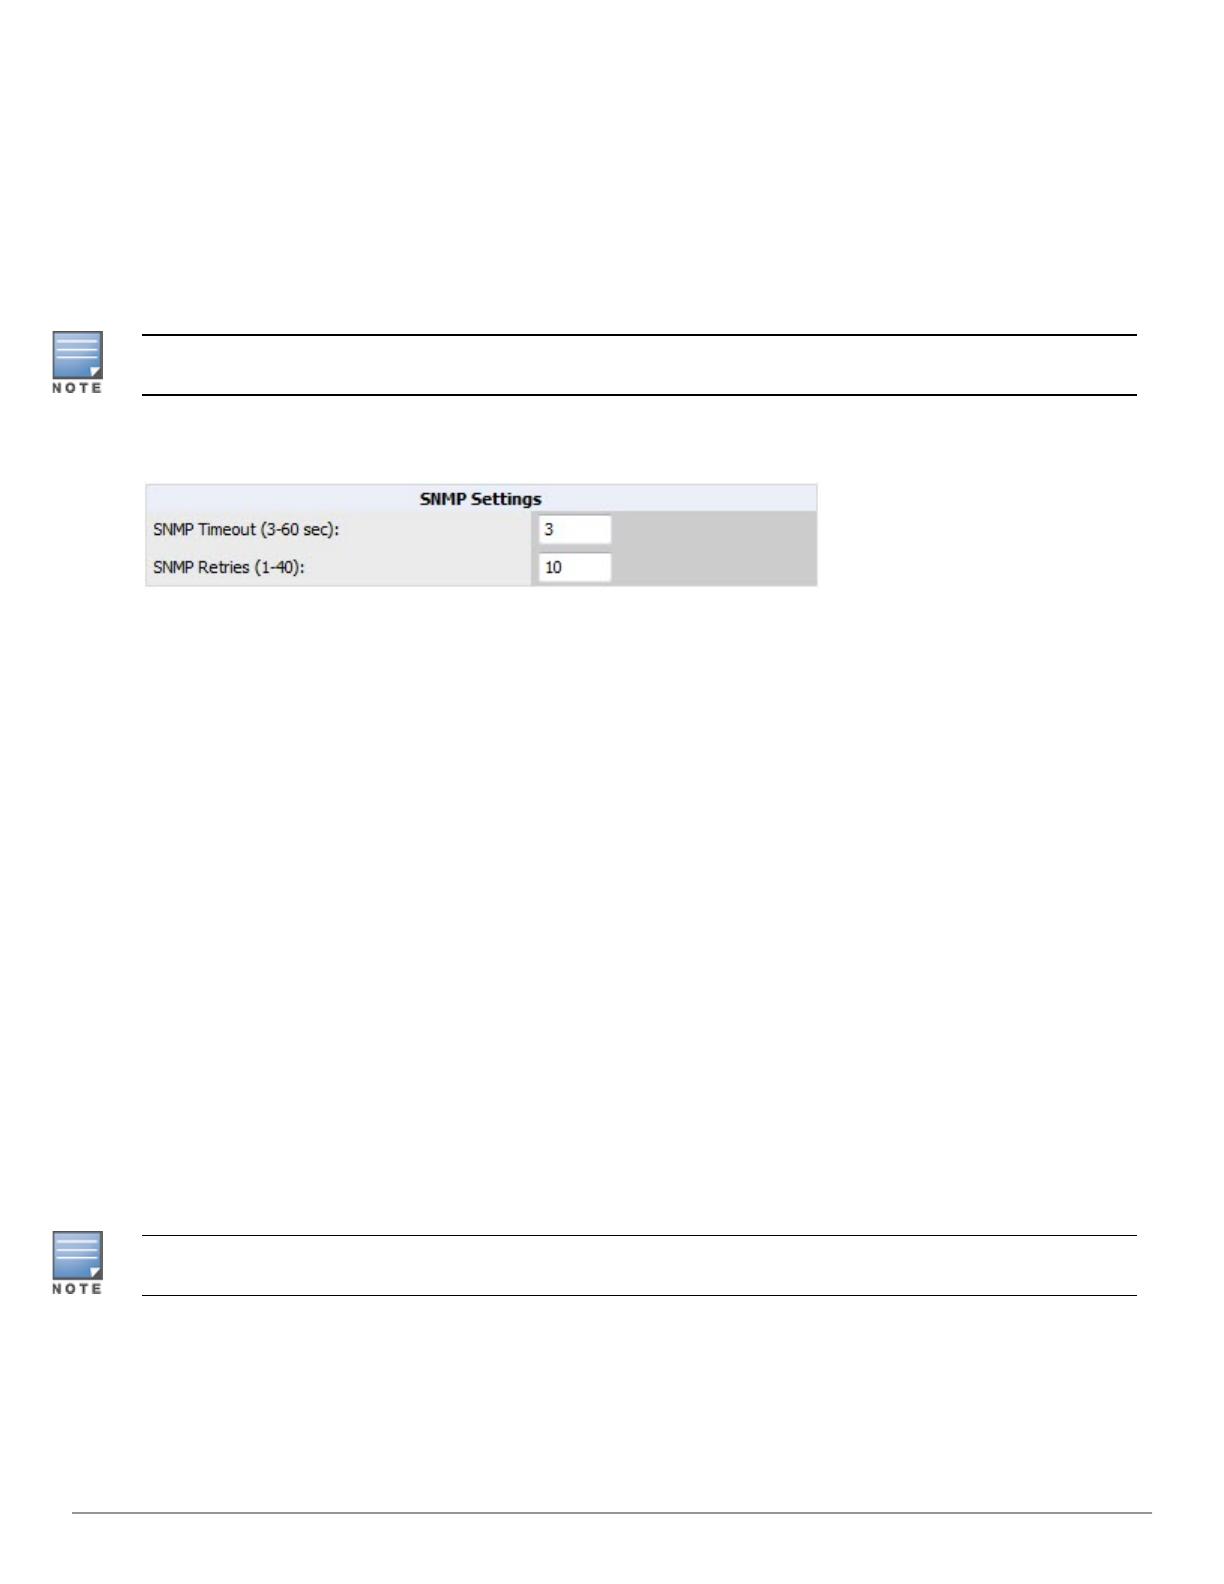
2. Change the SNMP Timeout setting to a value or either 3, 4, or 5. This is the number of seconds that AirWave will
wait for a response from a device after sending an SNMP request, so a smaller number is more ideal.
3. Change the SNMP Retries value to 10. This value represents the number of times AirWave tries to poll a device
when it does not receive a response within the SNMP Timeout Period or the Group’s Missed SNMP Poll Threshold
setting (1-100).
Although the upper limit for this value is 40, some SNMP libraries still have a hard limit of 20 retries. In these cases, any
retry value that is set above 20 will still stop at 20.
Figure 4:Timeout settings in Device Setup > Communication
4. Click Save when you are done.
Setting Up Time Synchronization
You can set the clock on a controller manually or by configuring the controller to use a Network Time Protocol (NTP)
server to synchronize its system clock with a central time source.
Manually Setting the Clock on a Controller
You can use either the WebUI or CLI to manually set the time on the controller’s clock.
1. Navigate to the Configuration > Management > Clock page.
2. Under Controller Date/Time, set the date and time for the clock.
3. Under Time Zone, enter the name of the time zone and the offset from Greenwich Mean Time (GMT).
4. To adjust the clock for daylight savings time, click Enabled under Summer Time. Additional fields appear that allow
you to set the offset from UTC and the start and end recurrences.
5. Click Apply.
Setting Up NTP
On the AMP Setup >Network page, locate the Network Time Protocol (NTP) section. The Network Time Protocol is
used to synchronize the time between W-AirWave and your network reference NTP server. NTP servers synchronize with
external reference time sources, such as satellites, radios, or modems.
Specifying NTP servers is optional. NTP servers synchronize the time on the AirWave server, not on individual access
points.
To disable NTP services, clear both the Primary and Secondary NTP server fields. Any problem related to
communication between AirWave and the NTP servers creates an entry in the event log. For more information on
ensuring that AirWave servers have the correct time, please see
http://support.ntp.org/bin/view/Servers/NTPPoolServers.
Dell Networking W-AirWave 8.0 | Best Practices Guide Configuring W-AirWave for Global W-Series Infrastructure | 7
8 | Configuring W-AirWave for Global W-Series Infrastructure Dell Networking W-AirWave 8.0 | Best Practices Guide
Setting Default Description
Primary
ntp1.yourdomain.com Sets the IP address or DNS name for the primary NTP server.
Secondary
ntp2.yourdomain.com Sets the IP address or DNS name for the secondary NTP server.
Table 1:
AMP Setup> Network > Secondary Network Fields and Default Values
Enabling Support for Channel Utilization And Statistics
To enable support for channel utilization statistics, you must have the following versions:
l Dell Networking W-AirWave 7.6 or later
l Dell Networking W-Series AOS 6.0.1 or later
l Dell Networking W-Instant 3.3 or later
AOS 6.0.1 can report RF utilization metrics, while AOS 6.1 is necessary to also obtain classified interferer information.
W-AirWave Setup
1. Navigate to AMP Setup > General.
2. In the Additional AMP Services section, set Enable AMON Data Collection to Yes, and set Prefer AMONvs
SNMP Polling to Yes.
3. Click Save.
Figure 5:AMON Data Collection Setting in AMP Setup > General
Controller Setup (Master And Local)
Enabling these commands on AOS versions prior to 6.0.1.0 can result in performance issues on the controller. If you are
running previous firmware versions such as AOS 6.0.0.0, you should upgrade to AOS 6.0.1 (to obtain RF utilization
metrics) or 6.1 (to obtain RF utilization
and
classified interferer information) before you enter this command.
The following commands are for AOS 6.4. To get the commands for other versions of AOS, refer to the Command-Line
Interface Reference Guide for that version.
Use SSH to access the controller’s command-line interface, enter enable mode, and issue the following commands:
(Controller-Name) # configure terminal
Enter Configuration commands, one per line. End with CNTL/Z
(Controller-Name) (config) # mgmt-server type amp primary-server <AMP-IP> profile <profile-name>
(Controller-Name) (config) # write mem
You can add up to four <AMP-IP> addresses.
Dell Networking W-AirWave 8.0 | Best Practices Guide Configuring W-AirWave for Global W-Series Infrastructure | 9
10 | Configuring W-AirWave for Global W-Series Infrastructure Dell Networking W-AirWave 8.0 | Best Practices Guide
Dell Networking W-AirWave 8.0 | Best Practices Guide Configuring aDell Networking W Group in AirWave | 11
Chapter 3
Configuring aDell Networking W Group in AirWave
It is prudent to establish one or more Dell Networking W Groups within AirWave. During the discovery process you
will move new discovered controllers into this group.
This section contains the following topics:
l "Basic Monitoring Configuration" on page 11
l "Advanced Configuration " on page 12
Basic Monitoring Configuration
1. Navigate to Groups > List.
2. Select Add.
3. Enter a Name that represents the Dell Networking W-Series device infrastructure from a security, geographical, or
departmental perspective and select Add.
4. You will be redirected to the Groups > Basic page for the Group you just created. On this page you will need to
verify and/or change the following Dell-specific settings.
a. Find the SNMP Polling Periods section of the page, as illustrated in Figure 6.
b. Verify that the Override Polling Period for Other Services option is set to Yes.
c. Verify that Client Data Polling Period is set to 10 minutes. Do not configure this interval lower than 5 minutes.
Enabling the SNMP Rate Limiting for Monitored Devices option in the previous chapter adds a small delay between each
SNMP Get request, thus the actual polling interval is 12 minutes for 10 minute polling interval.
d. Verify that the Device-to-Device Link Polling Period option is set to 30 minutes.
e. Verify that the Rogue AP and Device Location Data Polling Period option is set to 30 minutes.
Figure 6:SNMP Polling Periods section of Groups > Basic
5. Locate the Aruba/Dell PowerConnect W section of this page. See Figure 7.
6. Configure the proper SNMP Version for monitoring the Dell Networking W-Series infrastructure.
12 | Configuring aDell Networking W Group in AirWave Dell Networking W-AirWave 8.0 | Best Practices Guide
Figure 7:Group SNMP Version for Monitoring
7. Click Save and Apply when you are done.
Advanced Configuration
Refer to the Dell Networking W-AirWave 8.0 Controller Configuration Guide for detailed instructions.
Dell Networking W-AirWave 8.0 | Best Practices Guide Discovering Dell Networking W-Series Infrastructure | 13
Chapter 4
Discovering Dell Networking W-Series Infrastructure
AirWave utilizes the Dell Networking W-Series topology to efficiently discover downstream infrastructure. This section
guides you through the process of discovering and managing your Dell Networking W-Series device infrastructure.
Refer to the following earlier sections in this document before attempting discovery:
l "Configuring W-AirWave for Global W-Series Infrastructure" on page 5
l "Configuring aDell Networking W Group in AirWave" on page 11
The following topics in this chapter walk through the basic procedure for discovering and managing Dell Networking
W-Series infrastructure:
l "Discovering or Adding Master Controllers" on page 13
l "Local Controller Discovery" on page 15
l "Thin AP Discovery" on page 15
Always add one controller and its affiliated Thin APs into management or monitoring mode in a serial fashion, one at a time. Adding
new devices is a very CPU intensive process for AirWave and can quickly overwhelm all of the processing power of the server if
hundreds of Thin APs are added (migrated from New to Managed or Monitoring) simultaneously.
Discovering or Adding Master Controllers
Scan networks containing Dell Networking W-Series master controllers from Device Setup > Discover.
- or -
Manually enter the master controller by following these steps in the Device Setup > Add page:
1. Select the Dell Controller type and select Add. The page illustrated on Figure 8 appears.
2. Enter the Name and the IP Address for the controller.
3. Enter SNMP Community String, which is required field for device discovery.
Be sure to note the community string because it must match the SNMP trap community string, which is configured later in
this document.
14 | Discovering DellNetworking W-Series Infrastructure Dell Networking W-AirWave 8.0 | Best Practices Guide
Figure 8:Dell Networking W Credentials in Device Setup > Add
4. Enter the required fields for configuration and basic monitoring:
n Telnet/SSH Username
n Telnet/SSH password
n enable password
5. Enter the required fields for WMS Offload
n SNMPv3 Auth Protocol
n SNMPv3 Privacy Protocol
n SNMPv3 Username
n Auth Password
n Privacy Password
The protocols for SNMPv3 Auth and SNMPv3 Privacy should be SHA-1 and DES in order for WMS Offload to work.
Ifyou are using SNMPv3, and the controller's date/time is incorrect, the SNMP agent will not respond to SNMP requests
from the AirWave SNMP manager. This will result in the controller and all of its downstream access points showing as
Down in AirWave.
6. Assign the controller to a Group and Folder.
7. Ensure that the Monitor Only option is selected.
If you select Manage read/write, AirWave will push the group setting configuration, and existing device configurations will be
deleted/overwritten.
8. Select Add.
9. Navigate to the APs/Devices > New page.
10. Select the Dell Networking W-Series master controller you just added from the list of new devices.
11. Ensure Monitor Only option is selected.
12. Select Add.
Local Controller Discovery
Local controllers are added to AirWave via the master controller by a discovery scan, or manually added in Device
Setup > Add. After waiting for the Thin AP Polling Period interval or executing a Poll Now command from the
APs/Devices > Monitor page, the local controllers will appear on the APs/Devices > New page.
Add the local controller to the Group defined previously. Within AirWave, local controllers can be split away from the
master controller's Group.
Local Controller Discovery/monitoring may not work as expected if W-AirWave is unable to communicate directly with the
target device. Be sure and update any ACL/Firewall rules to allow W-AirWave to communicate with your network
equipment.
Thin AP Discovery
Thin APs are discovered via the local controller. After waiting for the Thin AP Polling Period or executing a Poll Now
command from the APs/Devices > Monitor page, thin APs will appear on the APs/Devices > New page.
Add the thin APs to the Group defined previously. Within W-AirWave, thin APs can be split away from the controller's
Group. You can split thin APs into multiple Groups if required.
Dell Networking W-AirWave 8.0 | Best Practices Guide Discovering Dell Networking W-Series Infrastructure | 15
16 | Discovering DellNetworking W-Series Infrastructure Dell Networking W-AirWave 8.0 | Best Practices Guide
Dell Networking W-AirWave 8.0 | Best Practices Guide AirWave and Dell Networking W-Series Integration Strategies | 17
Chapter 5
AirWave and Dell Networking W-Series Integration
Strategies
This section describes strategies for integrating AirWave and Dell Networking W-Series devices and contains the
following topics:
l "Integration Goals" on page 17
l "Example Use Cases" on page 18
l "Prerequisites for Integration" on page 19
l "Enable Statistics Utilizing AirWave" on page 19
l "WMS Offload with AirWave" on page 20
l "Define AirWave as a Trap Host Using the AOS CLI" on page 21
l "Understanding WMS Offload Impact on Dell Networking W-Series Infrastructure" on page 23
Integration Goals
Table 2 summarizes the types of integration goals and strategies for meeting them in certain architectural contexts:
Integration Goals All Masters Architecture Master/Local Architecture
Rogue And Client Info enable stats
Rogue containment only ssh access to controllers ssh access to controllers
Rogue And Client
containment
WMS Offload WMS Offload
Reduce Master Controller
Load
WMS Offload debugging off
IDS And Auth Tracking Define AirWave as a trap host Define AirWave as a trap host
Track Tag Location
enable Real Time Location
System (RTLS) WMS Offload
enable RTLS WMS Offload
Channel Utilization
enable Application Monitoring
(AMON)
enable AMON
Spectrum enable AMON enable AMON
AppRFVisibility enable AMON enable AMON
UCC Visability enable AMON enable AMON
Health Information
enable Adaptive Radio
Management (ARM)
enable ARM
Table 2:
Integration Goals in All Masters or Master/Local Architectures
Key integration points to consider include the following:
l IDS Tracking does not require WMS Offload in an all-master or master/local environment.
l IDS Tracking does require enable stats in a master/local environment.
l WMS Offload will hide the Security Summary tab on master controller’s web interface.
18 | AirWave and Dell Networking W-Series Integration Strategies Dell Networking W-AirWave 8.0 | Best Practices Guide
l WMS Offload encompasses enable stats or enable stats is a subset of WMS Offload.
l Unless you enable stats on the local controllers in a master/local environment, the local controllers do not populate
their MIBs with any information about clients or rogue devices discovered/associated with their APs. Instead the
information is sent upstream to master controller.
Example Use Cases
The following are example use cases of integration strategies:
l "When to Use Enable Stats" on page 18
l "When to Use WMS Offload" on page 18
l "When to Use RTLS" on page 18
l "When to Define AirWave as a Trap Host" on page 18
l "When to Use Channel Utilization" on page 19
When to Use Enable Stats
You want to pilot AirWave, and you do not want to make major configuration changes to their infrastructure or manage
configuration from AirWave.
Enable Stats still pushes a small subset of commands to the controllers via SSH.
See "Enable Statistics Utilizing AirWave" on page 19.
When to Use WMS Offload
l You have older Dell Networking W-Series infrastructure in a master/local environment and the master controller is
fully taxed. Offloading WMS will increase the capacity of the master controller by offloading statistics gathering
requirements and device classification coordination to AirWave.
l You want to use AirWave to distribute client and rogue device classification amongst multiple master controllers in a
master/local environment or in an All-Masters environment.
l See the following topics:
n "WMS Offload with AirWave" on page 20
n "Understanding WMS Offload Impact on Dell Networking W-Series Infrastructure" on page 23
n "WMS Offload Details" on page 44
When to Use RTLS
l A hospital wants to achieve very precise location accuracy (5 -15 feet) for their medical devices which are
associating to the WLAN.
l You want to locate items utilizing WiFi Tags.
RTLS can negatively impact your AirWave server's performance.
l See "Leveraging RTLS to Increase Accuracy" on page 46.
When to Define AirWave as a Trap Host
l You want to track IDS events within the AirWave UI.
l You are in the process of converting their older third-party WLAN devices to Dell Networking W-Series devices and
want a unified IDS dashboard for all WLAN infrastructure.
l You want to relate Auth failures to a client device, AP, Group of APs, and controller. AirWave provides this unique
correlation capability.
See "Define AirWave as a Trap Host Using the AOS CLI" on page 21.
When to Use Channel Utilization
l You have a minimum version of AOS 6.1.0.0.
Prerequisites for Integration
If you have not discovered the Dell infrastructure or configured credentials, refer to the previous chapters of this book:
l "Configuring W-AirWave for Global W-Series Infrastructure" on page 5
l "Configuring aDell Networking W Group in AirWave" on page 11
l "Discovering Dell Networking W-Series Infrastructure" on page 13
Enable Statistics Utilizing AirWave
To enable stats on the Dell Networking W-Seriescontrollers, follow these steps:
1. Navigate to AMP Setup> General and locate the Device Configuration section.
2. Set the Allow WMS Offload Configuration in Monitor-Only Mode field to Yes, as shown in Figure 9:
Figure 9:WMS Offload Configuration in AMP Setup> General
3. Navigate to Groups > Basic for the group that contains your Dell Networking W-Seriescontrollers.
4. Locate the Dell Networking W section on the page.
5. Set the Offload WMS Database field to No, as shown in Figure 10:
Dell Networking W-AirWave 8.0 | Best Practices Guide AirWave and Dell Networking W-Series Integration Strategies | 19
20 | AirWave and Dell Networking W-Series Integration Strategies Dell Networking W-AirWave 8.0 | Best Practices Guide
Figure 10:Offload WMS Database field in Groups > Basic
6. Select Save and Apply.
7. Select Save.
This will push a set of commands via SSH to all Dell Networking W-Series local controllers. AirWave must have
read/write access to the controllers in order to push these commands.
This process will not reboot your controllers.
Ifyou do not follow the above steps, local controllers will not be configured to populate statistics. This decreases AirWave's
capability to trend client signal information and to properly locate devices. See "AOS CLI" on page 35 for information about
how to utilize the AOS CLI to enable stats on Dell Networking W-Series infrastructure.
If your credentials are invalid or the changes are not applied to the controller, error messages will display on the
controller's APs/Devices > Monitor page under the Recent Events section. If the change fails, AirWave does not audit
these setting (display mismatches) and you will need to apply to the controller by hand. See "AOS CLI" on page 35 for
detailed instructions.
These are the commands pushed by AirWave while enabling WMS Offload. Do not enter these commands:
configure terminal
no mobility-manager <Active WMS IP Address>
wms
general collect-stats enable
stats-update-interval 120
show wms general
write mem
WMS Offload with AirWave
To offload WMS on the Dell Networking W-Seriescontrollers using AirWave:
1. In AMP Setup> General, locate the Device Configuration section and enable or disable Allow WMS Offload
Configuration in Monitor-Only Mode.
2. Select Save and Apply. This will push a set of commands via SSH to all Dell Networking W-Series master
controllers. If the controller does not have an SNMPv3 user that matches the AirWave database it will automatically
create a new SNMPv3 user. AirWave must have read/write access to the controllers to push these commands
3. Navigate to Groups > Basic and locate the Dell Networking W section.
4. Set the Offload WMS Database field to Yes.
  • Page 1 1
  • Page 2 2
  • Page 3 3
  • Page 4 4
  • Page 5 5
  • Page 6 6
  • Page 7 7
  • Page 8 8
  • Page 9 9
  • Page 10 10
  • Page 11 11
  • Page 12 12
  • Page 13 13
  • Page 14 14
  • Page 15 15
  • Page 16 16
  • Page 17 17
  • Page 18 18
  • Page 19 19
  • Page 20 20
  • Page 21 21
  • Page 22 22
  • Page 23 23
  • Page 24 24
  • Page 25 25
  • Page 26 26
  • Page 27 27
  • Page 28 28
  • Page 29 29
  • Page 30 30
  • Page 31 31
  • Page 32 32
  • Page 33 33
  • Page 34 34
  • Page 35 35
  • Page 36 36
  • Page 37 37
  • Page 38 38
  • Page 39 39
  • Page 40 40
  • Page 41 41
  • Page 42 42
  • Page 43 43
  • Page 44 44
  • Page 45 45
  • Page 46 46
  • Page 47 47
  • Page 48 48
  • Page 49 49
  • Page 50 50
  • Page 51 51
  • Page 52 52

Dell W-Airwave Quick start guide

Type
Quick start guide

Ask a question and I''ll find the answer in the document

Finding information in a document is now easier with AI

in other languages