Page is loading ...

U10C022
End User Guide
2/16/2009
Version 1.0
End User Guide

Revision History
Issue Date Author/Prime Description of changes
1.0 2009-Feb-16 John Create version 1.0
U10C022

i
CONTENTS
Revision History ............................................................................................................................... 1
Introduction ...................................................................................................................................... 1
1. Before you begin ...................................................................................................................... 1
1.1 Understand the Wireless eMTA Features ................................................................ 1
1.2 Contact Your Local Cable Operator ......................................................................... 2
1.3 Prepare Your Area for Wireless eMTA Installation ................................................... 2
2. Installing the Modem ................................................................................................................ 3
2.1 Installing the Hardware ............................................................................................. 3
2.2 Troubleshooting the Ethernet Installation ................................................................. 3
3. Wireless EMTA LEDs ............................................................................................................... 5
3.1 LEDs on the Front of the Modem ............................................................................. 5
3.2 Connectors on the Back of the Modem .................................................................... 6
4. Web User Interface .................................................................................................................. 7
Web User Interface Home Page .................................................................................................. 8
4.1 MODEM .................................................................................................................... 8
4.1.1 Information ................................................................................................................ 9
4.1.2 Status ...................................................................................................................... 10
4.1.3 Downstream ............................................................................................................ 11
4.1.4 Upstream ................................................................................................................ 12
4.1.5 Upstream Burst ....................................................................................................... 13
4.1.6 Operation Configuration .......................................................................................... 14
4.1.7 Event Log ................................................................................................................ 15
4.1.8 Battery Information ................................................................................................. 16
4.2 Gateway .................................................................................................................. 17
4.2.1 Information .............................................................................................................. 17
4.2.2 Basic Setup ............................................................................................................. 18
4.2.3 DHCP ...................................................................................................................... 20
4.2.4 DHCP static Lease ................................................................................................. 21
4.2.5 Time ........................................................................................................................ 22
4.2.6 Advanced- Options ................................................................................................. 23
4.2.7 Advanced - MAC Filtering ....................................................................................... 24
4.2.8 Advanced - IP Filtering ........................................................................................... 24
4.2.9 Advanced - Port Filtering ........................................................................................ 25
4.2.10 Advanced - Forwarding ........................................................................................... 26
U10C022

ii
U10C022
4.2.11
Advanced - Port Triggering ..................................................................................... 27
4.2.12 Advanced- Pass Through ....................................................................................... 29
4.2.13 Advanced- DMZ Host (Exposed Host) ................................................................... 30
4.3 Wireless .................................................................................................................. 30
4.3.1 Basic ....................................................................................................................... 30
4.3.2 Security ................................................................................................................... 32
4.3.3 Access Control ........................................................................................................ 35
4.3.4 Guess Network: Multiple SSID Support ..................................................................... 36
4.4 VPN ......................................................................................................................... 38
4.4.1 VPN- Enable ........................................................................................................... 38
4.4.2 VPN-Summary ........................................................................................................ 38
4.4.3 VPN- Configure ....................................................................................................... 39
4.4.4 VPN - Event Log ..................................................................................................... 45
4.5 Parental Control ...................................................................................................... 45
4.5.1 User Setup .............................................................................................................. 45
4.5.2 Activation ................................................................................................................ 48
4.5.3 TOD Filter ............................................................................................................... 49
4.5.4 Event Log ................................................................................................................ 51
4.6 Firewall .................................................................................................................... 52
4.6.1 Content Filter .......................................................................................................... 52
4.6.2 Event Log ................................................................................................................ 54
4.6.3 Remote Log ............................................................................................................ 55
4.7 Tools ....................................................................................................................... 56
4.7.1 Ping ......................................................................................................................... 56
4.7.2 Trace Route ............................................................................................................ 57
4.7.3 Client List ................................................................................................................ 58
4.7.4 Password ................................................................................................................ 59
4.7.5 User Defaults .......................................................................................................... 59

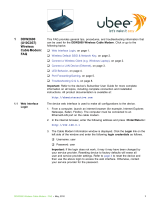
Introduction
The Ubee U10C022 Wireless eMTA is designed to support both the residential
and commercial users in one device. WiFi, Internet sharing, Firewall, VPN &
Parental Control are more advanced. It’s not a single eMTA device.
1. Before you begin
Your new wireless eMTA provides high-speed wireless access to the Internet by
using IEEE 802.11b/g wireless standard and an active Internet Connection through
your cable service provider. This user guide describes how to set up and use the
wireless eMTA. Before installing the wireless eMTA, you should read this user
guide to ensure proper wireless eMTA operation.
1.1 UNDERSTAND THE WIRELESS EMTA FEATURES
Your wireless eMTA has the following features to help you access and use the
Internet:
Wireless connectivity means that you can use your PC just about anywhere
in your home.
802.11b/g compliance ensures interoperability with other 802.11b/g
compliant devices
Your wireless eMTA supports transmission rates of 54, 48, 36, 24, 18, 12,
11, 9, 6, 5.5, 2, and 1 Mbps.
Two-way design allows the wireless eMTA to send and receive data over the
cable television network.
Cable bandwidth allows data rates of up to 38 megabits per second (Mbps)*,
which is faster than analog modems, integrated services digital network
(ISDN), or asymmetric digital subscriber line (ADSL).
Using your cable line means that the wireless eMTA is always on, always
connected, and doesn
'
t tie up your phone line.
Data over Cable Service Interface Specification (DOCSIS
!
) compliance
U10C022

2
ensures interoperability with DOCSIS compliant cable operators.
*NOTE: Speeds may vary based on the following factors:
Computer equipment including available RAM and processor speed
Software applications utilizing your computer
'
s resources
Network traffic depending on the time of day
Limitations set by your Cable Service Provider
1.2 CONTACT YOUR LOCAL CABLE OPERATOR
Before installing you new wireless eMTA, you must contact your local cable service provider to
activate your Internet access. Be sure to have the wireless eMTA MAC address available, which
can be found on the underside of the wireless eMTA.
1.3 PREPARE YOUR AREA FOR WIRELESS EMTA
INSTALLATION
Before installing your wireless eMTA, you should first prepare your area. To do this:
1) Locate your cable outlet and ensure that it is located within proper distance
of your wireless eMTA and computer. Be sure not to bend the cable as this
may strain the connector and cause damage.
2) Place wireless eMTA as high as possible. Allow sufficient airflow around the
wireless eMTA to prevent overheating.
3) Place wireless eMTA and wireless clients in open areas or far away from
transformers, heavy-duty motors, microwave ovens, refrigerators, fluorescent
lights, and other manufacturing equipment.
4) Ensure that the temperature in the room where the wireless eMTA will be
operating is between 0 and 40C (32 and 104F)
5) The wireless signal may be weaker after it has passed through metal,
concrete, brick, walls, or floors. Also, make sure that the wireless eMTA and
wireless adapters are positioned so that the signal will travel straight through a
wall or ceiling for better reception. For example, a wall that is 1 foot thick, at
a 45-degree angle appears to be almost 2 feet thick.
U10C022

3 Installing the Modem
2. Installing the Modem
This chapter explains the process for installing your wireless eMTA using the Ethernet port. Using
the Ethernet port allows to you connect multiple computers to a wireless eMTA through the use of
additional equipment which is not included. Please contact your cable service provider for more
information on using multiple computers.
You can use the wireless meat’s Ethernet port if you have:
• A PC running Windows 95 (or later) operating system or a Macintosh computer running
system 7.6 (or later) operating system
• An active Ethernet port on your PC
Before you begin, verify that your Network Interface Card (NIC) has been installed and
configured for use with your wireless eMTA. The wireless eMTA requires TCP/IP to be
installed. Contact your cable service provider for assistance with installing and
configuring TCP/IP. After installed the hardware, your computer can connect the
wireless eMTA directly by using Network Interface Card. Unlike USB installation, there is
no needed for software installation for the Ethernet connection.
2.1 INSTALLING THE HARDWARE
This section explains how to connect the wireless eMTA to the computer, wall cable outlet,
and electrical outlet. To install the hardware:
• Power off the computer
• Connect one end of the coaxial cable to the wireless meat’s cable connector. Connect
the other end of the coaxial cable to the cable wall outlet. Be sure not to bend or over
tighten the cables as this may strain the connector and cause damage. If you plan to
connect the wireless eMTA and television to the same wall outlet, you must use a cable
line splitter (not included).
• Connect one end of the Ethernet cable to the wireless meat’s Ethernet port and the other
end of the cable to the Ethernet port on the PC or network interface card (NIC).
• Plug the wireless eMTA’s power adapter into the wireless eMTA’s power jack and into a
wall outlet or surge protector.
• If the Power, Online, and ethernet LEDs are solidly lit, the wireless eMTA is working
properly.
2.2 TROUBLESHOOTING THE ETHERNET INSTALLATION
None of the LEDs are on when I power on the Wireless LAN EMTA.
U10C022

4 Installing the Modem
U10C022
Check the connection between the power adapter and the eMTA. Power off the Wireless
LAN EMTA and wait for 5 seconds and power on the modem again. If the problem still
exists, you may have a hardware problem.
The ETH 1 or 2 or 3 or 4 LED on my wireless eMTA is not lit.
• Try restarting the computer so that is could re-establish a connection with the wireless
eMTA.
• Check for a resource conflict (Windows users only). To do this:
• Right-click on the My Computer icon on your desktop and choose Properties.
• Click the Device Manager tab and look for a yellow exclamation point or red X over the
NIC in the Network Adapters field. If you see either one, you may have an IRQ conflict.
Refer to the manufactures documentation or you cable service provider for further
assistance.
• Verify that TCP/IP is the default protocol for your network interface card (NIC)
• Power cycle the wireless eMTA by removing the power adapter from the electrical outlet
and plugging it back in. Wait several minutes for the wireless eMTA to re-establish
communications with your cable service provider.
• Your Ethernet cable may be damaged. Try another Ethernet cable.
All of the LEDs on the front of my modem look correct, but I cannot access the Internet.
• If the Power & Online LEDs are solidly lit, the wireless eMTA is working properly. Try
restarting the computer so that is could re-establish a connection with the wireless eMTA.
• Power cycle the wireless eMTA by removing the power adapter from the electrical outlet
and plugging it back in. Wait several minutes for the wireless eMTA to re-establish
communications with your cable service provider.
• If your PC is connected to a hub or gateway, try connecting the PC directly into the
wireless eMTA.
• If you are using a cable splitter, try removing the splitter and connect the wireless eMTA
directly to the cable wall outlet. Wait several minutes for the wireless eMTA to re-
establish communications with your cable service provider. Your Ethernet or coaxial
cable may be damaged. Try using another cable.
• If none of these suggestions work, contact your cable service provider for further
assistance.

5 Wireless EMTA LEDs
3. Wireless EMTA LEDs
This chapter describes the functions of the wireless eMTA
’
s LEDs and connectors.
When the Power & Online LEDs are lit, the wireless eMTA is working properly. The
USB or ETH 1, 2, 3, 4 LEDs should also be lit depending on what port is being used.
The following provides an overview of the LED indicator lights on the front of the wireless
eMTA and what the LEDs mean.
3.1 LEDS ON THE FRONT OF THE MODEM
Power DS US Online USB Tel1 Tel2 Batt1 Batt2 WLAN ETH1 ETH2 ETH3 ETH4
• Power: Indicates that the wireless eMTA has successfully completed internal power-on
tests.
• DS: Indicates that the wireless eMTA is scanning downstream frequency according to
DOCISIS specification. If it’s steady lit, that means eMTA has succeeded to lock to a
certain Downstream channel.
• US: Indicates that the wireless eMTA is scanning upstream frequency according to
DOCISIS specification. If it’s steady lit, that means eMTA has succeeded to lock to a
certain upstream channel. Only after DS LED is steady lit, will eMTA start to scan
upstream frequency.
• Online: The wireless eMTA has completed the ranging/registration process and is ready
to send/receive user’s data.
• USB: Indicates connectivity between the USB port on the wireless eMTA and a PC's USB
port.
• Tel 1: Indicates the status of telephone port 1. If onhook, the LED will be on; If offhook,
the LED will be off.
• Tel 2: Indicates the status of telephone port 2. If onhook, the LED will be on; If offhook,
the LED will be off.
• Batt 1: Indicates the status of battery slot 1.
• Batt 2: Indicates the status of battery slot 2.
• WLAN: Indicates the status of wireless function.
• ETH 1, 2, 3, 4: Indicates connectivity between the Ethernet port on the wireless eMTA
and the Ethernet port on a PC. This LED blinks when the wireless eMTA is transferring or
receiving data over the Ethernet cable.
U10C022

6
Installation problems with the wireless eMTA are commonly due to the cable network and
its topography. LEDs on the front panel of the wireless eMTA reveal operational status
and help you determine problem areas.
3.2 CONNECTORS ON THE BACK OF THE MODEM
This list of connectors describes where to connect the cables and power adapter when
installing the wireless eMTA.
• Power: This is where you plug the included power adapter. Remember to use only the
power adapter that came with the wireless eMTA.
• Ethernet 10/100 Port 1, 2, 3, 4: This is where you plug the Ethernet cable. The other end
connects to the Ethernet port on the PC or NIC
• USB Port: This is where you plug the included USB cable. The other end connects to the
USB port on your PC.
• Cable Connector: This is where you connect the coaxial cable (not included) that leads to
the cable splitter (not included) or the cable wall outlet.
U10C022

7 Web User Interface
4. Web User Interface
This chapter describes how to access the wireless cable router via Web configuration
interface. First, please connect your PC to the Ethernet port, via an Ethernet cable. Open the
web browser and input IP address to: http://192.168.0.1 for local access.
*User interfaces will eventually be updated to reflect the Ubee brand
1. Click Login. Enter
user for User name and user for Password, and then click OK.
U10C022

8 Web User Interface
2. If the user enters an incorrect user name and/or password, the web user interface
displays 401 Unauthorized. PARENTAL CONTROL, FIREWALL and TOOLS.
WEB USER INTERFACE HOME PAGE
After login, user will see the EMTA page first. The layout is divided into 3 areas. Menu
Bar, Menu Tree and Configure Area.
Menu Bar includes top level menu, like GATEWAY, WIRELESS and VPN. Once
user select the option in menu bar, Menu Tree will be changed correspondently. To
change parameter settings, user needs to operate in Configure Area. Below chapter
is to go through page by page, to ensure that you’re clear about each feature and
how to use it.
4.1 MODEM
User can select different options to view wireless eMTA’s information and real time
status. They include Information, Status, Downstream, Upstream, Upstream Burst,
Operation Configuration, Event Log options.
U10C022

9 Web User Interface
4.1.1 Information
This page is to show EMTA Information.
Label Description
Cable Modem Indicates the eMTA complies with DOCSIS specification.
MAC Address Indicates the RF MAC address
EMTA Indicate the DOCSIS standard it’s compliant with.
MAC address Unique hardware address of eMTA.
Serial Number Unique manufacture ID number of a product.
U10C022

10 Web User Interface
Boot Code Version Software version of device driver.
Software version Software
Hardware Version An internal ID number to identify hardware design.
CA Key This is required by BPI. EMTA will install a CA Key that
transferred from your service provider’s server after eMTA is
authenticated.
4.1.2 Status
This page is to show cable modem status.
Label Description
Item List the item to be showed here.
Status Status of the item.
Comments Additional information for this item.
Acquire a Downstream
Channel
It shows a Downstream channel that eMTA is trying to lock to,
and informs the progress.
Connectivity State After physical layer’s initialization, eMTA will be configured by a
DHCP server. Once succeeds to get an IP, that means eMTA is
online. In status column, it shows the progress. In comments
Column, it tells the reason why eMTA’s connectivity state is not
ok.
Boot state Shows the registration status.
Security If BPI is enabled, status will show Enabled.
MTA Provisioning State Indicates the eMTA status.
U10C022

11 Web User Interface
4.1.3 Downstream
This page is to Show EMTA Downstream.
Label Description
Downstream lock Display if the eMTA succeeded to lock to a downstream
channel.
Downstream Channel ID Display the channel ID.
Downstream Frequency Display the channel frequency eMTA is scanning.
Downstream Modulation Display the modulation method that’s required for the
downstream channel locked by eMTA. This is decided by
service provider.
Downstream Symbol Rate Display the symbol rate. Current eMTA downstream symbol
rate
(QAM64 is 5056941 sym/sec, QAM256 is 5360537
sym/sec).
Downstream Interleave
Depth
Current eMTA downstream Interleave depth
(8/16/32/64/128/other).
Downstream Receive Power
Level
Display the receiver power level after ranging process.
Downstream SNR Display the SNR of this downstream channel.
U10C022

12 Web User Interface
4.1.4 Upstream
Label Description
Upstream Lock Current eMTA upstream lock status (Locked/Not
locked).
Upstream Channel ID Current eMTA upstream channel identify.
Upstream Frequency Current eMTA upstream frequency (Hz).
Upstream Modulation Current eMTA upstream modulation type. (QPSK/
QAM8 /QAM16/ QAM32/ QAM64/ QAM128/
QAM256).
Upstream Symbol Rate Current eMTA upstream symbol rate (Ksym/sec)
Upstream transmit Power Level Current eMTA upstream transmit power (dBmV)
Upstream Mini-Slot Size Current eMTA upstream mini-slot.
U10C022

13 Web User Interface
4.1.5 Upstream Burst
Label Description
Modulation Type QPSK/16QAM.
Differential Encoding On/Off
Preamble Length 0-1024 (bits).
Preamble Value Offset 0-1022 (bits).
FEC Error Correction (T) 0 to 10 (0 implies no FEC. The number of codeword parity
bytes is 2*T)
FEC Codeword Information Bytes (k) Fixed: 16 to 253 (assuming FEC on). Shortened: 16 to 253
(assuming FEC on)
Scrambler Seed 15 bits (Not used if scrambler is off)
Maximum Burst Size 0-255 (mini-slots)
Guard Time Size 4-255 (symbols)
Last Codeword Length Fixed/shortened
Scrambler on/off On/Off
U10C022

14 Web User Interface
4.1.6 Operation Configuration
This page shows the running configuration of eMTA.
Label Description
Network Access Display the status of eMTA, denied means
currently no connectivity is established. Deny the
access to Internet. Allow means allow the access
to Internet.
Maximum Downstream Data
Rate
Display the maximum downstream data rate.
Maximum Upstream Data Rate Display Maximum Upstream Data Rate
Maximum Upstream Channel
Burst
Display Maximum Upstream Channel Burst
Maximum Number of CPEs Shows the maximum CPE that can be connected
at LAN side to access Internet at the same time.
Modem Capability Displayed certain configuration, like PHS enabled.
U10C022

15 Web User Interface
4.1.7 Event Log
Label Description
First Time Display the time of the event.
Last Time Display the last time of the event.
Priority Event log severity.
Description Detail of the event log.
Refresh Refresh the log record.
Clear Log Clear all of the logs.
During daily operation and trouble shooting, log is very useful. For example, you
can see “configuration file CVC validation Failure”, this indicates that eMTA failed to
validate the CONFIG file downloaded from MSO’s TFTP server, maybe caused by
error root key. Furthermore, event logs will be stored unless user clicks “clear log”
button. Power cycle reboot will not clear event logs.
U10C022

16 Web User Interface
4.1.8 Battery Information
Label Description
Battery 1 : Absent Indicates the battery 1 status, if it’s existing, it will be present,
otherwise to be Absent.
Battery 2 : Absent Indicates the battery 2 status, if it’s existing, it will be present,
otherwise to be Absent.
Capacity To indicate the capacity of the existing battery
Full Charge Voltage To indicate the total volume of voltage
Depleted Voltage To indicate the consumed voltage
Measured Voltage To indicate the remained voltage
Current Charge Level To indicate the current status of charging.
U10C022
/