Solid - State Enthalpy Sensor - C7400A
Accessories - Commercial Package Equipment
IMPORTANT SAFETY INFORMATION
INSTALLER: Please read all instructions before servicing this
equipment. Pay attention to all safety warnings and any other
special notes. Safety markings are used frequently throughout
these instructions to designate a degree or level of seriousness
and should not be ignored.
WARNING - Indicates a potentially hazardous situation that if
not avoided, could result in personal injury or death.
CAUTION - Indicates a potentially hazardous situation that if
not avoided, may result in minor or moderate injury or property
damage.
WARNING:
This kit is to be installed by a qualified service
technician in accordance with these instructions and
all codes having jurisdiction. Failure to follow these
instructions could result in serious injury, property
damage, or death.
WARNING:
All electrical wiring must comply with the latest
edition of the National Electrical Code ANSI/NFPA 70.
These instructions are primarily intended to assist qualified
individuals experienced in the proper installation of this
appliance. Some local codes require licensed installation/
service personnel for this type of equipment.
Read these instructions and those which accompany the
Solid-State Enthalpy control in their entirety before proceeding
with the installation of this control kit.
ABOUT THE ENTHALPY SENSOR
This Solid-State Differential Enthalpy Control kit can be used
for all Nordyne economizer applications. The C7400A Enthalpy
Sensor is only used with economizer logic modules having the
A,B,C, & D performance curves. This second C7400A control is
used to achieve maximum system efficiencies over the standard
single enthalpy control application. The differential enthalpy
control system compares the temperature and humidity of
the outside air to that of the building return air and allows the
economizer to adjust position to ensure the lowest enthalpy air
is used for cooling.
DIFFERENTIAL ENTHALPY CONTROL
1. SET UNIT INDOOR THERMOSTAT TO THE “OFF”
POSITION.
2. DISCONNECT ALL ELECTRICAL POWER TO THE UNIT.
3. The second C7400A controller is used for return air sensing
and should be mounted in the return air duct as far from the
outdoor air sensor as possible.
IMPORTANT NOTES:
• The C7400 sensor can be mounted in any position.
However, the sensor must be installed where it is exposed
to freely circulating air, but protected from rain, snow, and
direct sunlight.
• The C7400 sensor is designed to operate in 500 ft. /
minimum airflow.
• Connect the Blue wire to the “S” terminal and the Violet
wire to the “+” terminal of the C7400A control.
• If needed, see the sensor mounting section for additional
information.
4. Partial removal of economizer may be required for wire routing
purposes.
5. Remove the 7/8” K.O. located on the lower right side of
economizer panel, insert wire grommet provided in kit, then
route wires from the second sensor out through grommet and
along existing wiring harness. Wire tie as required to keep
away from vane travel.
6. Remove the 620 Ohm resistor across SR and (+) on the
W7459A or W7212A logic module and connect additional
C7400 for differential operation.
IMPORTANT! Connect the Blue wire to the “SR” terminal
and the Violet wire to the “+” terminal of the logic module.
7. The enthalpy control setpoint scale markings located on
the W7459A & W7212A are A, B, C, and D. They are field
selectable and are used for single enthalpy control only.
IMPORTANT! Turn the setpoint potentiometer fully
clockwise to the “D” setting for Differential Enthalpy
control. The economizer will select the air with lower
enthalpy for cooling. i.e. If outdoor air has lower enthalpy
than return air, then the outdoor air damper will be opened
to bring in outdoor air for free cooling.
8. Replace all panels.
9. Reconnect electrical power to the unit and check economizer
for proper operation.
INSTALLATION INSTRUCTIONS

INSTALLER: PLEASE LEAVE THESE INSTALLATION
INSTRUCTIONS WITH THE HOMEOWNER
708883A (Replaces 7088830)
Specifications & illustrations subject to change without notice or incurring obligations.
O’ Fallon, MO | Printed in U.S.A. (07/11)
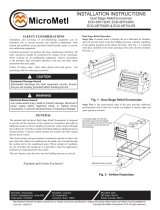
SENSOR MOUNTING
The C7400A2XXX Series sensor can be mounted directly on
to the sheet metal of the return air duct or can be mounted in
the air stream using the duct mounting kit (P/N 50053060-001).
Contact your local TRADELINE dealer for kit availability.
The duct mounting kit contains a rod to hold the sensor in the
duct, a flange to secure the sensor rod to the duct wall and to
fill the hole, and a gasket to prevent air from leaking through
the duct wall. See Fig. 1.
The rod has slots for threading the wire to prevent loose or
hanging wire in the duct and can be adjusted for 6 or 12 inch
length. The flange has extended relief for ease of mounting.
See Fig. 2.
ROD - 1 PIECE
FLANGE - 1 PIECE
GASKET - 1 PIECE
Figure 1. Duct Mounting Kit
(P/N 50053060-001)
WIRE HOLDER
EXTENDED RELIEF
(FOR CORRECT MOUNTING)
LENGTH ADJUSTS
TO 6 OR 12 INCHES
Figure 2. Duct Mounting Adjustments
-
 1
1
-
 2
2
Unbranded P6SP Installation guide
- Type
- Installation guide
Ask a question and I''ll find the answer in the document
Finding information in a document is now easier with AI
Related papers
-
Unbranded Differential Enthalpy Kit for Economizers, 920233 Installation guide
-
Unbranded Economizers for 559375 Installation guide
-
Reznor R6GP Installation guide
-
Unbranded Economizers for 559374 Installation guide
-
Broan Economizers for 558870 Downflow Installation guide
-
Broan R8GE Installation guide
-
Reznor R6GN Installation guide
-
Intertherm Q4SD-O (archived 5-11-12) Installation guide
-
Unbranded Economizer for B5SM-090/120 Air Handler Installation guide
-
Unbranded Economizers for 547866, 657875 Installation guide
Other documents
-
Reznor R6GP Installation guide
-
Reznor R8GE Installation guide
-
Reznor R6GN Installation guide
-
Honeywell W7340 User manual
-
Reznor B5SM Installation guide
-
Jade Range W7220 User manual
-
Trane BAYECON103AB Installer's Manual
-
Honeywell W7750A User manual
-
 Micrometl ECD-PRC0BTA-DYDB0 Installation guide
-
Trane BAYRLAY004A Installer's Manual


