MURdesign PANLOWESPBB Installation guide

Type
Installation guide

This manual is also suitable for

Installation Technique
Installing your WallDesign Panels
The following are illustrations of all the tools and accessories needed
to successfully install your WallDesign panels.
A simple precaution will guarantee
the problem-free installation of your
long-lasting panels.
Take into account the humidity level
of the room where you will
be installing your panels.
Above all, store your WallDesign
panels for a period of 48 to 72 hours
in the room where you plan to install
them. It is essential that they become
acclimatized to the room temperature
and humidity.
For wood-based products, the humidity
level has an impact on the wood’s
expansion and contraction. The relative
humidity of the room must not be less
than 30 % or more than 50 %.
1
2
3
4
Even the simplest installations
require some preparation.
Your walls must be as level
as possible.
For impeccable results... The panels
can be directly installed on studs but
we strongly recommend adding furring
strips, which will enhance the quality of
the joints and provide increased solidity.
A sound take-off will guarantee
successful results !
Always work with a level.
At the base of the wall, draw a
reference line with your level.
This will allow you to make sure that
your panels are straight, even if your
walls are not square.
The panels must be
securely fastened.
Use construction adhesive.
Apply construction adhesive to the
back of the panels.
5
6
walldesign.ca
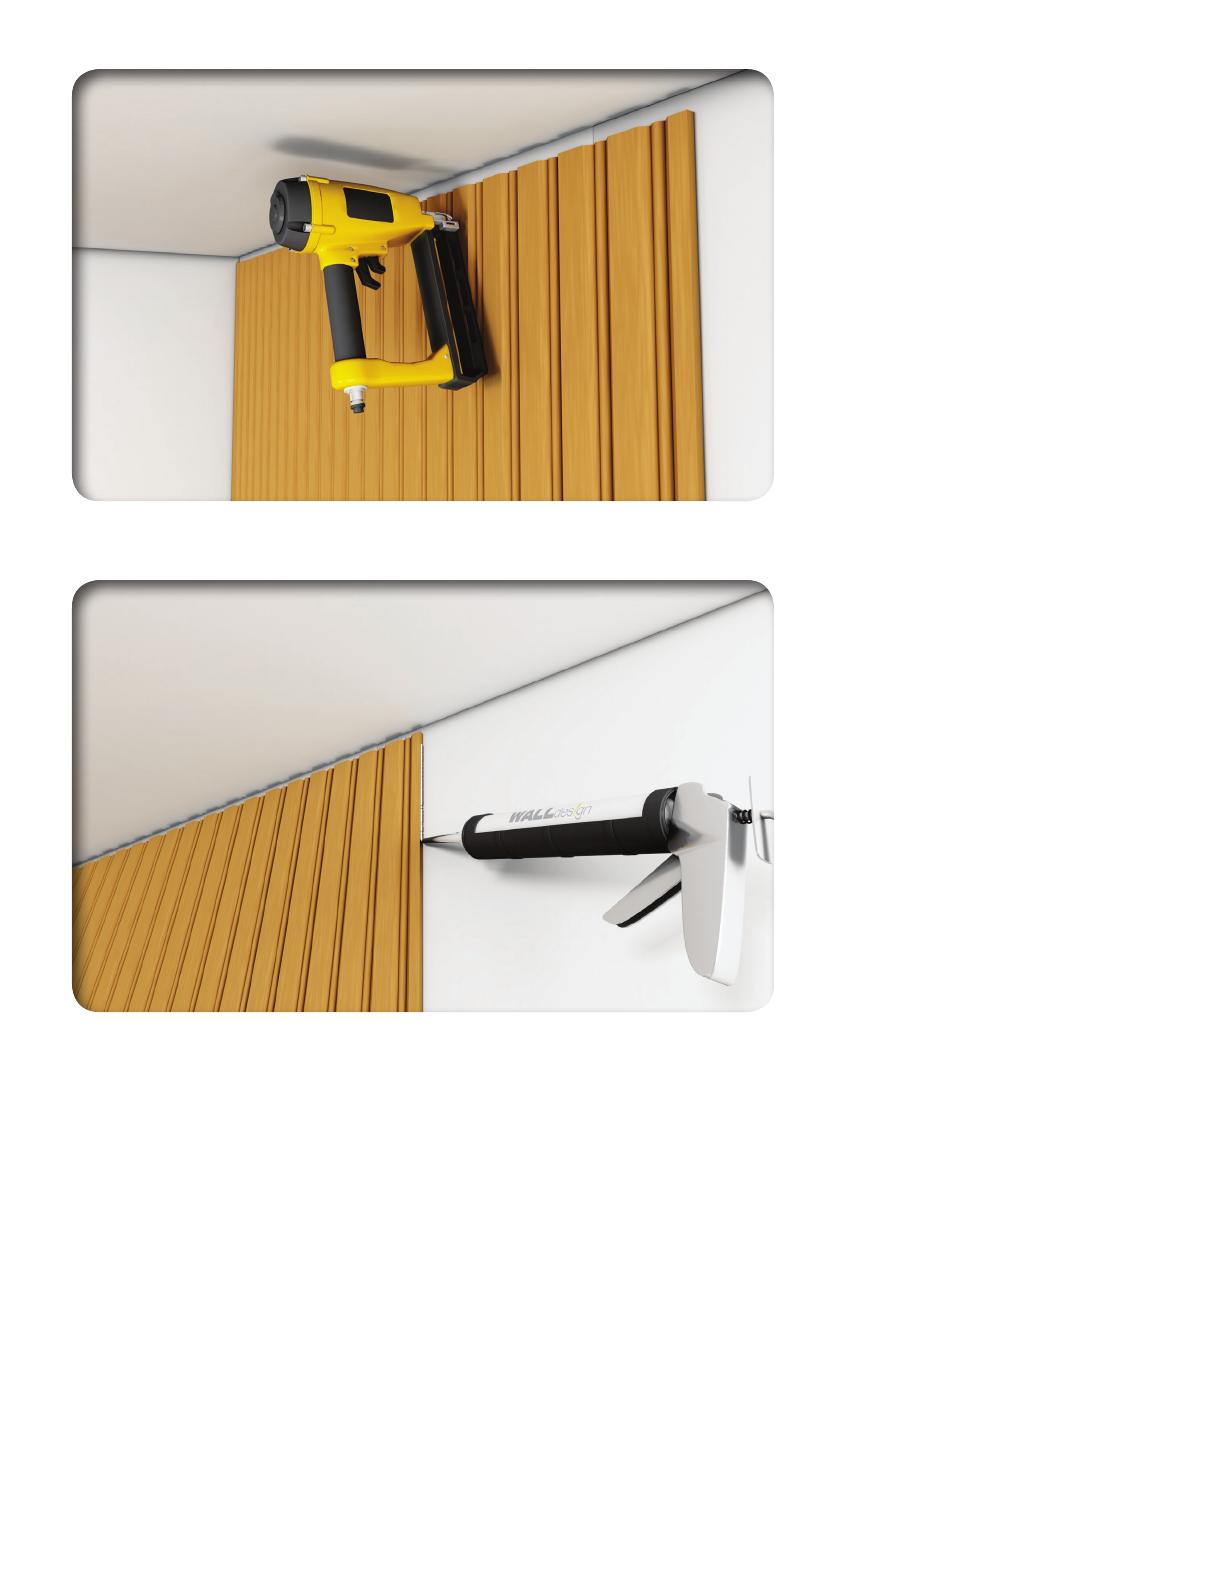
The first panel can now be installed.
Your level line is your point
of reference.
Position the first panel aligning it with
the line drawn on the wall. Then start
nailing making sure to do so in the
grooves so that the nails are less visible
and to ensure a smoother finish.
In construction, joints are always
somewhat touchy areas.
Reinforce each joint with this
helpful hint.
Apply adhesive to the joints to prevent
them from separating. Then, simply
remove the excess adhesive.
You’re off to a good start.
Continue installing your panels.
Different finishing options are available. The panels can be installed on a full wall or you can leave a space for mouldings.
The inner and outer corners can be simply glued one over the other or you can choose to install them at a 45 degree
angle, which provides a more refined cachet to your final results.
For panels at the base of your walls, you can easily coordinate them with your wall panels and install a chair rail
to create a dramatic effect to your decor.
Now, sit back and admire your work... and, especially, enjoy !
WallDesign is a plus, not only for your walls, but for your quality of life !
  • Page 1 1
  • Page 2 2
  • Page 3 3

MURdesign PANLOWESPBB Installation guide

Type
Installation guide
This manual is also suitable for

Ask a question and I''ll find the answer in the document

Finding information in a document is now easier with AI