Page is loading ...

Use and Care Manual
Floor Maintenance:
Frequently moved furniture (chairs) should be equipped with felt pads to avoid scratching
the floor and checked regularly. Heavy furniture and appliances should be equipped with
non-staining large surface floor protectors. Furniture with castors or wheels must be easy
swiveling, large surface non-staining and suitable for resilient floors. Do not use ball type
castors as they can damage the floor.
Avoid exposure to long periods of direct sunlight. Close blinds or drapes during peak sunlight
hours
Use walk-off mats at entrances to prevent dirt and grit from being tracked on to the floor.
Sweep or vacuum the floor regularly to remove loose dirt. Avoid using a vacuum with a
beater bar.
Clean up spills immediately.
Damp mop as needed using clean water and a diluted floor cleaner. Do not use harsh
cleaners or chemicals on the floor.
Clean with non-detergent soap and water or any product designed for cleaning vinyl floors
Repairs:
In the unlikely event that a plank is damaged for whatever reason, the simplest method is to disconnect
the planks carefully (protecting the tongue and groove edges) until the damaged plank can be removed.
Then replace the damaged plank with a new one and re-assemble the disconnected planks. This typically
works for planks that are close to the two long perimeters of a room. For damaged planks that are not
close to the perimeter, you may have to remove the damaged planks and insert new pieces without the
short and long end grooves.
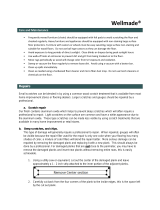
1. Using a sharp utility knife and a straight edge, cut out the center of the damaged plank by
leaving approximately 1 inch (25.4mm) strip attached to the adjacent planks.
2. Carefully cut back from the four corners of the plank to the inside edges in space left by the cut
out plank.
3. Remove the plank edges carefully from of the adjacent planks making sure the tongues and
grooves of the adjacent planks are not damaged.
4. Using a sharp utility knife, remove the tongue strip on both the long and short ends of the
replacement plank. In addition, remove the groove strip of the short end of the replacement
plank.
5. Place two-sided carpet tape with one half under the sides of the adjacent planks where the
tongues and the groove of the replacement plank have been removed. Only the top side release
paper of the carpet tape should be removed. Leave the bottom side of the release paper in
place, as it should NOT be taped to the subfloor.
6. Position the replacement plank by engaging the groove of the long side into the tongue of the
adjoining plank and pushing down on the other three sides. The carpet tape will hold the
replacement plank in place with its adjacent planks. Use a hand roller to further secure the tape.
/


