Page is loading ...

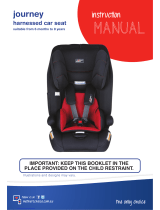
Rodi AP
Booster Seat
Suitable from 4 years to 8 years
Illustrations and designs may vary
IMPORTANT: KEEP THIS BOOKLET IN THE PLACE
PROVIDED ON THE CHILD RESTRAINT.

2
I
Rodi AP
I
Booster Seat
I
Maxi-Cosi
Toddler (approximately 4 years, up to approximately 6-8 years)
Front of vehicle
Quick Start Installation
PULL TO LOOSEN
TO LOOSEN TETHER STRAP
CLICK

Rodi AP
I
Booster Seat
I
Maxi-Cosi
I
3
Toddler (approximately 4 years, up to approximately 6-8 years)
Quick Start Installation

4
I
Rodi AP
I
Booster Seat
I
Maxi-Cosi
Table of Contents
Quick start installation
Contents
Warranty
Warnings
Preparing seat to fit child
Three point test
Shoulder heights
Components list
Preparing vehicle for your seat
Anchorage locations
Anchorage fitment check
Anchorage installation
Seat to vehicle positioning
Installing the seat in your vehicle
Securing and adjusting top tether strap
Correct seat positioning
Adjusting headrest
Adjusting lap-SASH belt
Using the seat and product features
Two position base adjustment
Side wing adjustment
Headrest vibration dampener
Securing your child in vehicle
Correct shoulder position
Care and maintenance
Cleaning covers and headrest
Cleaning shell
Guarantee
2
4
5
6
8
8
9
10
12
12
13
14
16
17
17
18
19
19
20
20
21
21
22
22
23
23
24
27

Rodi AP
I
Booster Seat
I
Maxi-Cosi
I
5
Need assistance?
Call our Customer Service Centre: 1300 809 526
Monday to Friday (8:30am-5:00pm AEST)
or send
an email: customerservice@dorel.com.au
www.maxi-cosi.com.au maxicosi.australia
Our car seats are so good, we’ve put them under a Lifetime Warranty – so you can enjoy
them for years to come. Don’t forget to register within three months after purchase.
Go to our website for full terms and conditions.
In the event of a car accident, your Maxi-Cosi child restraint may have unseen damage from
crash forces. The Maxi-Cosi Accident Exchange Service oers new for old Maxi-Cosi child
restraint replacement in the even of a serious accident (where a police report is required),
giving you peace of mind knowing your child is correctly protected.
Dear customer,
Congratulations on the purchase of your brand
new Maxi-Cosi car seat, we hope you and your little
one will have plenty of hours of fun together!
Lifetime
warranty

6
I
Rodi AP
I
Booster Seat
I
Maxi-Cosi
Please read and follow all of the instructions outlined in this manual for maximum
protection.
If you have any questions regarding the installation or use of this child restraint
in Australia or New Zealand, please contact our customer service numbers
provided.
An alternative option is to also contact any registered child fitting station
authorised
by your local transport authority.
No child restraint can guarantee absolute protection from a crash. However
proper use of this restraint may reduce the risk of injury or death.
WARNINGS
IMPORTANT: RETAIN FOR FUTURE REFERENCE
THESE INSTRUCTIONS DETAIL THE SAFE USE, FITMENT AND
MAINTENANCE OF THE SEAT.
PLEASE READ THESE INSTRUCTIONS CAREFULLY AND ENSURE THAT
THEY ARE FOLLOWED AT ALL TIMES.
NO SAFETY SEAT CAN GUARANTEE PROTECTION FROM INJURY
HOWEVER, PROPER USE OF THIS SEAT REDUCES THE RISK OF SERIOUS
INJURY OR DEATH TO YOUR CHILD.
THIS RESTRAINT MUST BE ATTACHED TO A CHILD RESTRAINT UPPER
ANCHORAGE POINT IN THE CAR. REFER TO CAR OWNER’S HANDBOOK
FOR LOCATION OF UPPER ANCHORAGE POINTS. REFER TO A CHILD
RESTRAINT FITTING STATION IF NO ANCHORAGE POINTS ARE IN THE
MOTOR CAR.
Follow the manufacturer’s instructions at all times.
To be used with a lap-sash seat belt by a child whose shoulders are above
the lower shoulder height marker with head restraint in lowest position
(approximately 4 years of age) until the child’s shoulders reach the upper
shoulder height marker with head restraint in highest position (approximately 6
to 8 years of age). Continue to use this booster seat until the child reaches this
limit. Children are safest in a booster seat until their shoulders reach the upper
shoulder height marker of the booster seat. Do not use this restraint until child’s
shoulders are above the lower shoulder height marker with the head restraint
in the lowest position. If knees do not bend in front of the vehicle seat cushion
continue to use a booster seat.

Rodi AP
I
Booster Seat
I
Maxi-Cosi
I
7
WARNINGS
• Use the restraint exactly as shown in the instructions.
• Supervision of children is needed because they may be able to undo the
buckles.
• DO NOT LEAVE CHILDREN UNATTENDED IN THE CAR.
• Do not alter or modify this restraint.
• Repairs must only be done by the manufacturers or agent.
• Do not allow the restraint to come into contact with polishes, oils, bleach and
other chemicals.
• Destroy the restraint if it has been in a severe crash, even if no damage is
visible.
• DO NOT USE THIS RESTRAINT WITHOUT THE COVER.
• DO NOT USE WITH JUST A LAP BELT. You must use with a lap-sash seat belt.
• The lap part of the seat belt must be firmly across the thighs and the sash belt
fitted diagonally across the chest and on the shoulder.
• Always secure the loose end of the top tether strap. Do not use the child
restraint where this strap may fall into a split in the seat back or off the side of
the seat.
• ALWAYS ATTACH HOOK AND REMOVE SLACK.
• Seat belt extenders should not be used if the seat belt is not long enough to
secure the child restraint. If seat belt is not long enough to secure the child
restraint, advice should be sought from a child restraint fitter.
• THIS RESTRAINT IS NOT SUITABLE FOR USE WHERE THE TOP TETHER
STRAP MAY FALL INTO A SPLIT IN THE SEAT BACK OR OFF THE SIDE OF
THE SEAT.
• THIS RESTRAINT MUST BE USED IN CARS WITH FORWARD FACING
SEATS WITH A LAP-SASH SEAT BELT. THIS BOOSTER SEAT IS NOT
SUITABLE FOR USE WITH A CHILD HARNESS.
• This child restraint is not approved for use with any connectors that connect to
the car’s ISOFIX low anchorages.
• The use of child restraints in the front seat may be restricted for children of
specific ages by local legislation. Please check with your local legislation
regarding any restriction for child restraint.

8
I
Rodi AP
I
Booster Seat
I
Maxi-Cosi
If your child is transitioning out of a booster, try this simple three point test. You may find
that your child is not yet ready to use an adult seat belt without the booster.
Three point test
INCORRECT CORRECT
1
2
3
1
2
3
1
2
3
1
2
3
Sash part across
neck and face
and not shoulder
Lap belt across
stomach and not
low on hips
Legs are not long
enough so child is
slumping in seat
Sash on shoulder
and not on neck
or face
Lap belt low
across hips and
not stomach
Legs long enough
to bend at knees
- no slumping
1. Does the sash part of the seat belt sit on the middle of the shoulder
and not touch the neck or face?
2. Does the lap part of the seat belt sit low down on the hips and not
on the abdomen?
3. When you sit the child on the seat with their bottom all the way back, are their
thighs long enough for their knees to bend allowing the legs to hang over the
front of the seat?
If you answered “no” to any of these questions, your child needs to be in a booster seat
to make both the sash and the lap part of the seat belt fit right to ensure maximum crash
protection.
Information obtained from www.raa.com.au

Rodi AP
I
Booster Seat
I
Maxi-Cosi
I
9
Marker A
Marker B
The child’s shoulders must be in-line
or above this marker. If the child’s
shoulders are below then the child
should remain in their previous child
restraint.
When the child’s shoulders reach this
upper marker, or the child no longer ts
in the child restraint (approximately 6 to
8 years of age), then try the 3 point test
(see page 8).
MARKER B: YOUNG TODDLER
MARKER A: OLDER CHILD
Lower Shoulder Height Marker
Upper Shoulder Height Marker
IMPORTANT: FOLLOW THIS ADVICE
NOTE: The booster seat is unsuitable for the occupant when the shoulders are below
the lower marker (Marker B) or above the upper marker (Marker A). The child needs to be
moved into the next form of restraint when they reach the top shoulder height marker.
SHOULDERS BELOW THIS LINE WHEN
HEADREST AT HIGHEST POSITION
SHOULDERS ABOVE THIS LINE WHEN
HEADREST AT LOWEST POSITION
Preparing seat to fit your child
Shoulder heights

10
I
Rodi AP
I
Booster Seat
I
Maxi-Cosi
A. Air Protect Cell (x2,
under cover)
B. Adjustable Headrest
C. Sash Guide (both sides)
D. Shoulder Height Markers (x2)
B
D
E
A
C
F
I
H
E. Seat Back
F. Seat Base
G. Booster Seat belt Path
(both sides, under arm rests)
H. Adjustable side wings (x2)
I. 2 Position Base Adjustment
Components list
G
BOOSTER SEAT BELT PATH

Rodi AP
I
Booster Seat
I
Maxi-Cosi
I
11
J. Booster Seat Belt Paths
(both sides, rear of headrest)
K. Top Tether Adjuster
L. Top Tether / Instruction Manual
Pocket
K
L
N
M
O
Q
P
Components list
M. Top Tether Strap
N. Top Tether Hook
O. Anchor Fitting
P. Headrest vibration dampener
Q. Height Adjustment Handle
BOOSTER SEAT
BELT PATH
J

12
I
Rodi AP
I
Booster Seat
I
Maxi-Cosi
• The anchor point can be found in dierent locations in dierent cars. The illustration above
shows possible locations of anchor points. Sometimes it is on the parcel shelf in sedans,
and on the floor area in station wagons, vans and hatchbacks. Make sure that you do not
confuse the luggage hook in the back of a station wagon with anchor points. Refer to your
owner’s manual.
• An extension strap may be needed for vehicles without a fixed parcel shelf. Extension
straps and extra fittings are available from various stores.
• Use of aftermarket accessories (i.e. items not provided in the box with the child restraint),
can reduce the safety provided by the child restraint and may cause injury or death.
• If an aftermarket accessory is to be used then the manufacturer may advise that it is
compliant with AS/NZS 8005 and is stated as suitable for this child restraint.
Preparing vehicle for your seat
Extension straps 300mm ref no. 014398
Extension straps 600mm ref no. 014399
Anchor kit ref no. 014400
POSSIBLE
ANCHOR
LOCATIONS
Anchorage locations

Rodi AP
I
Booster Seat
I
Maxi-Cosi
I
13
Child restraints must be used correctly to provide proper protection for your child. The
anchorage system on child restraint must be used in the correct way.
CORRECT
Make sure there is no slack in the top strap and the attachment clip is
upright in the anchorage fitting.
INCORRECT
The clip must not lie flat on the anchorage fitting.
INSTALLATION CORRECT
Make sure there is no
slack in the top strap
and the attachment
clip is upright in the
anchorage fitting.
The clip must not
lie flat on the
anchorage fitting.
Anchorages in
vertical panel at
rear of vehicle
Floor mounted
anchorages
INCORRECT
FIGURE 1
FIGURE 2
x
x
Preparing vehicle for your seat
Anchorage fitment check

14
I
Rodi AP
I
Booster Seat
I
Maxi-Cosi
For cars fitted with a child restraint upper
anchorage point:
Locate the upper anchorage point behind the rear seating
position (consult the car owner’s handbook for the
location of the upper anchorage point).
Remove the thread plug from the parcel shelf/floor/roof
and install the attachment bolt as shown in Figure 1.
CAUTION: DO NOT OVERTIGHTEN THE ATTACHMENT
BOLT. OVER TIGHTENING MAY FRACTURE OR BREAK
BOLT. MAXIMUM TORQUE IS 20 Nm.
For cars fitted not with a child restraint upper
anchorage point:
For sedans only
Drill a 9mm diameter hole in the parcel shelf on the
centre-line of the seating position as shown in Figure 2.
Install the anchor bolt as shown in Figure 3.
It is recommended that this installation be carried out
by a child restraint fitting station or licenced motor
mechanic.
For vehicles other than sedans:
In Australia, consult your nearest child restraint fitting
station or trac authority for vehicle inspection to find
the best, correct position for the placement of the upper
anchorage point, and for the correct attachment bolt
length and use of spacers.
In New Zealand, consult the agent for the vehicle.
Vehicle metal
structure
Spacer(s)
(if required)
Attachment bolt
Anchor fitting
Vehicle trim
Vehicle metal
structure
Attachment bolt
Anchor fitting
Vehicle trim
Lock washer
Nut
Reinforcing
washer
Centre line of
seating position
200mm
min.
For sedans only:
Front of vehicle
1
2
3
Preparing vehicle for your seat
Spacer(s)
(if required)
Anchorage installation

Rodi AP
I
Booster Seat
I
Maxi-Cosi
I
15
Preparing vehicle for your seat
CHILD RESTRAINTS MUST NOT BE ATTACHED TO UNSOUND METAL OR
TO WOOD OR SYNTHETIC STRUCTURES. WHEN DRILLING THE 9mm
HOLE DO NOT DRILL THROUGH FUEL LINES, FUEL TANKS, ELECTRICAL
WIRING, OR RADIO SPEAKERS. WEBBING STRAPS MUST BE PROTECTED
FROM SHARP CORNERS AND EDGES.
THE ANCHOR FITTING MUST BE USED ONLY AS DESCRIBED ABOVE. IT
MUST NOT BE HOOKED ONTO ANY OTHER OBJECT.
IMPROPER PLACEMENT OF THE SAFETY SEAT INCREASES THE RISK OF
SERIOUS INJURY OR DEATH.
Some seating positions in your vehicle may NOT be safe for this safety seat.
Some vehicles do not have any seating positions that can be used safely with the
seat. If you are not sure where to place the booster seat in your vehicle, consult
your vehicle’s owner’s handbook.
WARNINGS

16
I
Rodi AP
I
Booster Seat
I
Maxi-Cosi
Preparing vehicle for your seat
INCORRECT USE
CORRECT USE
CORRECT USE
Seat to vehicle positioning

Rodi AP
I
Booster Seat
I
Maxi-Cosi
I
17
PUSH
PULL TO LOOSEN
• Press on the adjuster button and pull strap
to loosen.
• Attach top tether strap to vehicle anchor
point.
• Place one knee on child restraint, push
down firmly and tighten top anchorage
strap by pulling free end of strap.
Always secure the loose end of the top tether strap to prevent it hanging out
of the car or being accessible by the child. Please store excess webbing in
the rear pocket at the rear of the restraint.
PULL TO
TIGHTEN
Installing the seat in your vehicle
NOTE: Ensure the base of the seat is not
lifted from the car seat.
Securing and adjusting top tether strap
CAUTION: CHILDREN CAN BE INJURED OR RESTRAINTS AND TOP TETHER
STRAP DAMAGED BY UNSECURED CARGO IN A COLLISION. SECURE OR REMOVE
HAZARDOUS CARGO BEFORE USING THIS CHILD RESTRAINT.

18
I
Rodi AP
I
Booster Seat
I
Maxi-Cosi
Correct and safe positioning:
• Use only the vehicle’s lap-sash seat belt when restraining
the child in the booster seat.
• When the child is not using the booster seat, the lap-sash
should remain fastened and secure accross the back rest
so that it remains stable whilst driving and in the event
of an accident.
Incorrect and unsafe positioning:
• NEVER use a vehicle’s lap-only belt across front of the
child and booster seat. It WILL NOT restrain your child’s
shoulders in the event of an accident and could result in
serious injury.
WARNING: A SASH BELT UNDER THE ARM
OR BEHIND THE BACK IS DANGEROUS.
CORRECT
INCORRECT INCORRECT
Installing the seat in your vehicle
INCORRECT USE
CORRECT USE
Correct seat positioning

Rodi AP
I
Booster Seat
I
Maxi-Cosi
I
19
• The booster seat is fitted with 6 height positions
• Lift up to raise headrest to the desired position.
• Minimal force is required to activate smooth
motion.
• Simply push down to lower.
• Position the lap belt across the child’s lap. Place
the shoulder belt over the child’s chest and into
the seat sash guide, located in the headrest (as
shown). Fasten the seat belt buckle. Remove slack.
ALWAYS USE THE SASH GUIDE.
PUSH DOWN
TO LOWER
LIFT UP
TO RAISE
SASH GUIDE
Adjusting lap-SASH belt
Installing the seat in your vehicle
Adjusting headrest

20
I
Rodi AP
I
Booster Seat
I
Maxi-Cosi
Using the seat and product features
•
To adjust the base position, pull up firmly on the
handle that is located underneath the front of the
seat.
• Slide the seat forward until it clicks into recline.
• The back of the seat has a recline feature.
• The seats back rest will hinge backwards until
it rests on the car seat for improved installation
(figure a).
a
Two position base adjustment
/