Page is loading ...

1
Important Safeguards/Conventions
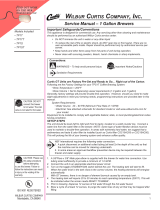
This appliance is designed for commercial use. Any servicing other than cleaning and preventive maintenance
should be performed by an authorized Wilbur Curtis service technician.
•DONOTimmersetheunitinwateroranyotherliquid
•Toreducetheriskofreorelectricshock,DONOTopenservicepanels.Nouserserviceableparts
inside.
•Keephandsandotheritemsawayfromhotsurfacesofunitduringoperation.
•Nevercleanwithscouringpowders,bleachorharshchemicals.
Symbols
WARNINGS – To help avoid personal injury
Important Notes/Cautions – from the factory
Sanitation Requirements
YourIntelliFreshbrewerisFactoryPre-SetandReadytoGo…RightfromtheBox.
FollowingaretheFactorySettingsforIntelliFreshbrewer:
•BrewTemperature=200°F •WaterBypass=OnLARGE&MEDIUMbrewonly
•BrewVolume=Large-Medium-Small •EnergySaveMode=Off
•QualityTimer=120Minutes
SystemRequirements:
•WaterSource20–90PSI(MinimumFlowRateof1GPM)
•Electrical:Seeattachedschematicforstandardmodelorvisitwww.wilburcurtis.comforyourmodel.
SETUPSTEPS
Theunitshouldbelevel(lefttorightandfronttoback)andlocatedonasecurecountertop.Connectawater
linefromthewaterltertothebrewer.
NOTE:Awaterltrationsystemmustbeusedtomaintainatrouble-freeoperation.(Inareaswithextremely
hardwater,wesuggestthatasedimentaryandtaste&odorlterbeinstalled.)Thiswillprolongthelifeofyour
brewingsystemandenhancecoffeequality.
1.A3/8”Flarex3/8”Malepipeelbowissuppliedwiththebrewerforwaterlineconnection.Usetubingsized
sufcientlytoprovideaminimumof1.0GPM.
2.Connecttheunittoanappropriateelectricalpowercircuit.
3.Turnonthetoggle(STANDBY/ON)switchbehindtheunit.Theheatingtankwillstarttoll.Whenthewater
levelinthetankrisestothecorrectvolume,theheatingelementswillenergizeautomatically.Withthe
IntelliFreshbrewer,thereisnodangerofelementburnoutcausedbyoverheatinganemptytank.
4.Theheatingtankwillrequire20to30minutestoreachoperatingtemperature(200°F),indicatedwhen
READYTOBREWisdisplayedontheLCDscreen.
5.Priortobrewing,dispense12ouncesofhotwaterthroughthehotwaterfaucet.
6. Brewacycleofatleast12ounces,topurgethewaterlinesofanyairthatmaybetrappedafterlling.
NSF International requires the following water connection:
1. A quick disconnect or additional coiled tubing (at least 2x the depth of the unit) so that the ma-
chine can be moved for cleaning underneath.
2. Insomeareasanapprovedbackowpreventiondevicemayberequiredbetweenthebrewerand
the water supply.
Wilbur Curtis Company, inC.
Models
GEMTIF
GEMSIF
GEM3IF
ServiceManual–GeminiIntelliFreshBrewer
CAUTION: DO NOT
connect this brewer to hot
water. The inlet valve is
not rated for hot water.
CAUTION: Please use
this setup procedure
before attempting to use
this brewer. Failure to follow the
instructions can result in injury or the
voiding of the warranty.
IMPORTANT: Equipment
to be installed to comply
with applicable federal,
state, or local plumbing/electrical
codes having jurisdiction.
FOR THE LATEST SPECIFICATIONS AND INFORMATION GO TO WWW.WILBURCURTIS.COM
ISO9001:2008
Wilbur Curtis Company
Montebello,CA90640
Tel:(323)837-2300
www.wilburcurtis.com

2
GEMINI IF BREWER
SATELLITE
UCM CONTROL
IF CONNECTOR
INTELLIFRESHFUNCTION&FEATURES
The IntelliFresh system is a method of storing coffee to maintain freshness and alert
youwhenthecoffeehasexceededthedesiredholdingtime.BeingaGEMINIsys-
tem,coffeeisbreweddirectlyintoanIntellifreshSatellitecontainer.TheSatellites
arelinkedtothebrewerbyaconnector.TheIntellifreshsystemisactivatedwhen
theconnectorontheSatellitecomesintocontactwithacorrespondingconnector
onthecenterpanel.TheSatellitecontainstwomaincontrolfunctionsbuiltintothe
server.
TEMPERATURE: Thissystemallowsyoutoselecttheholdingtemperature
withintheSatellite.Therearethreetemperaturesettingstochoosefrom:HIGH,
MEDIUMandLOW.ThefactorydefaultisMEDIUM.Thetemperatureisadjust-
ablethroughtheUCMcontrolpanelonthebrewer.
TIMER: Thetimerdoestwothings.Itturnsonandoffaredindicatorlightand
turnsoffthewarmerelement.ThetimerisalsoprogrammablethroughtheUCM.
Theindicatorlightsignalswhenapredeterminedtimehasexpired.Thewarmer
shutsoff12hoursaftertheindicatorlightcomeson.
WARNING: TOAVOIDSCALDING,Donotremovebrewconewhilebrewlightisashing.
1.BrewershouldbeON(Conrmatreartoggleswitch,thenpresstheON/OFFbutton).Ready-to-Brewshouldbeonthedisplay.Ifthe
brewerisconnectedtoanInterLockgrinder,thegrindershouldbeon.WhenInterlockconnectionismade,grindcoffeeatthistime.
2.PlaceanemptySatelliteunderthebrewconeandpressthewarmerswitchtopre-heattheSatellite.
NOTE: Only utilize Intellifresh Satellites on Intellifresh Brewers.
6. Pressappropriate
brewbutton.
Brewingwillbegin
immediately.
5. Transferlledbrew-
conetobrewer.
3. Placeacleanlter
intothebrewcone. 4. Fillbrewconewith
ground coffee.
INTELLIFRESHBREWINGINSTRUCTIONS
Atthebeginningofthebrew-
cycle,theLEDontheSatellite
comes on and stays lit during
thequalitytimesetting.Range
20min–240min,in10minute
increments.
Whenqualitytimeexpires,
LEDwillashfor12hours.
After12hoursofashing,the
LEDandwarmerwillturnoff.
TheLEDabovethewarmerbuttonontheUCMwillsimultaneouslyduplicatethelightpatternontheSatellite.
Ifanewbrewcycleisstartedbeforethequalitytimerhasexpired,thetimerwillresetandbegincountingdownagain.

3
ERROR MESSAGE DESCRIPTION CAUSE
(900) 000-0000 EXT (0000)
Water Level ERR.
Fill run error/OverflowThe fill solenoid has either run for
more than 10 minutes on the initial
tank fill or 1 minute, 30 seconds in
normal operation.
Break in the temperature thermistor
circuit.
Open Probe(900) 000-0000 EXT (0000)
Sensor Error
(900) 000-0000 EXT (0000)
Over Temp. Error
Excess Temperature The sensor is reading the tempera-
ture in the heating tank has risen
above 210ºF.
1-(800)-000-0000
Water Level Error
1-(800)-000-0000
Sensor Error
1-(800)-000-0000
Over Te mp. Error
Error Message
Anerrormessagewillappearonthescreenintheeventofamalfunctionunderthefollowingconditions:
1.WaterLevelOverow.
2.BreakinTemperature
Control Circuit
3.ExcessTemperaturein
HeatingTank
Toturnoffanerrormessage,
press the buttonforve
seconds.
Warmers
Thewarmer,underthebrewconewillturnonautomatically
wheneveracoffeebrewcycleisstarted.Thewarmersmay
beswitchedonandoffusingtheWARMERbuttonsonthe
control panel.
CLEANING
Regularcleaningofyourcoffeebrewerwillmaintainthehighestqualitycoffeeyourequipmentiscapableofproducing.Apropercleaningis
essentialinpreservingtheappearanceofthebrewer.
1. Turnofftheunitatthebuttononthefrontcontrolpanel.
2. Wipeexteriorsurfaceswithadampcloth,removingspillsanddebris.
3. Slidethebrewconeoutandcleanit.Thoroughlysoapthesprayheadareawithamilddetergentsolution.
4. Washthebrewbasket.Useasoftbristledbrushforhardtocleanareas.Washbothpartswithadetergentsolutionorputtheseparts
throughadishwasher.
CAUTION: DO NOT use undiluted bleach or chlorine.
LEFT & RIGHT
SATELLITE WARMERS

4
Curtis
Curtis
Ready
Entering
Programming Mode
Enter Code
- - - -
Program Menus
<-- Select -->
Global Recipes
<-- Select -->
Gourmet STD
<-- Select -->
Light Roast
<-- Select -->
Dark Roast
<-- Select -->
High Yield
<-- Select -->
Filter Pack
<-- Select -->
Decaf
<-- Select -->
Exit
<-- Select -->
Non-Brew Prog
<-- Select -->
Temperature
<-- Select -->
Energy Save Mode
<-- Select -->
Brew Count Odom
<-- Select -->
Quality Timer
<-- Select -->
Brew Count Total
<-- Select -->
Cold Brew Lock
<-- Select -->
Master Reset
<-- Select -->
Service Call
<-- Select -->
Acess Code
<-- Select -->
Banner Name
<-- Select -->
P-Maintenance
<-- Select -->
Beeper On/Off
<-- Select -->
Drip-Out Mode
<-- Select -->
Warmers Default
<-- Select -->
Exit
<-- Select -->
Brew Button Prog
<-- Select -->
Select Button…
<-- Select -->
Brew By Volume
<-- Select -->
Brew By Time
<-- Select -->
Pre-Infusion
<-- Select -->
Pulse Brew On/Off
<-- Select -->
Bypass On/Off
<-- Select -->
Exit
<-- Select -->
One Batch
<-- Select -->
Two Batch
<-- Select -->
Three Batch
<-- Select -->
Exit
<-- Select -->
Model Select
<-- Select -->
ThermoPro Twin
<-- Select -->
ThermoPro Single
<-- Select -->
Gemini - Single
<-- Select -->
Gemini - Twin
<-- Select -->
Milano Twin
<-- Select -->
Milano Single
<-- Select -->
Gemini - Twin IF
<-- Select -->
Gemini - Single IF
<-- Select -->
Display Brew Time
<-- Select -->
Warmers Auto-Off
<-- Select -->
TheG3/GoldCupSeriesBrewingSystemisFactoryPre-SetforOptimumPerformance.
Afterconnectiontowaterandpower;thereartoggleswitchmustbeon.Youwillhearabeepsound,indicatingpowerisavailabletothecontroller.
Thecontroldisplays .PressON/OFFbuttonandthescreenwilldisplay .Afterthreeseconds, isdisplayed.
Waterwillllthetank(approximately2-3minutesdependingonwaterowrate).Whentheproperlevelisreached willappearonthe
screen.Ittakesapproximately20minutestoreachsetpointtemperatureof200°F.
Controlwilldisplay whentemperaturereachesthesetpoint(200°F).Unitisnowreadytobrew.
<GEMINITWIN>
WILBURCURTIS
CURTIS CURTIS
FILLING
CURTIS
HEATING
CURTIS
READYTOBREW
PROGRAM MENUS
All programming selections are performed with the three center
buttons.
The symbols below the buttons are:
Scroll LEFT
SELECTION or ENTER to save new parameter
Scroll RIGHT
IMPORTANT NOTE:
GEM INTELLIFRESH

5
Program Menus GEMIF Brewer
Program Menus
Temperature
Energy Save Mode
Brew Count Odom
Global Recipes
Banner Name
Access Code
Service Call
Master Reset
Cold Brew Lock
Brew Count Total
From Program Menus press>displaywillshowthenextfeatureGlobalRecipes.
Quality Timer
NON-BREW PROGRAMMING
Temperature(Factorysetto200ºF)
PresstoSelect.Press<or>tomovetodesiredtemperatureandthen to set. Temperature is programmable from
170ºFto206ºFin2-degreeincrements.
Energy Save Mode (FactorysettoOFF)
PresstoSelect,<or>ON,OFForON140ºF,toset.WheninON,unitwillautomaticallyshutoff4hoursfromlast
brew.WhenfeatureisOFF,unitdoesnotutilizetheenergysavingmode.
IntheON140ºFposition,temperaturelowersto140ºF,ifunithasnotbrewedin4hours.Thisfeaturewillsaveenergyby
maintainingalowertemperatureinthetankinperiodsofnon-operation.
Brew Count Odom
Presstodisplaytotalbrewcycles.PressEXorReset.
Quality Timer (Factorysetto120Minutes)
Press to select,press<or>tochoosedesiredsetting.Range20min–240min,in10minuteincrements.The timer
doestwothings.Itturnsonandoffaredindicatorlightandturnsoffthewarmerelement.Theindicatorlightsignalswhena
predeterminedtimehasexpired.Thewarmershutsoff12hoursaftertheindicatorlightcomeson.
Brew Count Total
PresstoSelect,Showstotalgallonsandtotalbrewcyclesontheunit.Notresettable.
Cold Brew Lock ...(Factorysetto5º)
Presstoselect,<or>toselectdesiredsetting(CBL5,15orOFF), to set.
TheColdBrewLockfeatureallowsthebrewertobrewatthreedifferenttemperaturelevelsfromtheactualsetpoint.The
rstsettingiswithin5degreesofsetpoint,nextiswithin15degreesofsetpoint,OFFiswithin30degreesofsetpointfor
theReadytoBrewmessage,however,itwillbrewatanytemperature.
Master Reset
Press to display Are You Sure?
Then<forYes,>forNo.Brewerfactorydefaultsarethenreset.
Service Call (PhonenumberFactorysetto1-800-000-0000X0000)
Presstodisplaynumberandchangenumberor<tomoveplaceandEXtoexitwhencomplete.Thisnumberwillbe
displayedduringaHeatingsystemSENSORERRORorduringaWATERERROR.
Access Code(Factorysetto1-2-3-4)
Presstodisplaynumberandchangenumber,(thenumbercanbechanged1to4)or<tomoveplaceandEXtoexit
whencomplete.
Banner Name(FactorysettoCURTIS)
Presstodisplaylettersandchangelettersor<tomoveplaceandEXtoexitwhencomplete
Thisfeatureallowsupto14letterstobeprogrammedforcompanynameorregionalname.Programmingallblanksdis-
ablesBannerName.Ifprogrammed,BannerNameisdisplayedevery5sec.onandoff.
Warmers Auto – Off(FactorysettoMEDwhilebrewing)
PresstoSelect.Press<or>toadjustfrom1hourto12hours.Thisfeatureadvancesin1hourincrements.
GLOBAL RECIPES
Global Recipes(FactorysettoGourmetSTD)
Presstoselect.Ifselected,press <or>tochosearecipebasedonthetypeofcoffeebeingbrewed.Selectionsare
GourmetSTD,LightRoast,DarkRoast,HighYield,FilterPack,orDecaf.Press to select the desired recipe.
Warmers Auto-Off

6
Program Menus GEMIF Brewer
P-Maintenance
Brew By Time
Brew By Volume
Displ. Brew Time
Pre-infusion
Pulse Brew
By-Pass
Model Select
P-Maintenance(FactorysettoOFF)
PresstoSelect,SetgallonsbrewedtoindicateP-Maintenance.Press<or>toadjustfromOffto9500gallons.This
featureadvancesin100gallonincrements.Presstoexit.
Beeper On/Off (FactorysettoON)
PresstodisplayONorOFF.Pressingeither<or>togglesbetweenonandoff.toset.WhenON,thisfeatureallows
you to hear a short beep each time a button is pressed.
Drip-out Mode (Factorysetto2minutes)
PresstoSelect.Press<or>tomovetodesiredtime.SettingsareOFF,1,2,3,4and5minutes.Press to Select
time.
Warmers Default(Factorysetting-MED)
PresstoSelect.Press<or>toadjustfromOFF,HIGH,MEDorLOW.PowersettingforHIGHis100WwattsMEDis
82watts.LOWis66watts.
Displ. Brew Time (FactorysettoON)
PresstodisplayONorOFF.Pressingeither<or>togglesbetweenonandoff.AfterDisplayBrewTimeanEXITscreen
willreturnyoutoNon-BrewProg.
Drip-out Mode
Beeper On/Off
Warmers Default
BREW BUTTON PROGRAMMING
Brew by Volume(Factorysettings:LARGE200oz±8oz.MEDIUM132oz±4oz.SMALL64oz±4oz.)
PresstoSelect.Displaywillaskyoutoselectabrewbutton,Large,MediumorSmall.Pressthedesiredbrewbuttonto
begin...whendesiredvolumeisreachedpressthesamebrewbuttontostoptheow.Nowthevolumehasbeenset.
Brew by Time(Factorysettings:LARGE5min-25sec.MEDIUM3min-32sec.SMALL1min-52sec.)
NextiteminthesequenceisBrewbyTime.PresstoSelecttochangethebrewtime.Displaywillnowshowthecurrent
time.Bypressing<or>youcantogglebackandforthfromminutestosecondstoexit(ex).Changethetimeorsetandexit
by pressing the button.
Pre-Infusion(FactoryDisabled)
PresstoSelect.Currentsettinginsecondsisdisplayed<todecreaseorselect>toincrease(rangefromOFFto10
through60seconds), to set.
IfPre-infusionisselected(ON),ColdBrewLockissetwithin5ºFofsetpointandColdBrewLockdisappearsfromthelistof
programselections.WhenPre-infusionisON,PulseBrewdisappearsfromthelistofprogramselections.
Pulse Brew(FactorysettingC)
Presstoselect,<or>toselectOFForoneofvepulsepatterns(AtoE).ThevePulseBrewoptionshelp“tune”or
changethecoffeeavor.
GuidelinesforPulseBrew:
FilterPacktypecoffeestypicallyextractbetterwiththeA and B pulse setting.
DecafcoffeestypicallyextractbetterwiththeB pulse setting.
High-YieldcoffeestypicallyextractbetterwiththeCpulsesetting.Ofcourse,anyoftheA, B or C settings may be used to
suityourtasteprole.
Settings D and E are manual pulse counts.
ToexitfromthePulseBrewmode,select0 for the time.
IfPulseBrewison,ColdBrewLockissetwithin5ºFofsetpointandColdBrewLockdisappearsfromthelistofprogram
selections.WhenPulseBrewison,Pre-infusiondisappearsfromthelistofprogramselections.
By-Pass (Factorysettings:LARGE35%.MEDIUM10%.SMALLOff.)
TheBy-Passoptionhelpswithcontrollingextractionwithlargerbrews.Contacttimethatistoolongwillextractundesirable
bitter,harshavorcompounds.By-passingsomeofthebrewwateraroundthecoffeebedwillbalancetheextraction.
Presstodisplaycurrentsetting.Press<or>tochangesettings;OFF,5%to50%,in5%increments.Press to set.
Model Select(FactorysettoGemini-TwinIF)
Presstoselect,<or>toselectmodel.Theselectionsare:ThermoPro-Twin,ThermoPro-Single,Gemini-Twin,Gemini-
Single,Milano-Twin,Milano-Single,Gemini-TwinIF,andGemini-SingleIF.Presstoset.WhentheModelSelectfeatureis
changed,allsettingsareresettothedefaultsofthenewlyselectedmodel.

7
1
2
3
4
5
32
6
7
8
9
10
11
12
42
13
39
14
38
15
16
17
18
19
43
44
45
20
21
22
30
31
25
26
23
27
24
28
29
33
34
35
41
36
40
537
Illustrated Parts List
GEMTIF

8
1
2
3
4
5
6
7
8
8A
9
10
11
12
13
14
15
16
17
18
19
20
21
22
23
24
25
26
27
28
29
30
31
32
33
34
35
36
37
38
39
40
41
42
43
44
45
GEM3IF
WC-37121*
WC- 442
WC-2977-101
WC- 844-101*
WC-39744
WC-37388*
WC-39755*
WC-39756*
WC-29050*
WC-8559*
WC-37308*
WC-39745
WC-61309
WC-61307
WC-38504
WC-61301
WC-37008*
WC-43067*
WC-37406*
WC- 934-04*
WC-4382*
WC-1438-101*
WC-62033
WC-29044
WC-2402P*
WC- 847 *
WC-37122 *
WC-1501*
WC- 102*
WC- 522 *
WC-43055*
WC-5421
WC-3528 *
WC-1809*
WC-5310*
WC-5231*
WC-3765L*
WC-13429
WC-13428
WC-37132*
WC-5350*
WC-61674
WC-37266*
WC-37317*
WC-37365*
SATELLITE, INTELLIFRESH
DUMP VALVE LEFT
SOLENOID, LOCK BREW CONE RIGHT 120V
FITTING, SPRAYHEAD ULTEM
VALVE, BY-PASS, NON-ADJUSTABLE W/RSTRCTR
LABEL, UCM & OUTER 3-BATCH GEM-IF
KIT, LABEL & UCM GEMTIF 3-BATCH CURTIS
LABEL, UCM OVERLAY 1-BATCH
LABEL, UCM OVERLAY 2-BATCH
SPRAYHEAD, AFS-AMBER
RELAY, SOLIDSTATE 40A W/HEAT SINK
BREWCONE, BLACK NON-METAL GEM
LABEL, BOTTOM PANEL
COVER, FRONT CENTER WRAP WELD ASSY GEMTIF
HOLDER, CONNECTOR FEMALE GEMTIF
LABEL, WARNING SHOCK HAZARD
DECK, WARMER WELD ASSY GEMTIF
KIT, TANK LID ROUND
O’RING, 4.5” ID SILICONE
KIT, LIQUID LEVEL PROBE FAIL-SAFE, NON-METAL
ELEMENT HEATING 2.5KW 220V
GUARD, SHOCK HEATING ELEMENT
SENSOR, HEATING TANK
TANK, COMPLETE GEMTS NON-METAL FITTINGS
SLEEVE, OVERFLOW ASSY GEN USE
ELBOW, 3/8”FL x 3/8” NPT PLATED
VALVE, INLET 2 GPM 120V 10W GEN USE YEL BODY
DUMP VALVE RIGHT
FUSE HOLDER ASSY W/5A FUSE
SWITCH, TOGGLE NON-LIT SPST 15A 125/250VAC
THERMOSTAT, RESET
GUARD, SHOCK RESET T-STAT
COVER, TOP SS GEM
LEG, 4” ADJUST 3/8-16 THREAD STYLIZED
FAUCET, PS/HPS SERIES HOT WTR
TUBE, 5/16 ID x 1/8W SILICONE
COMPOUND, SILICONE
KIT, VALVE REPAIR USE ON WC-847
HARNESS ASSY IF CONNECTOR RT
HARNESS ASSY IF CONNECTOR LT
KIT, VALVE REPAIR USE ON WC-844-101
TUBE, SILICONE Ø1/2” ID x Ø3/4” OD x 1/8” WALL
BRACKET, BREWCONE ALIGNMENT
KIT, TANK OVERFLOW FITTING WITH BUSHING
KIT, STRAIGHT FITTING WITH BUSHING
KIT, TANK INLET FITTING WITH BUSHING
Description
Index
Nº Part Nº
Illustrated Parts List
GEMTIF
* SUGGESTED PARTS TO STOCK

9
5
6
7
8
9
10
11
12
13
14
35
36
15
16
17
18
19
20
21
22
23
24
25
26
27
28
29
30
31
32
33
1
2
3
4
34
37
38
39
40
7
Illustrated Parts List
GEMSIF

10
Illustrated Parts List
GEMSIF
1
2
3
4
5
6
7
8
9
9A
9B
10
11
12
13
14
15
16
17
18
19
20
21
22
23
24
25
26
27
28
29
30
31
32
33
34
35
36
37
38
39
40
41
GEM3IF
WC-58117
WC-37122*
WC-2977-101
WC-37308*
WC- 442
WC- 844-101*
WC-37389
WC-39801*
WC-39802*
WC-39803*
WC-8559*
WC-61384
WC-39800
WC-1809*
WC-61307
WC-3528 *
WC-61379
WC-2402P*
WC-1501
WC-59020
WC- 102*
WC- 847 *
WC-29050*
WC-5853-102
WC-43062*
WC-37406*
WC-62035
WC- 906-04*
WC-1438-101*
WC-4394*
WC- 522 *
WC-43055*
WC-5310*
WC-5231*
WC-3765L*
WC-13429
WC-38504
WC-37266*
WC-37317*
WC-37365*
WC-37132*
WC-29044
SATELLITE, INTELLIFRESH
COVER TOP
DUMP VALVE RIGHT
FITTING, SPRAYHEAD ULTEM
BREWCONE, BLACK PLASTIC GEM
SOLENOID, LOCK BREWCONE L/R LABEL
VALVE BY-PASS NON-ADJUSTABLE
KIT, LABEL & UCM GEMSIF 3-BATCH CURTIS
LABEL, UCM PANEL 3-BATCH GEMSIF
LABEL, UCM PANEL 2-BATCH GEMSIF
LABEL, UCM PANEL 1-BATCH GEMSIF
RELAY, SOLIDSTATE 40A W/HT SINK
COVER, FRONT CENTER WRAP GEMSIF
LABEL, BOTTOM WRAP GEMSIF
FAUCET, PS/HPS SERIES HOT WTR
HOLDER, WC-571 FEMALE IF CONNECTOR
LEG, 4” ADJUST 3/8-16 THRD STYLIZED
DECK, WARMER W/A
ELBOW, 3/8”FL x 3/8” NPT PLATED
FUSE HOLDER ASSY W5A FUSE
PANEL, BACK GEMSS
SWITCH, TOGGLE NON-LIT SPST 15A 125/250VAC
VALVE, INLET 2 GPM 120V 10W GEN USE YEL BODY
SPRAYHEAD, AFS-AMBER
COVER, TOP HEATING TANK
GASKET, TANK LID
KIT, PROBE LIQUID LEVEL NON-METAL
TANK, COMPLETE GEMSS W/ULTEM FITTINGS
KIT, ELEMENT, HEATING 2KW 220V
SENSOR, HEATING TANK
GUARD, SHOCK HEATING ELEMENT
THERMOSTAT, RESET
GUARD, SHOCK RESET THERMOSTAT
TUBE, 5/16 ID x 1/8W SILICONE
COMPOUND, SILICONE
KIT, VALVE REPAIR
HARNESS ASSY IF CONNECTOR RT
LABEL, WARNING SHOCK HAZARD
KIT, TANK OVERFLOW FITTING WITH BUSHING
KIT, STRAIGHT FITTING WITH BUSHING
KIT, TANK INLET FITTING WITH BUSHING
KIT, BY-PASS VALVE USE ON WC-844-101
SLEEVE, OVERFLOW ASSY GEN USE (NOT SHOWN)
Description
Index
Nº Part Nº
* SUGGESTED PARTS TO STOCK

11
2
3
4
5
6
1
7
10
11
12
13
16
18
19
8
9
A
20
15
14
17
A
Illustrated Parts List
GEM3IF

12
Description
Index
Nº Part Nº
* SUGGESTED PARTS TO STOCK
Illustrated Parts List
GEM3IF
A daily routine of cleaning the GEM3IF Satellite will maintain the appearance of the unit and ensure great tasting cof-
fee.
CAUTION – Do not use cleansers, liquids containing bleach, powders or any other substance containing chlo-
rine. These products promote corrosion and will pit the stainless steel. USE OF THESE PRODUCTS WILL
VOID THE WARRANTY.
CLEANING THE GEM3IF SATELLITE
To clean the Satellite components, prepare a mild detergent solution.
1. Remove lid from Satellite.
2. Turn the lid over and clean the funnel area, preferably with a gauge glass brush.
3. Rinse the lid, removing all traces of cleaning solution.
4. Unscrew the handle/bonnet assembly and remove from faucet.
5. Remove seat cup from stem and inspect for wear or hardening. Replace if necessary.
6. Clean all parts, including faucet body, with mild detergent and warm water. Thoroughly rinse with clear warm
water.
7. Dry and assemble. Hand-tighten the handle assembly.
8. Remove the gauge glass tube by unscrewing the gauge glass cap.
9. Clean the tube and washers with a gauge brush and washing solution. Rinse with clear water. Dry and as-
semble.
10. Clean inside Satellite with a cloth or ScotchBrite™ pad.
11. Remove coffee residue using a mild detergent solution with water.
12. Thoroughly rinse with clear warm water.
1
2
3
4
5
6
7
8
9
10
11
12
13
14
15
16
17
18
19
20
WC-5622*
WC-2001
WC-2005*
WC-2025*
WC-2010C
WC-2006*
WC-2102
WC-39747
WC-2007
WC-6417
WC-1901A
WC-1800*
WC- 976-101*
WC- 586*
WC-39746
WC- 736-101*
WC-3705*
WC-38151
WC-13426
WC-39747
LID, BLACK PLASTIC GEM-3
CAP, SHIELD W/VENT
WASHER, SHIELD CAP 1/8”
GLASS, GAUGE 8”
SHIELD, GAUGE GLASS ¾” D. x 8”
WASHER, .188ID x .188 THK BOTTOM
GAUGE GLASS ASSEMBLY 8”
LABEL, SIDE GEM3IF CURTIS LOGO
BRACKET, GAUGE GLASS GEM-3
GUARD, FAUCET GEM-3
SHANK, FAUCET W/SHIELD BASE
FAUCET, S’ SERIES NON-LOCKING
HEATER, SILICONE 120V 71W W/TERMINALS
LED, 5MM W/HOLDER & WIRES
LABEL, FRONT GEM3IF CURTIS LOGO
BOARD, HYBRID T-STAT CNTRL W/TRMNLS
KIT, FAUCET S’ SERIES
LABEL, LOCK/UNLOCK GEM3
IF CONNECTOR, FEMALE W/WIRES
LABEL, SIDE GEM-3IF CURTIS LOGO

13
5200
7600
23.6
34.5
Electrical Schematic
GEMTIF

14
Electrical Schematic
GEMSIF(-10Only)

15
Electrical Schematic
GEM3IF

16
SHOWING WC-37259
BREW CONE ASSEMBLY
.125”
(.3 cm)
.25”
(.6 cm)
1.0”
(2.5 cm)
30.5”
(77.5 cm)
4.0”
(10.0 cm)
5.375”
(13.7 cm)
7.75”
(19.7 cm)
11.75
(29.8 cm)
11.25”
(28.6 cm)
18.125”
(46.1 cm)
22.125”
(56.2 cm)
12.0”
(30.5 cm)
11.75”
(29.8 cm)
.75”
(1.9 cm)
7.75”
(19.7 cm)
4.0”
(10.2 cm)
5.625”
(14.3 cm)
30.5”
(77.5 cm) 11.625
(29.5 cm)
11.875”
(30.2 cm)
9.125”
(23.2 cm)
22.125”
(56.2 cm)
13.25”
(33.7 cm)
9.0”
(22.9 cm)
11.5”
(29.2 cm)
10.25”
(26.0 cm)
10.0”
(25.4 cm)
11.75”
(29.8 cm)
9.0”
(22.9 cm)
GEMTIF
GEM3IF
GEMSIF
Rough-In Drawings

17
This Page Intenionally Left Blank

ECN 12835 . 12/27/[email protected]
ECN 12640 . 9/30/[email protected]
ECN 12400 . 6/15/10 @ 12.7
edr 7091 . 3/23/10 @ 12.2
Printed in U.S.A. 12/10 . F-3691 . rev C
WILBUR CURTIS CO., INC.
6913AccoSt.,Montebello,CA90640-5403USA
Phone:800/421-6150 Fax:323-837-2410
TechnicalSupportPhone:800/995-0417(M-F5:30A-4:00PPST) E-Mail:[email protected]
WebSite:www.wilburcurtis.com
Product Warranty Information
TheWilburCurtisCompanycertiesthatitsproductsarefreefromdefectsinmaterialandworkmanshipundernormaluse.Thefollowinglimited
warranties and conditions apply:
3 Years, Parts and Labor, from Original Date of Purchase on digital control boards.
2 Years,Parts,fromOriginalDateofPurchaseonallotherelectricalcomponents,ttingsandtubing.
1 Year,Labor,fromOriginalDateofPurchaseonallelectricalcomponents,ttingsandtubing.
Additionally, the Wilbur Curtis Company warrants its Grinding Burrs for Forty (40) months from date of purchase or 40,000 pounds of coffee,
whichevercomesrst.StainlessSteelcomponentsarewarrantedfortwo(2)yearsfromdateofpurchaseagainstleakingorpittingandreplace-
ment parts are warranted for ninety (90) days from date of purchase or for the remainder of the limited warranty period of the equipment in which
the component is installed.
All in-warranty service calls must have prior authorization. For Authorization, call the Technical Support Department at 1-800-995-0417. Effective
date of this policy is April 1, 2003.
Additional conditions may apply. Go to www.wilburcurtis.com to view the full product warranty information.
CONDITIONS&EXCEPTIONS
The warranty covers original equipment at time of purchase only. The Wilbur Curtis Company, Inc., assumes no responsibility for substitute replace-
ment parts installed on Curtis equipment that have not been purchased from the
Wilbur Curtis Company, Inc. The Wilbur Curtis Company will not accept any responsibility if the following conditions are not met. The warranty
does not cover and is void under the following circumstances:
1) Improper operation of equipment: Theequipmentmustbeusedforitsdesignedandintendedpurposeandfunction.
2) Improper installation of equipment: Thisequipmentmustbeinstalledbyaprofessionaltechnicianandmustcomplywithalllocalelectrical,
mechanical and plumbing codes.
3) Improper voltage: Equipmentmustbeinstalledatthevoltagestatedontheserialplatesuppliedwiththisequipment.
4) Improper water supply: Thisincludes,butisnotlimitedto,excessiveorlowwaterpressure,andinadequateoructuatingwaterow
rate.
5) Adjustments and cleaning: Theresettingofsafetythermostatsandcircuitbreakers,programmingandtemperatureadjustmentsarethe
responsibilityoftheequipmentowner.Theownerisresponsibleforpropercleaningandregularmaintenanceofthisequipment.
6) Damaged in transit: Equipmentdamagedintransitistheresponsibilityofthefreightcompanyandaclaimshouldbemadewiththecar-
rier.
7) Abuse or neglect (including failure to periodically clean or remove lime accumulations): Manufacturerisnotresponsibleforvariation
inequipmentoperationduetoexcessivelimeorlocalwaterconditions.Theequipmentmustbemaintainedaccordingtothemanufacturer’s
recommendations.
8) Replacement of items subject to normal use and wear: Thisshallinclude,butisnotlimitedto,lightbulbs,sheardisks,“0”rings,gaskets,
siliconetube,canisterassemblies,whipperchambersandplates,mixingbowls,agitationassembliesandwhipperpropellers.
9) Repairs and/or Replacements aresubjecttoourdecisionthattheworkmanshiporpartswerefaultyandthedefectsshowedupundernormal
use.Alllaborshallbeperformedduringregularworkinghours.Overtimechargesaretheresponsibilityoftheowner.Chargesincurredby
delays,waitingtime,oroperatingrestrictionsthathindertheservicetechnician’sabilitytoperformserviceistheresponsibilityoftheowner
oftheequipment.Thisincludesinstitutionalandcorrectionalfacilities.TheWilburCurtisCompanywillallowupto100miles,roundtrip,per
in-warrantyservicecall.
RETURN MERCHANDISE AUTHORIZATION: AllclaimsunderthiswarrantymustbesubmittedtotheWilburCurtisCompanyTechnical
SupportDepartmentpriortoperforminganyrepairworkorreturnofthisequipmenttothefactory.Allreturnedequipmentmustberepackaged
properlyintheoriginalcarton.Nounitswillbeacceptediftheyaredamagedintransitduetoimproperpackaging.NO UNITS OR PARTS WILL
BE ACCEPTED WITHOUT A RETURN MERCHANDISE AUTHORIZATION (RMA). RMA NUMBER MUST BE MARKED ON THE CARTON
OR SHIPPING LABEL. All in-warranty service calls must be performed by an authorized service agent. Call the Wilbur Curtis Technical Sup-
portDepartmenttondanagentnearyou.
/

