Kenwood DMX110 Owner's manual

Category
Car video systems
Type
Owner's manual

This manual is also suitable for

Updated information (the latest Instruction Manual, etc.) is available from
<http://www.kenwood.com/cs/ce/>.
Des informations actualisées (le dernier mode d’emploi, etc.) sont disponibles sur le site
<http://www.kenwood.com/cs/ce/>.
La información actualizada (el Manual de instrucciones más actualizado, etc.) está
disponible desde <http://www.kenwood.com/cs/ce/>.
Estão disponíveis informações atualizadas (o Manual de Instruções mais recente, etc.) em
<http://www.kenwood.com/cs/ce/>.
DMX110BT
DMX110
MONITOR WITH RECEIVER
INSTRUCTION MANUAL
ÉCRAN AVEC RÉCEPTEUR
MODE D’EMPLOI
MONITOR CON RECEPTOR
MANUAL DE INSTRUCCIONES
MONITOR COM RECETOR
MANUAL DE INSTRUÇÕES
B5A-2245-00 (K/E/Q)© 2017 JVC KENWOOD Corporation
Model name indication position
See “Removing the trim plate” (P.21)
Position d’indication du nom du modèle
Reportez-vous à la section «Retrait de la
plaque de garniture» (P.49)
Posición de la indicación del nombre del
modelo
Consulte “Retirada del marco” (P.75)
Posição da indicão do nome do modelo
Consulte “Retirar a moldura” (P.103)
Trim plate
Plaque de garniturea
Marco
Moldura
B5A-2245-00_KEQ_EnFrEsPt.indb 1 2017/09/07 13:46
2
Before use
Before use ....................................................................................2
How to read this manual .......................................................................................2
Precautions ....................................................................................................................2
Getting Started .......................................................................... 3
Clock settings ............................................................................................................... 4
Touch panel adjustment ....................................................................................... 4
Basics .............................................................................................5
Functions of the Buttons on the Front Panel .......................................... 5
Common operations ...............................................................................................5
HOME screen descriptions ..................................................................................6
Source control screen descriptions ............................................................... 6
List screen .......................................................................................................................6
USB .................................................................................................7
Preparation .....................................................................................................................7
Playback operations .................................................................................................7
iPod/iPhone ................................................................................9
Preparation .....................................................................................................................9
Playback operations .................................................................................................9
Radio ............................................................................................11
Radio Basic Operation...........................................................................................11
Presetting stations ..................................................................................................11
FM RDS features ........................................................................................................11
Radio Setup ................................................................................................................. 12
External Components ...........................................................13
Using external audio/video players ............................................................ 13
Rear view camera .................................................................................................... 13
Bluetooth smartphone (DMX110BT) ...............................14
Register your smartphone to the unit ...................................................... 14
Receive a phone call ............................................................................................. 14
Make a phone call ................................................................................................... 15
Playing Bluetooth Audio Device ................................................................... 16
Delete the registered Bluetooth device .................................................. 16
Controlling Audio ...................................................................17
Controlling General Audio .................................................................................17
Equalizer Control ......................................................................................................17
Subwoofer settings ................................................................................................17
Remote control ........................................................................18
Functions of the Remote control Buttons .............................................. 18
Installation .................................................................................19
Before Installation ................................................................................................... 19
Installing the unit ....................................................................................................20
About this Unit ........................................................................ 24
More information .................................................................................................... 24
Troubleshooting ......................................................................................................24
Copyrights ................................................................................................................... 25
Specifications ............................................................................................................ 26
Precautions
#WARNING
Ñ To prevent injury or re, take the
following precautions:
• To prevent a short circuit, never put or leave any
metallic objects (such as coins or metal tools) inside
the unit.
• Do not watch or fix your eyes on the unit’s display
when you are driving for any extended period.
• If you experience problems during installation,
consult your KENWOOD dealer.
Ñ Precautions on using this unit
• When you purchase optional accessories, check
with your KENWOOD dealer to make sure that they
work with your model and in your area.
• The Radio Data System or Radio Broadcast Data
System feature won’t work where the service is not
supported by any broadcasting station.
Ñ Protecting the monitor
• To protect the monitor from damage, do not
operate the monitor using a ballpoint pen or similar
tool with the sharp tip.
Ñ Cleaning the Unit
If the front panel of this unit is stained, wipe it with
a dry soft cloth such as a silicon cloth. If the front
panel is stained badly, wipe the stain off with a cloth
moistened with neutral cleaner, then wipe it again
with a clean soft dry cloth.
! CAUTION
• Applaying spray cleaner directly to the unit may affect
its mechanical parts. Wiping the front panel with a
hard cloth or using a volatile liquid such as thinner
or alcohol may scratch the surface or erase screened
print.
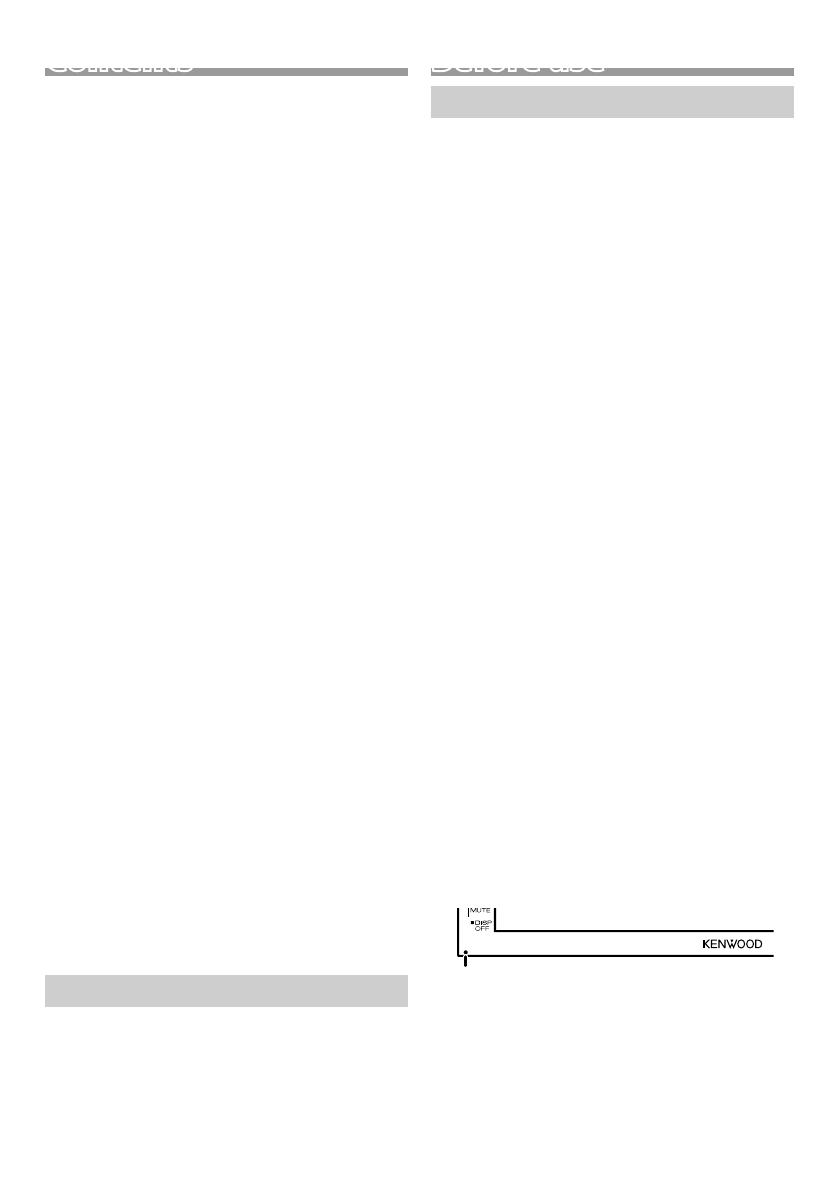
Ñ How to reset your unit
If the unit or the connected unit fails to operate
properly, reset the unit.
Reset button
Contents
How to read this manual
• The panels shown in this guide are examples used to
provide clear explanations of the operations. For this
reason, they may be different from the actual panels.
• In operation procedures, bracket shape indicates the
key or button you should control.
< >: indicates the name of panel buttons.
[ ]: indicates the name of touch keys
B5A-2245-00_KEQ_EnFrEsPt.indb 2 2017/09/07 13:46
3
English |
Continued on the next page...
Getting Started
1 Turn the ignition key of your car to ACC.
The unit is turned on.
2 Press the <8MENU> button.
3 Touch [Setup].
4 Touch the corresponding key and set the value.
Audio
Sound Eect
Displays the Equalizer screen. (P.17)
Beep
Activates or deactivates the key-touch tone.
“ON” (Default), “OFF”
Loudness
Sets the amounts of boost of low and high tones.
“ON”, “OFF” (Default)
Subwoofer
Displays the Subwoofer screen. (P.17)
Display
Touch
Adjust the sensing position of touch panel. See
Touch panel adjustment(P.4).
Display Mode
Select the screen mode.
“16:9” (Default), “4:3 Pan Scan”
Radio
Displays the Radio Settings screen. (P.12 )
General
Language
Select the language used for the control screen and
setting items. Default is “English”.
1) Touch [Language].
2) Select the desired language.
* You can change the page to display more items
by pressing [
]/ [ ].
BT Auto Connect
The unit automatically reconnect when the last
connected Bluetooth device is within range.
“ON” (Default), “OFF”
Clock Setting
Adjust the clock time. (P.4).
Default
Touch [Default] to set all the settings to the initial
default settings.
5 Touch [6].
B5A-2245-00_KEQ_EnFrEsPt.indb 3 2017/09/07 13:46
4
Getting Started
Clock settings
Ñ Synchronizing the clock time with FM RDS
Activate [RDS Clock Sync]. See “Radio Setup
(P.12).
Ñ Adjusting the clock manually
NOTE
• Deactivate [RDS Clock Sync] before adjusting the
clock. See “Radio Setup” (P.12).
1 Press the <8MENU> button.
2 Touch [Setup].
3 Touch [General].
4 Touch [Clock Setting].
Clock screen appears.
5 Selects time format.
[12] (Default : North America, South America sales
area only)
[24] (Default : Europe, CIS sales area only)
6 Touch [R] or [S] to set the clock time.
• If you have selected [12] as the time format, touch
[AM] or [PM] before setting the clock time.
7 Touch [6].
Touch panel adjustment
1 Press the <8MENU> button.
2 Touch [Setup].
3 Touch [Display].
4 Touch [Touch].
5 Follow the instruction on the screen and touch
the center of each +.
• To cancel the touch panel adjustment, touch
[Cancel].
• If the touch position is deviated, [OK] is not
displayed. Retry from the beginning.
6 Touch [OK].
B5A-2245-00_KEQ_EnFrEsPt.indb 4 2017/09/07 13:46
5
English |
Basics
Continued on the next page...
Basics
Functions of the Buttons on the Front
Panel
1
2
3
4
5
6
1
Remote Sensor
• Receives the remote control signal.
2
8MENU
• Displays the HOME screen. (P.6)
• Pressing for 1 second turns the power off.
• When the power off, turns the power on.
3
AUD
• Displays the Equalizer screen.* (P.17)
* During video file playback, you can set only the
preset equalizer curve.
* The Equalizer screen is not displayed during
picture file playback or on the list screen or
SETUP screen etc,
4
+ , – (Volume)
• Adjusts volume. The volume will go up until 20
when you keep pressing [ + ].
5
MUTE/ DISP OFF (Display o)
Mutes/restores the sound.
• Pressing for 1 second turns the screen off.
When the screen is off, touch the display to turn
on the screen.
6
Reset
• If the unit or the connected unit fails to operate
properly, the unit returns to factory settings when
this button is pressed.
Common operations
Ñ Turning on the power
1 Press the <8MENU> button.
NOTE
• If the gear is in the reverse (R) position, the power
cannot be turned on or off.
Ñ Turning o the power
1 Press and hold the <8MENU> button.
Ñ Adjusting the volume
1 Press the <+> or <–> button.
NOTE
• The volume will go up until 20 when you keep
pressing [ + ].
Ñ Mutes the sound
1 Press the <MUTE> button.
To restore the sound, touch the button again, or
adjust the volume.
Ñ Turn o the screen
1 Press and hold the <MUTE> button.
To turn on the screen, touch the display.
B5A-2245-00_KEQ_EnFrEsPt.indb 5 2017/09/07 13:46
6
Basics
Continued on the next page...
HOME screen descriptions
1 Press the <8MENU> button.
HOME screen appears.
2
5
3
6
4
7
1
1
Clock display
Touch to displays the Clock screen.
2
Switches to the radio broadcast. (P.11)
3
[USB]
Plays files on a USB device. (P.7)
[iPod]
Plays an iPod/iPhone. ( P.9)
When iPod/iPhone is connected.
4
Switches to an external component connected to
the AV-IN input terminal. (P.13)
5
Displays the Hands Free screen. (P.15)
(D MX110BT only)
6
Plays a Bluetooth audio player. (P.16)
(D M X110BT only)
7
Displays the SETUP screen. (P.3)
Source control screen descriptions
You can perform source playback operations on the
source control screen.
1
4
3
2
5
1
Clock display
Touch to displays the Clock screen.
2
Source name
3
appears when the Bluetooth smartphone is
connected. *
appears when the Bluetooth audio player is
connected. *
appears when the mute function is active.
(P.5)
* DMX110BT only
4
[DIM]
Select dimmer mode. Dim 1, Dim 2, Not dim
5
Returns to previous screen.
List screen
There are some common function keys in the list
screens of most sources.
1 You can change the page to display more items
by pressing [ ]/ [ ].
B5A-2245-00_KEQ_EnFrEsPt.indb 6 2017/09/07 13:46
7
English |
USB
Continued on the next page...Continued on the next page...
USB
Preparation
Ñ Connecting a USB device
1 Remove the cap of the USB terminal.
2 Connect the USB device with the USB cable.
The unit reads the device and playback starts.
Ñ To disconnect the USB device:
1 Press the <8MENU> button.
2 Touch a source other than [USB].
3 Detach the USB device.
Ñ Usable USB device
This unit can play MPEG1/ MPEG2/ MPEG4/ MP3/
WMA/ AAC/ JPEG/ BMP les stored in a USB mass
storage class device. (P.24)
• File system: FAT16/ FAT32
• This unit can recognize a total of 9 999 files and 320
folders (a maximum of 9 999 files per folder).
The maximum number of characters:
– Folder names : 24 characters
– File names : 24 characters
– Tag : 30 characters
NOTE
• When the USB device is connected to this unit, it can
be charged through the USB cable.
• Install the USB device in the place where it will not
affect safe driving.
• You cannot connect a USB device via a USB hub and
Multi Card Reader.
• Take backups of the audio files used with this unit.
The files may be erased depending on the operating
conditions of the USB device.
We shall have no compensation for any damage
arising from any erased data.
• No USB device comes with this unit. You need to
purchase a commercially available USB device.
• Cap the USB terminal whenever not using.
Playback operations
Ñ Control the music you are listening to on
the source control screen.
1
6
3
2
5
4
1
The jacket of the currently playing file is displayed.
2
##:##:## : Song time
Play time bar : For confirmation of current playing
position
3
[L] : Plays or pauses.
[E] [F] : Searches the previous/next content.
Touch and hold to fast forward or fast backward.
Touch [L] to resumes normal play.
[
] : Selects Repeat playback mode.
Lights o (Default): Repeats all files in the USB
device.
: Repeats the current file.
FO
: Repeats all files in the current folder.
[
] : Selects Random playback mode.
: Randomly plays all files.
Lights o (Default): Normal playback.
4
Displays the information of the current file.
Only a file name is displayed if there is no tag
information.
5
Searches file. (P.8)
6
D, etc. : Playback status
: Repeat playback mode indicator
: Random playback mode indicator
B5A-2245-00_KEQ_EnFrEsPt.indb 7 2017/09/07 13:46
8
USB
Ñ For Video playback
1 When the operation buttons are not displayed on
the screen, touch the display.
3
2
1
2
4
5
1
D, etc. : Playback status
: Repeat playback mode indicator
: Random playback mode indicator
##:##:## : Song time
Play time bar : For confirmation of current playing
position
2
To switch the operation buttons.
3
[
] : You can adjust image quality in video screen.
[Brightness]: Adjusts the brightness. (00 to 08)
[Contrast]: Adjusts the contrast. (00 to 08)
[Tint]: Adjusts the tint. (00 to 08)
[Color]: Adjusts the color. (00 to 08)
[Reset]: To clear the adjustment.
[
] : Select the zoom ratio.
“Off, “x2”, “x3”, “x4”, “x5”, “1/2”, “1/3”, “1/4”
[3] [2] [ < ] [ > ] : Scrolls the screen.
4
The operation buttons disappear when 4 is
touched or when no operation is done for about
10 seconds.
5
Displays the File List screen.* (P.8)
* The video file stops.
Ñ Selecting a track in a list (Searches le)
1 Touch [ ].
2 Select whether you search by audio files [ ],
video files [ ] or picture files [ ].
3 Touch [Y] to moves to the upper hierarchy.
4 Touch the desired folder.
When you touch a folder its contents are displayed.
5 Touch desired item from the content list.
Playback starts.
NOTE
• When file types are switched, the Random/Repeat
playback setting is cancelled.
B5A-2245-00_KEQ_EnFrEsPt.indb 8 2017/09/07 13:46
9
English |
iPod/iPhone
Continued on the next page...
iPod/iPhone
Preparation
Ñ Connecting iPod/iPhone
• For Lightning connector models: Use USB Audio
cable for iPod/iPhone—KCA-iP103 (optional
accessory).
For details about connecting iPod/iPhone, see page
23 .
1 Remove the cap of the USB terminal.
2 Connect the iPod/iPhone.
The unit reads the device and playback starts.
Ñ To disconnect the iPod/iPhone
1 Press the <8MENU> button.
2 Touch a source other than [iPod].
3 Detach the iPod/iPhone.
Ñ Connectable iPod/iPhone
The following models can be connected to this unit.
Made for
iPhone 7 Plus
iPhone 7
iPhone SE
iPhone 6s Plus
iPhone 6s
iPhone 6 Plus
iPhone 6
iPhone 5s
iPhone 5c
iPhone 5
iPod touch (6th generation)
iPod touch (5th generation)
NOTE
• If you start playback after connecting the iPod, the
music that has been played by the iPod is played first.
• Cap the USB terminal whenever not using.
Playback operations
Ñ Control the music you are listening to on
the source control screen.
1
6
3
2
5
4
1
Artwork (Shown if the track contains artwork)
2
##:##:## : Song time
Play time bar : For confirmation of current playing
position
3
L : Plays or pauses.
[E] [F] : Searches the previous/next content.
Touch and hold to fast forward or fast backward.
[
] : Selects Repeat playback mode.
Lights o: Repeat off
: Functions the same as Repeat All.
1 : Functions the same as Repeat One.
[
] : Selects Random playback mode.
: Functions the same as Shuffle Songs.
Lights o: Random off
4
Displays the information of the current file.
5
Searches content. (P.10)
6
D, etc. : Playback status
: Repeat playback mode indicator
: Random playback mode indicator
B5A-2245-00_KEQ_EnFrEsPt.indb 9 2017/09/07 13:46
10
iPod/iPhone
Ñ Selecting a content in a list
1 Touch [ ].
2 Touch desired item.
When you touch a category its contents are
displayed.
3 Touch desired item from the content list.
Playback starts.
Touch [6] to moves to the upper hierarchy.
NOTE
• The source control screen appears when you touch
[6] at the top hierarchy.
B5A-2245-00_KEQ_EnFrEsPt.indb 10 2017/09/07 13:46
11
English |
Radio
Continued on the next page...
Radio
Radio Basic Operation
1 Press the <8MENU> button.
2 Touch [Radio].
Ñ Source control screen
4
1
3
2
5
1
Displays the information of the current station:
PS name, Frequency, PTY Genre, Indicator Items
[<<] [>>] : Touch to the next frequency manually.
2
Recalls the memorized station.
When touched for 2 seconds, stores the current
receiving station in memory.
3
[E] [F] : Tunes in a station with good
reception automatically. *
1
[TA] : Traffic information mode is set. *
2
*
3
(P.11)
[PTY] : Select the available Program Type. *
2
*
3
(P.11)
*1 If “AF” is set to ON on the Tuner screen, only RDS
stations are received. (P.12)
*2 FM only
*3 Europe, CIS sales area only
4
[1] : Presets stations automatically. (P.11)
5
[FM] : Switches the FM band.
FM1”, “FM2”, “FM3”
[AM] : Switches the AM band.
“AM1”, “AM2
Presetting stations
Ñ Auto memory
You can preset 18 stations for FM and 12 stations for
AM.
1 Touch [FM] or [AM] to select the band.
2 Touch [1].
The local stations with the strongest signals are
found and stored automatically.
If “AF” is set to “ON” on the Tuner screen, only RDS
stations are stored in the memory. (P.12)
Ñ Manual memory
You can store the current receiving station in
memory.
1 Tune in to a station you want to preset.
2 Touch and hold [#] (#:1-6) in which you want to
store the station.
Ñ Recalling the preset station
1 Touch [#] (#:1-6).
NOTE
• Only frequencies are registered as preset stations.
Information about RDS stations is not registered.
FM RDS features
(Europe, CIS sales area only)
Ñ Search by program type
1 Touch [PT Y].
2 Select a program type from the list.
PTY Search starts.
Ñ Trac Information
1 Touch [TA].
Switches to the traffic information automatically
when the traffic bulletin starts. (TA indicator lights
up.)
“ON”, “OFF” (Default)
If “AF” is set to “ON” on the Tuner screen, the station is
switched to the RDS station. (P.12)
When the trac bulletin starts
The Traffic Information screen appears automatically.
B5A-2245-00_KEQ_EnFrEsPt.indb 11 2017/09/07 13:46
12
Radio
Radio Setup
Ñ Function menu
1 Press the <8MENU> button.
2 Touch [Setup].
3 Touch [Radio].
4 Set each item as follows.
Area *
1
North America (Default): For North/Central/South
America, AM/FM intervals: 10 kHz/200 kHz.
South America: For some South American countries,
AM/FM intervals: 10 kHz/50 kHz.
Europe: For Europe, AM/FM intervals: 9 kHz/50 kHz.
Stereo
Determines whether to receive stereo broadcasts
in the stereo mode or monaural mode (the MONO
indicator lights up).
“ON” (Default), “OFF”
Local
Tunes in only to the stations with sufficient signal
strength. (LOC indicator lights up.)
“ON”, “OFF” (Default)
RDS Clock Sync
Synchronizing the Radio Data System station time
data and this unit’s clock.
“ON” (Default), “OFF”
AF *
2
When station reception is poor, automatically switches
to the station that is broadcasting the same program
over the same Radio Data System network.
“ON” (Default), “OFF”
*1 North America, South America sales area only
*2 Europe, CIS sales area only
5 Touch [6].
B5A-2245-00_KEQ_EnFrEsPt.indb 12 2017/09/07 13:46
13
English |
Continued on the next page...
External Components
Using external audio/video players
Ñ Starting playback
1 Connect an external component to the AV-IN
input terminal. (P.22)
2 Press the <8MENU> button.
3 Touch [AV-IN].
4 Turn on the connected component and start
playing the source.
Ñ For Video playback
1 When the operation buttons are not displayed on
the screen, touch the display.
1
The operation buttons disappear when 1 is
touched or when no operation is done for about 5
seconds.
NOTE
• When the picture from the rear view camera is
displayed on the AV-IN screen, the picture output
from the Visual Output terminal disappears.
Rear view camera
To use a rear view camera, the REVERSE lead
connection is required. For connecting a rear view
camera. (P.22)
Ñ Displaying the picture from the rear view
camera
The rear view screen is displayed when you shift the
gear to the reverse (R) position.
• To erase the caution message, touch the screen.
B5A-2245-00_KEQ_EnFrEsPt.indb 13 2017/09/07 13:46
14
Bluetooth smartphone (DMX110BT)Bluetooth smartphone (DMX110BT)
Ñ About the Bluetooth smartphone and
Bluetooth audio player
This unit conforms to the following Bluetooth
specications:
Version
Bluetooth Ver.2.1 + EDR
Prole
Smartphone/ Cell-phone:
HFP (V1.6) (Hands Free Profile)
PBAP (V1.1.1) (Phonebook Access Profile)
Audio player:
A2DP (V1.2) (Advanced Audio Distribution Profile)
AVRCP (V1.3) (Audio/Video Remote Control Profile)
Sound codec
SBC
Ñ About mobile phones compatible with
Phone book Access Prole (PBAP)
If your mobile phone supports PBAP, you can display
the following items on the touch panel screen when
the mobile phone is connected.
• Phone book (up to 1000 entries)
• Dialed calls, received calls, and missed calls (up to 20
entries in total)
Register your smartphone to the unit
You can use your Bluetooth smartphone when paired
to this unit.
You can register up to 5 Bluetooth devices.
• You can pair the device and the unit using SSP (Secure
Simple Pairing) which only requires confirmation.
• One device can be connected at a time.
• When you register a new Bluetooth device, disconnect
the Bluetooth device currently connected and then
register the new device.
• A new device cannot be registered if there are 5
registered Bluetooth units. Delete unnecessary
registration. (P.16)
1 Turn on the Bluetooth function on your
smartphone/cell-phone.
2 Search the unit (“DMX110BT”) from your
smartphone/cell-phone.
If a PIN code is required, enter the PIN code (“0000”).
appears when the Bluetooth smartphone is
connected.
appears when the Bluetooth audio player is
connected.
Ñ Disconnecting the device
• Turn off the Bluetooth function from your
smartphone/cell-phone.
• Turn off the ignition switch.
Receive a phone call
1 Touch [Û].
• [Ý] : Reject an incoming call.
Ñ Operations during a call
[Ý]
Ending a call
You can send tones by touching desired keys
on the screen.
• Touch [
] to close the window.
Switches the speaking voice output between
cell-phone and speaker.
Adjust the receiver volume
Press the <+> or <> button.
B5A-2245-00_KEQ_EnFrEsPt.indb 14 2017/09/07 13:46
15
English |
Bluetooth smartphone (DMX110BT)
Continued on the next page...
Make a phone call
1 Press the <8MENU> button.
2 Touch [TEL].
3 See the table below for each operation method.
• [ ] : Disconnects the Bluetooth smartphone.
• [
] : Closes the screen for sending tones while
talking.
• [
] : Displays the screen for deleting the
previously registered Bluetooth devices.
(P.16)
Call by entering a phone number
1) Touch [
].
2) Enter a phone number with number keys.
3) Touch [Û].
Make a call
Touch [W] to delete the last entry.
Call using call records
1) Touch [
] (Incoming Calls), [ ] (Outgoing
Calls), [
] (Missed Calls).
2) Select the phone number from the list.
Make a call
Call using the phonebook
1) Touch [
].
2) Select the name from the list.
Make a call
• [
] : Updates the phonebook. Touch this
button after you have made a change to
the phonebook of your cell-phone.
Call by voice
You can make a voice call using the voice recognition
function of the Bluetooth smartphone.
1) Touch [
].
2) Touch [
].
3) Say the name registered in the Bluetooth
smartphone.
Touch [ ] to cancel voice dialing.
B5A-2245-00_KEQ_EnFrEsPt.indb 15 2017/09/07 13:46
16
Bluetooth smartphone (DMX110BT)
Playing Bluetooth Audio Device
1 Press the <8MENU> button.
2 Touch [BT Audio].
Ñ Source control screen
2
3
1
4
1
The jacket of the currently playing file is displayed.
2
[L] : Plays or pauses.
[E] [F] : Searches the previous/next content.
3
Displays the information of the current file.
Only a file name and a folder name are displayed if
there is no tag information.
4
D, etc. : Playback status
: Repeat playback mode indicator *
: Random playback mode indicator *
* The settings on the Bluetooth audio device are
displayed.
NOTE
• Operations and display indications may differ
according to their availability on the connected
device.
Delete the registered Bluetooth
device
1 Press the <8MENU> button.
2 Touch [TEL].
3 Touch [ ].
4 Touch the device name.
5 Touch [ ].
B5A-2245-00_KEQ_EnFrEsPt.indb 16 2017/09/07 13:46
17
English |
Continued on the next page...
Controlling General Audio
1 Press the <8MENU> button.
2 Touch [Setup].
3 Touch [Audio].
4 Touch [Sound Effect].
5 Touch [ ].
6 Set each item as follows.
Fader
[
] [ ]
Adjust the front and rear volume balance.
12 (front) to -12 (rear)
Balance
[
] [ ]
Adjust the left and right volume balance.
12 (right) to -12 (left)
[Reset]
To clear the adjustment.
Ñ Loudness
1 Press the <8MENU> button.
2 Touch [Setup].
3 Touch [Audio].
4 Touch [Loudness].
Sets the amounts of boost of low and high tones.
“ON”, “OFF” (Default)
Equalizer Control
1 Press the <8MENU> button.
2 Touch [Setup].
3 Touch [Audio].
4 Touch [Sound Effect].
5 Set each item as follows.
1
3
2
1
You can select frequency bar and adjust its level.
(-7 to +7)
The adjustments are stored and “User” is activated.
2
To recall the preset equalizer curve.
3
The “User” preset and the current EQ curve returns
to flat.
Subwoofer settings
1 Press the <8MENU> button.
2 Touch [Setup].
3 Touch [Audio].
4 Touch [Subwoofer].
5 Set each item as follows.
Frequency
[80Hz], [120Hz],
[160Hz], [OFF]
Low Pass Filter adjustment. /
[OFF]: Turns off the subwoofer
output. (Default OFF)
Volume
[–], [+]
Adjusts the subwoofer level. 0 to 12
(Default 6)
Controlling Audio
B5A-2245-00_KEQ_EnFrEsPt.indb 17 2017/09/07 13:46
18
Remote control
This unit can be operated using the remote control
KNA-RCDV331 (optional accessory).
! CAUTION
• Put the remote control in a place where it will
not move during braking or other operations. A
dangerous situation could result, if the remote control
falls down and gets wedged under the pedals while
driving.
• Do not leave the battery near fire or under direct
sunlight. A fire, explosion or excessive heat generation
may result.
• Do not recharge, short, break up or heat the battery
or place it in an open fire. Such actions may cause the
battery to leak fluid. If spilled fluid comes in contact
with your eyes or on clothing, immediately rinse with
water and consult a physician.
• Place the battery out of reach of children. In the
unlikely event that a child swallows the battery,
immediately consult a physician.
Ñ Battery Installation
If the remote control operates only over shorter
distances or does not operate at all, it is possible that
the batteries are depleted.
In such instances, replace the both batteries with new
ones.
1 Insert two “AAA”/“R03”-size batteries with the
and poles aligned properly, following the
illustration inside the case.
Ñ Switch the operation mode
Turn its operation mode switch to “DVD.”
DVD
T V
NAV
AUD
Functions of the Remote control
Buttons
• Aim the remote control directly at the remote sensor
on the faceplate.
• DO NOT expose the remote sensor to bright light
(direct sunlight or artificial lighting).
1
3
4
6
9
5
2
7
8
1 SRC
Switches to the source to be played.
2
I
Stop playback.
3
L
Plays or pauses.
4 AUDIO
Displays the Equalizer screen. (P.17)
5
Û
When a call comes in, answers the call.
6 VOL R S
Adjusts the volume.
7 FM+
AM–
Selects the folder to be played.
During tuner source, select FM/ AM
band to be received.
8
E
F
Selects the track or file to be played.
During tuner source, switches to
broadcast stations received by the unit.
9 ATT
Mutes/restores the sound
Other
Not used.
B5A-2245-00_KEQ_EnFrEsPt.indb 18 2017/09/07 13:46
19
English |
Installation
Continued on the next page...
Installation
Before Installation
Before installation of this unit, please note the
following precautions.
#WARNINGS
• If you connect the ignition wire (red) and the battery
wire (yellow) to the car chassis (ground), you may
cause a short circuit, that in turn may start a fire.
Always connect those wires to the power source
running through the fuse box.
• Do not cut out the fuse from the ignition wire (red)
and the battery wire (yellow). The power supply must
be connected to the wires via the fuse.
#CAUTION
• Install this unit in the console of your vehicle.
Do not touch the metal part of this unit during and
shortly after the use of the unit. Metal part such as the
heat sink and enclosure become hot.
NOTE
• Mounting and wiring this product requires skills and
experience. For best safety, leave the mounting and
wiring work to professionals.
• Make sure to ground the unit to a negative 12V DC
power supply.
• Do not install the unit in a spot exposed to direct
sunlight or excessive heat or humidity. Also avoid
places with too much dust or the possibility of water
splashing.
• Do not use your own screws. Use only the screws
provided. If you use the wrong screws, you could
damage the unit.
• If the power is not turned ON (“There is an error in
the speaker wiring. Please check the connections.” is
displayed), the speaker wire may have a short-circuit or
touched the chassis of the vehicle and the protection
function may have been activated. Therefore, the
speaker wire should be checked.
• If your car’s ignition does not have an ACC position,
connect the ignition wires to a power source that
can be turned on and off with the ignition key. If you
connect the ignition wire to a power source with a
constant voltage supply, such as with battery wires,
the battery may be drained.
• If the console has a lid, make sure to install the unit so
that the front panel will not hit the lid when closing
and opening.
• If the fuse blows, first make sure the wires aren’t
touching to cause a short circuit, then replace the old
fuse with one with the same rating.
• Insulate unconnected wires with vinyl tape or other
similar material. To prevent a short circuit, do not
remove the caps on the ends of the unconnected
wires or the terminals.
• Secure the wires with cable clamps and wrap vinyl
tape around the wires that comes into contact with
metal parts to protect the wires and to prevent short
circuit.
• Connect the speaker wires correctly to the terminals
to which they correspond. The unit may be damaged
or fail to work if you share the ¤ wires or ground
them to any metal part in the car.
• When only two speakers are being connected to
the system, connect the connectors either to both
the front output terminals or to both the rear output
terminals (do not mix front and rear). For example,
if you connect the ¢ connector of the left speaker
to a front output terminal, do not connect the ¤
connector to a rear output terminal.
• After the unit is installed, check whether the brake
lamps, blinkers, wipers, etc. on the car are working
properly.
• Mount the unit so that the mounting angle is 30° or
less.
Do not press hard on the panel surface when installing
the unit to the vehicle. Otherwise scars, damage, or
failure may result.
• Reception may drop if there are metal objects near
the Bluetooth antenna.
Bluetooth antenna unit
Ñ Supplied accessories for installation
1
x1
2
x2
3
x1
4
[2]
(3 m)
x1
5
[1]
x1
6
[1]
x1
7
[1]
(M5 × 6 mm)
x4
8
[1]
(M5 × 7 mm)
x4
9
(2 m)
x1
[1]
North America, South America sales area only
[2]
DMX110 BT only
B5A-2245-00_KEQ_EnFrEsPt.indb 19 2017/09/07 13:46
20
Installation
Ñ Installation procedure
1) To prevent a short circuit, remove the key from
the ignition and disconnect the ¤ terminal of the
battery.
2) Make the proper input and output wire connections
for each unit.
3) Connect the wire on the wiring harness.
4) Take Connector B on the wiring harness and connect
it to the speaker connector in your vehicle.
5) Take Connector A on the wiring harness and connect
it to the external power connector on your vehicle.
6) Connect the wiring harness connector to the unit.
7) Install the unit in your car.
8) Reconnect the ¤ terminal of the battery.
9) Press the reset button.
Installing the unit
Ñ Non-Japanese cars
Bend the tabs of the
mounting sleeve with
a screwdriver or similar
utensil and attach it in
place.
NOTE
• Make sure that the unit is installed securely in place. If
the unit is unstable, it may malfunction (eg, the sound
may skip).
Ñ Japanese cars (North America, South
America sales area only)
7 or 8
7 or 8
Car Bracket
Ñ Trim plate
1) Attach accessory 1 to the unit.
1
Ñ Microphone unit (DMX110BT)
1) Check the installation position of the microphone
(accessory 4).
2) Clean the installation surface.
3) Remove the separator of the microphone (accessory
4), and stick the microphone to the place shown
below.
4) Wire the microphone cable up to the unit with it
secured at several positions using tape or other
desired method.
5) Adjust the direction of the microphone (accessory 4)
to the driver.
4
Fix a cable with a commercial item of tape.
NOTE
• Swap the clips if necessary.
B5A-2245-00_KEQ_EnFrEsPt.indb 20 2017/09/07 13:46
  • Page 1 1
  • Page 2 2
  • Page 3 3
  • Page 4 4
  • Page 5 5
  • Page 6 6
  • Page 7 7
  • Page 8 8
  • Page 9 9
  • Page 10 10
  • Page 11 11
  • Page 12 12
  • Page 13 13
  • Page 14 14
  • Page 15 15
  • Page 16 16
  • Page 17 17
  • Page 18 18
  • Page 19 19
  • Page 20 20
  • Page 21 21
  • Page 22 22
  • Page 23 23
  • Page 24 24
  • Page 25 25
  • Page 26 26
  • Page 27 27
  • Page 28 28
  • Page 29 29
  • Page 30 30
  • Page 31 31
  • Page 32 32
  • Page 33 33
  • Page 34 34
  • Page 35 35
  • Page 36 36
  • Page 37 37
  • Page 38 38
  • Page 39 39
  • Page 40 40
  • Page 41 41
  • Page 42 42
  • Page 43 43
  • Page 44 44
  • Page 45 45
  • Page 46 46
  • Page 47 47
  • Page 48 48
  • Page 49 49
  • Page 50 50
  • Page 51 51
  • Page 52 52
  • Page 53 53
  • Page 54 54
  • Page 55 55
  • Page 56 56
  • Page 57 57
  • Page 58 58
  • Page 59 59
  • Page 60 60
  • Page 61 61
  • Page 62 62
  • Page 63 63
  • Page 64 64
  • Page 65 65
  • Page 66 66
  • Page 67 67
  • Page 68 68
  • Page 69 69
  • Page 70 70
  • Page 71 71
  • Page 72 72
  • Page 73 73
  • Page 74 74
  • Page 75 75
  • Page 76 76
  • Page 77 77
  • Page 78 78
  • Page 79 79
  • Page 80 80
  • Page 81 81
  • Page 82 82
  • Page 83 83
  • Page 84 84
  • Page 85 85
  • Page 86 86
  • Page 87 87
  • Page 88 88
  • Page 89 89
  • Page 90 90
  • Page 91 91
  • Page 92 92
  • Page 93 93
  • Page 94 94
  • Page 95 95
  • Page 96 96
  • Page 97 97
  • Page 98 98
  • Page 99 99
  • Page 100 100
  • Page 101 101
  • Page 102 102
  • Page 103 103
  • Page 104 104
  • Page 105 105
  • Page 106 106
  • Page 107 107
  • Page 108 108
  • Page 109 109
  • Page 110 110
  • Page 111 111
  • Page 112 112

Kenwood DMX110 Owner's manual

Category
Car video systems
Type
Owner's manual
This manual is also suitable for

Ask a question and I''ll find the answer in the document

Finding information in a document is now easier with AI