11
You can send a still image (*.riz) from the STILL IMAGE EDITOR screen (p. 9) to the V-1SDI. The sent still image can be output via the PGM connector (SDI)
on the V-1SDI and can also be used as a source for DSK composition.
At the STILL IMAGE EDITOR screen, you can import still images in JPEG, GIF, PNG, and other such formats, adjust their size, and trim them. You can also
superimpose shapes and text onto still images. Edited still images are saved with the “*.riz” le extension. Opening a riz le lets you continue editing it
from the state it was saved in.
* You can also capture still images from input video on the V-1SDI.
Sending a Still Image
NOTE
Either the still image sent from V-1SDI RCS or the captured still
image is temporarily stored in the V-1SDI.
If a new still image is sent from V-1SDI RCS or is captured while
a still image is already saved, the previously saved still image is
overwritten.
Also, still-image data is deleted when the power is turned o.
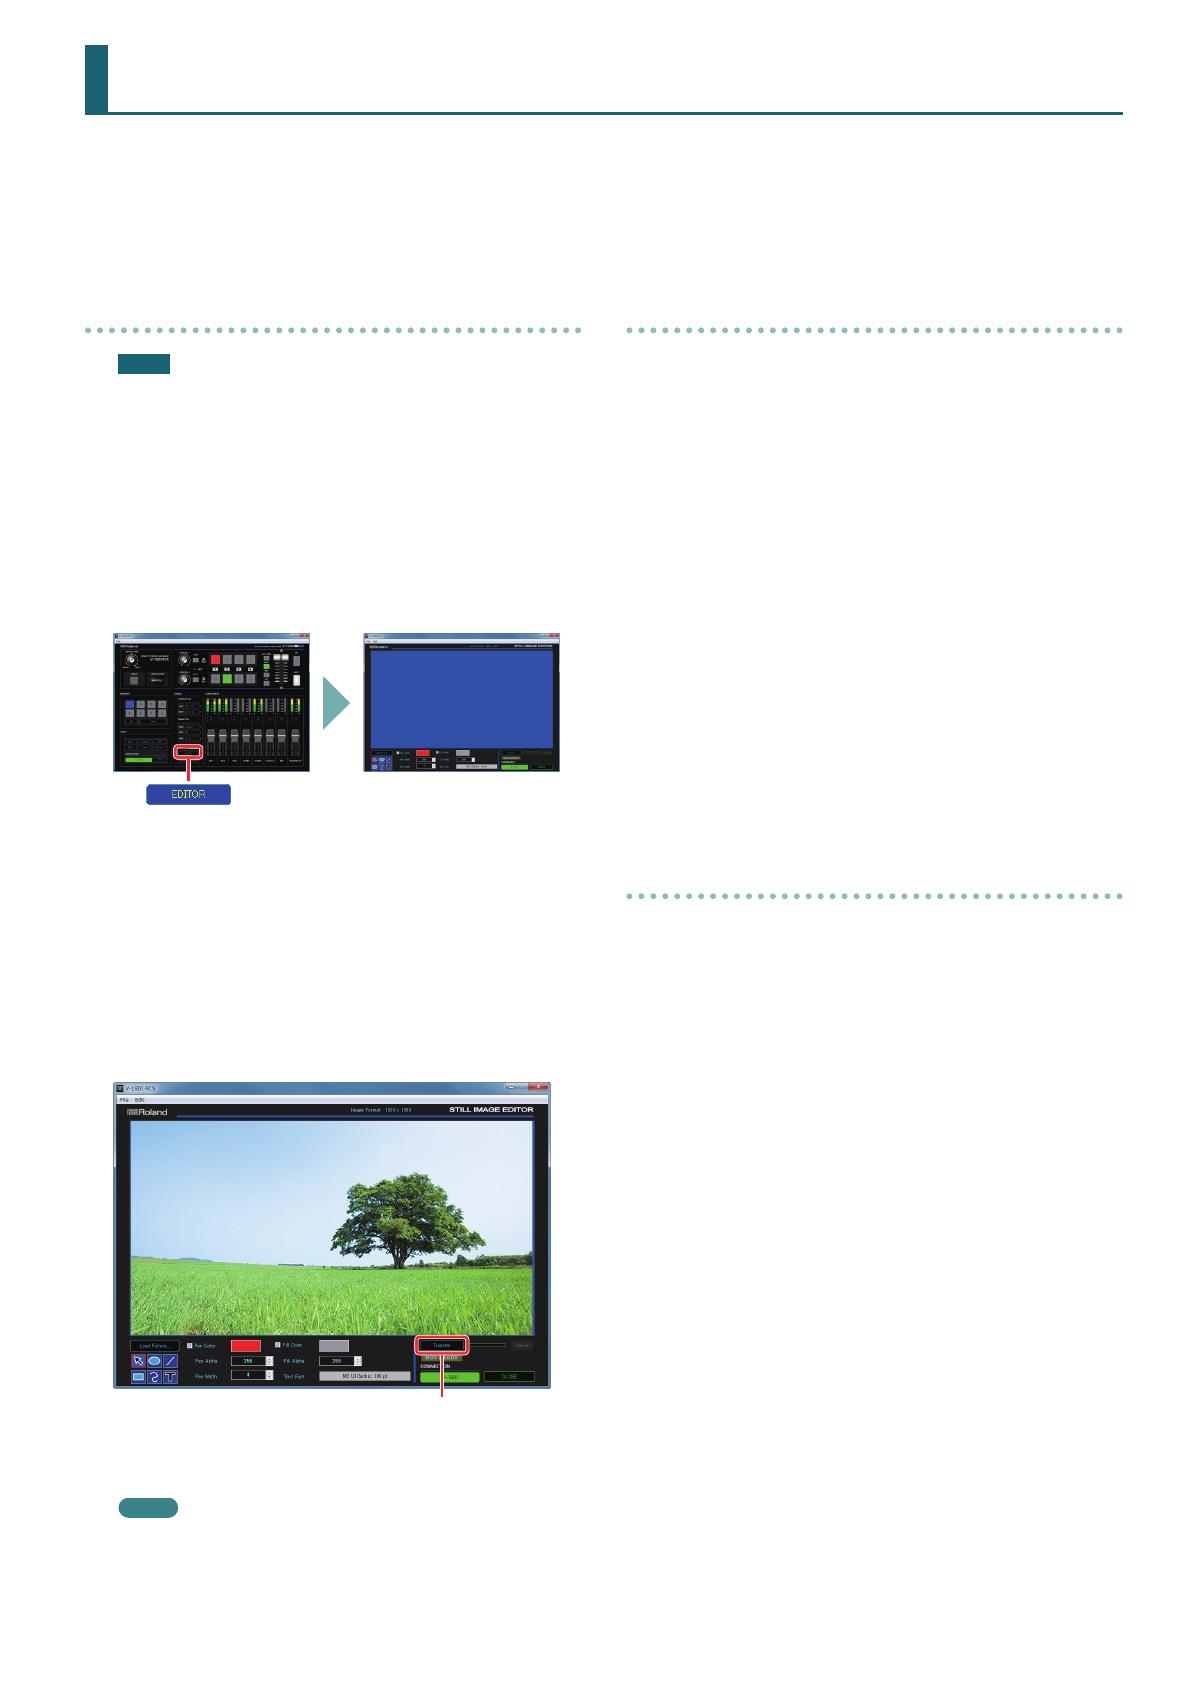
1. Switch V-1SDI RCS online (p. 4).
2. Click the [EDITOR] button to display the STILL IMAGE
EDITOR screen (p. 9).
3. Adjust the size of the still image and use the drawing tools
to edit shapes and text.
5 Loading a still image in JPEG, GIF, PNG, or another format
Click the [Load Picture] button to display the Open File dialog box,
then select the still image.
5 Opening a still image (*.riz) saved on the computer from the editor
From the “File” menu, select “Image” g “Open Image” to display the
Open Image Data dialog box, then select the still image.
4. Click the [Transfer] button to send the still image to the
V-1SDI.
[Transfer] button
The progress bar lets you monitor the progress.
When sending of the still image is nished, the message “Transfer
complete” is displayed under the progress bar.
MEMO
When a still image is saved on the V-1SDI, the NOT READY/READY
indicator changes to the READY indication (lighted up in red).
Saving a Still Image
Still images loaded into the STILL IMAGE EDITOR screen are saved with
the “*.riz” le extension.
Saving by Overwriting
1. From the “File” menu, select “Image” g “Save Image.”
The still image is saved, overwriting any earlier instance.
* If the still image you're working on has never been saved before,
the Save Image As dialog box is displayed to let you enter a le
name. Here you assign a le name (*.riz) and save the still image.
Saving Using a Name You Specify
1. From the “File” menu, select “Image” g “Save Image As.”
The Save Image As dialog box appears.
2. Specify where to save the still image and the name of the
le (*.riz), then click the [Save] button.
The still image is saved on the computer.
Opening an Existing Still Image (*.riz)
1. From the “File” menu, select “Image” g “Open Image.”
The Open Image Data dialog box appears.
2. Select the still image (*.riz) and click the [Open] button.
The still image is opened.
Sending Still Images to the V-1SDI


