Date: 2013-Aug.-17
Rev: www.pbteen.com Page 2 of 9
IMPORTANT SAFETY INSTRUCTIONS:
• Please read all instructions carefully before assembling this bed.
• For your safety, assembly by two or more adults is strongly recommended.
• Keep these instructions for future use.
• Use only vendor-supplied hardware to assembly this item. Using unauthorized hardware could jeopardize
the structural integrity of the item.
PRE- ASSEMBLY:
• Remove all parts and hardware from the box. Place them on a carpeted or scratch-free work surface, as this
will avoid damaging parts. The shipping box provides an ideal work surface.
• To avoid accidentally discarding small parts or hardware, please do not dispose of any contents until
assembly is complete.
• Two people are recommended for your safety and ease of assembly.
• Prior to starting this assembly, use the parts and hardware lists to identify and separate each of the pieces
included.
• The illustrations provided allow for easier assembly when used in conjunction with the assembly
instructions.
• Note: Do not fully tighten any of the bolts until all parts are in place. Failure to follow these instructions may
cause the bolts to misalign during assembly.
• Please use caution if using power tools to aid in assembly. Power tools can damage the hardware or split
the wood.
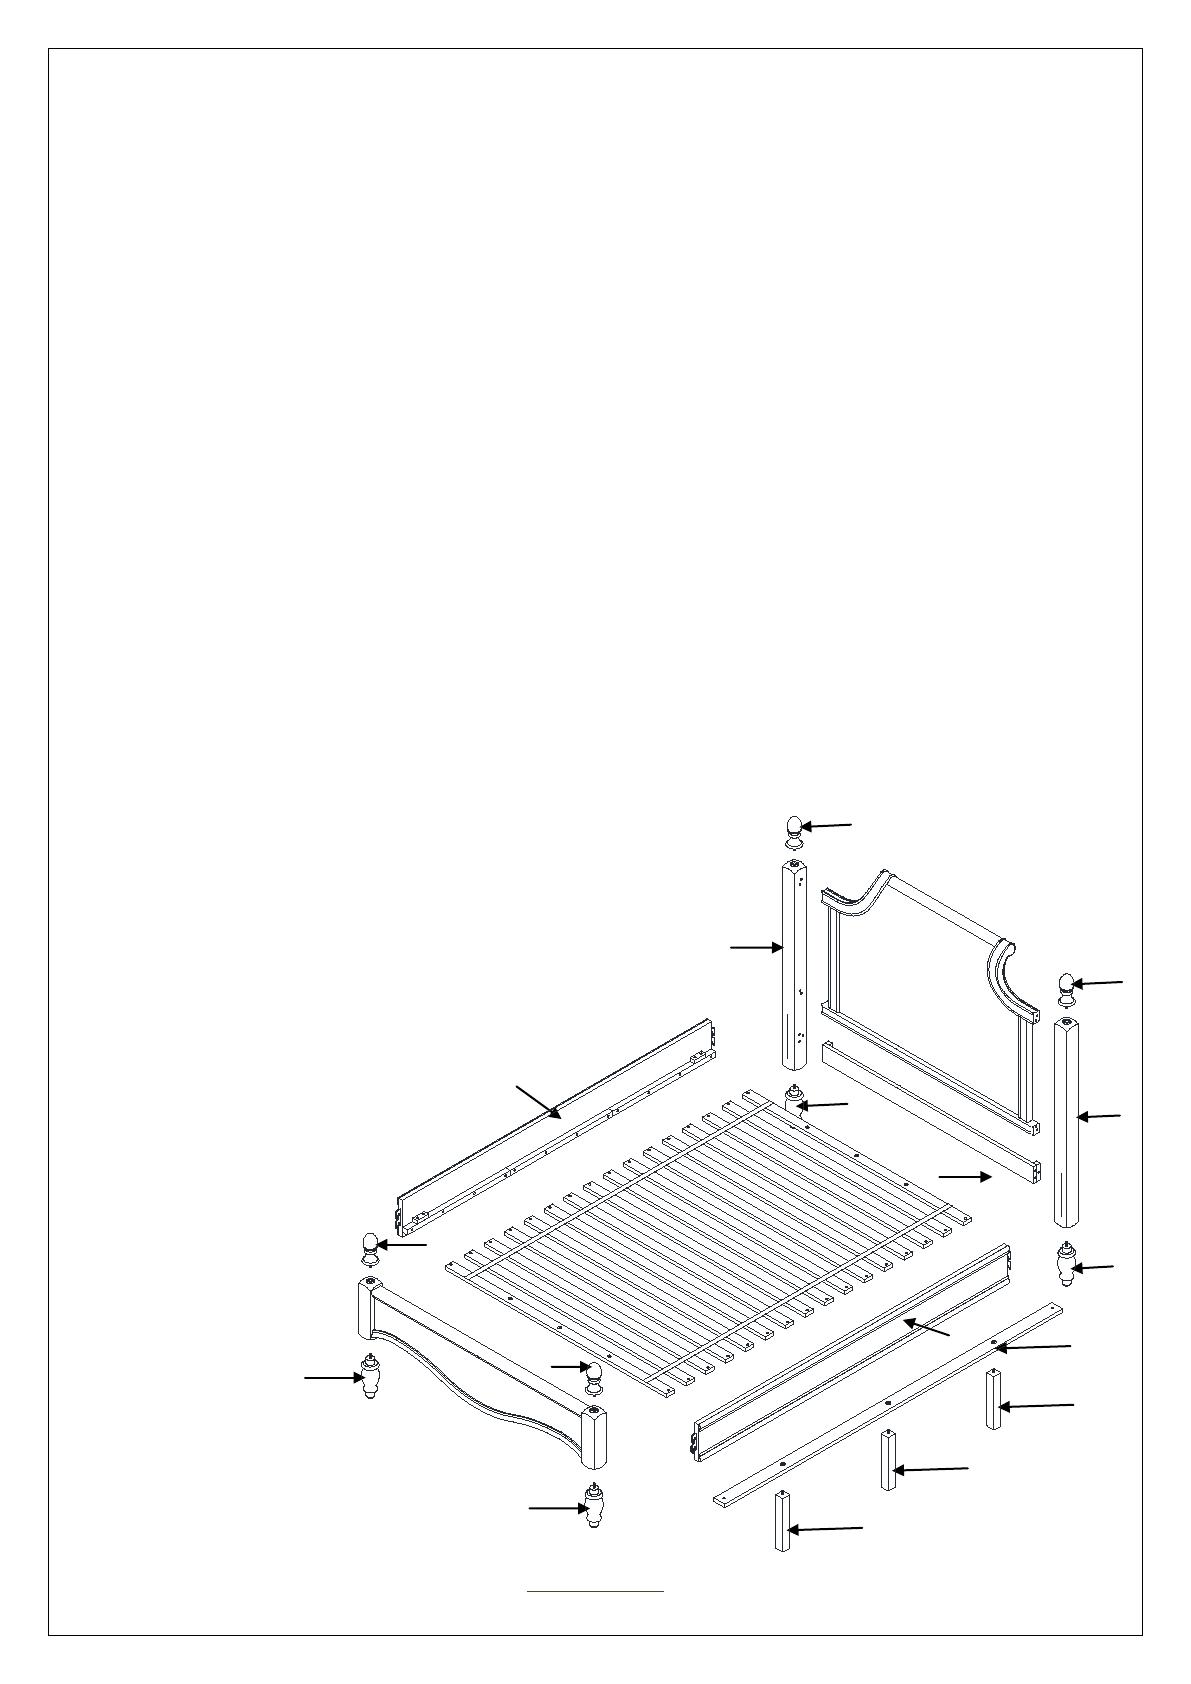
PARTS INCLUDED:
(A) Headboard Panel - 1 x
(B) Footboard - 1 x
(C) Side Rail - 2 x
(D) Slat Roll - 1 x
(E) Left Headboard Post - 1 x
(F) Right Headboard Post - 1 x
(G) Stretcher - 1 x
(H) Bun feet - 4 x
(I) Finial - 4 x
(J) Support Rail - 1 x
(K) Support Leg - 3 x


