What is a room thermostat?
A room thermostat simply switches the heating
system on and off as necessary. It works by sens-
ing the air temperature, switching on the heating
when the air temperature falls below the thermo-
stat setting, and switching it off once this set
temperature has been reached.
Turning a room thermostat to a higher setting will
not make the room heat up any faster. How
quickly the room heats up depends on the design
of the heating system, for example, the size of
boiler and radiators.
Neither does the setting affect how quickly the
room cools down. Turning a room thermostat to a
lower setting will result in the room being con-
trolled at a lower temperature, and saves energy.
The heating system will not work if a time switch
or programmer has switched it off.
The way to set and use your room thermostat is
to find the lowest temperature setting that you
are comfortable with, and then leave it alone to
do its job. The best way to do this is to set the
room thermostat to a low temperature, at say
18°C and then turn it up by one degree each day
until you are comfortable with the temperature.
You won’t have to adjust the thermostat further.
Any adjustment above this setting may waste
energy.
If your heating system is a boiler with radiators,
there will usually be only one room thermostat to
control the whole house. But you can have differ-
ent temperatures in individual rooms by installing
thermostatic radiator valves (TRVs) on individual
radiators. If you don’t have TRVs, you should
choose a temperature that is reasonable for the
whole house. If you do have TRVs, you can
choose a slightly higher setting to make sure that
even the coldest room is comfortable, then pre-
vent any overheating in other rooms by adjusting
the TRVs.
Room thermostats need a free flow of air to
sense the temperature, so they must not be cov-
ered by curtains or blocked by furniture. Nearby
fires, televisions, wall or table lamps may prevent
the thermostat from working properly.
temperature.
temperature.
adjusted 'SET' is shown.
symbol.
FEATURES
The Digistat RF room thermostat has the following
user settings:
• Required room temperature (temperature set-
point)
• Preset temperature setting - Advanced feature
• Minimum & Maximum temperature settings -
Advanced feature
Simple Setting or Operating
To set the required room temperature
• The display normally shows the current room
temperature to within 0.5°C
• To adjust the required temperature, turn the
dial clockwise to increase or anti-clockwise to
decrease, (1 click = 1°C), the LCD will display
the temperature setpoint as it is being adjusted
and ‘SET’ will be displayed. After a few seconds
the display will return to normal operation and
will display the actual room temperature.
While adjusting the temperature during normal
operation, when you reach the maximum or
minimum possible setting the display will flash to
indicate you cannot adjust the product further.
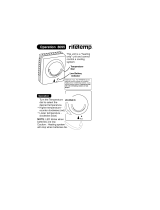
DIGISTAT ROOM THERMOSTAT
GENERAL INFORMATION
DT20RF PROGRAMMER
INSTRUCTION MANUAL
8 716 115 495a (02.2009)
OPERATING & INSTALLATION
INSTRUCTIONS
3