Page is loading ...

English

Notice
1. Do not drop, puncture or disassemble the camera.
2. Remove batteries during long periods between use.
3. Avoid all contact with water and dry hands before using.
4. Do not expose the camera to high temperature or leave it
in direct sunlight.
5. Avoid pressing hard on the camera body.
Notice

Identifying your camera parts
Preparing Your Camera
Installing batteries
Inserting CF card (Optional)
Attaching strap (Optional)
Using tripod (Optional)
How to hold your camera
Using Your Camera
Turning on/off your camera
Recording AVI movies
Taking pictures
Playback
Deleting a single picture
Voice recording
Self-Timer
Setting
Exporting to TV
1.Connecting your camera to your TV
2.Previewing and playback on TV
Copying Pictures to Your Computer
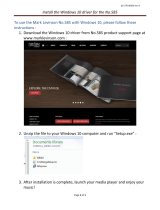
1.Installing the driver and application
2.Connecting your camera to your computer
3.Copying pictures to your computer
4.Viewing pictures on your computer
Using PC Camera (Video Conferencing) Function
1.Installing the driver and application
2.Connecting your camera to your computer
3.Open PC Camera (Video Conferencing) interface
4.Using your PC Camera
Additional Information
Battery indication and reduce power consumption
Storage capacity
Tips for best shoot
Language reference table
Troubleshooting
Specification
AIPTEK Service
Contents
Content
Content
2
3
5
13
15
22
29
37
1

Identifying your camera parts
Identifying your camera parts
Shutter button
Record button
Up button
Down button
MENU/OK button (Power button)
USB port
AV-out port
CF Card slot
Eject ( CF Card)
LED light
LCD display
View finder
LCD on/ off button
Strap-holder
Focus
Lens
Microphone
Mirror
Tripod port
Battery cover
Speaker
2

Installing Batteries
Your camera runs on two AA alkaline batteries. High
performance batteries are recommended for this camera
for maximum battery life.
In addition to 16MB (128Mbits) built-in flash memory, your
camera can store data on Compact Flash Card (8MB-
512MB). Insert your CF Card as shown. Files will be
automatically stored on the CF Card after you've inserted
the CF Card.
Do not eject CF Card while the camera is processing
data.
Inserting CF card (Optional)
Preparing Your Camera
Preparing Your Camera
3
EJECT
C
F
C
A
R
D

Attach the carrying strap for convenience and safety.
Attaching strap (Optional)
Preparing Your Camera
Use a tripod to minimize camera
movement and ensure optimal
image quality, especially while
shooting longer movies, self-
portraits or video conferencing.
Using tripod (Optional)
How to hold your camera
Do not cover the lens.
Microphone
Do not cover the microphone.
20cm~40cm
4

Opening LCD panel
Press and hold the MENU/OK button for 3 seconds to
turn on your camera.
Snap the LCD panel to the camera body and the
camera will be turned off.
Press the MENU/OK button for 3 seconds.
Your camera will automatically shut off after 60
seconds of inactivity. To turn on your camera,
press the MENU/OK button for 3 seconds.
Open the LCD panel. The LCD display and camera will be
turned on. Be careful not to over extend the panel.
1
1
Follow either of the two methods to turn on your camera.
Follow either of the two methods to turn off your camera.
Using MENU/OK button
2
22
Using Your Camera
Using Your Camera
Turning on your camera
Turning off your camera
5
o
90
o
90

(1) Press and release the Record button to record.
(2) Flashing LED light indicates recording in progress.
(3) Press and release the Record button again to stop
recording.
00:00:01
Second
Minute
Hour
REC
Recording.........
Recording AVI movies
Using Your Camera
Taking Pictures
Zoom In/ Zoom Out
Set focus
Set focus before taking pictures.
1
2
12"~16" (30cm~40cm)
16"~ (40cm~ )
Zoom in: Press the Up button up to zoom in image.
Zoom out: Press the Down button down to zoom out.
(1) Press the Shutter button.
(2) After LED light stops, image is successfully captured.
Taking still pictures
3
6
Record button
VIDEO
Shutter button

Playback
1
2
Entering MENU
Press and release the MENU/OK
button to show MENU.
Selecting mode
Press the Up or Down button to
highlight . Then press the
MENU/OK button again to select
Playback mode.
After selecting Playback mode,
you enter thumbnail mode. Press
the Up or Down button to shift
between thumbnails.
Playing back the file
Press the MENU/OK button to
playback files.
Selecting a thumbnail
Stopping playback
Press the MENU/OK button again to stop playback and
return to thumbnail mode.
Returning to preview mode
To return to LCD preview mode from thumbnail mode,
press the Record button.
6
Using Your Camera
MENU/OK button
Exit MENU
Playback
Voice REC
Self-Timer
Setting
M E N U
AVI
WAV
Thumbnail mode
Full Screen
JPEG
7
If you want to play another files, please repeat
the steps from to . Or stay at step ,
and press the Up button to playback the
previous file or press the Down button to
playback the next file.
Record button
VIDEO

AVI
Thumbnail mode
AVI
WAVWAVWAVWAV
JPEG
Deleting a single picture
Press the Shutter button.
Press the Shutter button
again and the file will be
erased.
Select a thumbnail.
AVIAVIAVI
WAVWAVWAV
Shutter
2
In Playback mode (see Playback section for details),
you can delete a single file.
Situation 1 : When you are in thumbnail mode
Situation 2 : When you are in full screen mode
Using Your Camera
Shutter
Playback in full screen.
1
Show recycle bin.
Show recycle bin.
If you don't press the Shutter button again within 5
seconds, the camera will return to step and
delete nothing.
xxxx
Press the Shutter button.
Press the Shutter button
again and the file will be
erased.
Shutter
2
Shutter
If you don't press the Shutter
button again within 5 seconds,
the camera will return to step
and delete nothing.
xxxx
8
Full Screen mode

Voice Recording
1
2
Entering MENU
Press and release the MENU/OK
button to show MENU.
Voice recording
(1) Press the Up or Down button to highlight and
press the MENU/OK button to start voice recording.
Using Your Camera
Exit MENU
Playback
Voice REC
Self-Timer
Setting
M E N U
(2) LED light indicates voice is being recorded.
(3) Speak directly into the microphone.
Microphone
(4) Press the MENU/OK button to
stop voice recording.
9
MENU/OK button
MENU/OK button

(1) Press the Up or Down button to highlight .
(2) Press the MENU/OK button to select .
Self Timer
1
2
Entering MENU
Self-Timer
Press and release the MENU/OK
button to show MENU.
Using Your Camera
10
Exit MENU
Playback
Voice REC
Self-Timer
Setting
M E N U
(3) Press the Shutter button.
(4) Counter will count down from ten to zero and take the
picture.
Shutter button
10
MENU/OK button

Press the Up or Down button to highlight .
Then press the MENU/OK button again to select Setting
mode.
Setting
1
2
3
Entering MENU
Press and release the MENU/OK
button to show MENU.
Selecting mode
Changing the Setting
Press the Up or Down button to shift between modes.
Then press the MENU/OK button to select mode.
Exit MENU
Playback
Voice REC
Self-Timer
Setting
M E N U
SETTING
SETTING
Exit
Display
Size
Delete All
Quality
Format
Language
Setting Mode ( Page 1)
Setting Mode ( Page 2)
Using Your Camera
11
MENU/OK button

DELETE ALL
SIZE
FORMAT
QUALITY
LANGUAGE
DISPLAY
YES
DEUTSCH
OFF
Item
Description
Delete all still pictures, AVI movies and audio files from your camera.
Turn on/ off the status shown on the LCD.
Format the memory of CF Card and clear all data from the memory.
Larger size indicates clearer image.
Select 2048x1536 or 1600x1200 when you want to develop 4x6 photo size.
And select 1280x1024 to develop 3x5 photo size.
Select Fine, if you want to develop pictures.
Select Standard, if you only need to view pictures on PC.
Multi-lingual LCD supports English and German.
See the Language Reference Table section for French, Italian, Spanish, Netherlands
and Portuguese language reference.
The description for Setting item
Using Your Camera
12
NO
YES
NO
2048x1536
1600x1200
1280x1024
Fine
Standard
ENGLISH
ON
Setting

Audio Video
Connect your camera and TV via A/V out cable for real time
display. You can export your video, still pictures and audio
directly to your TV or VCR to share them with friends and
family.
Turn on your TV and select AV-in mode.
Please plug in Video and Audio AV cable to your TV.
Plug in the camera.
Turn on the camera.
Connecting your camera to your TV
1
3
2
4
Exporting to TV
Exporting to TV
13

With few steps, you can take pictures, record AVI
Movies and playback files on TV.
Press the Shutter button
to take a still picture
Exit MENU
Playback
Voice REC
Self-Timer
Setting
M E N U
More functions are available when images export to
TV. For more details, please see the Using Your
Camera section.
Previewing and playback on TV
Exporting to TV
14
Press the MENU/OK
button to enter MENU.
Then select Playback
mode to playback image.
Press the Record button
to take AVI Movies. Then
Press it again to stop
recording.

Turn on your computer.
Do not connect your USB Cable to your computer
in this step.
Turn off the application programs running on your
computer.
Place the accessory CD into the CD-ROM drive.
The title appears in a few seconds.
MS XP users can skip this step and go to step .
directly if you don't use PC Camera function.
Installing the driver and application
You need to install DV 3100 Driver before your camera
connects to your computer at the first time. Please follow
the steps to complete the installation.
Copying pictures to your computer
Copying pictures to your computer
If no title appears on screen
Double-click the icon "My computer".
Double-click the icon CD-ROM ("DV3100 (E:)*")
*The CD-ROM driver varies, depending on how your computer
is set up.
Move the cursor to "DV 3100 Driver" and click on it.
Click on the item "DV 3100 Driver".
15

The "Install Shield Wizard" appears and automatically
installs the program. When Fig 1 appears, please click
"Next".
When Fig 2 appears, please click "Yes" or "No"
according to your circumstance:
5
Notice for Windows 2000 users
1.The checkbox "Digital Signature Not Found" might
appear twice, please simply click "Yes". This camera
works perfectly for Windows 2000 operation system.
Copying pictures to your computer
1. If you are not a Windows XP user and never install
DirectX 8.0 or above, please click "Yes".
2. If you are a Windows XP user or you have already
installed DirectX 8.0 or above, please click "No".
2.Then, follow the on-screen instructions and click
"Finish".
Don't restart your computer in this step.
Fig 2
Fig 1
16

Copying pictures to your computer
Remove the CD from the
CD-ROM driver.
1. Turn on your computer.
2. Connect the USB cable to the USB port of the computer.
Connecting your camera to computer
3.Connect the other end of the USB cable to your camera.
The driver is available for use after your computer is
restarted.
6
When Fig 3 or Fig 4 appears, please click "Finish" or
"OK" to complete the program installation.
Fig 3
Fig4
17
Slim 1.3

Copying pictures to your computer
Windows XP users
Windows 2000/ME/98SE users
After your camera is connected to your computer, Fig 5
will appear automatically. Please select "Open folder
to view files using Windows Explorer" item and click
"OK".
Double-click the icon "My Computer"
Copying pictures to your computer
Then double-click the icon "Removable Disk" to
identify the new drive.
Fig 5
18
/