Page is loading ...

23801 E. La Palma Ave., Yorba Linda, Ca 92887 Ph. 714.692.8180 Fax. 714.692.5016
www.cobrausa.com
12/03
*
Cobra recommends you always wear a helmet while ridi
ng. Please never operate your motorcycle while under
the influence of alcohol and/or drugs. Enjoy the new look of your motorcycle and please ride safely.
Items Supplied >
1
-
Swing Arm Skid Plate
4 - Bolt, Hex M8 x 20mm W/Patch
Application(s) >
HONDA TRX400EX
Instruction Manual >
Read your
installation instructions completely before beginning.
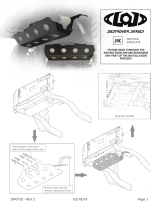
1. Remove the four M8 bolts from the stock swingarm protector. Remove the swingarm protector
and wipe clean any dirt or debree from the area were the swingarm skidplate will mount.
2. Install the new Cobra swingarm skidplate under the swingarm with the M8 bolts provided.
3. Torque all bolts to appropriate values.
4. Recheck for loose bolts periodically and tighten as needed.
50
-
1105
DOCUMENT NO
. 0019
REV. A
23801 E. La Palma Ave., Yorba Linda, Ca 92887 Ph. 714.692.8180 Fax. 714.692.5016
www.cobrausa.com
12/03
*
Cobra recommends you always wear a helmet while riding. Please never operate your motorcycle while under
the influence of alcohol and/or drugs. Enjoy the new look of your motorcycle and please ride safely.
Items Supplied >
1
-
Swing Arm Skid Plate
4 - Bolt, Hex M8 x 20mm W/Patch
Application(s) >
HONDA TRX400EX
Instruction Manual >
Read your installation instructions completely before b
eginning.
1. Remove the four M8 bolts from the stock swingarm protector. Remove the swingarm protector
and wipe clean any dirt or debree from the area were the swingarm skidplate will mount.
2. Install the new Cobra swingarm skidplate under the swingarm with the M8 bolts provided.
3. Torque all bolts to appropriate values.
4. Recheck for loose bolts periodically and tighten as needed.
50
-
1105
DOCUMENT NO
. 0019
R
EV. A
/

