Numark CDN-88 User manual

Category
CD players
Type
User manual

This manual is also suitable for

3
BOX CONTENTS
CDN88 MP3 CD player transport unit
CDN88 MP3 CD player control unit
Power cable
RCA cables (2 pair)
2 control cables
2 fader start cables
Quickstart Guide
Reference Manual
Safety & Warranty Information Booklet
REGISTRATION
Please go to http://www.numark.com to register your CDN88 MP3. Registering your product ensures that we can keep you
up-to-date with any new product developments and provide you with world-class technical support, should you run into any
problems.
GROUND RULES
1. Make sure all items listed in the BOX CONTENTS section are included in the box.
2. READ SAFETY & WARRANTY INFORMATION BOOKLET BEFORE USING THE PRODUCT.
3. Study the connection diagram in this guide.
4. Place mixer in an appropriate position for operation.
5. Make sure all devices are turned off and all faders and gain knobs are set to “zero.”
6. Connect all stereo input sources as indicated in the diagram.
7. Connect the stereo outputs to power amplifier(s), tape decks, and/or other audio sources.
8. Plug all devices into AC power.
9. Switch everything on in the following order:
Audio input sources (i.e. turntables, CD players, etc.)
Mixer
Last, any amplifiers or output devices
10. When turning off, always reverse this operation by:
Turning off amplifiers
Mixer
Last, any input devices
CONNECTION DIAGRAM
4
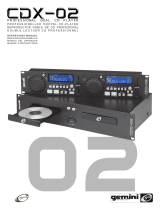
FRONT PANEL FEATURES
1. PLAY / STUTTER – To start the music from the initial cue point.
2. PAUSE To pause the music.
3. CUE To move the music to the cue point and preview the
selection.
4. JOG WHEEL Used for various functions such as cueing,
scratching, pitch bend, searching, and effect control.
5. LCD Indicates all the functions, as they are occurring, with the CD.
6. EJECT – Pressing will open or close the disc tray on the transport.
7. SNGL – To set play mode in single or continuous play.
8. TIME – Switches the time display between elapsed playing time and remaining time on the track and remaining time on
the entire CD.
9. PROGRAM – Used for setting track order and various special commands. Depress this button and the unit will stop and
the program indicator will light. Select each track to be programmed and press the PROGRAM button between
selections. You can program up to 30 tracks. Press PLAY to start the program. To exit and erase program, either hold
the program button down for more than 2 seconds while the unit is stopped, open the disc tray, or turn off the power.
10. TRACK SELECT / SEARCH –
y Rotation – selects tracks
y Pressing while rotating – selects tracks +10
y Pressing once - Puts JOG WHEEL in Search Mode.
11. KEY LOCK – While Key Lock is enabled, adjusting the pitch of the music playing on the deck will only influence its
tempo independent of its musical pitch.
12. PITCH RANGE – Activates and sets PITCH SLIDER range.
13. – /+ Works as pitch bend and controls key and pitch functions.
14. PITCH SLIDER – The pitch can be changed by pressing the PITCH button so a PITCH LED is lit, then moving the
sliding fader. The pitch will not be changed if the PITCH LED is off.
15. PITCH RANGE LED – Indicates current pitch range of the PITCH SLIDER.
16. EFFECT BUTTON – Used to determine desired effect.
17. EFFECT HOLD – Used to set effect buttons to an alternate position.
18. LOOP IN – Used for setting a start loop point and new cue points during playback.
19. LOOP OUT – Used for setting the end loop point and releasing the loop action.
20. RELOOP – Used for either repeating a previously set loop or seamlessly stuttering on the last set cue point.
21. AUTO START – Used for setting alternating play start (relay play) between attached units.
22. TAP – Tap this button in time with the beats of the music on that deck. This will enter a new BPM ("beats per minute")
reading for that track. Tap this button once only to reset the downbeat of the music at that point without entering a new
BPM. Holding the button for 4 seconds will cause the BPM counter to reset and recalculate.
23. MARCHING BAR GRAPH – Tracks the beats and measure position of music.
24. INTERLOCK – Links both players for beat alignment.
Note
:
When playing MP3 CDs, CDN88
MP3 will display all MP3s on that disc by
their file names and in a single list (i.e., not
in their folders/subfolders). When creating
an MP3 CD for use with CDN88 MP3, we
recommend placing them in only one folder
on the disc and properly naming the files.
5
CD PLAYER & REAR PANEL FEATURES
25. CD DRAWER – Place your CDs you wish to play in here. This unit is designed to play commercially available CDs, MP3
CDs and properly burned and finalized CD-Rs. Due to variances on the specification of certain CD burners and CDs,
some homemade CDs may not play properly. We recommend burning CDs at the minimum speed possible for the best
performance.
26. EJECT Pressing will open or close the disc tray on the transport.
27. POWER SWITCH Turn the machine on and off with this button. The unit should always be shut down with this button
first before any external power is removed. Typically it is recommended that the CD player is powered on before
amplifiers and powered off after amplifiers.
28. IEC POWER PLUG CONNECTOR Plug your supplied power cord in here.
29. CONTROL CABLE CONNECTOR – Plug in the 8-pin cable included in here to connect the remote control and main CD
unit together.
30. RCA AUDIO CONNECTORS Connect your CD player to your mixer from this line level output.
31. REMOTE START CONNECTOR – Use this connector to plug into your fader start compatible mixer or remote switch.
This function is always active.
y To use this connector for fader start, connect a fader start cable to a fader start-compatible mixer. Every time you
move the crossfader on the mixer over to the side that the unit is on, it will automatically start playing. When you
move the fader away from that side, the unit will stop. Moving the fader back to the unit side will start play again.
y Foot switches can also be attached to this jack for creative mixing techniques and can be found in most music
shops. Connector plugs are often 1/4” and an adapter to 1/8” will be needed for connection. There are also two
types of footswitches that will work with this connector. The first is a typical, on/off pushbutton switch and are
generally used for switching channels on guitar amps. The second switch is a momentary footswitch and is
usually used for keyboard sustain pedals.
SPECIFICATIONS
DISC TYPE: Redbook CD, CD-R, CD-RW, MP3 CD
TIME DISPLAY: Track Elapsed, Track Remaining, Total Remaining
QUANTIZATION: 1-bit linear/channel, 3 beam laser
OVERSAMPLING RATE: 8 times
SAMPLING FREQUENCY: 88.2 kHz
FREQ RESPONSE: 20 Hz – 20 kHz
THD+N: < 0.005%
SNR (IHF-A): > 82 dB
DYNAMIC RANGE: > 80 dB
OUTPUT LEVEL: 1.2 V RMS
START TIME: <
0.006 seconds
PITCH CONTROL RANGE: ± 6, 12, 25, or 100%
PITCH BEND: ± 50% rotary; ± 16% buttons
DIMENSIONS: Controller: 482 mm x 132 mm x 42 mm
Main Unit: 482 mm x 88.5 mm x 316 mm
WEIGHT: Controller: 1.9 kg
Main Unit: 6.5 kg
MAXIMUM TILT ANGLE: 15º
POWER SUPPLY: 100-240 V AC, 50/60 Hz
POWER CONSUMPTION: 36 W
*Specifications are subject to change
www.numark.com
MANUAL VERSION 1.1
  • Page 1 1
  • Page 2 2
  • Page 3 3
  • Page 4 4
  • Page 5 5
  • Page 6 6
  • Page 7 7
  • Page 8 8
  • Page 9 9
  • Page 10 10
  • Page 11 11
  • Page 12 12
  • Page 13 13
  • Page 14 14
  • Page 15 15
  • Page 16 16
  • Page 17 17
  • Page 18 18
  • Page 19 19
  • Page 20 20

Numark CDN-88 User manual

Category
CD players
Type
User manual
This manual is also suitable for

Ask a question and I''ll find the answer in the document

Finding information in a document is now easier with AI