Page is loading ...

Introduction
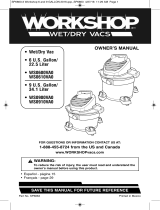
This Wet/Dry Vac with Detachable Blower
is intended for household use. It may be
used for vacuuming wet or dry media and
may be used as a blower.
Read this owner’s manual to familiarize
yourself with the product features and to
understand the specific usage of your
new Vac.
Unpacking and Checking Carton Contents
Carton Contents List
Key Description Qty
A Wet/Dry Vac . . . . . . . . . . . . . . . . . 1
B Accessory Storage Holder . . . . . . 1
C Extension Wands . . . . . . . . . . . . . 2
D Qwik Lock™ Filter. . . . . . . . . . . . . 1
E Hose . . . . . . . . . . . . . . . . . . . . . . . 1
F Caster Feet . . . . . . . . . . . . . . . . . 2
G Caster Feet with Storage . . . . . . . 2
H #10 x 1-3/4” screws . . . . . . . . . . . 4
I Caster Wheel . . . . . . . . . . . . . . . . 4
J Car Nozzle . . . . . . . . . . . . . . . . . . 1
K Utility Nozzle . . . . . . . . . . . . . . . . . 1
L Wet Nozzle . . . . . . . . . . . . . . . . . . 1
M Blower Wand. . . . . . . . . . . . . . . . . 1
N Owner’s Manual . . . . . . . . . . . . . . 1
A
B
C
F
E
D
G
H
J
K
L
M
N
I
Remove contents of carton. Check each
item against the Carton Contents List.
Call 1-800-4-RIDGID (1-800-474-3443)
from the US & Canada, 01-800-701-9811
from Mexico, or E-mail us at
[email protected] if any parts are
damaged or missing.
SP6779-1 Ridgid WD1680 12/21/10 4:07 PM Page 4

Filter Removal and Installation
NOTE: Failure to properly seat the
bottom gasket could result in debris
bypassing the filter.
Qwik
Lock™ Stud
Filter
Tabs (2)
Integrated Filter
Plate with Center
Hole
PUSH
DOWN
PULL
UP
Rubber
Gasket at
Bottom of
Filter
(cutaway
view)
Float
Lid
Filter
Cage
Removal and Installation
of the Qwik Lock™ Filter
Filter Removal:
1. Hold the filter tabs of the Qwik Lock™
filter in each hand.
2. With one thumb on the Qwik Lock™
stud, which protrudes through the
integrated filter plate, lift up on the filter
tabs while pushing down on the stud.
3. This action will cause the filter to
release from the filter cage. Slide filter
off cage.
Filter Installation:
1. Carefully slide the Qwik Lock™ filter
over the filter cage and press down on
the outside edge of the filter until the
rubber gasket on the bottom of the filter
seats securely around the base of the
filter cage and against the lid.
2. Align the small center hole in the top of
the filter over the Qwik Lock™ stud on
the filter cage. Press firmly on top of
the filter near the stud to allow the filter
to snap over the ball on the end of the
stud. The filter is now attached.
SP6779-1 Ridgid WD1680 12/21/10 4:07 PM Page 5

If any parts are missing or damaged
contact Customer Service.
Do not assemble until you have all the
parts.
1. Insert the front and rear caster feet into
the bottom of drum as shown. Light
taps with a mallet or hammer may be
needed to fully seat both caster feet.
2.
Install (4) #10 x 1-3/4” screws into
matching holes on both front and rear
caster feet, securing them to the
bottom of the drum. Tighten screws
until just snug. Do not over tighten as
this may tend to deform the caster feet.
3. Insert the caster stem into each of the
caster feet, as shown.
4. Push on the caster until the ball on the
caster stem is inserted all the way into
the socket. You will be able to hear the
ball snap into the socket and the caster
will swivel easily when positioning is
correct.
Drum/Caster Foot Assembly
Rear
Caster
Foot
Drain
Front
Caster
Foot
Drum
Front
Caster
Foot
Drain
#10 x 1-3/4"
Screw (4)
Rear
Caster
Foot
Socket
Caster Stem
Caster Ball
SP6779-1 Ridgid WD1680 12/21/10 4:07 PM Page 6

Accessory
Storage
Holder
Accessory
Holder
Receptacles
Accessory Storage
Holder Clips
Accessory
Holder
Receptacles
Accessory
Storage
Holder
Accessory Storage
Holder Clips
Installing Accessory Storage
Holder
1. Position rods of accessory storage
holder directly over accessory rod
receptacles in dust drum.
2. Slide accessory storage holder into
accessory rod receptacles until fully
seated with holder clips locked.
Accessory Storage Holder
Removing Accessory Storage
Holder
Push in both accessory storage holder
clips and then pull straight up on rods of
accessory storage holder.
Cord
Wrap
Detachable
Blower
Power
Cord
Cord Swivel
Accessory Storage
Your accessory storage holder has been
designed to hold all the accessories
included with your vac. The accessories
and hose should be stored as shown.
NOTE: Insert female end of extension
wand into the holder sleeve as shown.
Accessory
Storage
Holder
Accessories
Cord Wrap
When vacuuming is complete, unplug the
cord and wrap it around the detachable
blower as shown.
SP6779-1 Ridgid WD1680 12/21/10 4:07 PM Page 7

Wet/Dry Vac Assembly
Vacuum
Inlet
Detachable
Blower
Handle
Lid Assembly with
Detachable Blower
Drum Latch
Drum Catch
Inlet
Drain Cap
Dust Drum
Assembly
1. Locate the lid assembly and the drum
assembly (assembled earlier).
2. Position the lid assembly with the
detachable blower handle of the unit
located above the vacuum inlet on the
dust drum.
3. To assemble the lid assembly to the
drum assembly, lower the lid assembly
onto the dust drum. Rotate both
latches down until you hear them snap
over the drum latch catches of the
drum.
SP6779-1 Ridgid WD1680 12/21/10 4:07 PM Page 8

Positioning Detachable Blower
(Power Head Assembly)
Release
Button
Press and Pull
1. To remove the detachable blower from
the lid assembly, press down on the
detachable blower latch under the
detachable blower handle and lift the
blower off the lid of the Vac.
Detachable
Blower Handle
Detachable
Blower
Latch
3. Lightly press down on the carry handle
of the detachable blower until you
hear the “snap” of the detachable
blower latch engaging the detachable
blower. The detachable blower is now
latched to the lid assembly.
4. Your new Wet/Dry Vac is ready for
use. With the Wet/Dry Vac completely
assembled and ready for use, insert
the push button end of the “Tug-a-
Long” hose into the inlet of the Vac.
The hose should snap into place. To
remove the hose from the Vac, press
the release button in the hose
assembly and pull the hose out of the
Vac inlet, as shown.
Detachable
Blower
Molded
Leads
2. To replace the detachable blower onto
the lid assembly, position detachable
blower above the indented area of the
lid assembly. Rotate the detachable
blower down until the travel of the unit
stops.
Detachable
Blower
Detachable
Blower Latch
SP6779-1 Ridgid WD1680 12/21/10 4:07 PM Page 9
/