- 2 -
Care & Instrucions - Simplicity by STRASSER WOODENWORKS
www.simplicitybystrasser.com (800) 445-0494 Crafted in USA to Last a Lifetime
CAUTION! Remove Doors and Drawers
Always remove drawers and doors from your cabinets during installation and
store them away from the work area. This will make your cabinets lighter, easier to
move and position, and safer to handle. Drawers and doors open unexpectedly and
unbalance the cabinet while you are moving it, causing personal injury or damage
to your cabinet. Plus, drawer and door faces will be protected from damage during
installation if stored away from your project.
Damage caused during installation is not covered by warranty.
Installing Simplicity Vanities
The key to a good installation of a vanity ensemble is to understand that walls and
floors are never exactly level, plumb, or square.
Securing a vanity or ensemble to your walls is important. However, forcing a square
cabinet to fit against not-so-square walls will distort the cabinet frame and cause
drawer and door hardware to mis-align and bind. While our hardware is fully adjustable
to compensate for this visually, the drawers may not open and close smoothly. Never
close gaps by overly tightening the securing screws. Always use shims between the
cabinet and wall and floor where gaps exist before tightening securing screws.
Place your cabinet into approximate position.
If you are installing an ensemble of more than one piece, clamp components together
making sure that they are accurately mated and the top edges are exactly aligned. Drill
pilot holes and screw components together. We recommend four screws per pairing.
Place the vanity or ensemble into it’s exact final position and level. Shim underneath
where necessary.
We recommend screwing to wall studs in at least two positions along the back and
one in the side, if the side is against a wall. Shim where necessary at securing points
between wall and cabinet if the wall is not exactly straight or plumb.
Installing Mirrors
Our Mirror mounting system is easy to use, convenient, and very strong.
1. Determine the desired location of the Mirror and mark the wall, with a pencil, at
top center of the mirror.
2. Measure from the top of the mirror to the holes in the wall half of the mounting
cleat.
3. Measure down the wall that distance from the mark designating mirror top
center. Using a level, mark the positions of the cleat mounting holes.
Screw Cleat wall half to the wall. If you are not familiar with types of screws, load,
or how to do this for your specific application; ask at a home center.
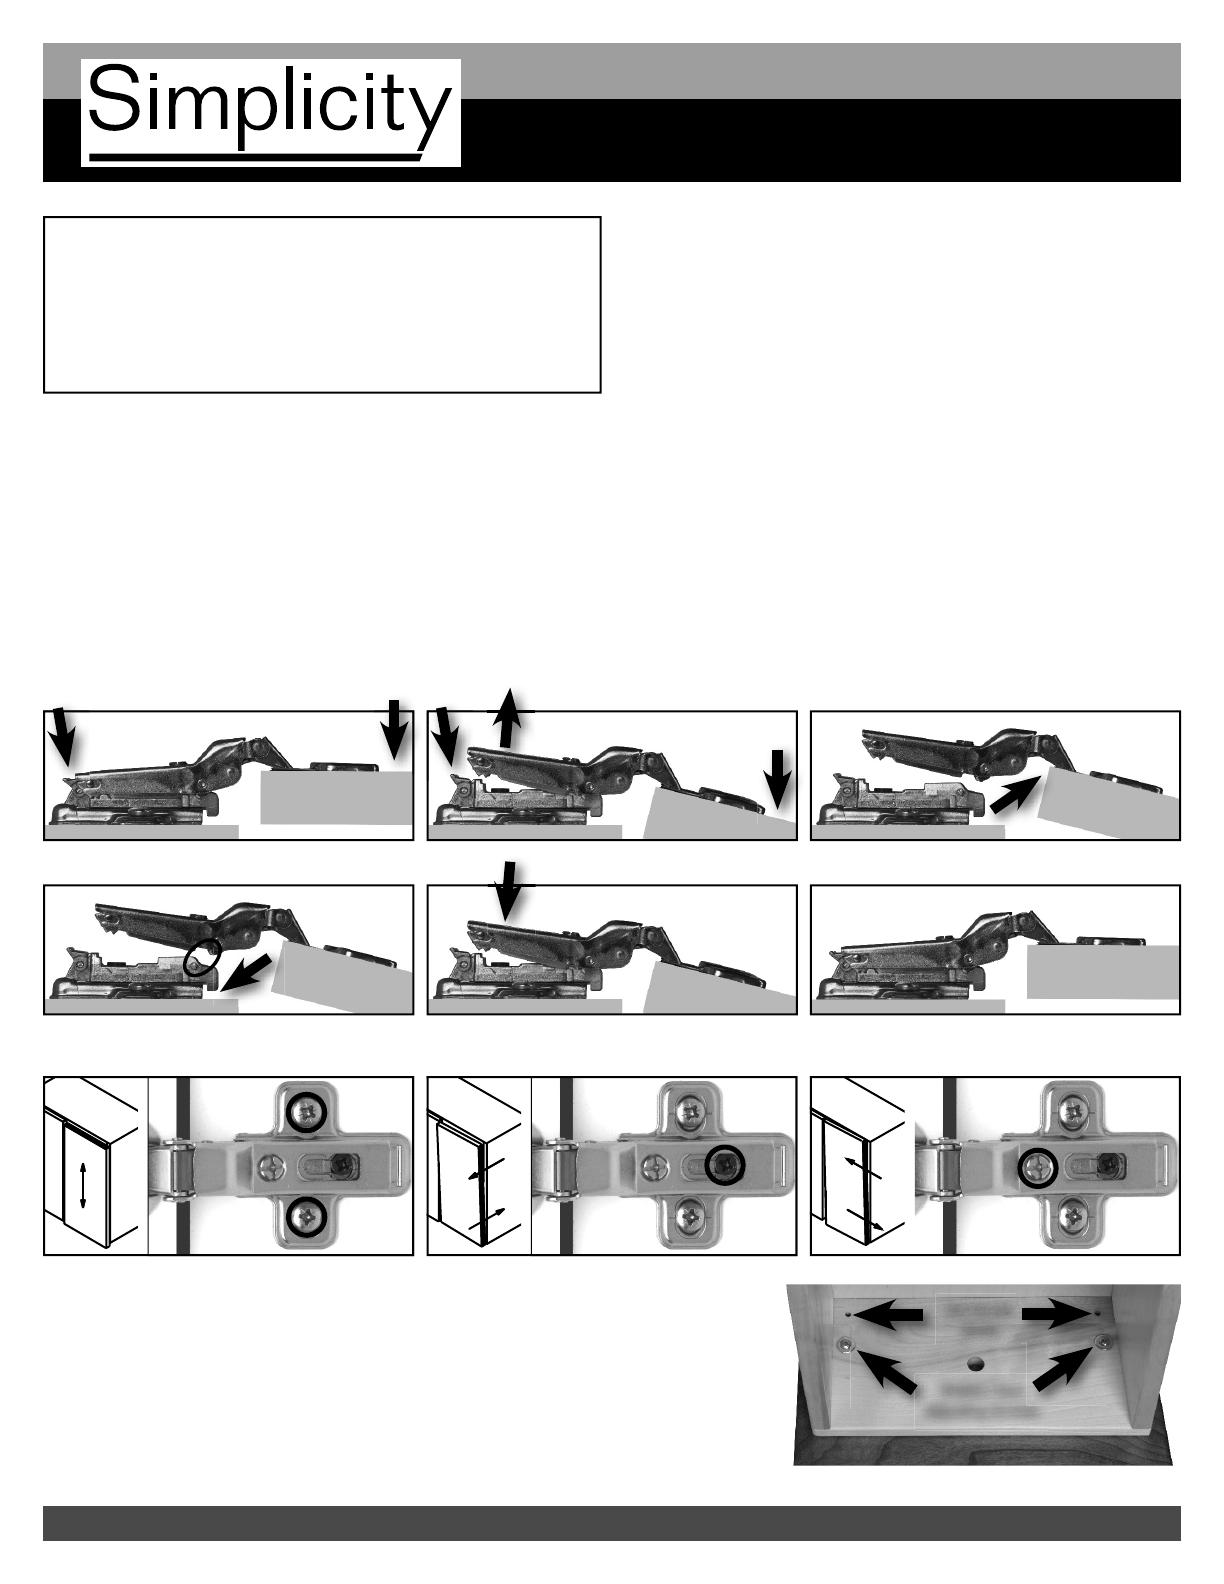
Removing and Re-installing Doors with 6-way Adjustable Hinges
To remove doors, push tab and gently open door beyond natural open position. Once both hinges are disengaged, remove the door.
To re-install doors, line up hinges sliding hooks under pins (oval below). Then push hinges into their receivers until they lock into place.
Adjusting Door Face Alignment
Removing and
Re-installing Drawers
To remove a drawer, simply open completely
while lifting the drawer box to disengage the
drawer box from the cabinet.
To re-install, align the nylon wheels and
drawer guides and insert the drawer.
Adjusting Drawer Face
Alignment
To adjust drawer face alignment loosen the two
indicated screws inside the drawer box slightly and
move the face to the desired position. Once you are
satisfi ed, tighten all of these screws on all drawers.
Finally, screw the provided set screws into the small
holes beneath the adjusting screws to secure the faces
to the drawer boxes.
Drawer Face
Adjusting Screws
Set Screw
Holes
by STRASSER WOODENWORKS


