Hampton Bay KADPK337-MO Installation guide

Type
Installation guide

This manual is also suitable for

DECORATIVE ISLAND PANEL KIT
ASSEMBLY & INSTALLATION INSTRUCTIONS
U180450/0518
KADPK337
Model Number(s):
1
CUTTING PANEL TO SIZE — If a reduced depth is required,
the panel can be cut to size. Measure and cut ¾" shorter than
the desired depth to account for the thickness of the post.
DESIRED DEPTH
DESIRED DEPTH MINUS 3/4"
3/4"
2
ATTACH LEG — Set the leg into place and
temporarily clamp it to the panel. Fasten
at the top and bottom with the provided
screws. Use finish nails to secure it on the
back side.
S8
2x
*
*ACTUAL SIZE
FINISH NAILS
(S8)
(S8)
4
3
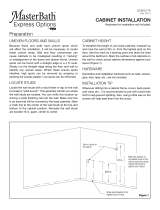
INSTALLING AS A PENINSULA END
1. A cleat is required that will fit under the panel. Fasten the
cleat to the floor in the desired location using a fastening
method appropriate for your floor type.
2. Lower the panel over the cleat and fasten in place using
appropriate fasteners and adhesive.
INSTALLING TO A CABINET — Clamp the
decorative island panel to the cabinet placing
¼" shims in between as shown. A small piece
of toe kick (KATK) works well as a shim. Pre-drill
through the cabinet and shims into the panel.
Secure using #8 x 1½" screws.
CLEAT
  • Page 1 1
  • Page 2 2

Hampton Bay KADPK337-MO Installation guide

Type
Installation guide
This manual is also suitable for

Ask a question and I''ll find the answer in the document

Finding information in a document is now easier with AI