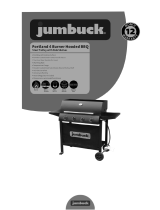
Gasmate Avenir BQ2026KIT Owner's manual

Type
Owner's manual

This manual is also suitable for

The Gasmate Avenir BQ2026KIT, a 6-burner kitchen, offers a spacious cooking area of 960mm x 460mm, allowing you to prepare a variety of dishes simultaneously. Electronic ignition ensures effortless lighting of the stainless steel tubular burners, while the cast iron hotplates and grill provide even heat distribution for your culinary creations. It comes complete with a hose, regulator, and drip tray for easy cleanup.

The Gasmate Avenir BQ2026KIT, a 6-burner kitchen, offers a spacious cooking area of 960mm x 460mm, allowing you to prepare a variety of dishes simultaneously. Electronic ignition ensures effortless lighting of the stainless steel tubular burners, while the cast iron hotplates and grill provide even heat distribution for your culinary creations. It comes complete with a hose, regulator, and drip tray for easy cleanup.

1
Double skinned 201 grade stainless steel roasting
hood with viewing window and temperature gauge
201 grade stainless steel fascia and cabinet doors with
powder coated cabinet trolley
Cast iron hotplates and grill with enamel warming rack
Stainless steel tubular burners lit by electronic ignition
Complete with hose and regulator
Total cooking area (mm): 960W x 460D
Approved to Australian and New Zealand Standards
Important: Retain these instructions for future use.
04207-09/20
Gasmate® is a registered trademark of: Sitro Group Australia Pty Ltd www.gasmate.com.au
Aber Living - Hamilton, N.Z. www.gasmate.co.nz
AVENIR
6 BURNER KITCHEN
Model No. BQ2026KIT
32
GENERAL INFORMATION
Gas Installation Codes
Barbecues must be used in accordance with New
Zealand Standard 5601 “Gas Installations”.
• Barbecues for use with bottled gas are labelled ‘LPG/
ULPG’.
• Barbecues for use with natural gas are labelled ‘natural
gas’ and must be installed by an authorised person.
Check the gas type sticker attached to the barbecue.
Clearances
Minimum Clearances from combustible materials must be:
Rear - 600mm Sides - 600mm Above - 1000mm
Specifications
Barbecue specifications can be found on the data label
attached to the door panel or the barbecue body.
Hose & Regulator Safety
The regulator and hose assembly supplied with the
barbecue are suitable for LPG only. Hose connection
thread is G1/4-19.
A gas regulator adjusted to have an outlet pressure of
2.75kPa is supplied for connection to the LPG cylinder.
The pressure regulator and hose assembly supplied
with the barbecue must be used. Replacement pressure
regulators and hose assemblies must be those specified
by the barbecue manufacturer.
When connecting the hose and regulator assembly to the
gas cylinder, take care to avoid unnecessary twisting of
the flexible hose.
After the assembly has been secured, turn on the gas
and check for leaks by brushing a soap and water
solution over all connections.
If you are unable to correct the leak by tightening the
connections, turn off the gas and contact the supplier
immediately.
Always ensure the barbecue is kept away from flammable
materials and the gas cylinder clear of any heat source.
When changing over from an empty gas cylinder to a
full one make sure this procedure is carried out in a well
ventilated location, preferably outside, away from people
and away from any sources of ignition; such as naked
flames, pilot flames, electric heaters/equipment.
Gas Cylinder Use & Safety
This is a low pressure barbecue and must only be used
with the hose and regulator supplied. Your barbecue is
designed for use with 9Kg LPG cylinders.
The gas cylinder should be filled by a reputable gas
supplier and visually inspected and requalified at each
filling.
Always keep cylinder in an upright position. Always close
the cylinder valve when the barbecue is not in use.
Do not subject gas cylinder to excessive heat.
NEVER STORE YOUR GAS CYLINDER INDOORS.
If you store your barbecue indoors, ALWAYS disconnect
the gas cylinder first and store the cylinder safely outside.
Cylinders must be stored outdoors in a well ventilated
area out of reach of children, and must not be stored in a
building, garage or any other enclosed area.
IMPORTANT
Read these instruction carefully prior to use.
Familiarise yourself with the appliance before
connecting it to it’s gas container. Keep these
instructions for future reference.
If you smell gas
1. Shut off gas to the barbecue at its
source, if possible.
2. Extinguish any open flame.
3. Open hood.
4. If odour continues immediately call your
gas supplier or fire department.
32
FOR YOUR SAFETY
Failure to comply with these instructions could result
in a fire or explosion which could cause serious
bodily injury, death or property damage.
CAUTION: Accessible parts may be very hot.
Keep young children away.
DO NOT modify this appliance.
DO NOT move this barbecue during use.
Turn off gas supply at the gas cylinder after use.
Parts sealed by the manufacturer or their agent must
not be manipulated by the user. This barbecue is
only to be used and stored outdoors.
Never operate this barbecue without a regulator.
Do not test for gas leaks with an open flame.
If this information is not followed exactly a fire
causing death or serious injury may occur. Do
not store a spare gas cylinder under or near this
barbecue. This barbecue is only to be used and
stored outdoors.
If there is a leak on your appliance (smell of gas)
immediately attempt to turn off the cylinder valve.
Remove the appliance to a well ventilated location
away from any ignition source. Only check for
leaks outdoors using soapy water. DO NOT try to
detect leaks using a flame.
Check for leaks by brushing a soap and water
solution over all connections. If you are unable to
correct the leak by tightening the connections,
turn off the gas and contact customer service
immediately.
Only use the hose assembly as supplied with this
appliance for connection to the cylinder -
DO NOT USE ADAPTORS.
After use turn the gas cylinder valve off, wait for
the flame to go out, then turn the appliance control
valve off.
Avoid twisting or kinking the flexible hose.
Do not store or use petrol or other flammable
liquids in the vicinity of this or any other appliance.
Do not store empty or full spare gas cylinders
under or near this or any other appliance.
Never test for gas leaks with a lit match or open
flame. Never light barbecue with hood closed or
before checking to ensure the burner tubes are
fully seated over gas valve orifices.
Never lean over cooking surface when lighting.
Never alter or modify the regulator or gas supply
assembly.
GENERAL INFORMATION
This barbecue must not be used indoors.
Only use in well ventilated areas.
CARBON MONOXIDE HAZARD - USING THIS
APPLIANCE IN AN ENCLOSED SPACE MAY
CAUSE DEATH. DO NOT USE IN CARAVANS,
TENTS, MARINE CRAFT, CARS, MOBILE HOMES
OR SIMILAR LOCATIONS.
This appliance shall only be used in an above
ground open-air situation with natural ventilation,
without stagnant areas, where gas leakage and
products of combustion are rapidly dispersed by
wind and natural convection.
Ensure the barbecue is set up on a level and
stable surface.
Do not move the barbecue while in use or when
hot. Remove the drip tray before moving.
DO NOT replace the grill with an extra hotplate.
The warranty will be voided and it violates the gas
approval, the grill provides the ventilation needed
for the BBQ to operate safely. It is not designed to
be a solid hotplate device.
IF THERE IS A LEAK
Turn the cylinder off.
Ventilate the area to disperse gas.
Check all connections.
If leak persists, keep the cylinder upright. Keep
skin away from any gas or liquid escaping from the
cylinder.
Keep the cylinder at least 20 metres away from
any sparks or ignition sources, including electrical
equipment, camera flashes, engines and motors.
Disperse gas by encouraging maximum ventilation
and spraying with a fine water spray.
IF THERE IS A FIRE
If the fire is at the barbecue, turn the gas off at the
cylinder. Smother the flames with a wet cloth, fire
blanket or extinguish using a fire extinguisher.
If the fire is at the cylinder, or you can not get
to the valve to turn the gas off, contact the fire
brigade immediately.
Using a garden hose, direct the water to the
middle of the cylinder to keep it cool. Try not to
extinguish the flame. At least if the gas is burning,
it won’t be able to build up pressure and explode.
54
GENERAL INFORMATION
Location of your Barbecue
DO NOT use your barbecue in garages, porches,
breezeways, sheds or other enclosed areas. Your
barbecue is to be used OUTDOORS. The barbecue is
not intended to be installed in or on recreational vehicles
and/or boats and should not be placed under any surface
that will burn. Do not obstruct the flow of combustion
and ventilation air around the barbecue housing.
Protect Children
Keep children away from barbecue during use and until
barbecue has cooled after you have finished.Do not allow
children to operate barbecue.
Always ensure that no sporting or physical activities are
carried out in close proximity to the barbecue during use
and while still hot.
General Assembly
Remove the barbecue and components from the packing
carton. Check against parts list and lay components out
within easy reach. Do not throw the carton away, unfold
flat and use as a protective work surface. Contact your
supplier for replacement parts if necessary.
Tools You Will Need
Standard Phillips-head screw driver (or cordless drill
and bits) and Adjustable spanner (open ended shifter) or
spanners.
Check Barbecue for any Damage
Inspect barbecue parts as you proceed. Contact your
supplier for assistance regarding replacement of any
damaged or missing parts. Do not assemble or operate a
barbecue that appears damaged. Barbecues for use with
gas cylinders are labelled ‘LPG/ULPG’. Check labelling at
the gas connection on your barbecue.
Kitchen/Module Installation
Modules can only be installed to the right hand side of
the BBQ. The side burner MUST NOT be removed.
Leave at least 200mm of distance between the back
of the unit and the wall for ventilation. All units must be
undercover.
Nominal Hourly Gas Consumption
Gas Type
BBQ
Burners
Injector
Size
Gas Consumption
Per Burner MJ/h
Total Gas Consumption
Primary Burners MJ/h
Gas
Pressure
kPa
Propane 6 Ø 1.0mm 13.5 81 2.75 kPa
ASSEMBLY INSTRUCTIONS
Before assembling the barbecue, read these Instructions
carefully.
Assemble the barbecue on a flat, clean surface.
The barbecue is heavy.
NOTE: Do not fully tighten all the nuts during the initial
stages of assembly.
Caution: Sheet metal can cause injury. Wear gloves
when assembling the barbecue.
54
EXPLODED DIAGRAM
No. Description QTY
1 Fire Box 1
2 Bottom shelf 1
3 Swivel Castor 2
4 Locking Swivel Castor 2
5 Left side panel 1
6 Right side panel 1
7 Upper door bracket 1
8 Back panel 1
9 Top panel 1
10 Left door assembly 1
11 Right door assembly 1
12 Door handle 2
No. Description QTY
13 Fat tray bracket 2
14 Fat tray 1
15 Fat tray front fascia 1
16 Flame tamer 4
17 Cooking grill 2
18 Hotplate 1
19 Warming rack 1
20 Regulator & hose assembly 1
21 Burner 6
No. Description QTY
22 Crossfire 5
23 Big control knob 6
24 Pulse Ignitor 1
A Screw M6x15 16
B Screw M6x12 27
C Screw M5x12 3
D Screw M4x12 2
E Spring washer Ø6 16
76
ASSEMBLY INSTRUCTIONS
STEP 1
Use 16x M6x15mm screws (A) and 16x M6 spring washers (E) to attach 2x swivel castors (3) and 2x locking swivel
castors (4) to the base panel (2).
STEP 2
Use 4x M6x12mm screw (B) to attach cabinet left side panel (5) and cabinet right side panel (6) to the base panel (4).
Use 2x M4x12mm screw (D) attach Upper door bracket (7).
7
76 7
ASSEMBLY INSTRUCTIONS
STEP 3
Use 5x M6x12mm screws (B) to attach cabinet back panel (8).
Note: DO NOT tighten the screws of this step now.
STEP 4
Use 4x M6x12mm screws (B) to attach cabinet horizontal shelf (9).
988
ASSEMBLY INSTRUCTIONS
STEP 5
Use 4x M6x12mm screws (B) to attach the door handle (12) to door (10,11).
STEP 6
Attach doors (10,11) to completed cabinet by inserting the bottom door locator into holes, then pressing down on the
top locator insert them into top door locator.
988
ASSEMBLY INSTRUCTIONS
STEP 7
Use 6x M6x12mm screws (B) to attach the flat tray bracket (13) to main cabinet.
STEP 8
Attach hose and gas regulator assembly (23) to firebox assembly (1).
Use 4x M6x12mm screws (B) to attach firebox to the cabinet, making sure that the locators insert into the base of the
firebox (1). Attach the ignitor (28).
111010
ASSEMBLY INSTRUCTIONS
STEP 9
Use 3x M5x12mm screws (C) to attach the flat tray front fascia (15) to the flat tray (14).
11
STEP 10
Insert 4x flame tamers (16).
111010 11
STEP 11
Insert 2x cooking grills (17) and 1x hotplate (18) into firebox.
STEP 12
Insert warming rack (19).
131212
STEP 13
Insert AA battery into the ignition pack with battery facing the correct way (+ facing out).
STEP 14
Position 9kg propane gas cylinder into the BBQ trolley and screw in the BBQ gas regulator.
Step 12
Attach the regulator to your gas cylinder.
Step 13
Turn on the gas cylinder ensuring that all of the
controls on the BBQ are turned OFF at this point.
DO NOT ATTEMPT TO LIGHT THE BBQ!!.
Step 14
Use a solution of soapy water (dishwashing liquid
and water is fine). Brush it on or use a spray
bottle as shown in the drawing. Ensure the
connections have a good coating.
Step 15a
If the connection is leaking, bubbles will start to
grow in the soapy solution. If this happens shut
off the gas supply at the cylinder.
Step 15b
Tighten the connections using a crescent then
repeat steps 13-14.
Step 15c
The connection is gas tight when no bubbles
grow around the gas connection.
131212
ASSEMBLY INSTRUCTIONS
STEP 15
Turn on the gas cylinder ensuring that all of the controls
on the BBQ are turned OFF at this point. DO NOT
ATTEMPT TO LIGHT THE BBQ.
STEP 16
Use a solution of soapy water (dishwashing liquid and
water is fine). Brush it on or use a spray bottle as shown in
the drawing. Ensure the connections have a good coating.
STEP 17
If the connection is leaking, bubbles will start to grow in
the soapy solution. If this happens shut off the gas supply
at the cylinder.
STEP 18
Tighten the connections using a crescent then repeat
steps 16-17.
STEP 19
The connection is gas tight when no bubbles grow
around the gas connection.
Step 12
Attach the regulator to your gas cylinder.
Step 13
Turn on the gas cylinder ensuring that all of the
controls on the BBQ are turned OFF at this point.
DO NOT ATTEMPT TO LIGHT THE BBQ!!.
Step 14
Use a solution of soapy water (dishwashing liquid
and water is fine). Brush it on or use a spray
bottle as shown in the drawing. Ensure the
connections have a good coating.
Step 15a
If the connection is leaking, bubbles will start to
grow in the soapy solution. If this happens shut
off the gas supply at the cylinder.
Step 15b
Tighten the connections using a crescent then
repeat steps 13-14.
Step 15c
The connection is gas tight when no bubbles
grow around the gas connection.
1514
GENERAL ASSEMBLY
Connecting & Disconnecting to Gas Source
Familiarize yourself with the general information and
safety guidelines located at the front of this manual.
Check:
1. The cylinder is filled. A sloshing sound will be heard
when shaken.
2. The burner controls are in the ‘OFF’ position.
Connecting
1. Ensure cylinder valve is in its full off position.
2. Check for any damage to either the cylinder
connection or the hose. NEVER attempt to use
damaged equipment.
3. When connecting the hose to the cylinder tighten the
nut to a positive stop by hand.
4. Open cylinder valve fully. If a leak can be heard at
either end of the hose turn cylinder off and tighten
joint. Wait 5 minutes before re-testing and use a soapy
water solution to check the joint. If bubbles appear the
connection will need to be re-tightened.
Disconnecting
1. Ensure the burner control is in the ‘OFF’ position.
2. Ensure cylinder valve is in the full off position.
For storage and cylinder exchange, disconnect hose
at the cylinder only, DO NOT disconnect hose from
appliance.
Regulator Safety Feature
All QCC regulators (the part that attaches to the gas
cylinder to regulate the flow of gas) have a safety feature
included that restricts gas flow in the event of a gas leak.
You can inadvertently activate this safety feature without
having a gas leak. This typically occurs when you turn
on the gas using the barbecue control knob before you
turn on the gas cylinder valve. If the gas regulator safety
feature activates, the barbecue will operate with reduced
output as gas flow is restricted.
These steps should be taken first to reset the gas
regulator safety device:
1. Ensure the barbecue hood is open.
2. Turn gas cylinder valve off.
3. Turn off all control knobs.
4. Disconnect the regulator from the gas cylinder.
5. Wait 30 seconds.
6. Reconnect the regulator to the gas cylinder.
7. Leak test the connection using a soapy water solution
Ensure no bubbles appear before proceeding.
8. Slowly open the gas cylinder valve all the way. Do
not put excessive force on the valve at the full open
position, to avoid damaging the valve.
9. Light barbecue as per the instructions provided.
1514
LIGHTING PROCEDURE
Burner Operation & Ignition System Check
1. Open the hood of the barbecue before attempting to
light the burners.
2. Turn all the control knobs clockwise to “OFF” position.
3. With cylinder valve in ‘OFF’ position press the igniter
button. Check for sparking to the burners.
4. If spark is not evident at the burner ignition point,
check that the ignition lead is firmly attached to the
control and sparker tip.
5. With sparking established turn the cylinder valve ‘ON’.
6. Push and turn control knob anti-clockwise to ‘HIGH’
and press the igniter button again.
7. If the burner fails to ignite after several attempts turn
off gas supply at cylinder valve and the control knob
off (clockwise). Wait five minutes before attempting
to relight with ignition sequence.
8. Following successful ignition, to ignite remaining
burners, turn control knobs to the HIGH position
starting with the burner closest to the ignition burner.
9. Adjust the heat by turning each control knob to the
“HIGH”/”LOW” position.
10. To turn the barbecue ‘OFF’ turn the cylinder valve to
the ‘OFF’ position, then turn the control knobs on the
barbecue clockwise to the ‘OFF’ position.
If re–ignition is necessary while the gas barbecue is still
hot, you must wait for a minimum of 5 minutes before
commencing to re–ignite (this allows accumulated gas
fumes to clear).
Problem Possible Reason Solution
Burner will
not ignite
Valve on cylinder is closed Open valve on cylinder
Control knob is closed Turn knob to high when lighting
Electronic igniter is faulty Use a long barbecue match
Food is not
cooking or
is taking too
long
Burner has gone out Check that the gas bottle is not empty and
re-ignite the burner
Cooking surface was not given enough time to
warm up before the food was applied
Remove the food and give the burner time to
warm the cooking surface (5-10 minutes)
There is too much food on the cooking surface Cook smaller portions
OPERATION
Note: If the appliance cannot be adjusted to perform correctly it should not be used until serviced or repaired.
Burner Operation & Ignition System Check
IMPORTANT:
IMPORTANT: Before connecting and
disconnecting barbecue to gas source, make sure
burner controls are in ‘OFF’ position.
CAUTION: When the barbecue is not in use, the
gas must be turned off at the cylinder.
Check that the seals between the appliance
and the gas cylinder are in place and in good
condition before connecting the gas cylinder.
Do not use this appliance if it has damaged or
worn seals.
Check performance of burner prior to installing
BBQ plates.
NOTE: If for some reason, ignitor fails to produce
a spark at the electrode, BBQ can be lit by a long
BBQ match. With hood open insert ignited match
into burner lighting hole positioned on the right
hand side of the BBQ body (underneath side
shelf). Push and turn the far right control knob to
HIGH. Burner ignition can be checked through
this hole. Subsequent burners will cross light.
Do not smoke when attempting to ignite BBQ.
Never use volcanic rock, heat beads or other
material.
Always use protective gloves when handling hot
components.
1716
OPERATING PROCEDURE
Burn Off Cooking Surfaces
We recommend operating your barbecue on its highest
setting for 15-20 minutes prior to first use. This aids
removing the oils used during manufacturing. Allow the
cooking surface to cool then we recommend seasoning
it before use. Season your cooking surface by coating
lightly with vegetable oil and bringing slowly up to a high
temperature (do not use olive oil as this burns off at a
low temperature). For best use your cooking surface
should be seasoned two or three times throughout each
barbecue season.
Preheating
It is necessary to preheat the barbecue for at least 5
minutes before cooking certain foods, depending on the
type of food and the cooking temperature. Food that
requires a low cooking temperature, needs only a period
of 2-3 minutes preheating.
Cooking Temperatures
‘HIGH’ setting - Use this setting only for fast warm up, for
searing steaks and chops, and for burning food residue
from the grill plates after cooking is over. Rarely, if ever,
do you use the ‘HIGH’ setting for extended cooking.
‘MEDIUM’ setting (mid-way between ‘HIGH’ and ‘LOW’).
Use this setting for most grilling, and for cooking
hamburgers and vegetables.
‘LOW’ setting - Use this setting when cooking very lean
cuts such as fish.
These temperatures vary with outside temperature and
the amount of wind.
When using the temperature gauge in the hood of your
barbecue please note that it measures air temperature.
The air temperature inside your barbecue will never be as
hot as the temperature of the cooking surface.
Roasting
For best results when roasting, the outer two burners
should be used on the low to medium setting. Use of the
high setting with the hood down may result in burnt food.
Remove the flat hotplate to help with heat circulation.
Preheat the barbecue for a few minutes. Place a roasting
rack or aluminium foil dish onto the ribbed hot plate and
place the meal to be roasted onto the rack or into the
dish and close the hood.
Adjust the control knob to maintain the temperature
around the medium mark (approx. 200° to 230°C).
Approximate Cooking Time
The table below shows approximate cooking times with
the control set to ‘MEDIUM’ temperature.
Barbecue Roasts Minutes (Approx)
Chicken & Rare Beef 45 minutes per Kg
Beef & Medium Lamb 60 minutes per Kg
Pork & Well Done Beef/Lamb 75 minutes per Kg
Refer to Care & Use Guidelines for more information.
IMPORTANT:
The hood must be in the open position for lighting.
Do not smoke at any time when attempting to ignite
the barbecue burners.
Do not leave the barbecue unattended when alight.
Important: Never use all burners on high at the same
time when cooking with the hood down.
1716
CARE & MAINTENANCE
As with all appliances, proper care and maintenance
will keep them in top operating condition and prolong
their life. Your new gas barbecue is no exception. By
following these cleaning procedures on a timely basis,
your barbecue will be kept clean and working properly
with minimum effort.
Flash-Back
If fire occurs in and around the burner, immediately turn
off gas at its source and turn the burner control to OFF,
wait until the barbecue has cooled, then clean the burner
tubes and burner ports as described in lighting and
operating procedure.
Spiders and small insects occasionally spin webs or
make nests in the burner tubes during warehousing and
transit. These webs can lead to a gas flow obstruction
which could result in a fire in and around the burner
tubes. Cleaning with a soft brush before use and at least
every six months is recommended.
This type of fire is known as ‘FLASH-BACK’ and can
cause serious damage to your barbecue and create an
unsafe operating condition for the user. Although an
obstructed burner tube is not the only cause of ‘FLASH-
BACK’ it is the most common cause and frequent
inspection and cleaning of the burner tubes is necessary.
Cleaning the Cooking Surface
After cooking, turn burner control to OFF and let
barbecue cool before attempting to clean your grill
plates. Before first use and periodically, it is suggested
that you wash the grill plates in a mild soap and warm
water solution.
Care of Cooking Surface
Use and care of the cooking surface is important. Do not
use pans on the cooking surface. Do not overheat the
cooking surface with the hood down or no food on the
cooking surface.
Cleaning the Drip Tray
To avoid fat or grease dripping from the barbecue remove
and empty the drip tray after each use. Wait until the drip
tray is cool to touch before disposing of contents.
The drip tray should be washed periodically in a mild
detergent and warm water solution.
Refer to Care & Use Guidelines for more information.
IMPORTANT:
Beware of spiders and wasps. Burner tube should
be inspected and cleaned periodically.
This appliance must only be serviced by an
authorized person.
To avoid any flare-ups, it is recommended that
the drip tray be checked and emptied regularly.
Contents of the drip tray may be very hot during
cooking. If emptied during extended cooking
extreme caution should be taken and direct
contact by hand should be avoided at all times.
Allow to cool completely before disposing of the
contents.
1918
NATURAL GAS CONVERSION
TO BE INSTALLED ONLY ON OR IN A
NON-COMBUSTIBLE ENCLOSURE
Note: Recommended clearances must be maintained.
Tools Required:
7mm Drill, Thin (2.5mm diameter) flat Screw Driver,
Adjustable spanner, Phillips head screw driver.
GAS PIPING
1. THIS APPLIANCE IS ONLY TO BE INSTALLED
BY AN AUTHORISED PERSON.
2. Check with local and state plumbing and heating
codes regarding sizing of the gas lines.
3. All gas pipe connections must be sealed with a gas
pipe compound resistant to Natural Gas.
4. Installation of a drip leg if required in the gas supply
line must conform to AS5601.
5. When checking for gas leaks, do not use an open
flame. Use a soap and water solution and check for
bubbles indicating gas leakage.
6. Installation of 1/8” NPT plugged tapping, accessible
for test gauge connections, is required upstream of
the gas supply connection.
Warning
Improper installation, adjustment, alteration, service or
maintenance can cause injury or property damage. Read
the instructions thoroughly before installing or servicing
this equipment.
Overall Dimensions
Length Width Height
BQ2026 995mm 550mm 1200mm
SERVICING INSTRUCTIONS
Appliances should be serviced at least annually and
servicing must only be carried out by a Licensed Plumber
or Authorised Person.
Clean the Burner Ports and top with a Soft Brush.
Inspect and clean all combustion air inlets, then replace
the Burner ensuring it is firmly secured.
Minimum Clearance for Ventilation:
Rear 50 mm Side 50 mm
NOTE TO THE INSTALLER
1. The injector size is increased by removing the
Propane Injector (outer brass cap) and leaving the
Natural Gas Injector in place. Ensure the Natural gas
Injector is still tight and in correct position; and the
hole size is correct.
2. To adjust the low/turndown flame setting remove the
main and side burner control knobs. Use a long thin
blade screwdriver to access the “LOW” adjustment
screw down hole located to the right of the valve
spindle, turn the screw anti-clockwise 1/4 of a turn.
3. Use suitable chain from the rear of the BBQ to the
floor or wall to secure the BBQ and ensure that the
chain length is short enough to limit the movement of
the hose to no more than 80%of its’ length.
TEST OPERATION OF APPLIANCE BEFORE LEAVING.
If the appliance has excessively yellow flames or cannot
be adjusted to perform correctly call 1300 174 876.
WARNING
Improper installation, adjustment, alteration,
service or maintenance can cause injury or
property damage.
Read the instructions thoroughly before installing
or servicing this equipment.
THIS APPLIANCE MUST NOT BE INSTALLED OR
USED INDOORS.
NATURAL GAS APPLIANCE. TO BE INSTALLED
ONLY BY AN AUTHORISED PERSON.
THE AUTHORISED PERSON WILL PROVIDE A
CERTIFICATE OF COMPLIANCE.
A Gasmate NGC30 or NGC40 AGA approved
natural gas pressure regulator must be installed in
the pipeline and be set at 1 kPa.
Conversion ONLY to be done by an authorised person.
1918
SAFE APPLIANCE LOCATIONS
This appliance shall only be used in an above ground
open-air situation with natural ventilation, without
stagnant areas, where gas leakage and products of
combustion are rapidly dispersed by wind and natural
convection.
Any enclosure in which the appliance is used shall
comply with the following:
An enclosure with walls on all sides, but at least one
permanent opening at ground level and no overhead
cover (see Example 1).
DIAGRAMMATIC REPRESENTATIONS OF OUTDOOR AREAS
The following figures are diagrammatic representations of outdoor areas. Rectangular areas have been used in these
figures – the same principles apply to any other shaped area.
Within a partial enclosure that includes an overhead
cover and no more than two walls
(see Example 2 & 3).
Within a partial enclosure that includes an overhead
cover and more than two walls, the following will apply:
at least 25% of the total wall area is completely open,
and at least 30% of the remaining wall area is open and
unrestricted (see Example 4 & 5).
In the case of balconies, at least 20% of the total wall
area shall be and remain open and unrestricted.
For any queries or assistance call
Customer Service
(Australia Only)
1300 174 876
Hours of operation: Monday to Friday 8am - 5pm EST
Do not return to place of purchase.
Keep your purchase receipt, this will be required to make any claims under the 12 month warranty.
  • Page 1 1
  • Page 2 2
  • Page 3 3
  • Page 4 4
  • Page 5 5
  • Page 6 6
  • Page 7 7
  • Page 8 8
  • Page 9 9
  • Page 10 10
  • Page 11 11
  • Page 12 12
  • Page 13 13
  • Page 14 14
  • Page 15 15
  • Page 16 16
  • Page 17 17
  • Page 18 18
  • Page 19 19
  • Page 20 20

Gasmate Avenir BQ2026KIT Owner's manual

Type
Owner's manual
This manual is also suitable for

The Gasmate Avenir BQ2026KIT, a 6-burner kitchen, offers a spacious cooking area of 960mm x 460mm, allowing you to prepare a variety of dishes simultaneously. Electronic ignition ensures effortless lighting of the stainless steel tubular burners, while the cast iron hotplates and grill provide even heat distribution for your culinary creations. It comes complete with a hose, regulator, and drip tray for easy cleanup.

Ask a question and I''ll find the answer in the document

Finding information in a document is now easier with AI