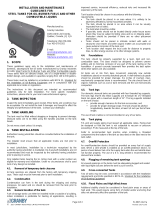
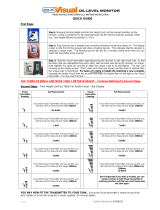
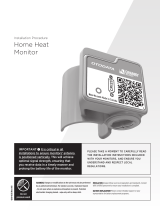
Beckett Rocket Wireless Gauge Operating instructions

Type
Operating instructions

Beckett Rocket Wireless Gauge is a fuel monitoring system that accurately measures fuel levels in your tank and wirelessly transmits the data to a receiver display. The system includes a transmitter that mounts onto the tank and a receiver display that can be placed anywhere in your home. The receiver display shows the current fuel level, as well as a history of fuel usage. The system can be configured to send an alert when the fuel level drops below a certain point, so you can be sure to never run out of fuel.

Beckett Rocket Wireless Gauge is a fuel monitoring system that accurately measures fuel levels in your tank and wirelessly transmits the data to a receiver display. The system includes a transmitter that mounts onto the tank and a receiver display that can be placed anywhere in your home. The receiver display shows the current fuel level, as well as a history of fuel usage. The system can be configured to send an alert when the fuel level drops below a certain point, so you can be sure to never run out of fuel.

PARTS INCLUDED IN 17000 KIT:
(1) 17070 Transmitter “Rocket” with gasket
(1) 17050 Bar type LCD Receiver display
(1) 17020 Metal Adapter (2” NPT)
(2) Mounting Screws
Inaccurate fuel level indications could result in fuel run-out, burner lockout, loss of heat, and
frozen pipes. This could result in water damage from ooding when pipes thaw.
The fuel level monitoring system must be installed by a quali ed service agency.
Follow the installation instructions and verify accurate oat/gauge performance before leaving the site.
For frozen pipe/ ooding protection, take preventive measures such as having a security system (or device) installed that operates during power out-
ages, senses low temperatures, and initiates an effective alarm action.
For technical assistance, call 1-800-645-2876, (Mon.-Fri. from 8:00am to 5:00pm EST)
ROCKET WIRELESS FUEL MONITOR BY BECKETT
INSTALLATION INSTRUCTIONS
To synchronize, please read instructions carefully.
INSTALLATION STEPS:
1. Con guring the Receiver
The Receiver Display comes con gured from the factory for the standard
oval vertical 138, 275 or 330 gal upright steel tanks. Important: To ensure
accurate measurement at the oil pickup, where the oil line comes from the
top of the tank, subtract 6 inches (0.15m) from the measurement before
con guring the Receiver below.
To con gure the Receiver Display for other style tanks determine the total
tank height either by making a direct measurement or using the Table on
page 3. Once the tank height is determined, use the Table on page 3 to
locate the correct DIP switch setting for your tank. The row of DIP switches
is located on the back of the Receiver Display. Toggling an individual switch
up towards the antenna will put it into the “ON” position. Plug the Receiver
into a convenient 120 VAC outlet. The top bar on the receiver display will
ash rapidly for about 2 minutes and the screen will then show the last
measurement received and is now ready for synchronization. See Figure 4.
2. Preparing for Mounting onto the Tank
Install the supplied metal adapter into an unused 2” NPT opening in the top of
the tank. Apply pipe sealant on the Adapter threads and tighten appropriately.
See Figure 2. Do not install the transmitter at this time. For basement tanks,
temporarily place a cover or rag over the adapter to minimize fuel odors until
the Transmitter has been synchronized. For tanks with 1-1/2” and 1-1/4” NPT
openings or European style double-wall tanks, adapters are required for proper
operation. See “Parts Sold Separately” section. Do not use an extension
pipe when mounting the adapter, this can cause inaccurate measurement and
erratic operation. See Figure 9 on page 2 for installation help.
3. Receiver / Transmitter Synchronization
On the Receiver and Transmitter there are black dots located on the side of
each device (Figures 4 & 5). To synchronize, plug the Receiver Display into
a convenient 120 VAC electrical outlet.
A. The LCD display on the Receiver will show a ashing top bar (for
about 2 minutes) as shown in the Figure 4.
B. During this 2 minute “Learn” period, slide the Transmitter, starting
at the bottom of the right side of the Receiver (Figure 5) until the
black dots touch each other (Figure 6) or until the Receiver Display
bars begin to increase in size similar to Figure 7 on following page.
Keep the devices in that position for about 20 seconds or until
all ten bars ash and a short “beep” occurs to indicate that
synchronization is complete.
C. The Transmitter stays in “Fast” transmit mode for 10 minutes
following synchronization. Moving the Transmitter up and down
above a solid surface should decrease or increase the number of
bars respectively on the Receiver Display. If you wish to deactivate
“Fast” transmit mode, again slide the Transmitter dot towards or past
the Receiver dot.
D. Now fasten the Transmitter to the Adapter using the gasket and
screws provided. Do not over tighten.
PARTS SOLD SEPARATELY:
17012 Metal Adapter 1-1/4” NPT,
17015 Metal Adapter 1-1/2” NPT
17030 Tank Adapter for Roth Type
TANK
HEIGHT
Figure 1 Figure 2
Figure 3
Figure 4
Figure 5 Figure 6
This device complies with Part 15 of the FCC Rules. Operation is subject to the following two conditions: (1) This device may not cause
harmful interference, and (2) This device must accept any interference received, including interference that may cause undesired operation.
Operating frequency is 915 MHz
FCC ID: S6T-377A
NORMAL OPERATION
The Rocket 17000 system uses ultrasonic radio wave technology to
measure the fuel level in the tank. It then uses wireless transmission to
send the measured fuel level to the Receiver. To preserve battery life, the
measurements and transmissions are done 8 times every hour.
TROUBLESHOOTING
DISPLAY CONTAINS FLASHING TRIANGLE—NO
BARS DISPLAYED
Indicates that the receiver has not received a signal for
two hours. Possible causes are:
• Receiver not matched to transmitter—Resynchronize
• Receiver location not suitable—Relocate receiver
• Failed Battery—Replace Battery (use 3 Volt CR2430)
• Moisture inside Transmitter (broken seal)—Replace
Rocket sensor.
DISPLAY CONTAINS FLASHING TRIANGLE—
MIDDLE BAR DISPLAYED
Indicates that the Transmitter is not receiving an echo
from its ultrasonic signal inside the tank. Likely cause:
• Condensation on the sensing surface at the
bottom of the Transmitter. Allow time to dry. If condition persists, remove
Transmitter from the tank and clean sensor surface and verify that the seal is
undamaged.
See FAQ on Page 4 for additional guidance.
NOTE: DIP switch No. 1 is used for enabling (ON)(factory setting) or disabling
(OFF) the audible low fuel level warning. See Figure 3 on previous page.
In the event of a power failure or if the Receiver is unplugged, it is not
necessary to re-synchronize the Receiver with the Transmitter. When the
Receiver is back under power, the top bar on the LCD display will ash for 2
minutes and the display will then show the last measurement received prior
to losing power. It may take up to one hour until a new measurement signal is
received from the Transmitter.
Battery Replacement
Though the lithium battery will have a very long service life, approximately
10 years, it will eventually require changing. The battery required is a 3 Volt
Lithium # CR2430.
1. Remove transmitter from tank
2. Take transmitter indoors, into a clean, dry environment
3. Using a Phillips screwdriver, remove two self tapping screws located
under the foam seal.
4. Remove the top cover – note O-ring seal and removed old battery
5. Install the new battery, with the positive terminal facing outward as
shown in Figure 10.
6. Install the top cover locating the key near the cover screw hole, and
t into the hole, ensuring the O-ring is seated correctly, re- t cover
and evenly tighten the two screws - do not over tighten
7. Replace transmitter on tank
8. Please dispose of battery properly
FULL
ALMOST EMPTY
LIGHT FLASHES,
BEEPS EVERY HOUR
LOW
WHEN THE “ALMOST EMPTY” WARNINGS FIRST OCCUR,
THERE IS ABOUT 5” OF FUEL LEFT IN THE TANK
Figure 7
Figure 8
Figure 9 - Installation Help
Do not insert a tube, or any other sharp or
rough edge inside, or on top of tank.
Obstacles can block
ultrasonic signal.
Mount Sensor as
vertical as possible.
CORRECT!
Figure 10
Measured Tank Height
Set Switches ON Settings for Commonly Available TanksEnglish (Inches) Metric (Meters)
From - To From - To
20 - 22 0.50 - 0.55 2 thru 8 OFF
22 - 24 0.55 - 0.60 7
24 - 26 0.60 - 0.65 6,8
23” High Oval Horizontal Steel Tanks (240 Gal)
26 - 28 0.65 - 0.70 6,7,8
28 - 30 0.70 - 0.75 5,7
Standard 27” High Oval Horizontal Steel Tank (137, 275, 330, Gal)
Highland Horizontal Cylinder Tank (160, 240, 320 Gal)
30 - 31 0.75 - 0.80 5,6
31 - 33 0.80 - 0.85 5,6,7,8
33 - 35 0.85 - 0.90 4,8
35 - 37 0.90 - 0.95 4,6
37 - 39 0.95 - 1.00 4,6,7
Highland UL-142 38” Dia. 185-300 Gal
39 - 41 1.00 - 1.05 4,5,8
41 - 43 1.05 - 1.10 4,5,7,8
43 - 45 1.10 - 1.15
4,5,6,7
(Factory Setting)
Standard Oval Vertical Steel Tank (138, 275, 330 Gal),
Roth DWT-400L (110 Gal)
45 - 47 1.15 - 1.20 3
Schütz No. 825026 (165 Gal)
47 - 49 1.20 - 1.25 3,7,8
Highland Vertical Cylinder Tank (128 Gal), Highland UL-142 48” Dia.
500 - 1000 Gal and Granby/Dehoust No. 961225 (160 Gal)
49 - 51 1.25 - 1.30 3,6,8
51 - 53 1.30 - 1.35 3,5
53 - 55 1.35 - 1.40 3,5,7
55 - 57 1.40 - 1.45 3,5,6,8
57 - 59 1.45 - 1.50 3,5,6,7,8
59 - 61 1.50 - 1.55 3,4,7
Highland Vertical Cylinder Tank (160 Gal),
Roth DWT-620L (165 Gal) and Roth DWT-1000L (275 Gal)
61 - 63 1.55 - 1.60 3,4,6
63 - 65 1.60 - 1.65 3,4,6,7,8
Schütz No. 825034 (265 Gal), Grandby/Dehoust No. 961226 (275
Gal) and Highland UL-142 64” Dia. 1,000 - 4,000 Gal
65 - 67 1.65 - 1.70 3,4,5,8
Roth DWT-1500L (400 Gal)
67 - 69 1.70 - 1.75 3,4,5,6
69 - 71 1.75 - 1.80 3,4,5,6,7
71 - 73 1.80 - 1.85 2,8
Highland Vertical Cylinder Tank (192 Gal) and
Highland UL-142 6 ft. Dia. 4,000 - 6,000 Gal
73 - 75 1.85 - 1.90 2,7,8
75 - 77 1.90 - 1.95 2,6,7
77 - 79 1.95 - 2.00 2,5
79 - 81 2.00 - 2.05 2,5,7,8
81 - 83 2.05 - 2.10 2,5,6,8
83 - 85 2.10 - 2.15 2,4
85 - 87 2.15 - 2.20 2,4,7
87 - 89 2.20 - 2.25 2,4,6,8
89 - 91 2.25 - 2.30 2,4,6,7,8
91 - 93 2.30 - 2.35 2,4,5,7
93 - 94 2.35 - 2.40 2,4,5,6
94 - 96 2.40 - 2.45 2,4,5,6,7,8
Highland UL-142 8 ft. Dia. 4,000 - 15,000 Gal
96 - 98 2.45 - 2.50 2,3,8
98 - 100 2.50 - 2.55 2,3,6
100 - 102 2.55 - 2.60 2,3,6,7
102 - 104 2.60 - 2.65 2,3,5,8
104 - 106 2.65 - 2.70 2,3,5,7,8
106 - 108 2.70 - 2.75 2,3,5,6,7
108 - 110 2.75 - 2.80 2,3,4
110 - 112 2.80 - 2.85 2,3,4,7,8
112 - 114 2.85 - 2.90 2,3,4,6,8
114 - 116 2.90 - 3.00 2,3,4,5
116 - 120 3.00 - 3.10 2,3,4,5,6,8
Highland UL-142 10ft. Dia. 8,000 - 20,000 Gal
DIP Switch Settings for the Beckett Rocket 17000 LCD Receiver
Part No. 61871 Rev.0, Printed in the USA 02/12
R.W. BECKETT CORPORATION
P.O. Box 1289, Elyria, Ohio 44036
1(800)645-2876
R.W. BECKETT CANADA, LTD
430 Laird, Unit 3, Guelph, Ontario, N1G 3X7
1(800)665-6972
FAQ Question/Problem Answer/Solution
1
I put the Rocket on the tank
and plugged in the receiver,
but it doesn’t work.
Customer does not wait long enough for the signal to be sent.
After plugging the receiver into a wall outlet and waiting for the 2 minute learn time to
expire, you may need to wait another 8 minutes before the Rocket transmits to send a
measurement to the Receiver. If the Receiver does not show a level (some number of bars)
shortly after the 10 min period, the go through a re-synchronization process.
2
The number of bars on the
receiver is not correct when
compared with a mechanical
gauge on the tank.
Receiver DIP switch settings are inconsistent with Actual Tank Height.
Customer should measure tank height and use the DIP switch table in the instruction sheet
to set the Receiver DIP switches.
3
I cannot synchronize the
Rocket to the receiver.
(A) Receiver is not in Learn Mode - Unplug receiver and plug back in and verify that the
top bar is blinking. Now proceed with the Sync Process.
(B) Rocket is in Fast Mode - Bring the Rocket to your ear and listen for rapid “clicking”. If
you hear that clicking, pass a magnet across the black dot on the rocket to turn the rocket
Fast Mode off. Listen again to verify that the clicking has stopped.
(C) Rocket Battery is dead - Rocket has an approximate 10-year battery life, so this is
usually not the problem. Install new battery per instructions on Page 2. Make sure that the
Warranty label (torn when rocket is taken apart) is matched up after assembly. The top and
bottom plastic housings are “keyed” and must be reassembled properly.
(D) Rocket was disassembled and improperly reassembled - Is the battery installed
upside down? Were the two housing sections assembled incorrectly (180° off) - which
locates the black dot on the other side of the circuit board from where the activation (Reed)
switch is located?
4
I ran out of fuel and the
Receiver still said I had oil.
Incorrect DIP Switch Settings on the Receiver
- See answer to FAQ #2
5
The receiver is still showing
that the tank is full, but
it is not. Reading hasn’t
changed since I installed the
Rocket on a full tank.
Was a bushing or nipple used to install the Rocket when a 2” NPT tank opening was
not available?
The Rocket can only be installed using the supplied 2” NPT Adapter
1-1/2” NPT, 1-1/4” NPT and adapters for Roth style tanks are available, see “Parts Sold
Separately” on front page. Using nipples or risers to convert a smaller opening to a 2” NPT
opening for the supplied 2” adapter will not work. [NOTE: The Distributor may have the
alternate bushings in stock].
6
How do I use two or more
Receivers to show the
measurements from one
Rocket?
All Receivers must be in Learn Mode at the same time
Use a power strip and plug both (or all) Receivers in at roughly the same time. All of the
receivers should show the top bar blinking (Learn Mode). Now Sync the Rocket to one of
the Receivers and they will all sync at the same time.
7
I’m installing two Rocket Kits
on two separate tanks in the
same location and they are
“interfering with each other”.
Install one system at a time.
Leave one receiver unplugged. Get the other set up rst and verify its operation. Make
sure that the rst Receiver set up is NOT in Learn Mode and that the rst Rocket is NOT in
Fast Mode. Now install the second Rocket/Receiver set on the second tank.
FREQUENTLY ASKED QUESTIONS:
  • Page 1 1
  • Page 2 2
  • Page 3 3
  • Page 4 4

Beckett Rocket Wireless Gauge Operating instructions

Type
Operating instructions

Beckett Rocket Wireless Gauge is a fuel monitoring system that accurately measures fuel levels in your tank and wirelessly transmits the data to a receiver display. The system includes a transmitter that mounts onto the tank and a receiver display that can be placed anywhere in your home. The receiver display shows the current fuel level, as well as a history of fuel usage. The system can be configured to send an alert when the fuel level drops below a certain point, so you can be sure to never run out of fuel.

Ask a question and I''ll find the answer in the document

Finding information in a document is now easier with AI