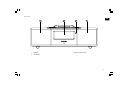
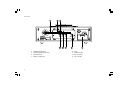
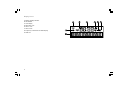
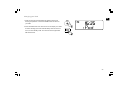
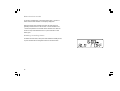
Sangean WR-5 is a versatile radio with AM/FM, iPod dock, and auxiliary input capabilities, making it a great choice for listening to music, news, and more. With its 12 radio station presets, large LCD display, and adjustable backlight, the WR-5 is easy to use and provides clear and crisp audio. Additionally, the WR-5 features two alarm timers with snooze, a sleep timer, and a remote control for added convenience.
Sangean WR-5 is a versatile radio with AM/FM, iPod dock, and auxiliary input capabilities, making it a great choice for listening to music, news, and more. With its 12 radio station presets, large LCD display, and adjustable backlight, the WR-5 is easy to use and provides clear and crisp audio. Additionally, the WR-5 features two alarm timers with snooze, a sleep timer, and a remote control for added convenience.


-
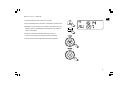
 1
1
-
 2
2
-
 3
3
-
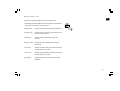
 4
4
-
 5
5
-
 6
6
-
 7
7
-
 8
8
-
 9
9
-
 10
10
-
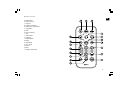 11
11
-
 12
12
-
 13
13
-
 14
14
-
 15
15
-
 16
16
-
 17
17
-
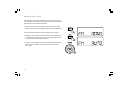 18
18
-
 19
19
-
 20
20
-
 21
21
-
 22
22
-
 23
23
-
 24
24
-
 25
25
-
 26
26
-
 27
27
-
 28
28
-
 29
29
-
 30
30
-
 31
31
-
 32
32
-
 33
33
-
 34
34
-
 35
35
-
 36
36
-
 37
37
-
 38
38
-
 39
39


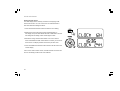
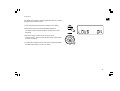
Sangean WR-5 is a versatile radio with AM/FM, iPod dock, and auxiliary input capabilities, making it a great choice for listening to music, news, and more. With its 12 radio station presets, large LCD display, and adjustable backlight, the WR-5 is easy to use and provides clear and crisp audio. Additionally, the WR-5 features two alarm timers with snooze, a sleep timer, and a remote control for added convenience.
Ask a question and I''ll find the answer in the document
Finding information in a document is now easier with AI
Related papers
Other documents
-
 Sangean Electronics RCR-10 User manual
-
Makita BMR103 User manual
-
Jensen JIMS-225 Owner's manual
-
Sanyo DMP-P7 User manual
-
Makita LXRM03 User manual
-
-
Soundmaster Highline UR 8680 User manual
-
Roberts Dreamdock 2 User guide
-
Roberts Fusion( Rev.1) User guide
-
jWIN JL-204 User manual
