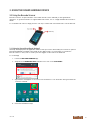
Handheld Nautiz X9 is a robust handheld device designed for use in demanding environments, featuring a barcode scanner, a long-lasting battery, and a range of connectivity options. With its IP67 rating, it can withstand dust, water, and drops, making it ideal for use in outdoor or industrial settings. The device runs on the Android operating system, providing access to a wide range of apps and services, including mapping, navigation, and data collection tools.
Handheld Nautiz X9 is a robust handheld device designed for use in demanding environments, featuring a barcode scanner, a long-lasting battery, and a range of connectivity options. With its IP67 rating, it can withstand dust, water, and drops, making it ideal for use in outdoor or industrial settings. The device runs on the Android operating system, providing access to a wide range of apps and services, including mapping, navigation, and data collection tools.


-
 1
1
-
 2
2
-
 3
3
-
 4
4
-
 5
5
-
 6
6
-
 7
7
-
 8
8
-
 9
9
-
 10
10
-
 11
11
-
 12
12
-
 13
13
-
 14
14
-
 15
15
-
 16
16
-
 17
17
-
 18
18
-
 19
19
-
 20
20
-
 21
21
-
 22
22
-
 23
23


Handheld Nautiz X9 is a robust handheld device designed for use in demanding environments, featuring a barcode scanner, a long-lasting battery, and a range of connectivity options. With its IP67 rating, it can withstand dust, water, and drops, making it ideal for use in outdoor or industrial settings. The device runs on the Android operating system, providing access to a wide range of apps and services, including mapping, navigation, and data collection tools.
Ask a question and I''ll find the answer in the document
Finding information in a document is now easier with AI
Related papers
-
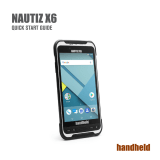 Handheld Nautiz Nautiz X6 Quick start guide
-
Handheld Nautiz Nautiz X9 Quick start guide
-
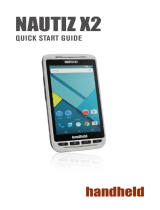 Handheld Nautiz Nautiz X2 Quick start guide
-
Handheld Nautiz X2 User manual
-
-
 Handheld Nautiz Nautiz X1 Owner's manual
-
 Handheld Group AB YY3-NAUTIZX3 User manual
-
 Handheld Nautiz Nautiz X41 Quick start guide
-
Geokon FPC-2 Quick start guide
-


Other documents
-
Garmin Dynamic Running Pod User manual
-
 jastecM Von Series OBD-II Protocol Based Data Receiver Operating instructions
-
Arbor Technology GT-500 User manual
-
Sitecom MD-010 Datasheet
-
 Anlinx PT7003 User manual
-
-
SHENZHEN ELECTRON TECHNOLOGY WA1042T User manual
-
pebblebee PB-701-B User guide
-
Speedata SD100 User guide
-
Partner Tech NDPEM-70 User manual

