Page is loading ...

The DVD video display of the in-dash unit will not operate while the vehicle is moving. This is a safety
feature to prevent driver distraction. In-dash DVD video functions will only operate when vehicle is in
Park and the parking brake is engaged. It is illegal in most states for the driver to view video while
the vehicle is in motion.
Safety Notes:
Multimedia Receiver
This Quick Start Guide gives you the basics to start using your AXV820.
Please visit www.axxera.dualav.com/downloads/manuals/axv820.pdf to download
a complete Owner's Manual or call customer service at 1-866-382-5476.
Copyright and Trademark Notes
This product incorporates copyright protection technology that is protected by method claims of
certain U.S. patents and other intellectual property rights owned by Macrovision Corporation and
other rights owners. Use of this copyright protection technology must be authorized by Macrovision
Corporation, and is intended for home and other limited viewing uses only unless otherwise authorized
by Macrovision Corporation. Reverse engineering or disassembly is prohibited. Manufactured under
license from Dolby Laboratories. Dolby and the double-D symbol are trademarks of Dolby Laboratories.
DVD Logo is a trademark of DVD Format/Logo Licensing Corporation registered in the U.S., Japan
and other countries. SD Logo is a trademark of SD-3C, LLC. iPod and iPhone are trademarks of Apple
Inc., registered in the U.S. and other countries. Other trademarks and trade names are those of their
respective owners.
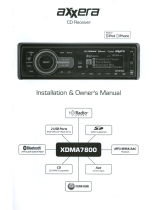
AXV820
Quick Start Guide

2
AXV820
Before You Start
• Disconnectnegativebatteryterminal.Consultaqualifiedtechnicianforinstructions.
• Avoidinstallingtheunitwhereitwouldbesubjecttohightemperatures,suchasfrom
directsunlight,orwhereitwouldbesubjecttodust,dirtorexcessivevibration.
Getting Started
•Insertthesuppliedkeysintotheslotsasshown,andslideunitoutofthemountingsleeve.
•Installmountingsleeveintoopening,bendingtabstosecure.
•Connectwiringharnessasshownonpage3.Consultaqualifiedtechnicianifyouare
unsure.
•Certainvehiclesmayrequireaninstallationkitand/orwiringharnessadapter
(sold separately).
•Reconnectnegativebatteryterminal,andtestforcorrectoperation.
•Snaptrimringintoplace(ifrequired).
•Slideunitintomountingsleevetosecure.
Preparation
TYPICAL FRONT-LOAD DIN MOUNTING METHOD
Mounting sleeve opening dimensions
7.16” x 4.40” (182 mm x 112 mm)
KEYS
HEX BOLT
DECORATIVE BEZEL MOUNTING SLEEVE
DASHBOARD
MOUNTING STRAP
HEX NUT
WASHER

3
AXV820
Wiring Diagram - Inputs/Outputs
External Bluetooth Mic Input
Black
Black
Note:
When replacing a fuse, make sure to
use the correct type and amperage.
Using an incorrect fuse could damage
the unit. The AXV820 uses (1) 15 amp
ATM mini style fuse located on the back
of the unit.
Wiring Notes:
Subwoofer output
The SUBWOOFER preamp audio output
(bluejacketwithblackRCA)isactiveinall
audio modes.
Rear view camera
A rear view camera (not included) can be
used with the CAMERA input. Refer to page
7 for details.
Steering wheel controls (optional)
The steering wheel interface input allows
connection to the Pacific Accessory
Corporation SWI-PS interface module
(sold separately). Visit www.pac-audio.com
for details. *Note the SWI input 3.5mm
connector color is blue.
Connecting an iPod/iPhone Device
To play music from an iPod/iPhone device using the direct USB interface, connect the USB cable (included with your
iPod/iPhone device) to one of the AXV820's USB port (front or rear). To view video and photos from an iPod/iPhone
device,theiPodvideocable(included)isrequired.
Bluetooth
The Bluetooth microphone input allows connection of an external Bluetooth microphone (included).

4
AXV820
Control Locations
2
4
5
7
8
3
1
6
Control Function Control Function
1Eject 5SD Card Slot
2Mode 6Front USB Port
3Menu 7Auxiliary A/V Input
4Power / Volume / Mute 8Reset
Control Function Control Function
1Power 16 Subtitle
2Mute 17 Zoom
3Eject 18 Audio
4Mode 19 Chapter / Track / Seek
Tune Down
5Number Keys 20 Chapter / Track / Seek
Tune Up
6Select 21 Title Menu
7Play / Pause 22 Arrow Down
8Stop 23 Arrow Left
9Arrow Right 24 OK
10 Picture 25 Menu
11 Root Menu 26 Arrow Up
12 Repeat 27 Escape
13 Fast Reverse /
Manual Tune Down 28 Search
14 Fast Forward /
Manual Tune Up 29 Info
15 Angle 30 Volume Down
31 Volume Up
14
3
2
7
6
5
21
30
31
17
11
10 9
8
15
14 13
12
16
27
23
24
25
26
19
20
22
18
29
28
*Theremotecontrolusesone3voltLithiumCR2025battery.Forbestperformance,replaceonlywithCR2025orequivalent.

5
AXV820
General Operation
Power On/Off
Mode
Menu
Volume
Mute
3.5mm A/V Input
Audio Setup
Setup Menu
Seek Tune Up
Seek Tune Down
Band
Automatically Store
Preset Scan
Local / Distance Tuning
Momentarily press the volume knob to turn the unit on. Hold for 2
seconds to turn the unit off.
Press MODE to step through all available input modes: Tuner, Disc
(which includes DVD and CD playback), SD, USB, operation of iPod, AV1,
AV2, Camera and Bluetooth.
Press MENU to view/select any operational mode, to enter the Setup
menu or to put the unit in Standby mode.
Turn the volume knobtoadjustthevolumelevellowerorhigher(0-40).
Thecurrentvolumelevelwillbedisplayedduringadjustment.
Briefly press the volume knob (MUTE) to silence the audio; will
appear in the OSD (On Screen Display). Briefly press the volume knob
(MUTE) again to cancel.
Connect external devices to this 3.5mm auxiliary A/V input.
From any operational mode except video, press the icon in the
bottom left corner of the screen to access the Audio menu and
adjustthefollowingfeatures:EQ,Loudness,Balance,Fader,Bass,
Midrange, Treble and Subwoofer Crossover.
From the Main Menu screen, press Setup to enter the Setup menu
andadjustthevariousoptions.
Press totuneradiotoahigherfrequency.This function can also be
performed by pressing the corresponding key on the remote control.
Press totuneradiotoalowerfrequency.This function can also be
performed by pressing the corresponding key on the remote control.
Press BANDtotogglebetweenAMandFMfrequencies.
Press AS to automatically find and store the strongest stations as
presets.
Note: To manually save preset stations, tune to the desired station,
then press and hold the desired preset number in the preset station
display. The newly-stored station will appear next to the preset number
when saved.
Press PS to scan all preset stations and listen to the first 10 seconds
of each. Press again to stop scanning and listen to the current station.
Press to choose between Local (LOC) or Distance (DX) tuning options.
The local option tunes to nearby radio stations with sufficiently strong
signals for good reception. In areas where reception is poor, switching
to distance tuning enables the unit to tune in to more distant stations.
Distance tuning is the default tuning mode.
AM/FM Tuner Operation

6
AXV820
CD Playback
MP3/WMA/JPG
Playback from Disc, USB
Device or SD Card
Play / Pause
Next / Previous Track
Fast Forward
and Fast Reverse
Random
Repeat
Track Information &
Track/Folder Selection
DVD Controls
Stop
Fast and Reverse
Pause
Additional Options
Title Menu
Audio Language
Subtitles
Audio Setup Mode
Repeat
DVD Search
Previous Menu
Insert disc with label facing up, and playback will begin automatically.
The AXV820 can play MP3, WMA and JPG files from a disc, USB
device or SD card. Insert disc, connect USB device or insert SD card,
and choose the desired source to begin playback.
Press to pause playback. Press again to resume playback.
Press to advance to the next track or file. Press to go back to
the previous track or file.
Press or on the remote control to fast forward or fast
reverse playback. Each touch changes speed from 2x to 4x to 8x to
16x then back to regular playback.
Press to play all tracks or files in random order. Press again to end
random playback.
Press to repeat current track or file. Press again to turn off the
repeat function.
In CD mode, press to toggle between play list and current track
information. In WMA / MP3 / JPG mode, press to toggle between
track and folder navigation for the up and down arrow buttons.
During DVD playback, use the remote control or the DVD touch screen
controls to control playback. The main DVD touch screen controls are
accessed by touching the bottom center of the touch screen.
Press once to stop the chapter at current point of playback. Press
again to fully stop the disc.
Press or to step through the following fast forward or reverse
speeds: 2x, 4x, 8x or 16x. Press again to resume normal play.
Press to pause DVD playback. Press again to resume.
Press to access the additional options (below).
Press TITLE to access the Title menu.
Press AUDIO to change language of the audio playback.
Press SUB-T to display subtitles.
Press to access audio setup mode.
Press to activate repeat functions: repeat chapter, repeat title and
repeat off.
Press to access search mode and enable searching by title, chapter
or time.
Press to return to previous DVD touch screen control menu.
CD / WMA / MP3 / JPG Operation
DVD Operation

7
AXV820
iPod Operation
Play / Pause
Next Song
Previous Song
Random
Repeat
Menu Mode
Bluetooth Microphone
Pairing and Connecting
Dialing a Number
Making and Ending a Call
Transferring Audio
Streaming Audio
Auxiliary Inputs
Rear Camera
Use the included video cable to connect an iPod to the AXV820 and
enable audio and video playback from your iPod device.
Press to pause playback. Press again to resume.
Press to advance to the next song.
Press to go back to the previous song.
Press once to random play all songs within the list. Press twice
to random play all songs on the current album. Press again to cancel
the random function.
Press to repeat current song. Press again to turn off the repeat
function,
Press to enter menu mode to toggle between Music, Video and
Photo files to navigate using the up and down arrow buttons.
Bluetooth features of the AXV820 function with either the unit's
internal microphone or the included external microphone, which is
designed for mounting to the visor or A-pillar inside the vehicle.
Before you can use a Bluetooth device, it must be paired and
connected. The AXV820 broadcasts the pairing signal constantly when
nodevicesarecurrentlyconnected.Completethepairingsequence
from your Bluetooth device. The device name is "AXV820". The
Bluetooth passcode "1234". Once pairing is complete, most
Bluetooth devices will connect automatically.
Press to display keypad and dial a number.
Press to make a call, and press to end a call.
Press to transfer audio between the head unit and mobile device.
Press A2DP to stream audio from your Bluetooth mobile device
directly to the AXV820.
Connect an optional audio/video source into the 3.5mm input on the
front panel (AV1) or to the red/white/yellow RCA connectors on the
back of the unit (AV2). Select AV1 or AV2 from the Main Menu to
access audio or video.
Connect an optional rear camera to the Camera Input (Black RCA
connector). Touch the Camera icon on the Main Menu to select
camera mode. The unit will automatically select camera mode when
connected to the reverse lamp circuitry.
iPod Operation
Bluetooth Operation
Auxiliary Inputs & Rear Camera Operation

Dual Electronics Corp.
Toll Free: 1-866-382-5476
www.axxeraaudio.com
©2012 Dual Electronics Corp. All rights reserved.
NSA0512-V01
Printed in China
Limited One Year Warranty
This warranty gives you specific legal rights. You
may also have other rights which vary from state to
state.
Dual Electronics Corp. warrants this product to the
original purchaser to be free from defects in material
and workmanship for a period of one year from the
date of the original purchase.
Dual Electronics Corp. agrees, at our option, during
the warranty period, to repair any defect in material
orworkmanshiportofurnishanequalnew,renewed
or comparable product (whichever is deemed
necessary)inexchangewithoutcharges,subjectto
verification of the defect or malfunction and proof
ofthedateofpurchase.Subsequentreplacement
products are warranted for the balance of the
original warranty period.
Who is covered? This warranty is extended to the
original retail purchaser for products purchased from
an authorized Dual dealer and used in the U.S.A.
What is covered? This warranty covers all defects
in material and workmanship in this product. The
following are not covered: software, installation/
removal costs, damage resulting from accident,
misuse, abuse, neglect, product modification,
improper installation, incorrect line voltage,
unauthorized repair or failure to follow instructions
supplied with the product, or damage occurring
during return shipment of the product. Specific
license conditions and copyright notices for the
software can be found via www.dualav.com.
What to do?
1. Before you call for service, check the
troubleshooting guide in your owner’s manual. A
slightadjustmentofanycustomcontrolsmaysave
you a service call.
2.Ifyourequireserviceduringthewarrantyperiod,
you must carefully pack the product (preferably
in the original package) and ship it by prepaid
transportation with a copy of the original receipt
from the retailer to an
authorized service center.
3. Please describe your problem in writing and
include your name, a return UPS shipping address
(P.O. Box not acceptable), and a daytime phone
number with your shipment.
4. For more information and for the location of the
nearest authorized service center please contact
us by one of the following methods:
•Callustoll-freeat1-866-382-5476
•E-mailusatcs@dualav.com
Exclusion of Certain Damages: This warranty is
exclusive and in lieu of any and all other warranties,
expressed or implied, including without limitation the
implied warranties of merchantability and fitness for
a particular purpose and any obligation, liability, right,
claim or remedy in contract or tort, whether or not
arising from the company’s negligence, actual or
imputed. No person or representative is authorized
to assume for the company any other liability in
connection with the sale of this product. In no event
shall the company be liable for indirect, incidental or
consequentialdamages.
/