Page is loading ...

Solid Hardwood Flooring Installation Instructions
1 Important Information before You Begin
1.1 Installer/Owner Responsibility
Carefully inspect all materials before installation for defects. Materials
installed with visible defects are not covered under warranty. Do not install if
you are not satisfied with the flooring; contact your dealer immediately. Final
quality checks and approval of the product is the sole responsibility of the
owner and installer.
IT IS THE RESPONSIBILITY OF THE INSTALLER/OWNER TO INSURE
THE MATERIAL IS AT THE PROPER MOISTURE CONTENT FOR THE
REGION AND/OR AREA IT IS BEING INSTALLED. NO CLAIMS FOR
HIGH MOISTURE CONTENT/SHRINKAGE WILL BE PROCESSED ON
INSTALLED MATERIAL
The installer must determine that the job-site environment and sub- floor
surfaces meet applicable construction and material industry standards.
Struxtur declines any responsibility for job failure resulting from deficiencies
caused by sub-floor or job-site environment. All sub-floors must be clean,
flat, dry and structurally sound.
1.2 Basic Tools and Equipment
Broom or vacuum, moisture meter, chalk line & chalk, tapping block, tape
measure, safety glasses, hand or electric saw, miter saw, 3M blue tape to
cover tools to avoid damage to the factory finished flooring, hardwood floor
cleaner, hammer, pry bar, color wood filler, straight edge, caulk gun and glue
2 Job-site conditions
2.1 Handling and Storage.
• Don't truck or unload wood flooring in the rain, snow or other humid
conditions.
• Store wood flooring in an enclosed environmentally controlled building
that is well ventilated with weather proof windows. Garages and exterior
patios, for example, are not appropriate for storing wood
• Leave adequate storage room for good air circulation around stacked
material

2.2 Job-site Conditions
• Wood flooring should be one of the last jobs completed in a construction
project. Prior to installing hardwood floors, the building must be structurally
complete and enclosed, including installation of exterior doors and windows.
All finished wall coverings and painting should be completed. Concrete,
masonry, drywall, and paint must also be complete, allowing adequate drying
time as to not raise moisture content within the building.
• HVAC systems must be fully operational at least 7 days prior to flooring
installation, maintaining a consistent room temperature between 60-75
degrees and relative humidity between 35-55%.
• It is essential that basements and crawl spaces are dry. Crawls spaces must
be a minimum of 18” from the ground to underside of joists. A vapor retarder
must be installed in crawl spaces using 6 mil black polyethylene film with joints
overlapped and taped.
• During the final pre-installation inspection, sub-floors must be checked for
moisture content using the appropriate metering device for wood and/or
concrete.
• Hardwood flooring must acclimate for as long as necessary to meet installation
requirements for moisture content in your area to avoid movement, shrinkage
or cupping. Always use a moisture meter to monitor the flooring and job-site
conditions as they acclimate, until the wood is neither gaining nor losing
moisture.
• Do not install solid hardwood flooring below grade
3 Sub-floor Preparation
3.1 Wood Sub-floors
• Sub-floor must be structurally sound and properly secured with nails or screws
every 6 inches along joists to reduce the possibility of squeaking.
• Wood sub-floors must be dry and free of wax, paint, oil, and debris.
Replace any water-damaged or delaminated sub-flooring or
underlayments.
• Preferred sub-floors – 3/4” CDX Grade Plywood or 3/4” OSB PS2 Rated sub-
floor/underlayment, sealed side down, with joist spacing of 19.2” or less;
Minimum sub-floors – 5/8” CDX Grade Plywood sub- floor/underlayment with
joist spacing of no more than 16”. If joist spacing is greater than 19.2” on
center, add a second layer of sub-flooring material to bring the overall
thickness to 1-1/8” for optimum floor performance. Hardwood flooring should

be installed perpendicular to flooring joists, otherwise an additional of 1/2"
plywood must be added
• Sub-floor moisture check. Measure the moisture content of both the sub-
floor and the hardwood flooring with a pin moisture meter. Sub-floors must not
exceed 12% moisture content. The moisture difference between sub-floor and
hardwood flooring shall not exceed 2%. If sub-floors exceed this amount, an
effort should be made to locate and eliminate the source of moisture before
further installation.
• Sub-floor flatness. Subfloors must be flat to within a 1/4" in a 10 ft radius or
3/16" in a 6 ft radius
• Do not install over particleboard or similar product.
• Solid wood flooring is not warranted over radiant heat flooring systems
4 Installation
4.1 Preparation
• To achieve a uniform color and shade mixture across the entire floor, open
and work from several different cartons at a time.
• Stagger the ends of boards and maintain at least 6” between end joints on all
adjacent rows.
• Undercut door casings 1/16” higher than the thickness of the flooring being
installed.
• Start installation parallel to the longest unbroken wall. An outside wall is
often the best.
• Leave a minimum 3/4” expansion space around all vertical
obstructions.
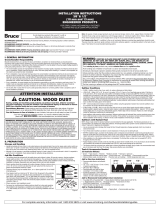
4.2 Nail-Down Installation Guidelines
• Snap a working line parallel to the starting wall, allowing expansion space
as specified above.
• Lay one row of boards along the entire length of the working line, with the
tongue facing away from the wall.
• Top-nail using 6d or 8d nails the first row along the wall edge 2”-3” from the
ends and 10"-12" along the length of the board if top nailed or every 6"-8"
along the side if blind nailed. Counter sink the face nails and fill with
appropriate colored wood filler. To ensure proper alignment of flooring, make
sure the flooring along the working chalk line is straight.
• Blind nail at 45° angle through the tongue 1”-3” from the end joints and every
6"-8" in along the length of each subsequent board throughout the installation.

Denser species may require pre-drilling the holes in the tongue.
• Additional Plank Flooring Requirements. The National Wood Flooring
Association recommends that plank floors (over 3" wide) need additional
fastening for proper performance. (Chapter 9 of the Installation Guidelines)To
achieve this in addition to the above fastener schedule use a polyurethane
tube adhesive to stripe the underside of the boards every 6"-8". This will help
to reduce the tangentially movement of the installed flooring
• An asphalt saturated paper should be used as an underlayment if National
Wood Flooring Association guidelines for plank flooring as listed above are not
followed
• Continue the installation until finished. Distribute lengths, staggering end
joints 6"-8" throughout the installation
• Thoroughly clean, sweep, and vacuum installed floor and inspect the floor
for scratches, gaps and other imperfections. Do not apply any tape
directly to the installed flooring to hold down floor protection. The new
floor can be used after 12-24 hours.
/